I decided a long time ago that home interiors just wasn’t my thing, and I say that because if you’ve ever come over to our home you would’ve seen that nothing had a theme and nothing matched! I didn’t care about design or furniture, and call it personal growth, but I care now. I’ve spent a lot of time these past few weeks investing money and careful thought into upgrading our space and rejuvenating the energy that’s in our home. At the end of the day we work from home and I want us to love our creative space and we do now! These little revamps make me so happy, it’s tapping into a different part of my creativity and this part is so fun.
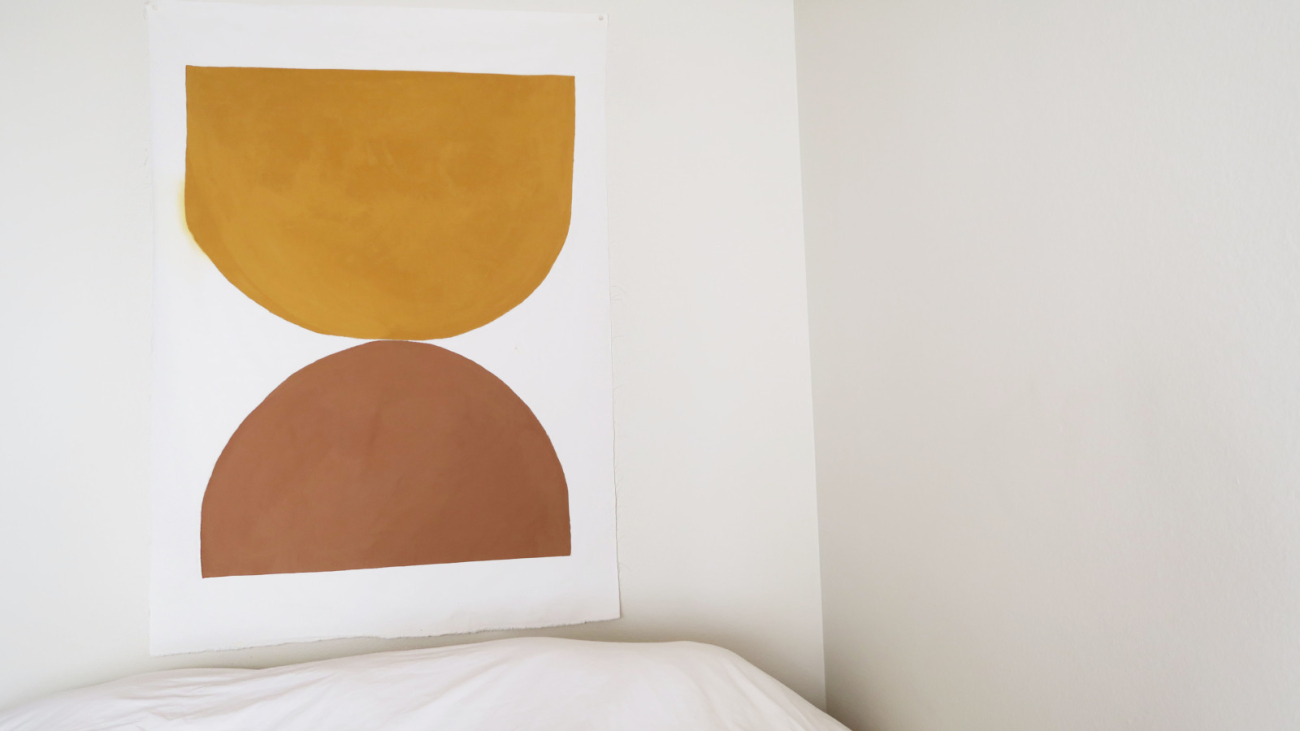
I get a lot of inspiration from Pinterest, Instagram, other bloggers, and let me tell you there is so.much.pinning! Corrine introduced me to Molly of Almost Makes Perfect and legit everything she does inspires me! Go follow along because the timeless simplicity of her home is what prompted Corrine to share with me one of her recent posts, hence this post. Molly showcased a large canvas painting her in kitchen and Corrine and I thought, “oh pretty, totally we can do that!” DIY is easy they said, it’ll save you time and money they said. Yes, totally saves you money, but ummm painting on canvas proved to be more difficult than I’d imagined so let me help you help your sanity and your art skills.
What we used:
- 59 x 40 inch canvas from Hobby Lobby (PS have you ever been there? We’d never been and omg they have everything!)
- pencil to stencil
- green painters tape for clean(ish) edges and placement keeping
- big paint brush and an angled small one to clean up rounded areas
- measuring tape to get the shapes even(ish)
For my canvas colors:
- smaller shape- (1) 8 oz Terracota Matte Chalk Finish decor paint from Martha Stewart Crafts
- larger shape- (3) 2 oz Cocoa Bean DecoArt Americana satin acrylic paint
For Corrine’s canvas colors:
- (3) 2 oz Raw Sienna DecoArt Americana acrylic paint
- (3) 2 oz True Ochre DecoArt Americana acrylic paint
What we did:
So what you’ll do is measure out the space where you want your canvas to go and have the fabric cut to fit. Then figure out the shapes and colors you’d like (we really tried to mimic Molly’s shapes but how mine turned out more mushroomed shaped rather than domed) and then use a pencil to lightly sketch the shape out. We used the tape to a) hold the fabric in place and we crawled all around it b) create straight edges for the flat portions of the shapes c) remove any debris or lint that got onto the canvas painting from all the crawling around them that we did.
We used the measuring tape to measure out the width of the canvas, and with that number decided where each side of the shapes would end and where on the design the dome part would begin. I knew one shape would be slightly smaller than the other so I had to map out where that shape would begin and end… hallelu pencil. Then we began to paint, then we ran out of paint, then we ran out to get more paint and by the time we got back half had dried up which you can see in the final product. So now I’ll have to go over it with a second coat at some point. Or leave it as is and say f*ck it.


We learned a few things along the way, so we’re just gonna call these Pro Tips 😉
PRO TIPS:
- pencil pencil pencil. Sketch in pencil so you can easily erase way any errors or miscalculations. My painting still has some pencil stenciled on it but it doesn’t bother me
- the measuring out bit is so important unless you don’t really care about straight lines or even shapes. Some people don’t care, I would’ve been that person a year ago but on this day I spent more time measuring than I did painting
- it’s better to have it and not need it than to need it and not have it so I suggest to purchase more paint than you think you’ll need and you can always return what you don’t use. We ran out to get more paint and now you can clearly see when one half was painted and when the other dried on up
- if it ain’t broke don’t fix it and if there’s a mistake don’t try to wash it out. Oh hai, we did that and it allowed the paint to bleed out onto the canvas and discolored the fabric. Sooo, I say if you make a mistake i.e. a flick of chunky paint lands onto the canvas (meee), or if paint slips underneath the tape and makes a jagged line versus a straight line (meee), it’s okay! And if you don’t get enough paint on the canvas and some of the canvas shows through (meee) well I actually think that gives it some personality, just leave it 😉


All in all we spent less than $40 for two canvases, some paints, and some fun. Now Corrine and I have some personalized paintings decorating our walls <3 We listened to Generation Why while we completed this project and got through 3 episodes… so we were painting for 3 hours and it was honestly so fun, so therapeutic! If you mess up, you can repaint, add paint, or start over, just have fun.
Thank you again to Molly and her creativity for sparking this inspiration, I hope you all get crafty this weekend!
What color palette would you choose? Are you a shapes kind of person or do you need a scene to be happening? We’re obsessed with all things earth toned and rattan right now and I couldn’t be more excited about it.


Love! Fun idea!
thank you so much, i hope you give it a try <3