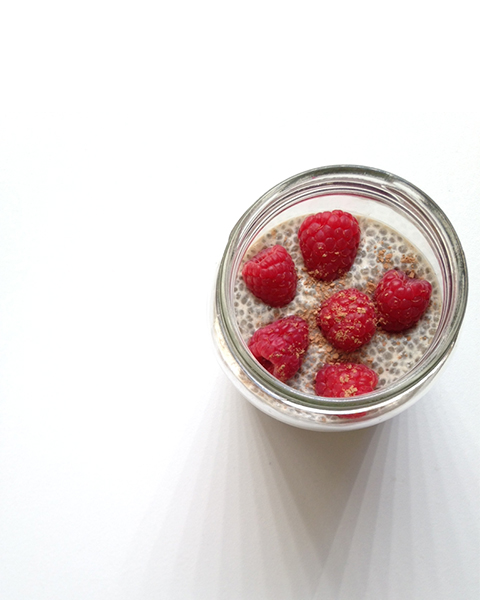
Chia seeds, they’re in everything! Skin care, desserts, and yummy breakfast items so I thought today I’d share with you my easy and delicious home made chia seed pudding! And if you know me than you KNOW of course I added in chocolate 😉
Chia seeds are extremely rich in antioxidants and minerals, they’re a great source of essential fatty acids, aaaand I do love it as a bit of crunch in my shakes. This recipe is my recent go-to for breakfast on the road and it’s the perfect post-workout treat! Big pros: low in sugar, gluten free, dairy free, and vegan! Say wuuut! I also decided to toss in cocoa powder and raspberries to curb my sugar cravings, and makes it extra satiating. You can also add in sliced almonds or toasted walnuts… goin’ for that crunch factor again. And any time I can add chocolate, I will! Method: – 4 TBSP Chia seeds (I like the texture so more chia seeds doesn’t bother me) – 1 1/2 cup unsweetened almond or coconut milk (have you tried the almond coconut milk combo?!) – rasberries – 2 tsp unsweetened cocoa powder – dash of cinnamon – and if you like your pudding sweet you can use some stevia or honey but I omitted it for this recipe – toasted walnuts, sliced almonds, or whatever nut you prefer…crunchy!
Combine the chia seeds with the almond milk, raspberries, cocoa powder, nuts, and cinnamon in a glass jar with a lid. Give it a good shake to combine the ingredients well and let it sit in the refrigerator over night. Tadaaa, enjoy!
This recipe made about two really big servings which is perfect for meal prepping. It’s filling, super healthy, and so simple to make. Try it out, let me know what you think, and TAG me with your creations! Chia seed pudding… make it? Order it? Like it? Leave it?
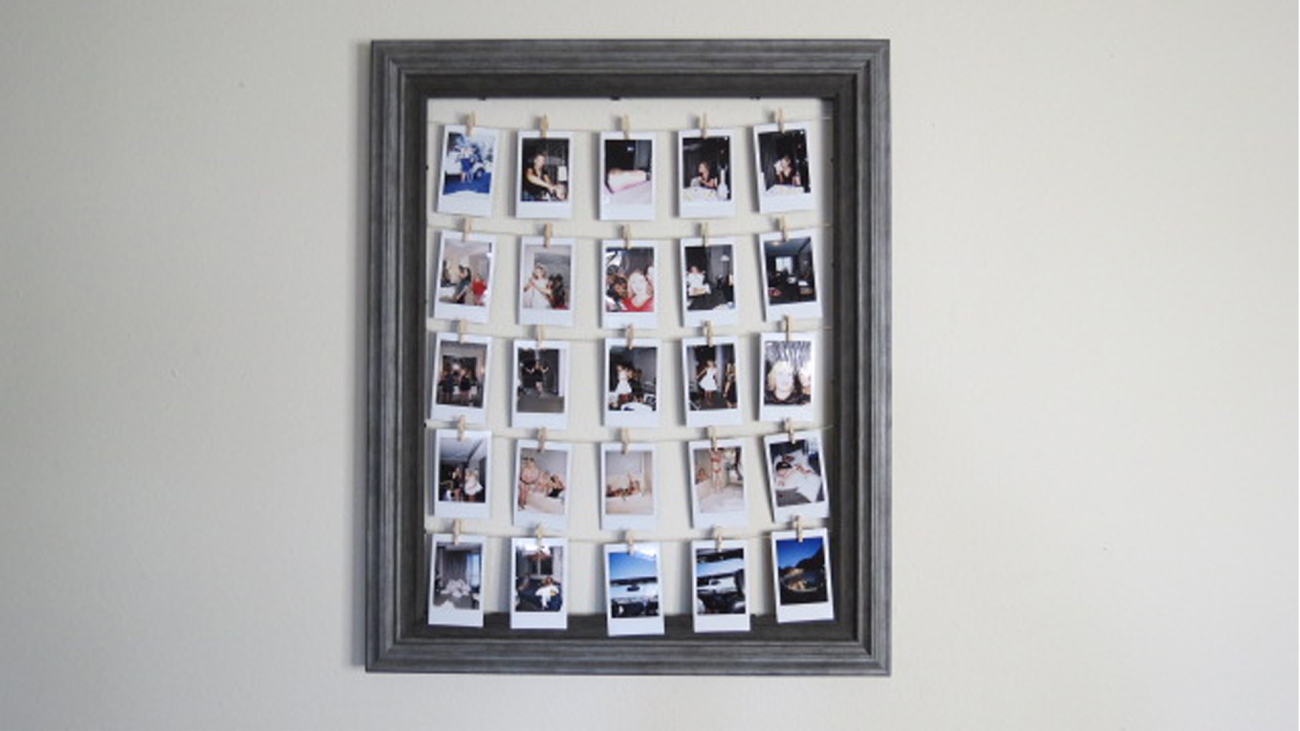
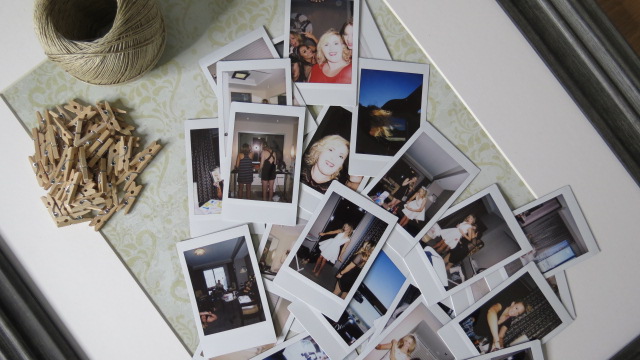
I love that pictures freeze moments in time and allow you to relive them again and again. Pictures are a physical memory since we can’t always rely on our mind memories (mind memories…totally a thing) to recall a special occasion, or remember exactly what that moment looked like. I toted a Polaroid camera along with me for Linz’s bachelorette party in Vegas last month, and asked that everyone take photos of the weekend and then give the Polaroids to me for a gift we’d make for her. This is what I did with all the photos, a Polaroid photo frame! Thank you Pinterest!!!!!! When in DIY doubt, Pinterest out!!!
For this you’ll need:
a frame of your choice
sturdy string or wire
mini clothes pins or metal clips
your photos
scissors
hot glue gun and glue
measuring tape
Method:
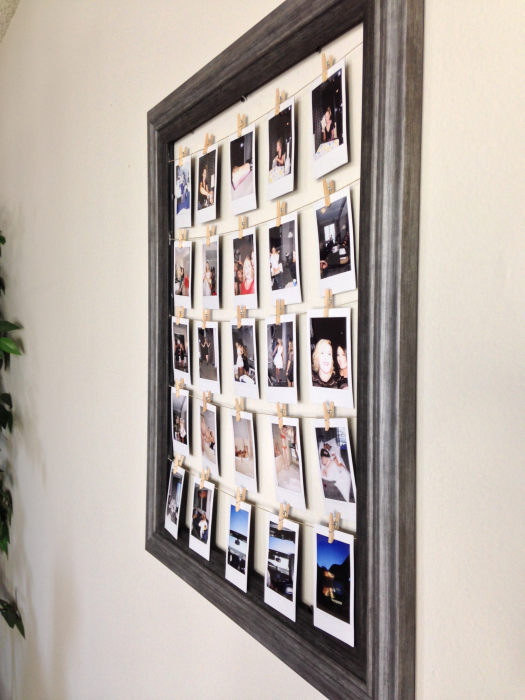
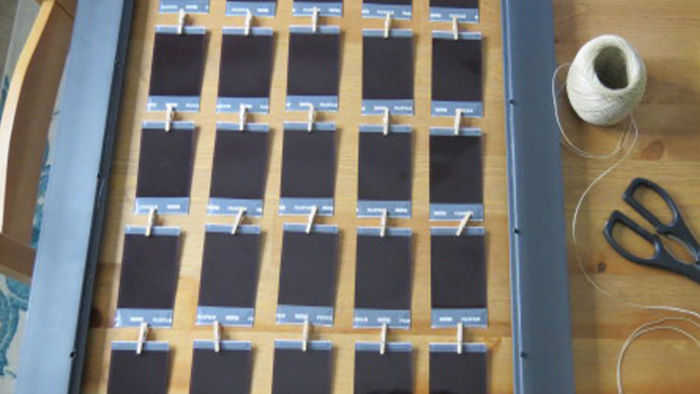
You’ll remove the back cardboard and glass from the frame so that you’re just left with the frame body
line up your photos so that you know how many columns you’ll have and how many rows
use the tape measure to figure out where you’re laying down your string or wire so that your rows are evenly distributed
lay down a dollop of hot glue into the nook of the frame to hold the string in place on one side than line up the other side and do the same
allow the glue to dry and then hang your photos onto the string with the mini clips and walaaaa!
All of your memories in a cute lil DIY frame, handmade by you, with love…and a few burned fingers 😉 I hope you enjoyed this DIY post, I love doing home decor, especially at a level that my skills or lack there of are able to grasp! haha!
Let me know what other home decor/DIY things you’d like to see, and I hope your weekend is awesome!!!
We were always the kids in school who got cafeteria breakfasts and lunches because it was FREE! I think that is the exact moment in my life when I became obsessed with packaged foods LOL I’m not kidding, I love cafeteria food, airplane food, gas station food… maybe I just love food. That could be it too.
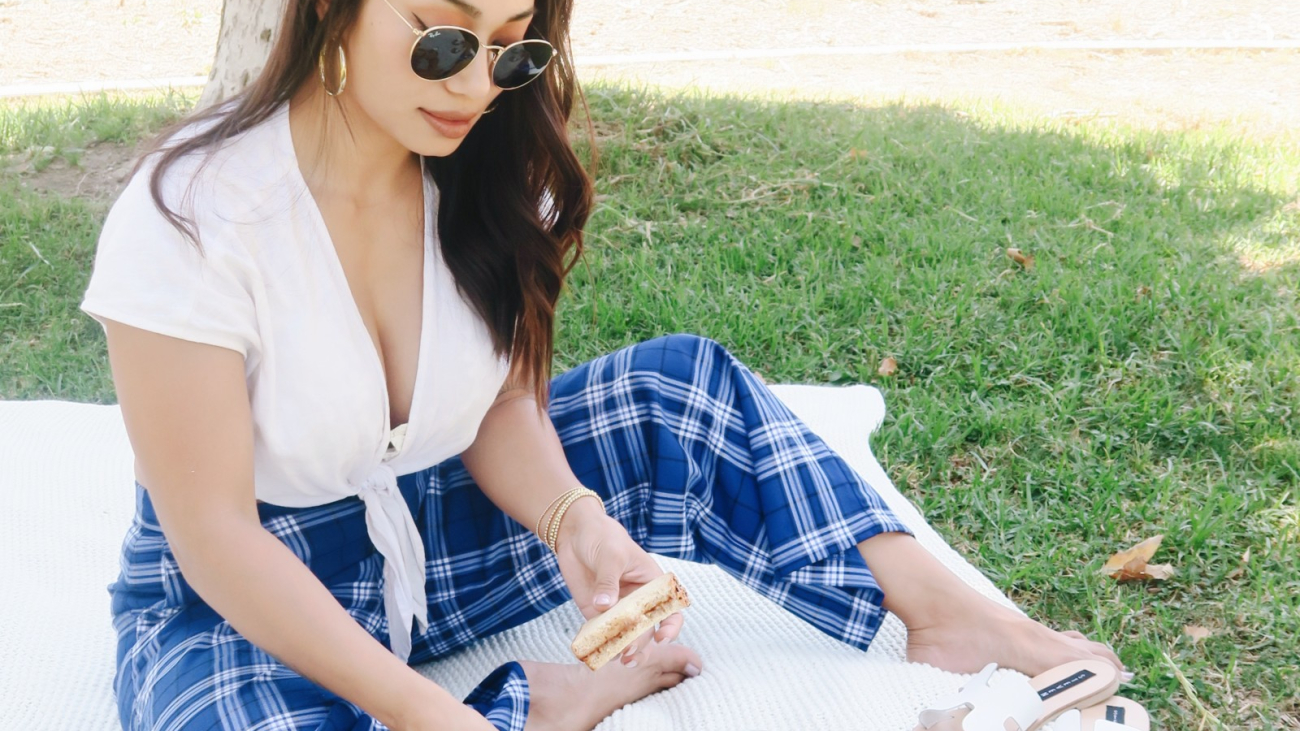
But I’d always envied the kids whose parents packed them a Lunchable, with a juice box, and a treat. Well baby is all grown up and thank goodness as an adult I can just relive all those moments and make them MY WAY! You want chocolate for lunch?! No problem!
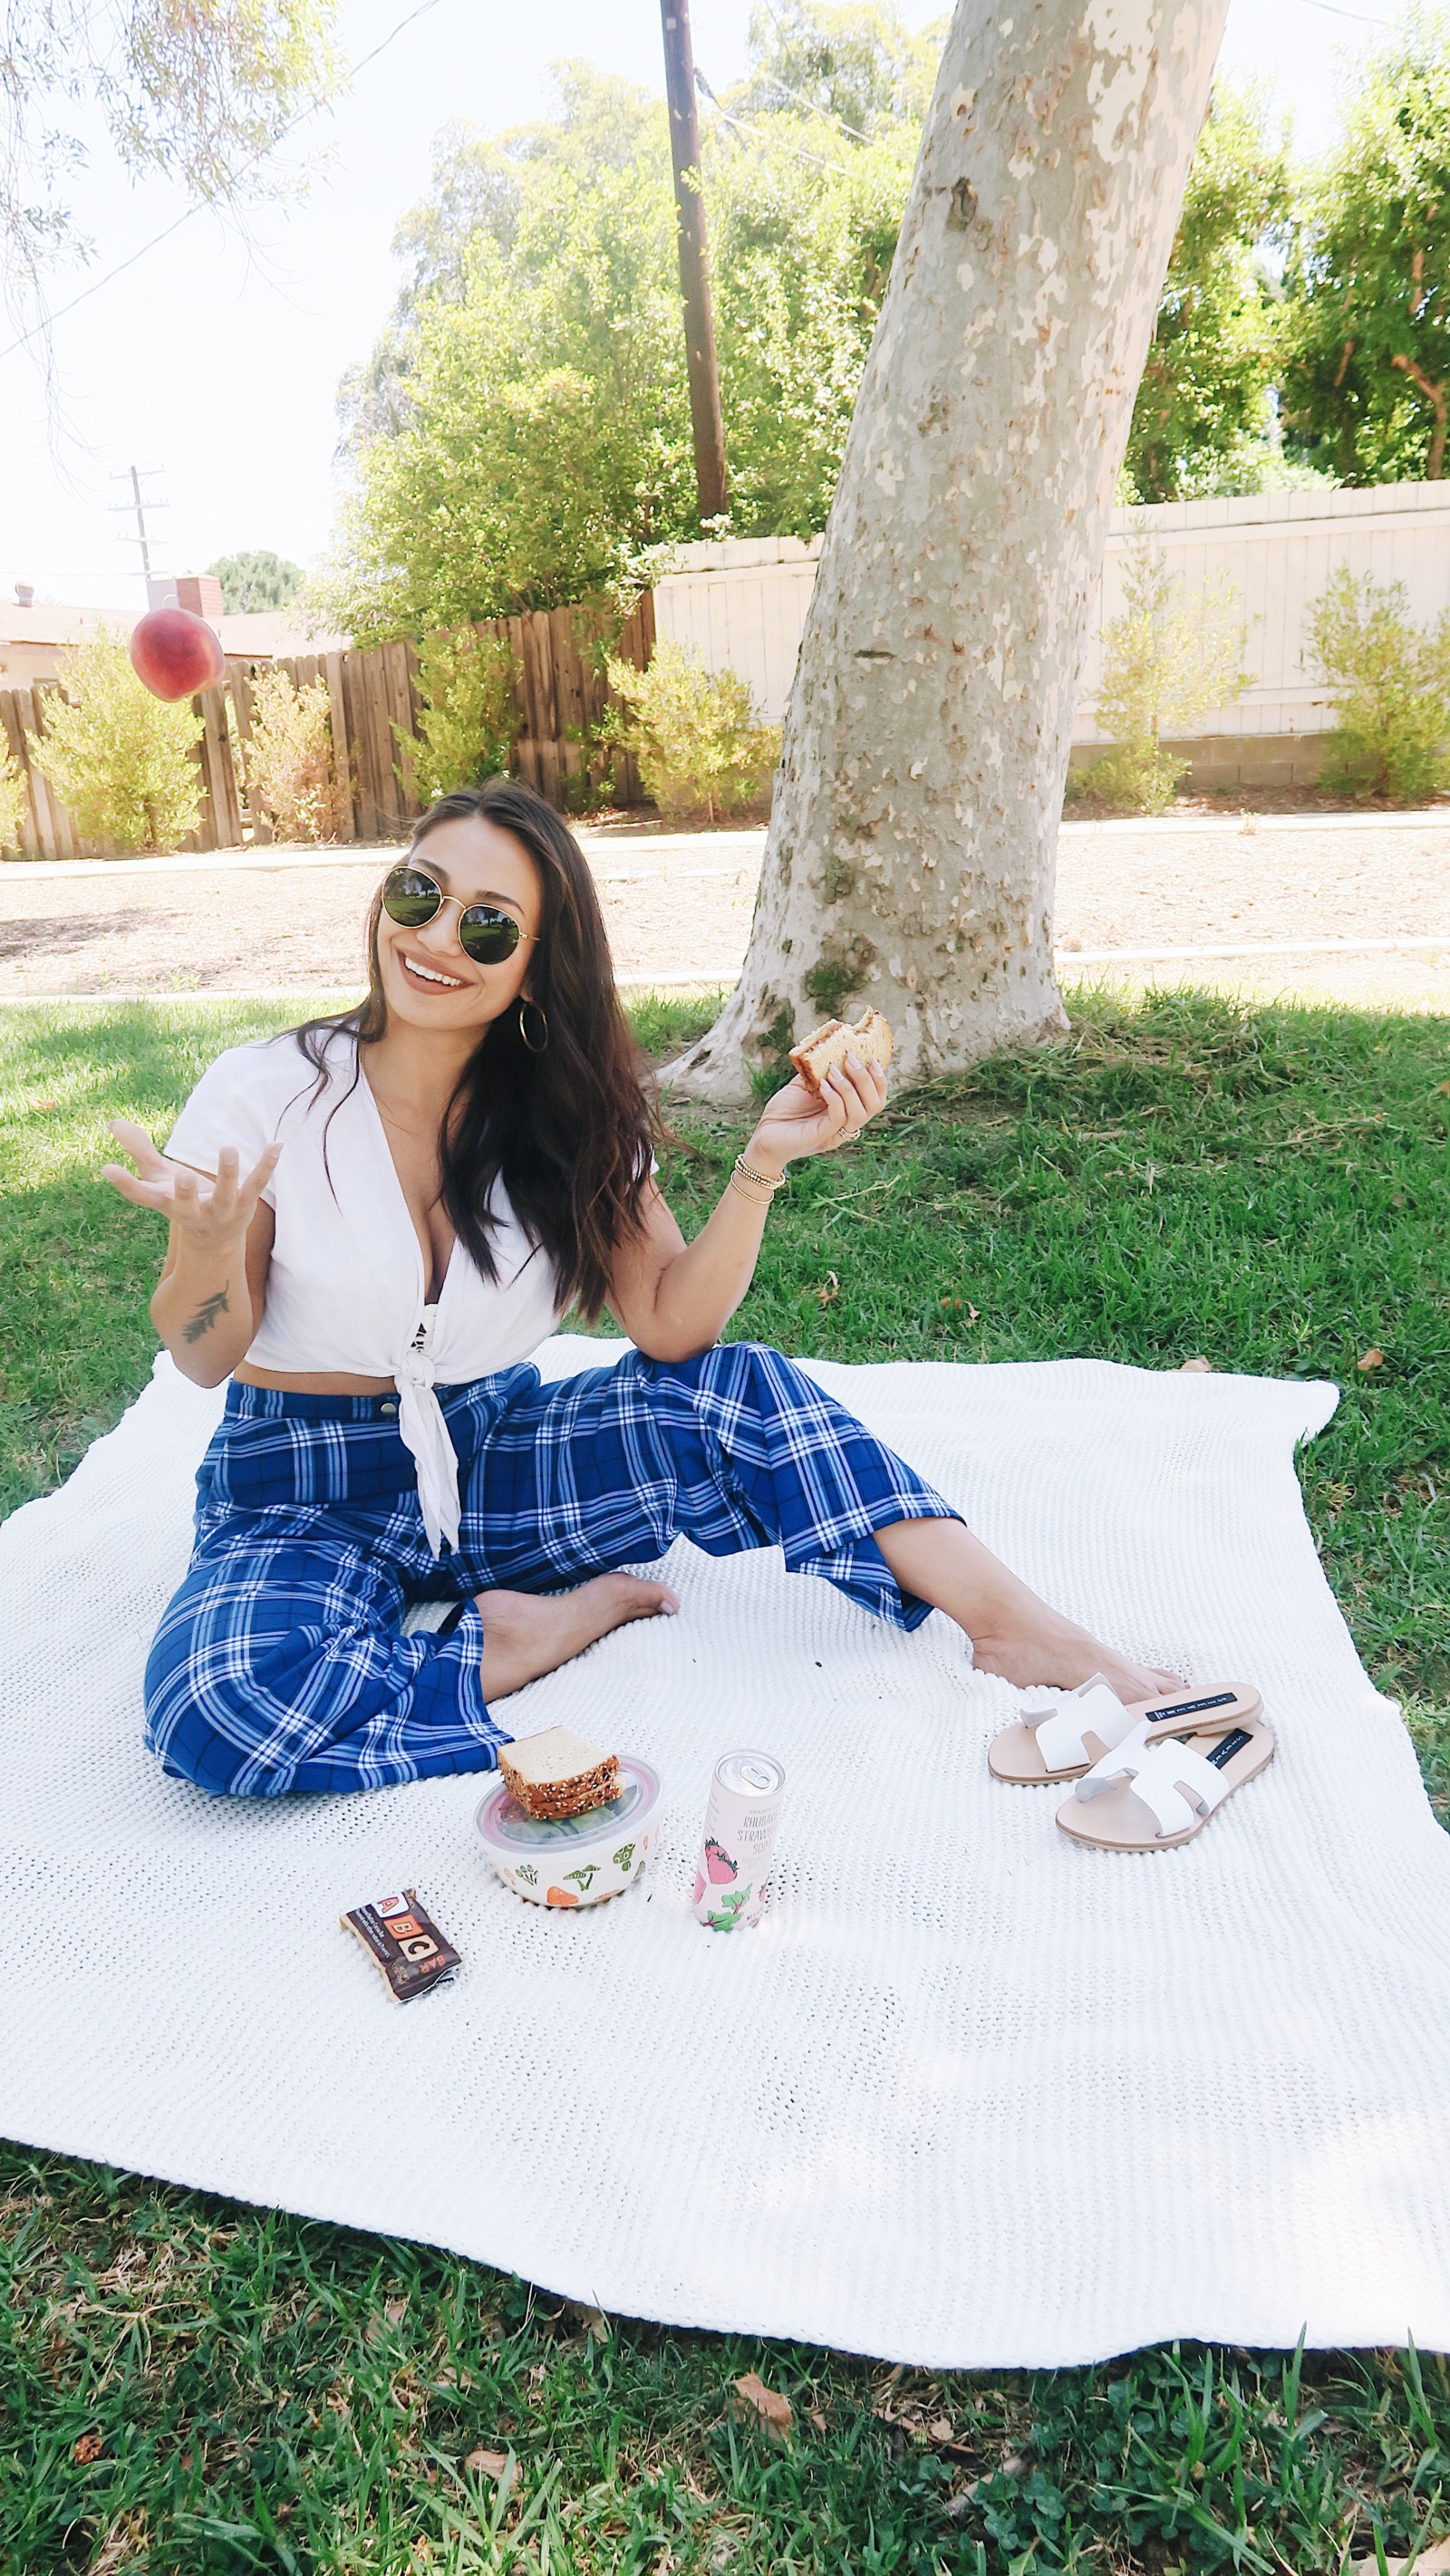
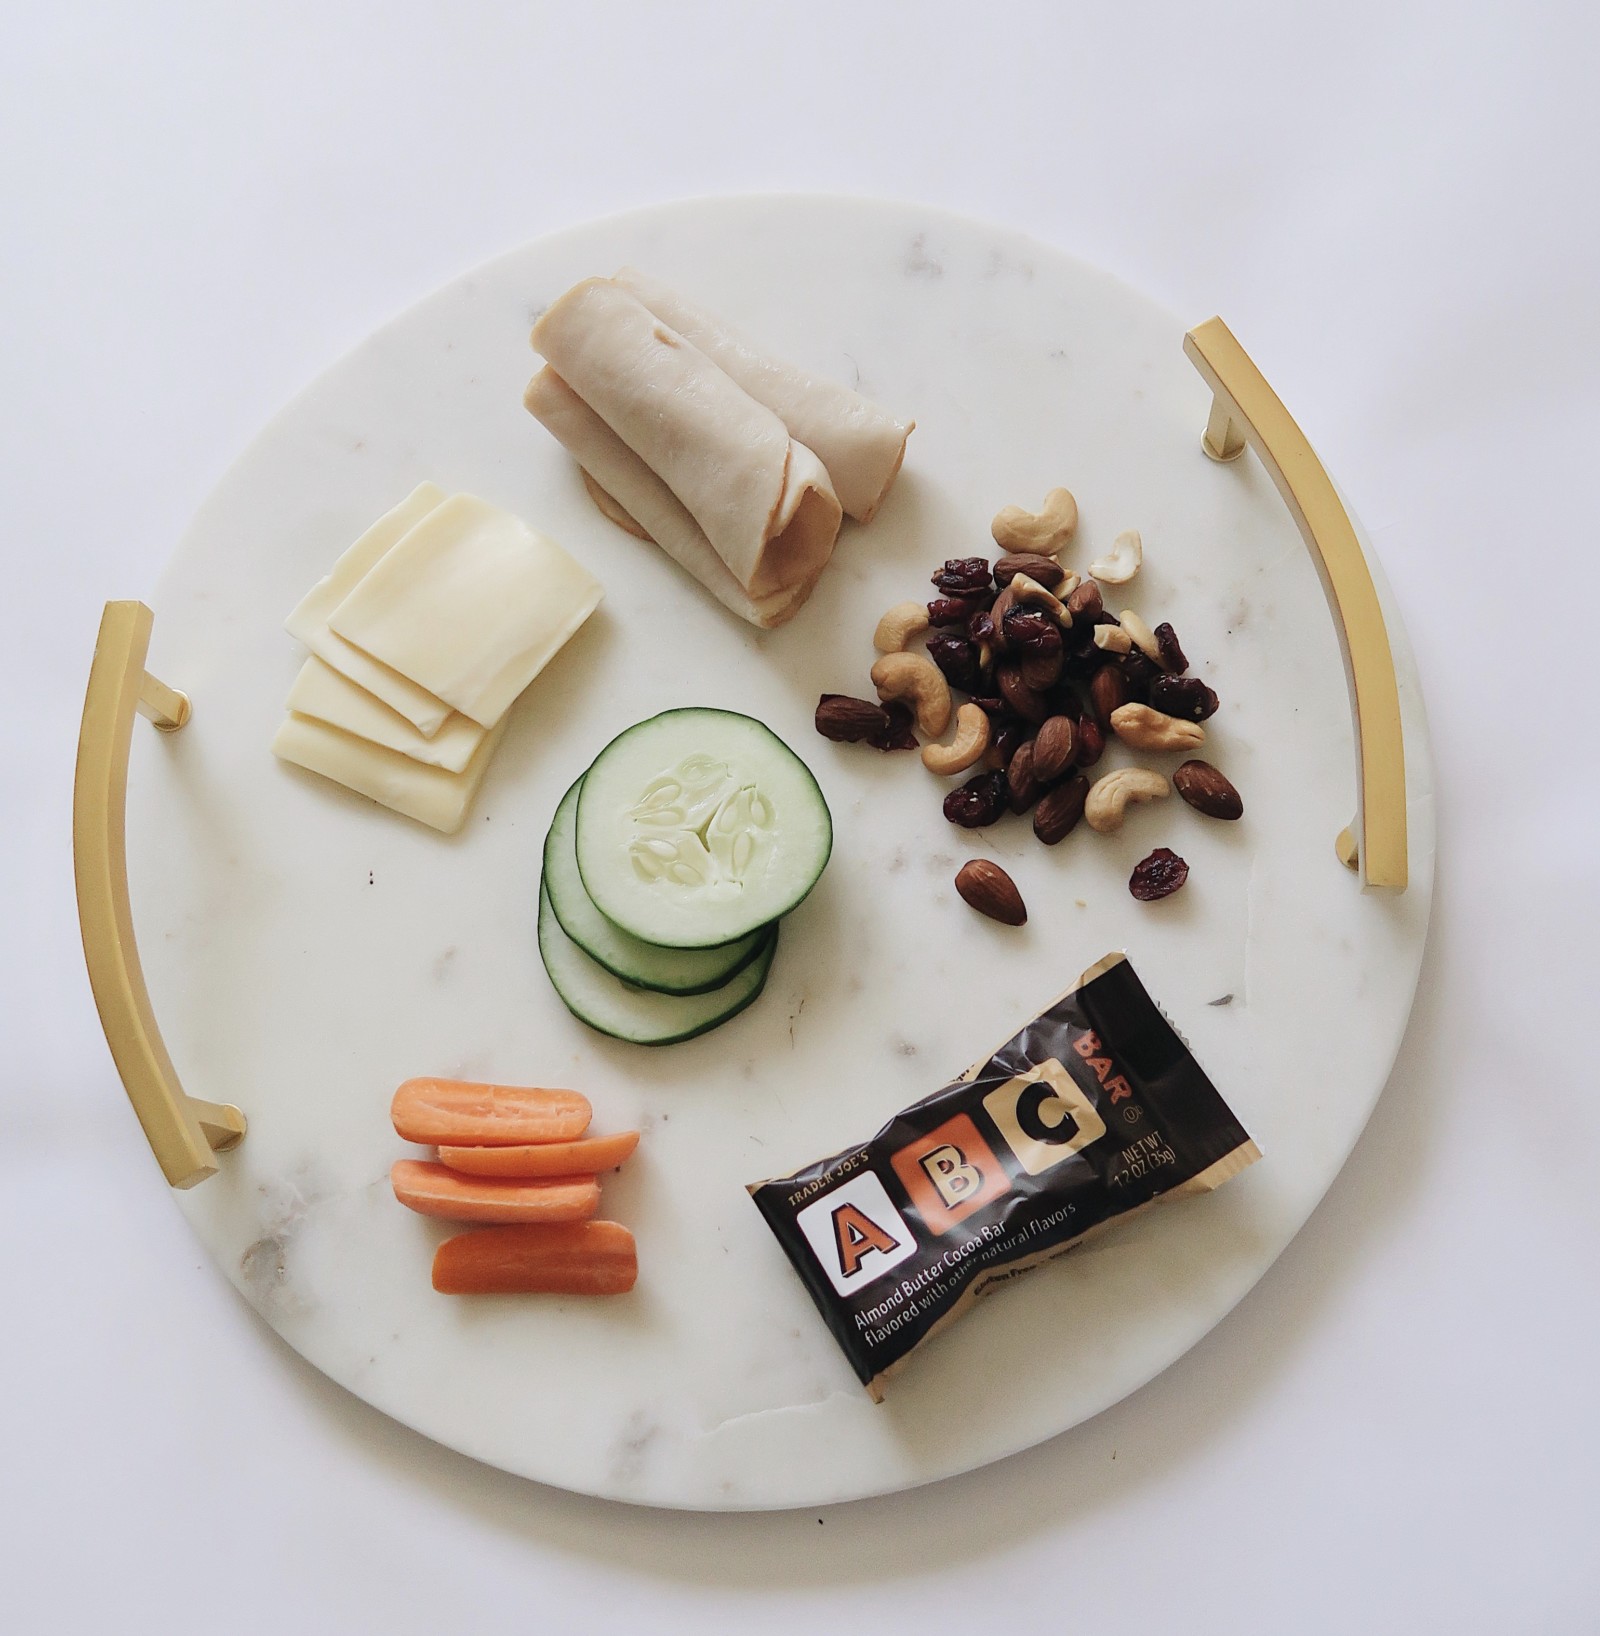
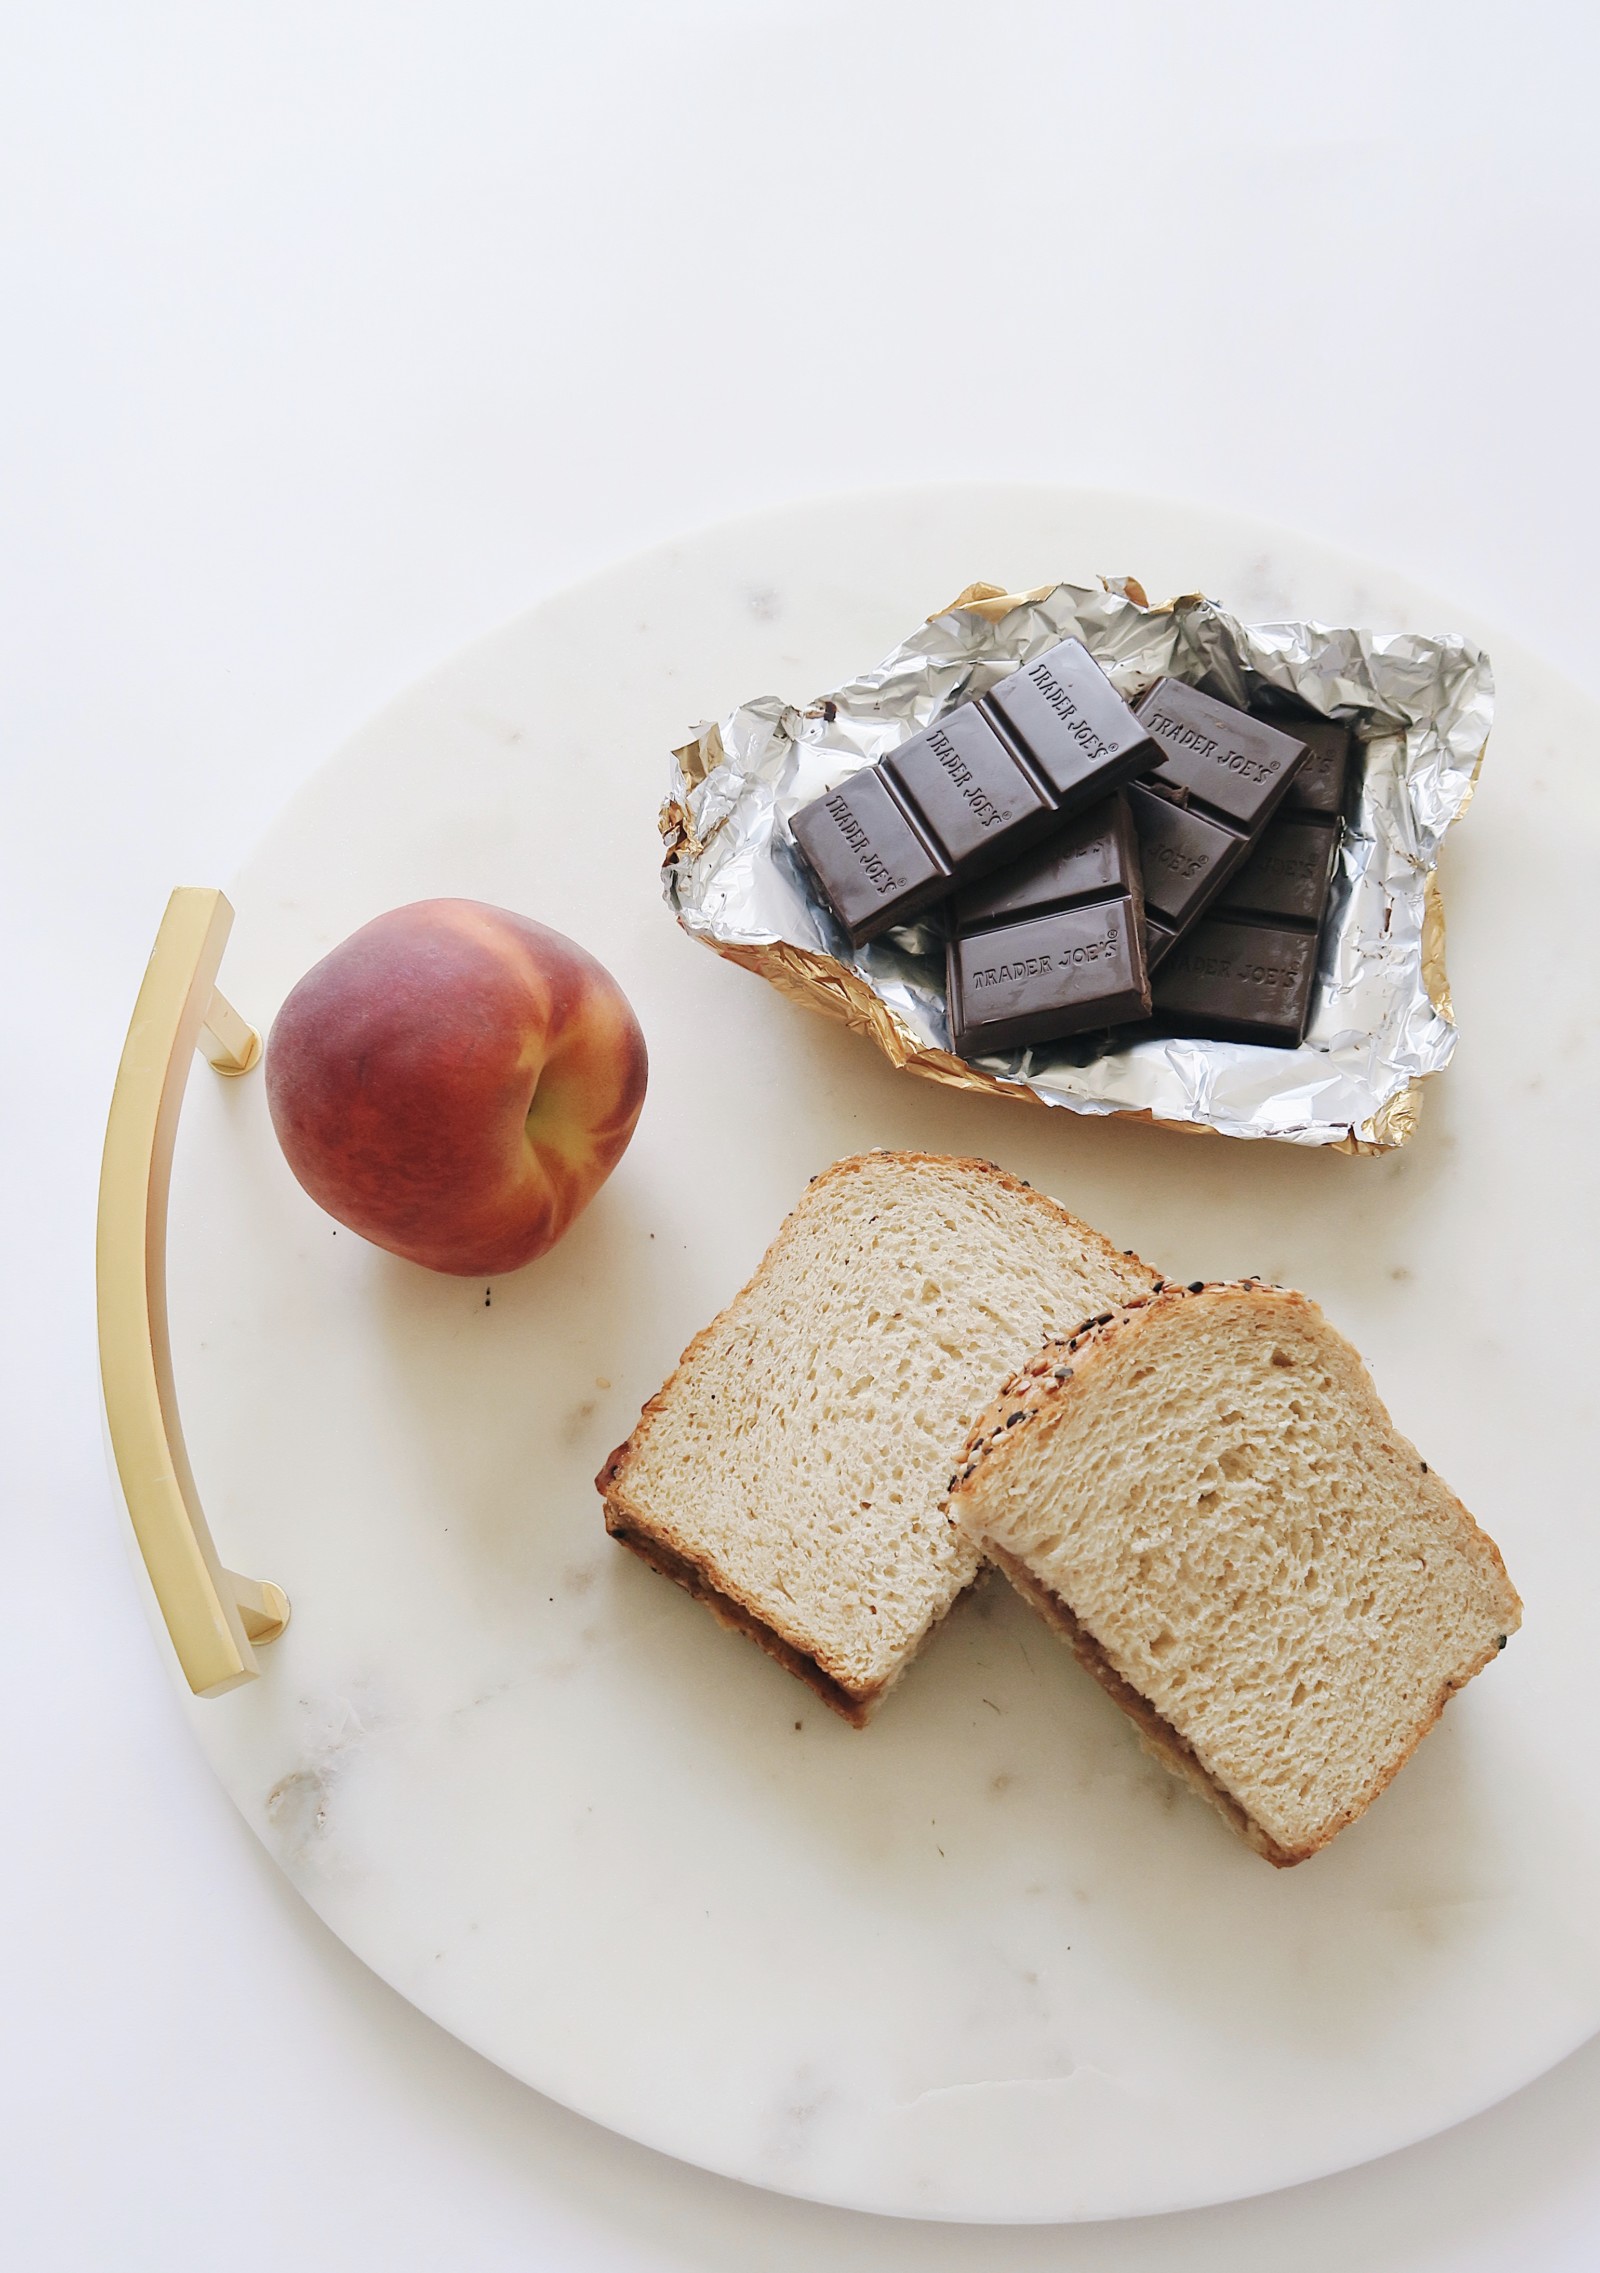
Packing an adult version of the Lunchables is super easy- you basically deconstruct a sandwich 😉 Throw in some nuts + a treat and you’re ready to go!
So the deal is, I really try to have a lean protein, complex carb, and healthy fat at every meal. Emphasis on ‘try’. Sometimes it doesn’t happen and I’m eating a protein bar or a a bento box from Starbies. I know the ‘lean protein, complex blah blah blah‘ is all I talk about, but it’s true! It’s how I help ensure I’m getting in all my nutrients AND helps me be flexible for when I want pizza or a dessert. Or both.
Some ideas for quick and easy back to school lunches for yourself, your kiddo, or your college student is:
pb&j + fruit + chocolate (this is from Trader Joe’s and one entire bar is 100 cals) – not that I’m counting, but if you were, there you have it <3
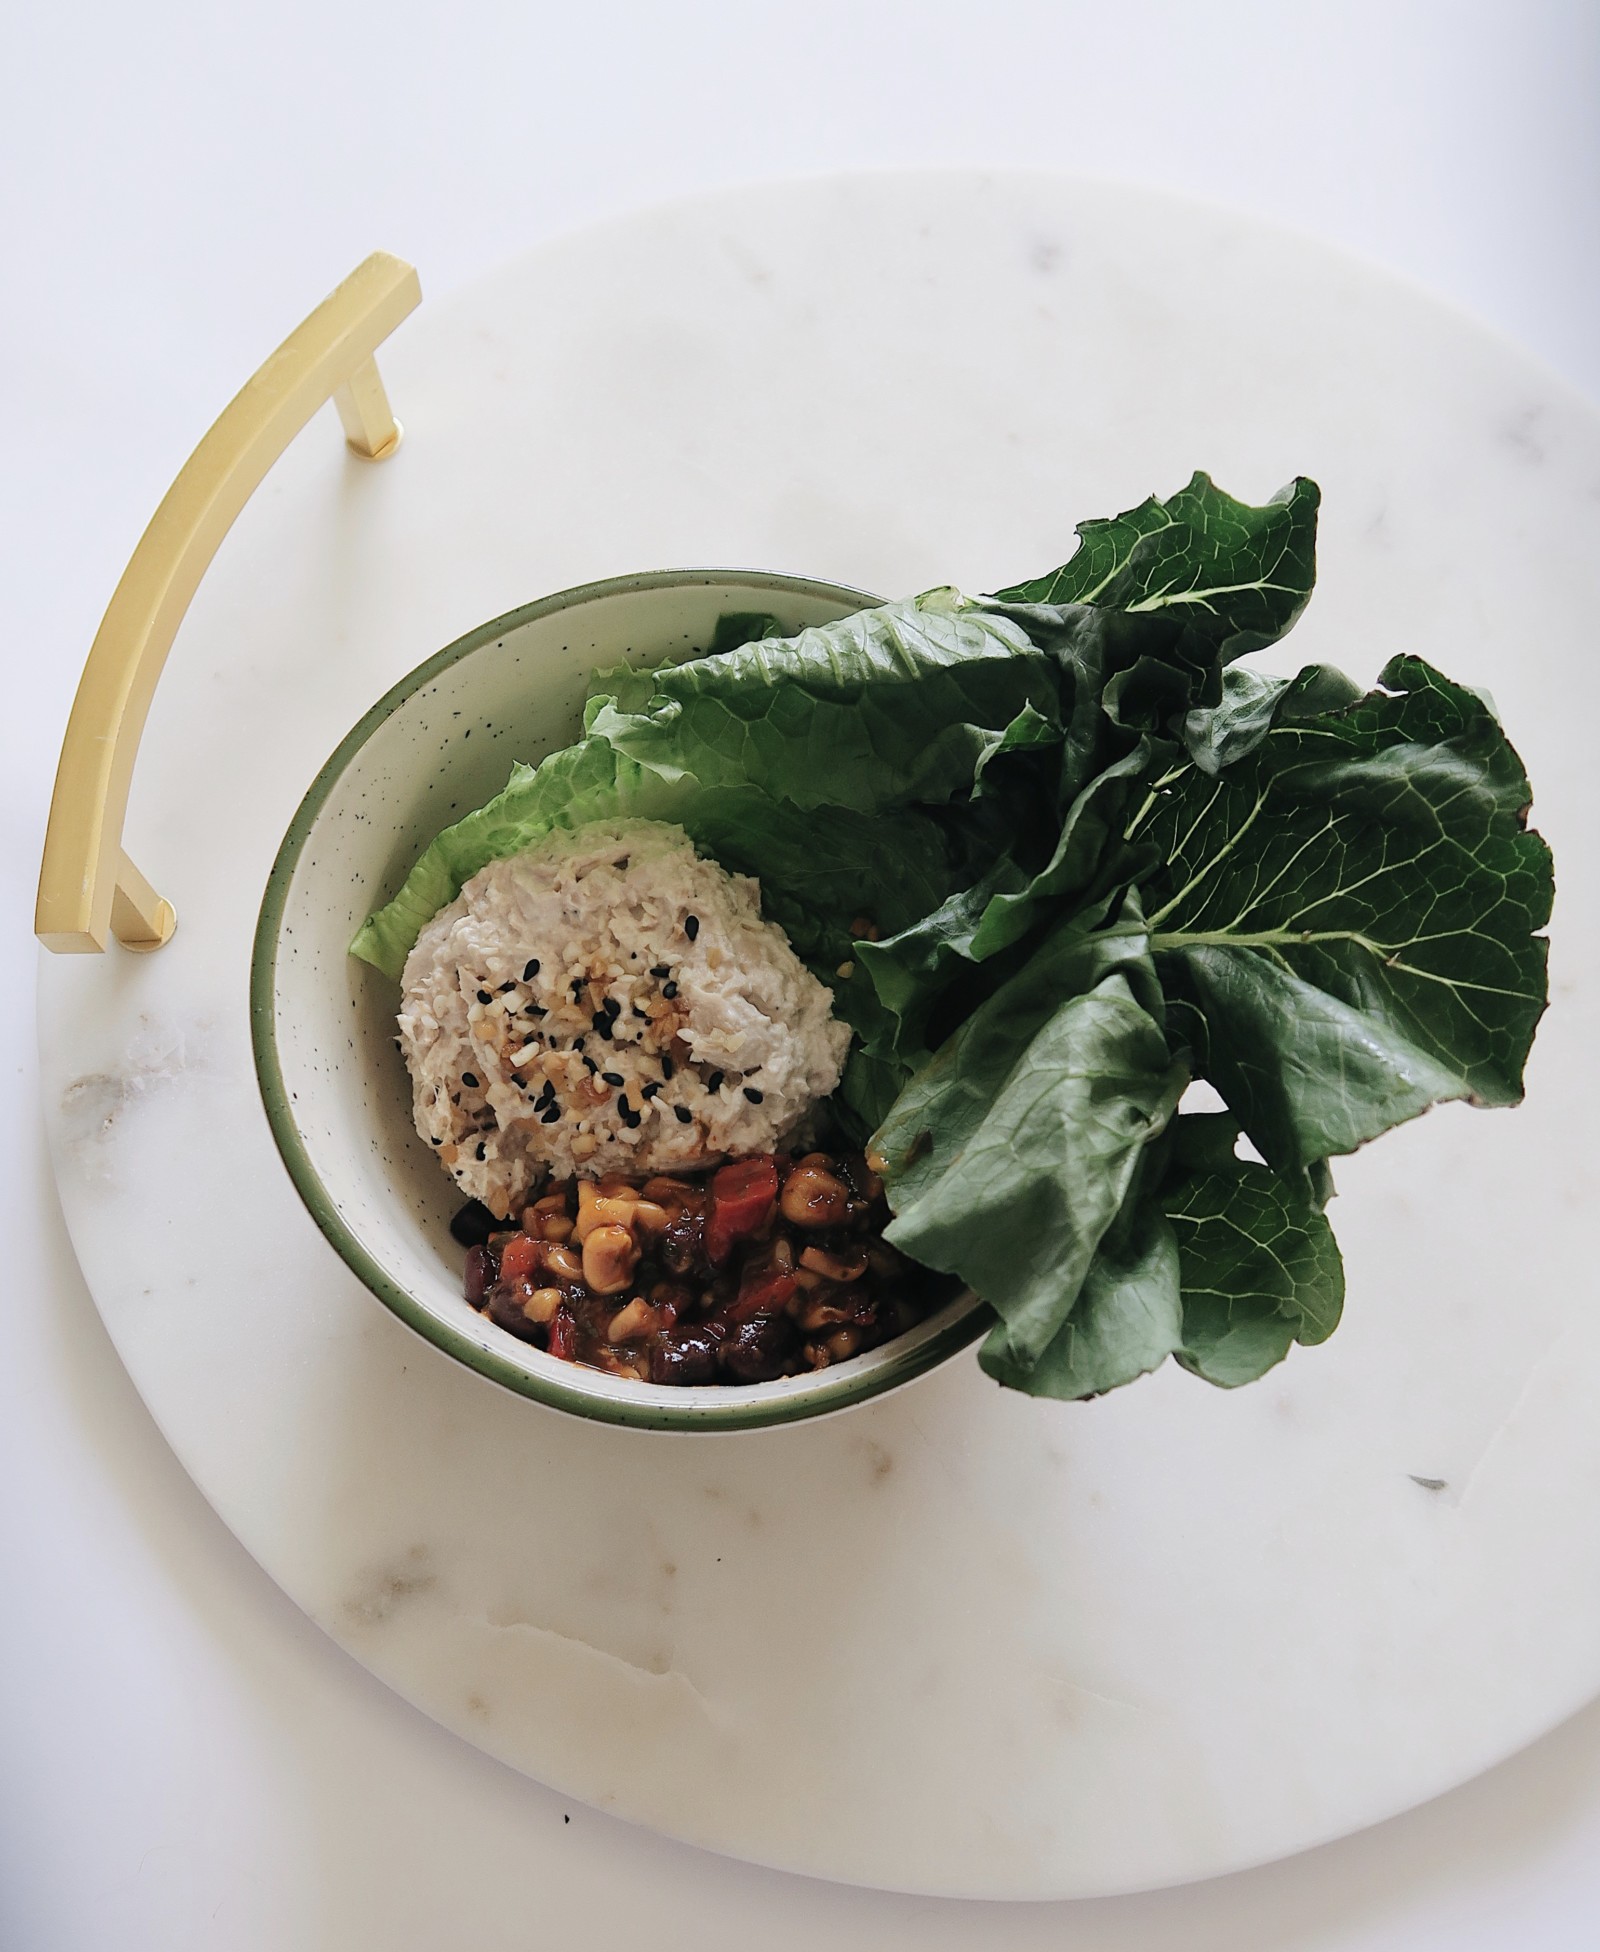
tuna salad + corn & black bean medley + leafy green friends
almond butter + rice cakes + fruit
yakisoba noodles + veggies + peanuts on top or sunflower seeds (only thing not pictured. we actually at them for lunch and Joe didn’t know it was for this post *face palm)
If you or your kiddo is a picky eater, swap out the boring fruit they won’t eat for blueberries or strawberries. Corrine would eat those without fail while she avoided her green beans. She also really loved fried rice instead of yakisoba noodles so try that too! Mac and cheese and hotdogs were a staple in my daughter’s child hood (and still are lets be real) because as long as she was eating I didn’t care what it was. She was EATING … hallelu!
Are you ready for back to school season to begin? Next week I’ll share my back to school easy outfits!
I hope today, right now in this moment, is not the first time you’re remembering that it’s Valentine’s day. I have mixed emotions about this holiday honestly – I’m a romantic at heart, but I also think every day should be special right?! I’ll save my love rant for another day, for now, if right now you’re scrambling to find a gas station teddy bear and some chocolates that will pass for the “I totally had this planned out” impression well here’s your guide to ‘fakin’ it ’til ya make it’….to the mall!
Valentine’s day gift ideas for when you have NO idea!
So it’s crunch time…. you forgot the thoughtful gift – you’ve been busy! You skipped out on making breakfast in bed to rush out to get a gift that’s you think will be more personal in gesture than making that breakfast in bed idea. Well there are a few things you can do to make it seem as though you totally had today in the bag! Also, this is for men and women, all of the ideas listed below will work whether it be for your boyfriend, girlfriend, fiance, husband, wife, child, pet goat…..all of them:
Breakfast in bed – before you rush out the door to frantically find a teddy bear that’s larger than life, why don’t you just cook their favorite breakfast meal and serve it to them in bed? This will work every time, it’s so thoughtful! AND it’s budget friendly, just use what you have already in your fridge
Hand picked flowers – great for men and for women, hand picked flowers are the cutest gesture, it’s sweet and Earth friendly and you can find them anywhere in your front yard… or a neighbor’s…PLUS they’re FREE! Unless your neighbor comes after you with the garden hose
Love notes – love notes are great because they’re building blocks! Leave them around the house, in the bathroom (extra points for notes left in heart shapes and smiley faces), on your loved one’s car, all with personalized messages to show them that you care, that you listen, and best part…it buys you time. To either make a reservation or go out and get their favorite icecream
Dinner cooked by a real life chef – yep that real life chef is YOU bud! Nothin’ says ‘”I love you”, more than a home cooked meal made with love. And bacon. Besides, all the restaurants will be over crowded and over priced. Save yourself the cold sweats of having to call around to make a last minute reservation and set the dining table for two
A love basket – this is my all time favorite go-to gift! You get a basket, or a bucket, or a shoe box, whatever – you fill it with their favorite items, trinkets, snacks, and a couple of tickets to the movies and BAM, YOU are the most thoughtful gift giver evaarrrrr!
Now I’m not saying these gifts will blow them out of the water with surprise and romance, but it will make your gift more interesting, and personal to your relationship, AND it’s not super expensive or super over the top ‘buy a star and name it after them’ status. Those are for movies like “The Notebook”.
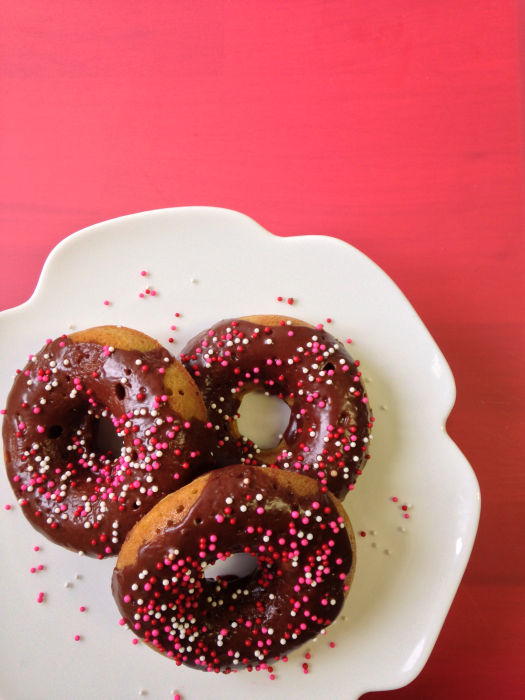
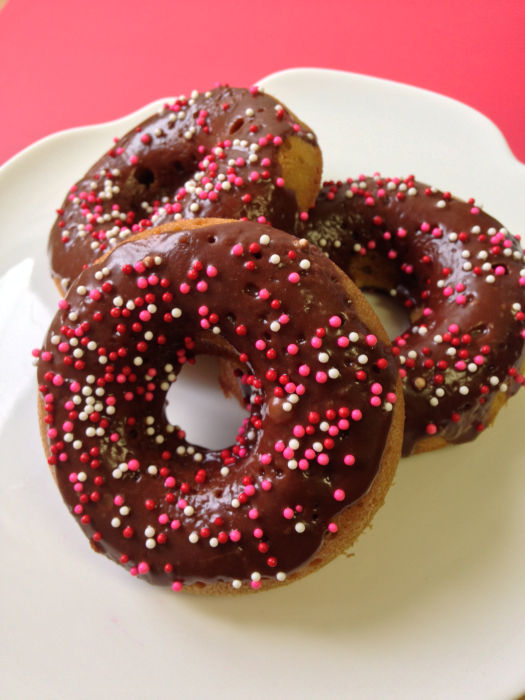
If all else fails, make them some ‘love donuts’. Picture below along with the recipe. It’s gluten free because… love. And remember, “if you’re a bird I’m a bird”.
xoxo- Jess
Gluten free donut recipe for my love, Corrine.
What you’ll need: (yields 12 donuts)
For the Donuts:
1/2 cup GF flour or coconut flour
6 eggs
1 tablespoon vanilla extract
1/2 cup sugar
1/4 teaspoon kosher salt
2/3 cup melted coconut oil
1/4 teaspoon baking soda
– Mix wet ingredients together and then stir in sifted dry ingredients, bake in a donut mold for 15 minutes at 350 degrees
For the Chocolate Glaze:
3 tablespoons cocoa powder
2 tablespoons melted butter
1 cup powdered sugar
3 tablespoons hot water
– Mix ingredients all together in a bowl and then glaze over the donuts once they’re cooled, top with sprinkles and kisses and you’re all done! Enjoy!
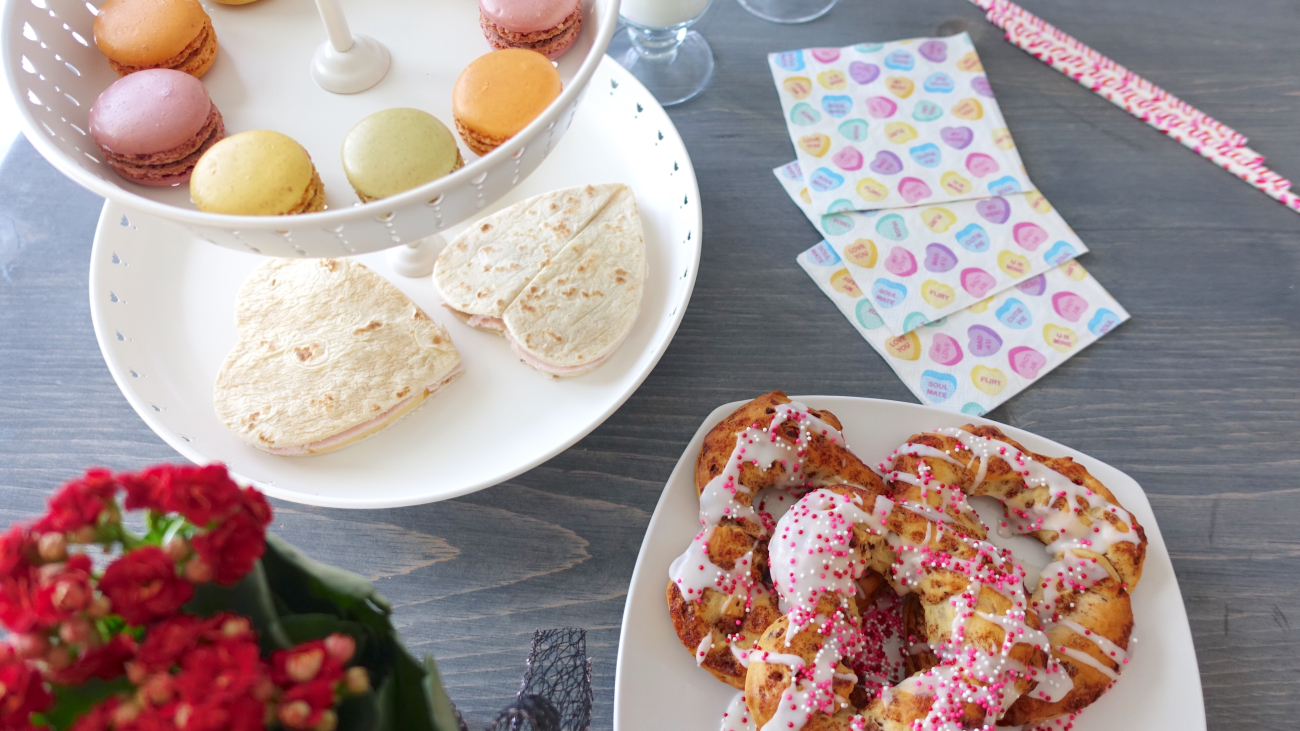
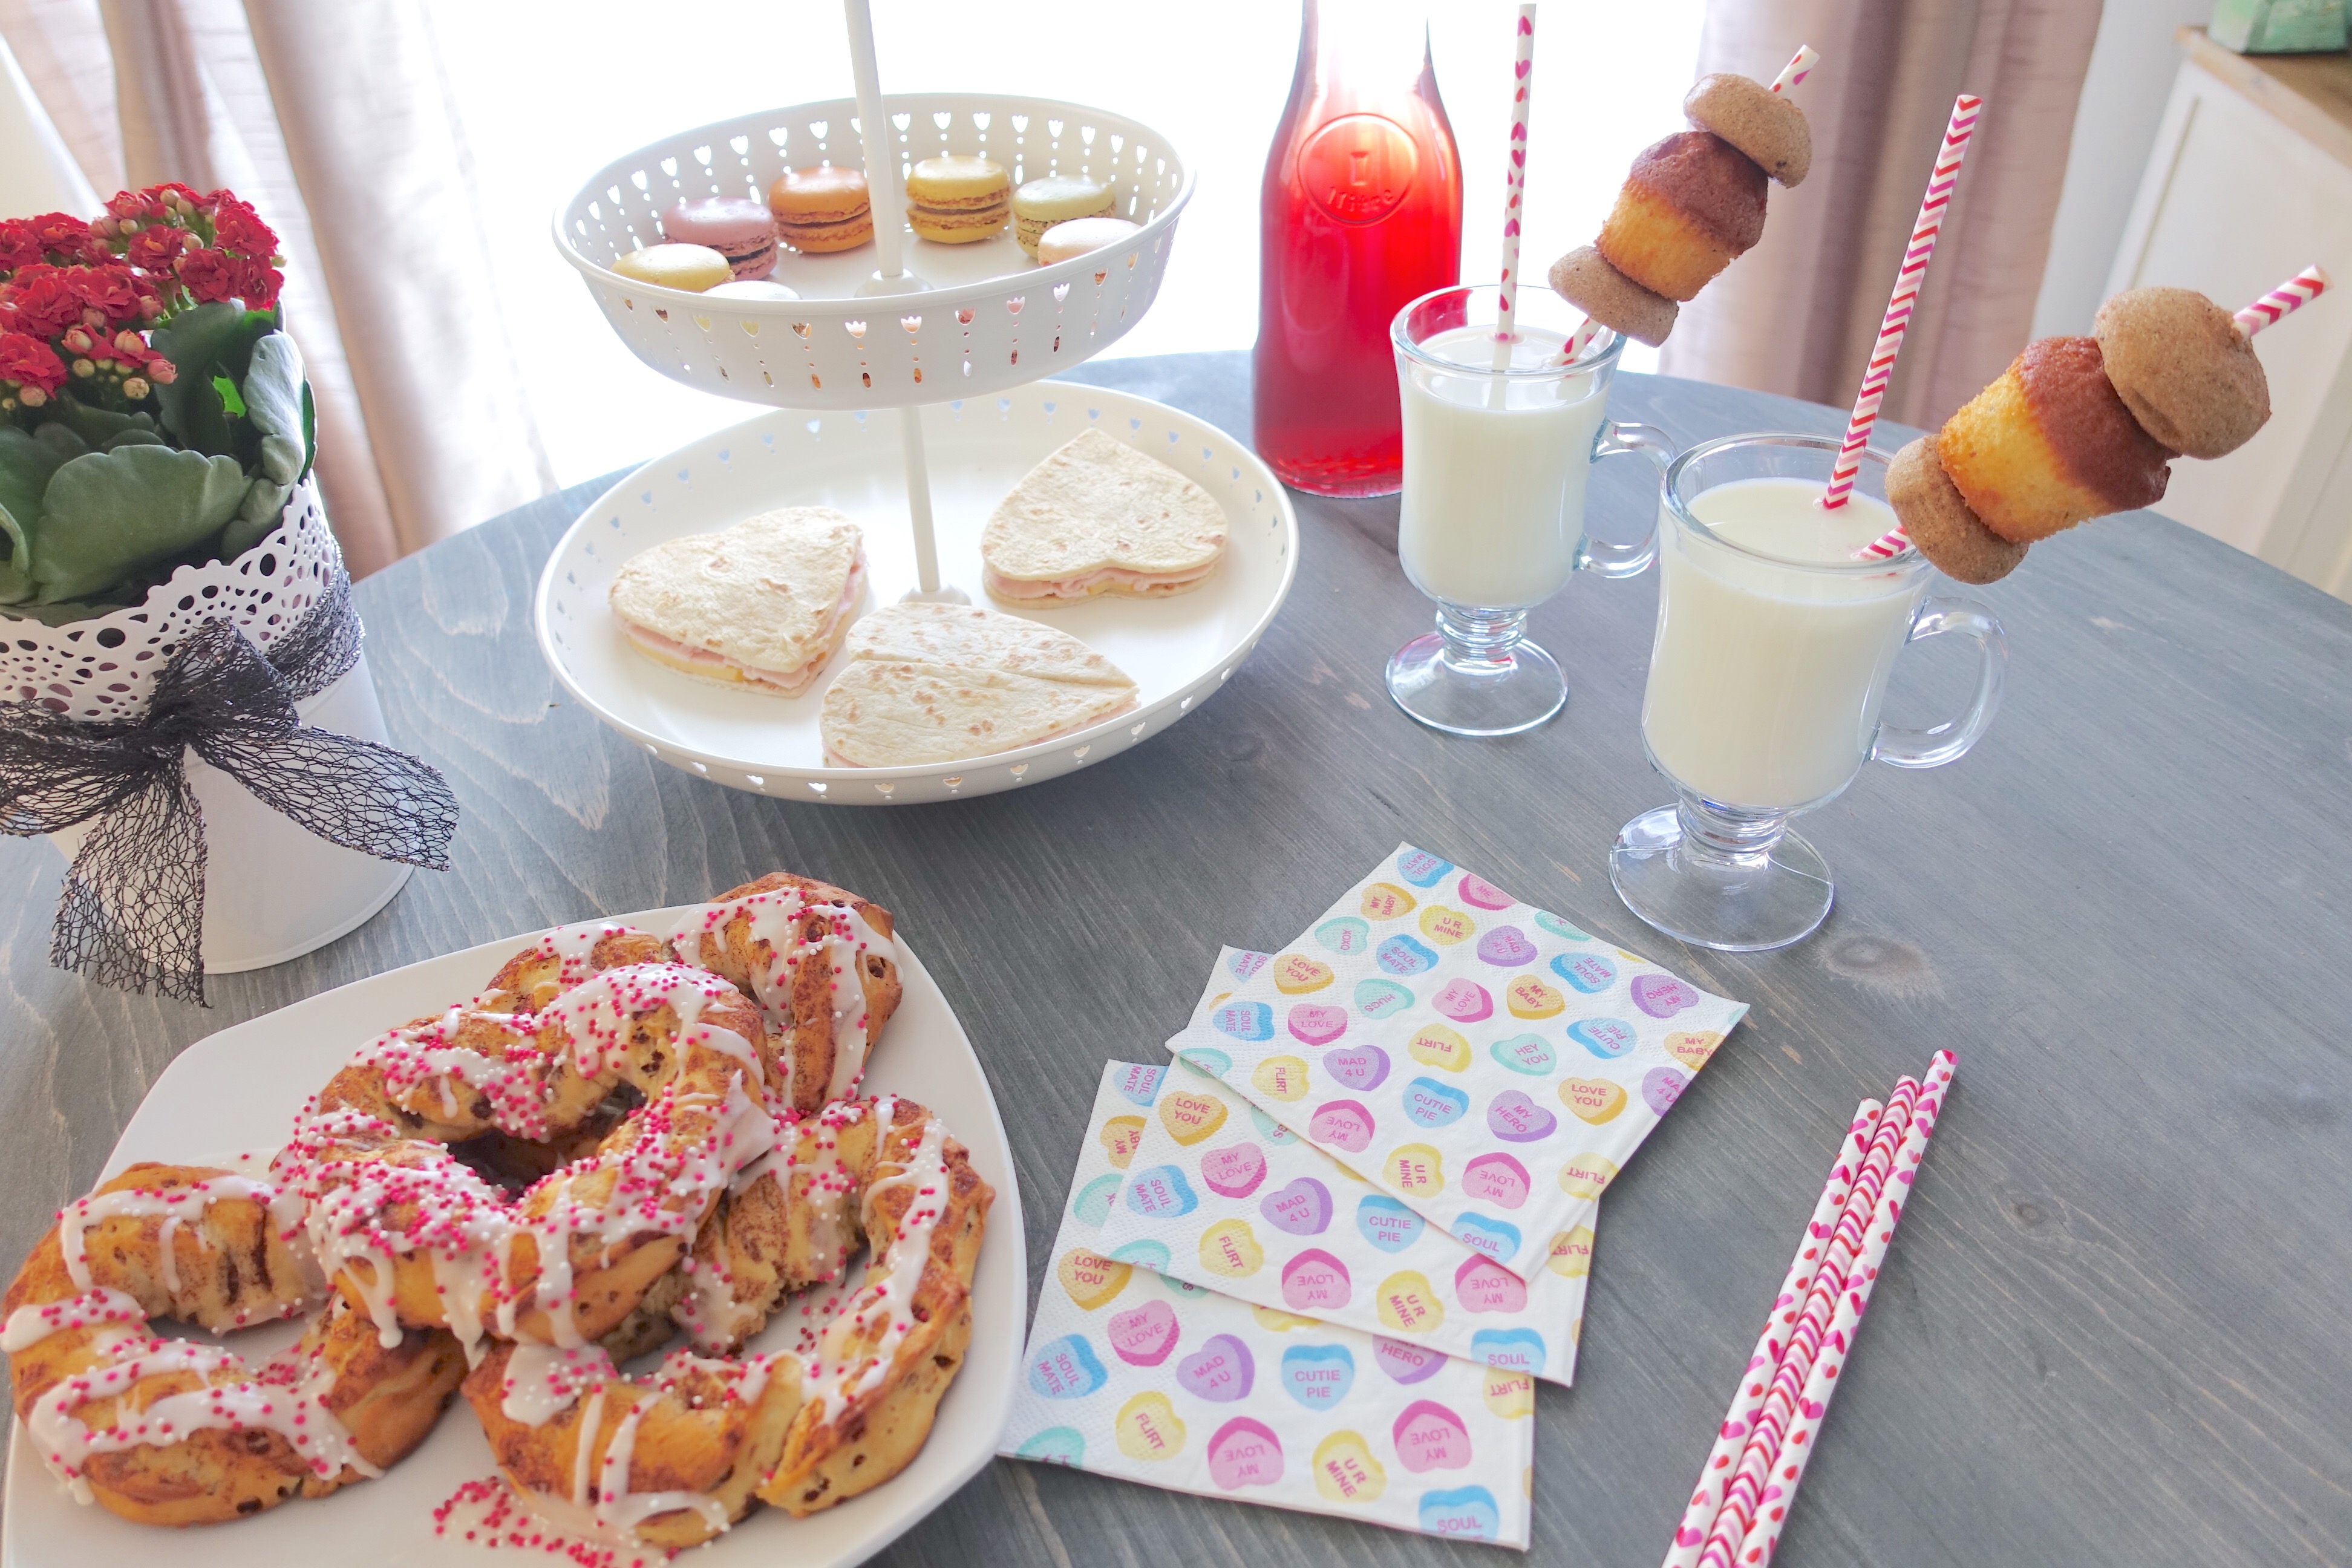
Love it or leave it Valentine’s Day is this Sunday and there’s been a flood of holiday themed treats and DIY posts. Who am I to stop the momentum? We’re celebrating Galentine’s Day today so grab your favorite gal pals, a bubbly drink, and lets start baking!
Today’s menu includes frosted cinna-hearts, pita heart-wiches, and a dessert skewer … not in the shape of a heart. See, we’re themed! Hearts everywhere!
For your frosted hearts you’ll need one package of cinnamon rolls and some sprinkles!
Unravel the cinnamon bun and split it into two halves and then shape the two into a heart!
Bake per the directions on the packaging and then drizzle the frosting over top and sprinkle with ALL the sprinkles!
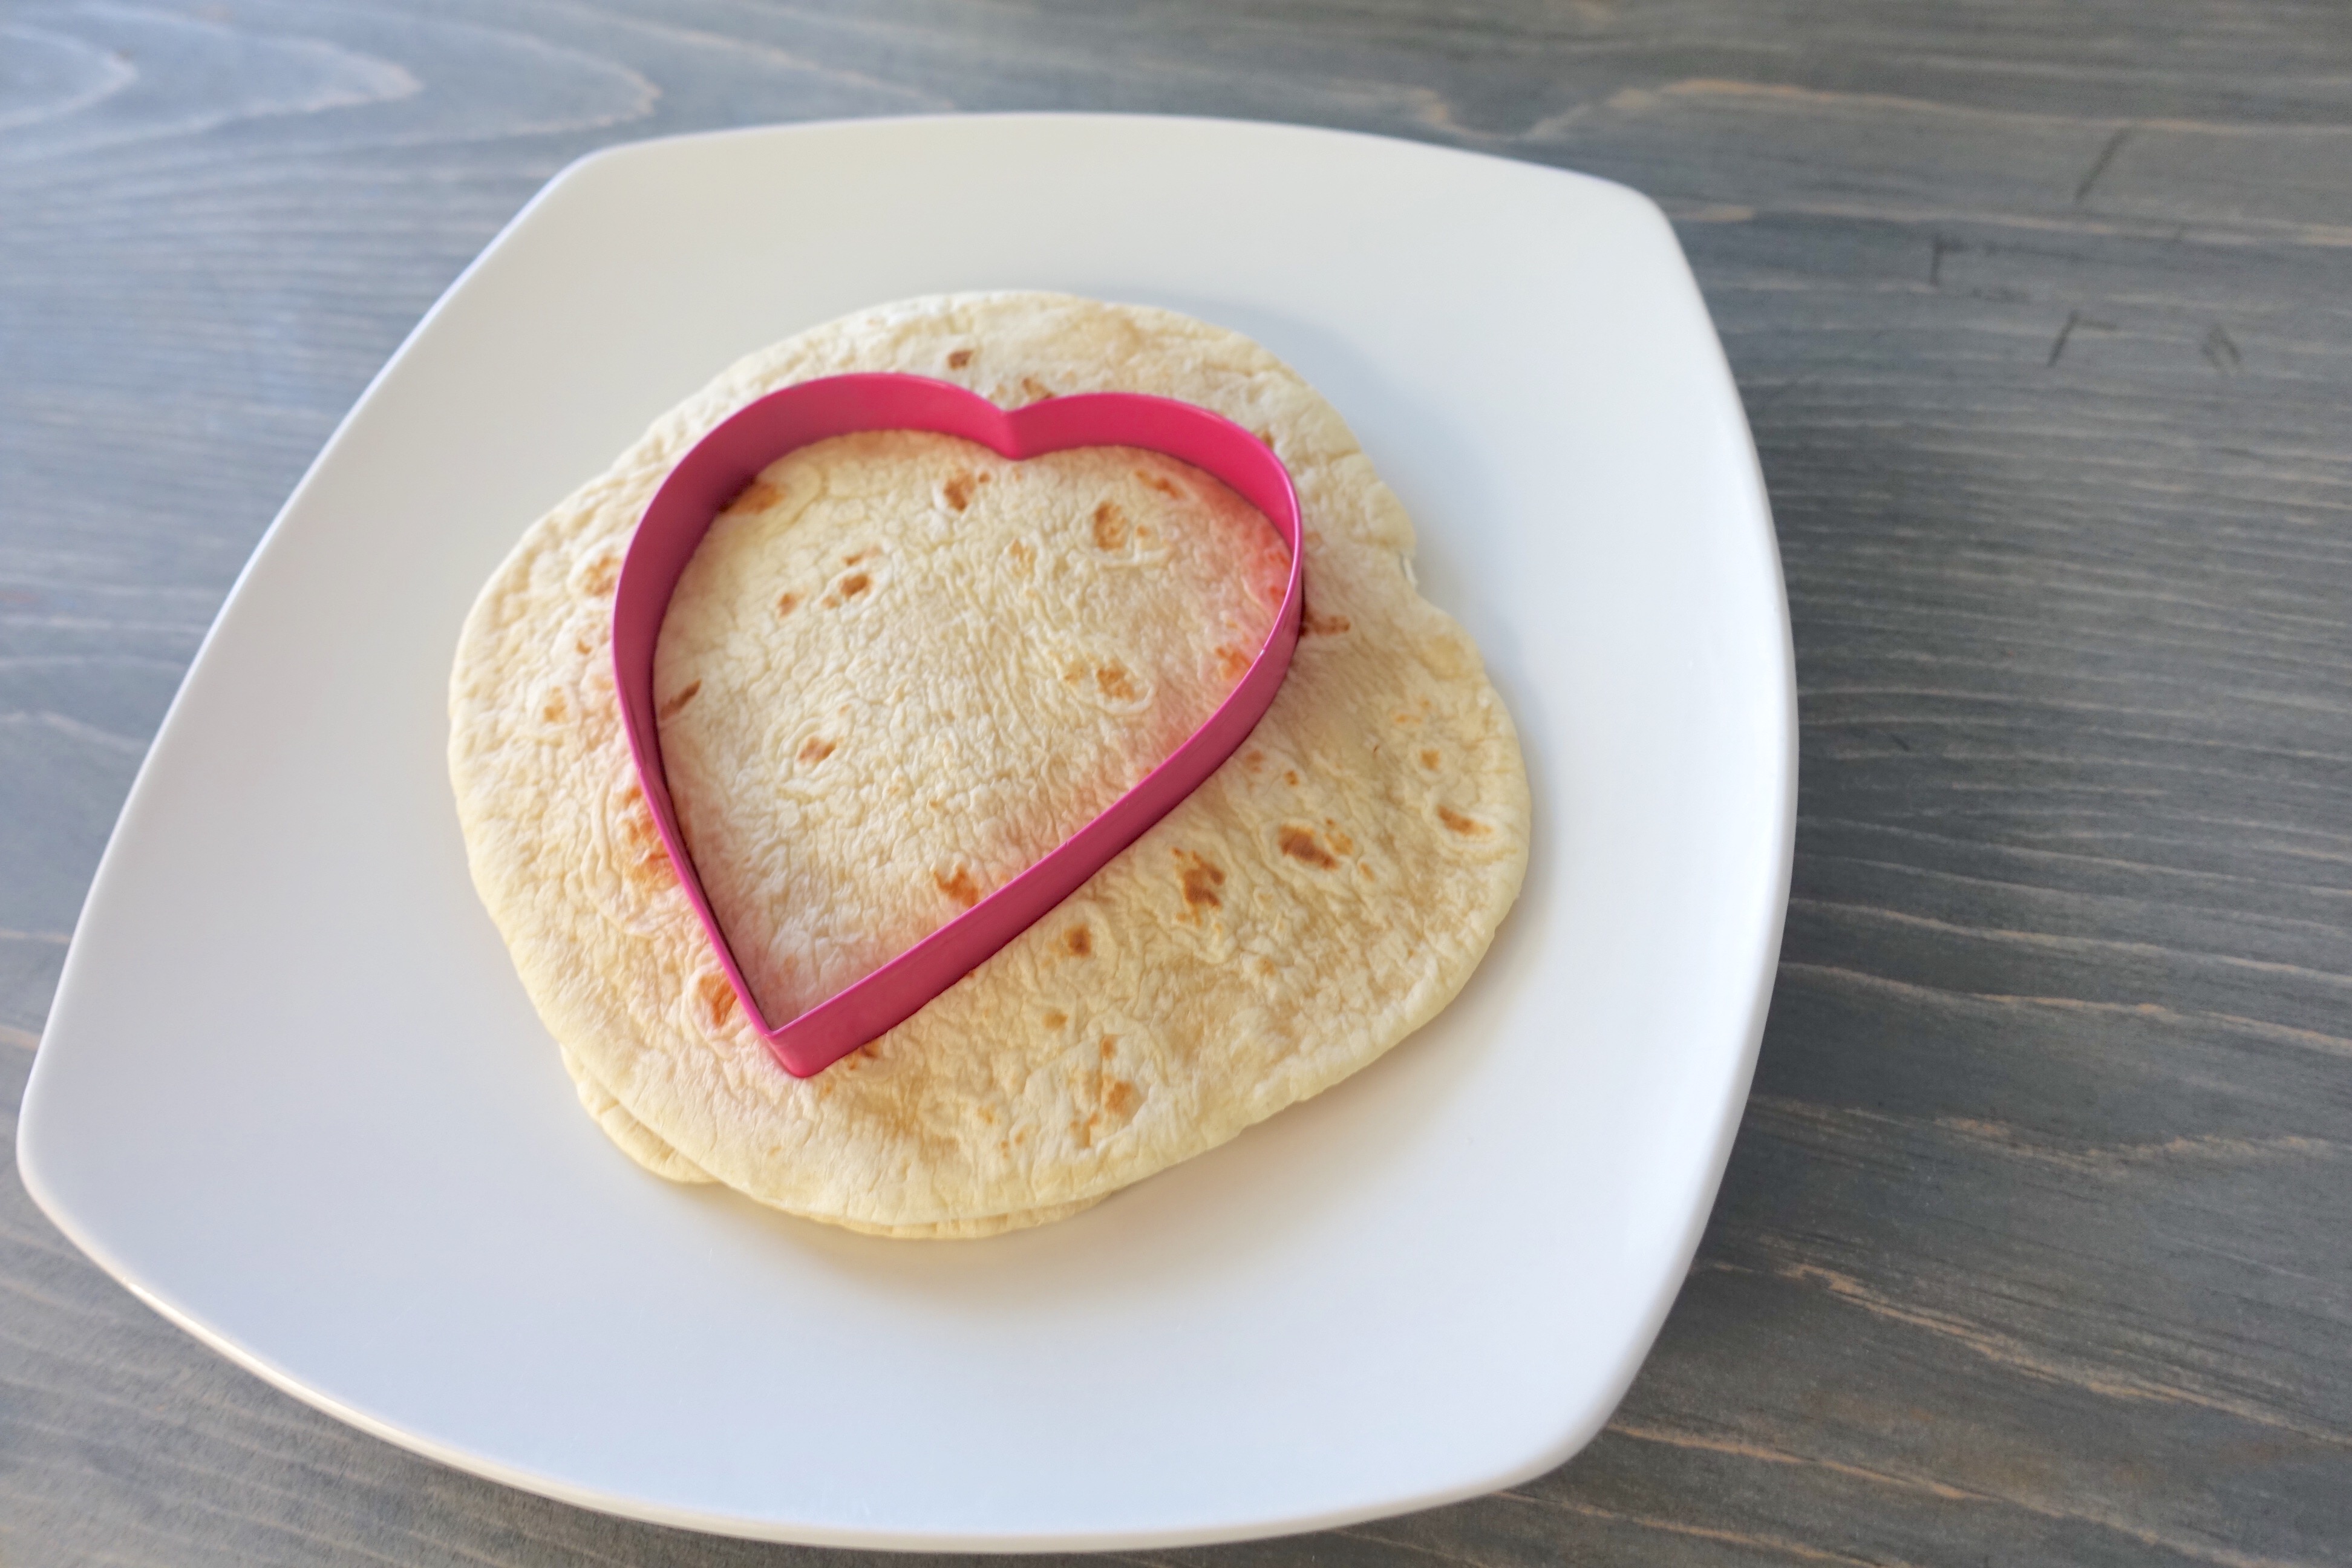
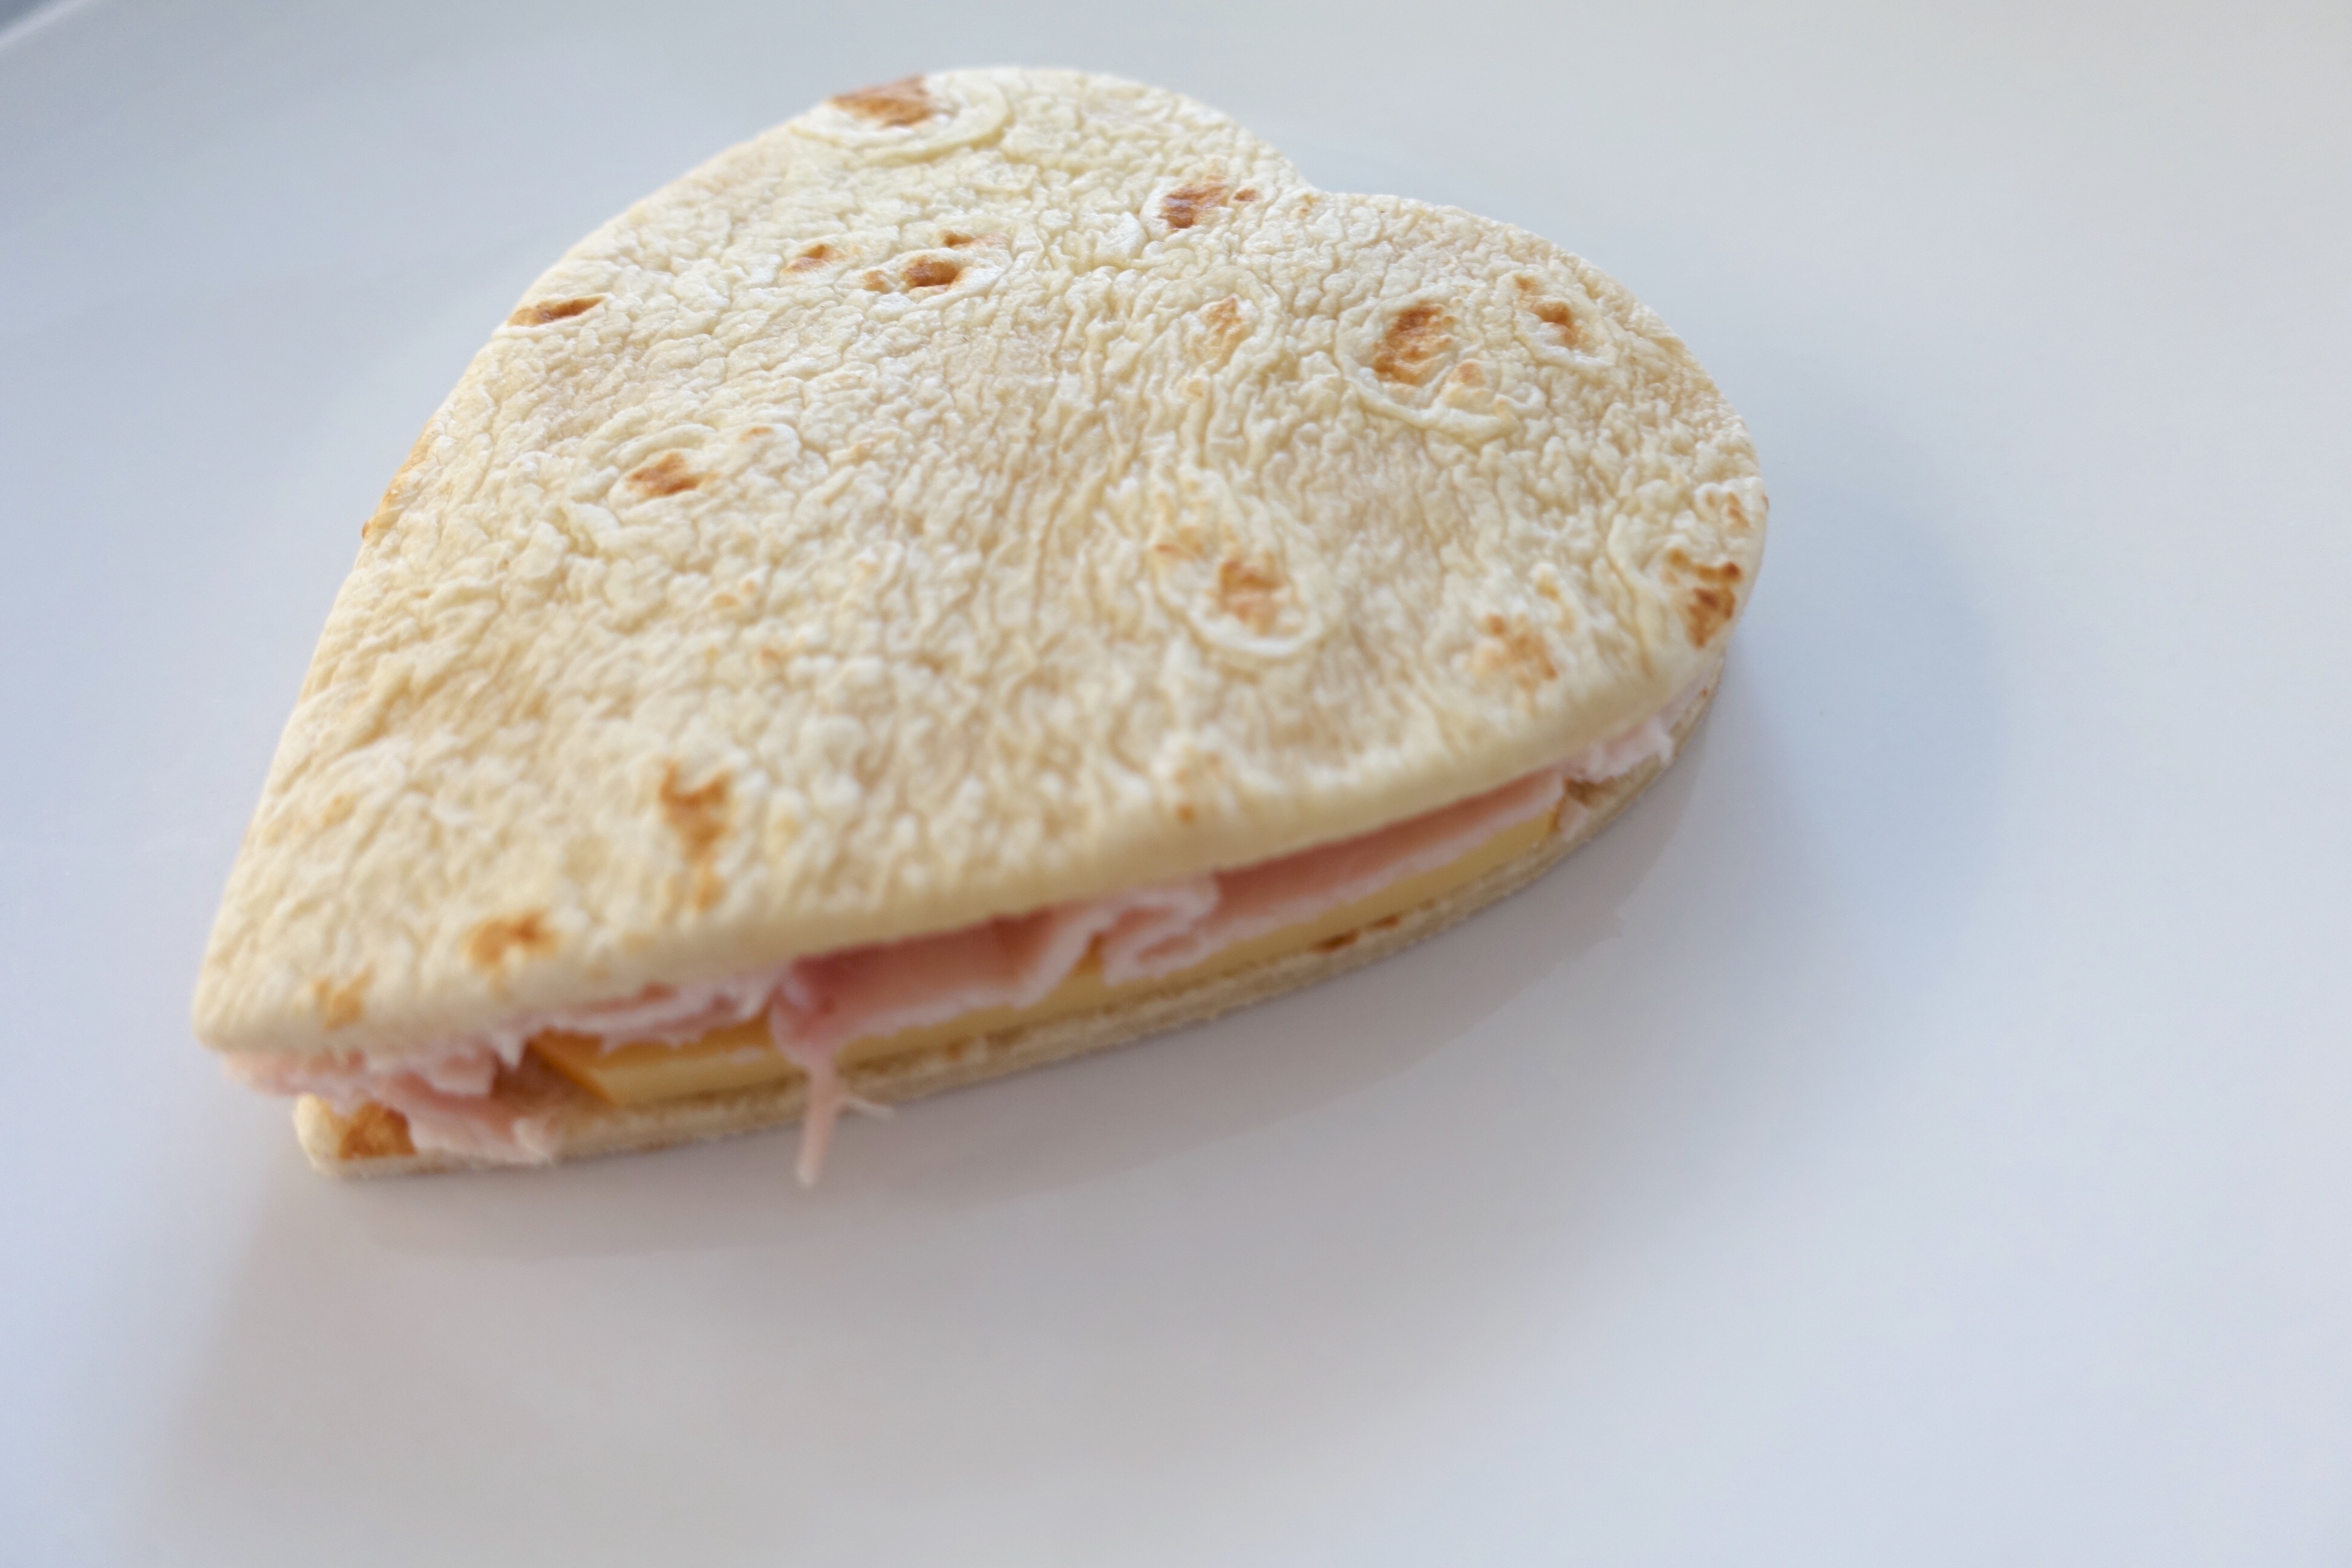
These pita heart-wiches are super easy and super yummy! Just take 2 pitas and layer them up with turkey, cheese, cucumber, or whatever your favorite fillings are. Then cut them up and enjoy! They’re especially enjoyable when you use a heart shaped cookie cutter!
I sliced a few of these in half which made them look like broken hearts, which still tasted delicious AND fit the theme of my next post ‘the achy-breaky Valentine’.
The macaroons were from Trader Joe’s and after you thaw them out it’s as if you picked them up fresh from the bakery! Salted caramel is my favorite!
For the dessert skewers just take a paper straw (I got these from the dollar store) and stack your favorite pastries, alternating between them. I chose snickerdoodles and blueberry muffins! Almond milk and another straw for sipping and we were set!
That red glowing drink you see in the background is cherry-cranberry juice spiked with our favorite vodka!
I hope this inspires you to enjoy a holiday with your friends, Valentine’s day ins’t just for lovers! It’s a day to celebrate all the loves! If you really don’t feel like celebrating and you just hate the holiday all together, then I have a post for you on Sunday (yes ON Valentine’s Day, see what I did there) with menu items like Bleeding Heart Brownies and Sour Cherry Puckers, so stay tuned for that!
Here is my most recent video, our first installment of Pinterest DIY-Not! I made Melt My Marshmallow treats and Cherry Whiskey Smashes! They were just as delicious and they sound!
Do you have any plans for Valentine’s Day? A Galentine’s day celebration perhaps? Share with me your plans so we can all live vicariously through one another and P.S. if you aren’t Subscribed to me on YouTube please do, I post videos twice a week! See, so much sharing! xx
I decided a long time ago that home interiors just wasn’t my thing, and I say that because if you’ve ever come over to our home you would’ve seen that nothing had a theme and nothing matched! I didn’t care about design or furniture, and call it personal growth, but I care now. I’ve spent a lot of time these past few weeks investing money and careful thought into upgrading our space and rejuvenating the energy that’s in our home. At the end of the day we work from home and I want us to love our creative space and we do now! These little revamps make me so happy, it’s tapping into a different part of my creativity and this part is so fun.
I get a lot of inspiration from Pinterest, Instagram, other bloggers, and let me tell you there is so.much.pinning! Corrine introduced me to Molly of Almost Makes Perfect and legit everything she does inspires me! Go follow along because the timeless simplicity of her home is what prompted Corrine to share with me one of her recent posts, hence this post. Molly showcased a large canvas painting her in kitchen and Corrine and I thought, “oh pretty, totally we can do that!” DIY is easy they said, it’ll save you time and money they said. Yes, totally saves you money, but ummm painting on canvas proved to be more difficult than I’d imagined so let me help you help your sanity and your art skills.
What we used:
59 x 40 inch canvas from Hobby Lobby (PS have you ever been there? We’d never been and omg they have everything!)
pencil to stencil
green painters tape for clean(ish) edges and placement keeping
big paint brush and an angled small one to clean up rounded areas
measuring tape to get the shapes even(ish)
For my canvas colors:
smaller shape- (1) 8 oz Terracota Matte Chalk Finish decor paint from Martha Stewart Crafts
larger shape- (3) 2 oz Cocoa Bean DecoArt Americana satin acrylic paint
For Corrine’s canvas colors:
(3) 2 oz Raw Sienna DecoArt Americana acrylic paint
(3) 2 oz True Ochre DecoArt Americana acrylic paint
What we did:
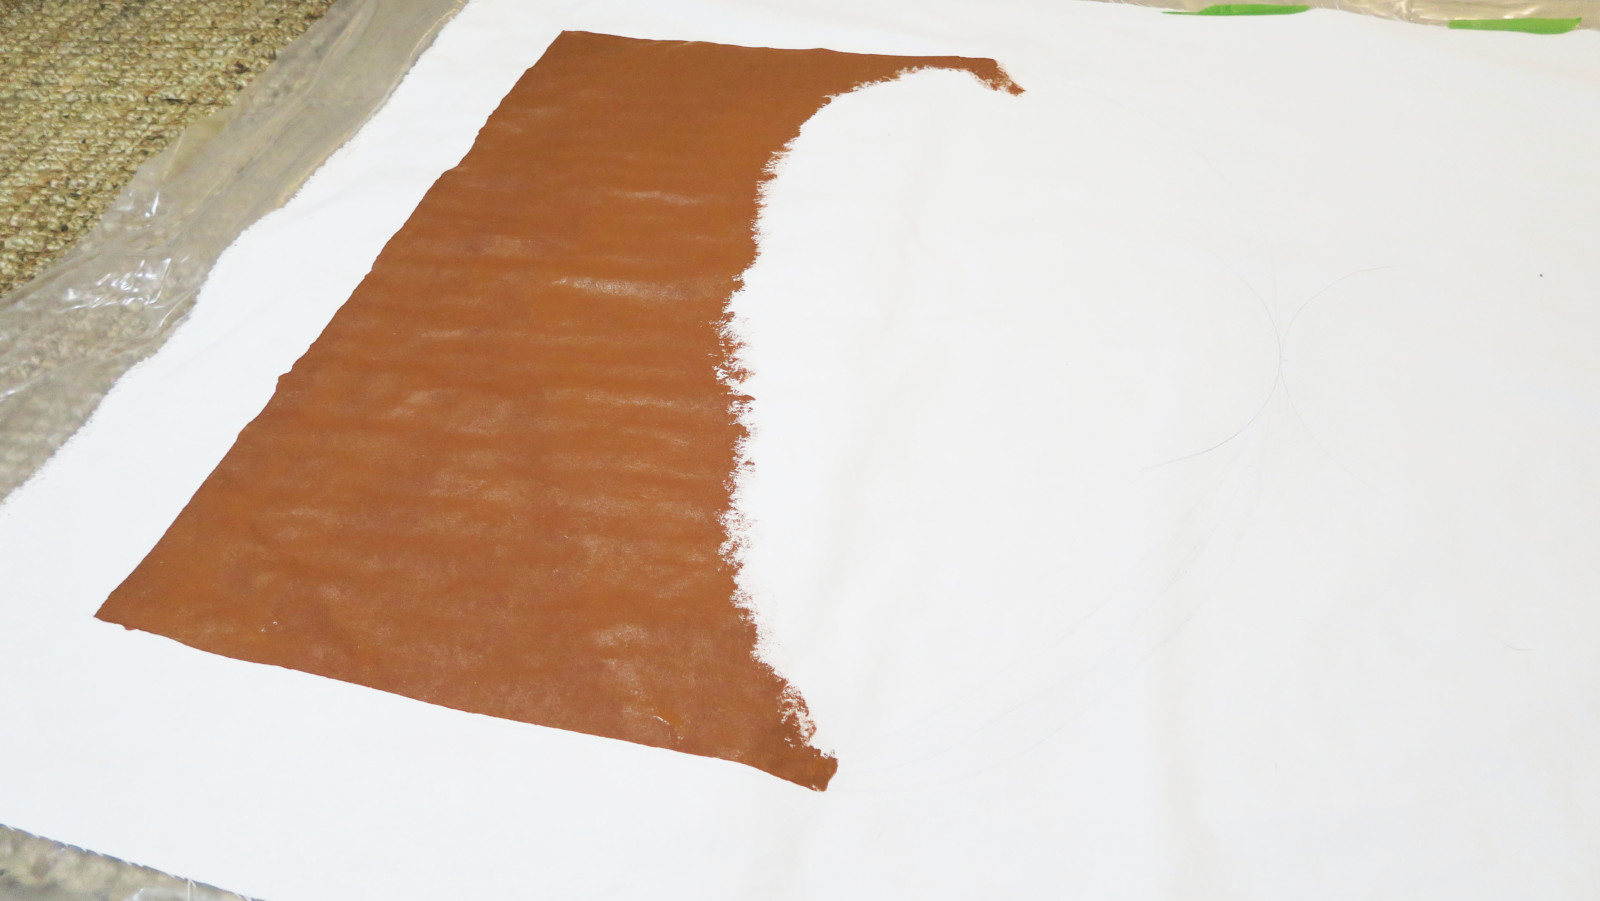
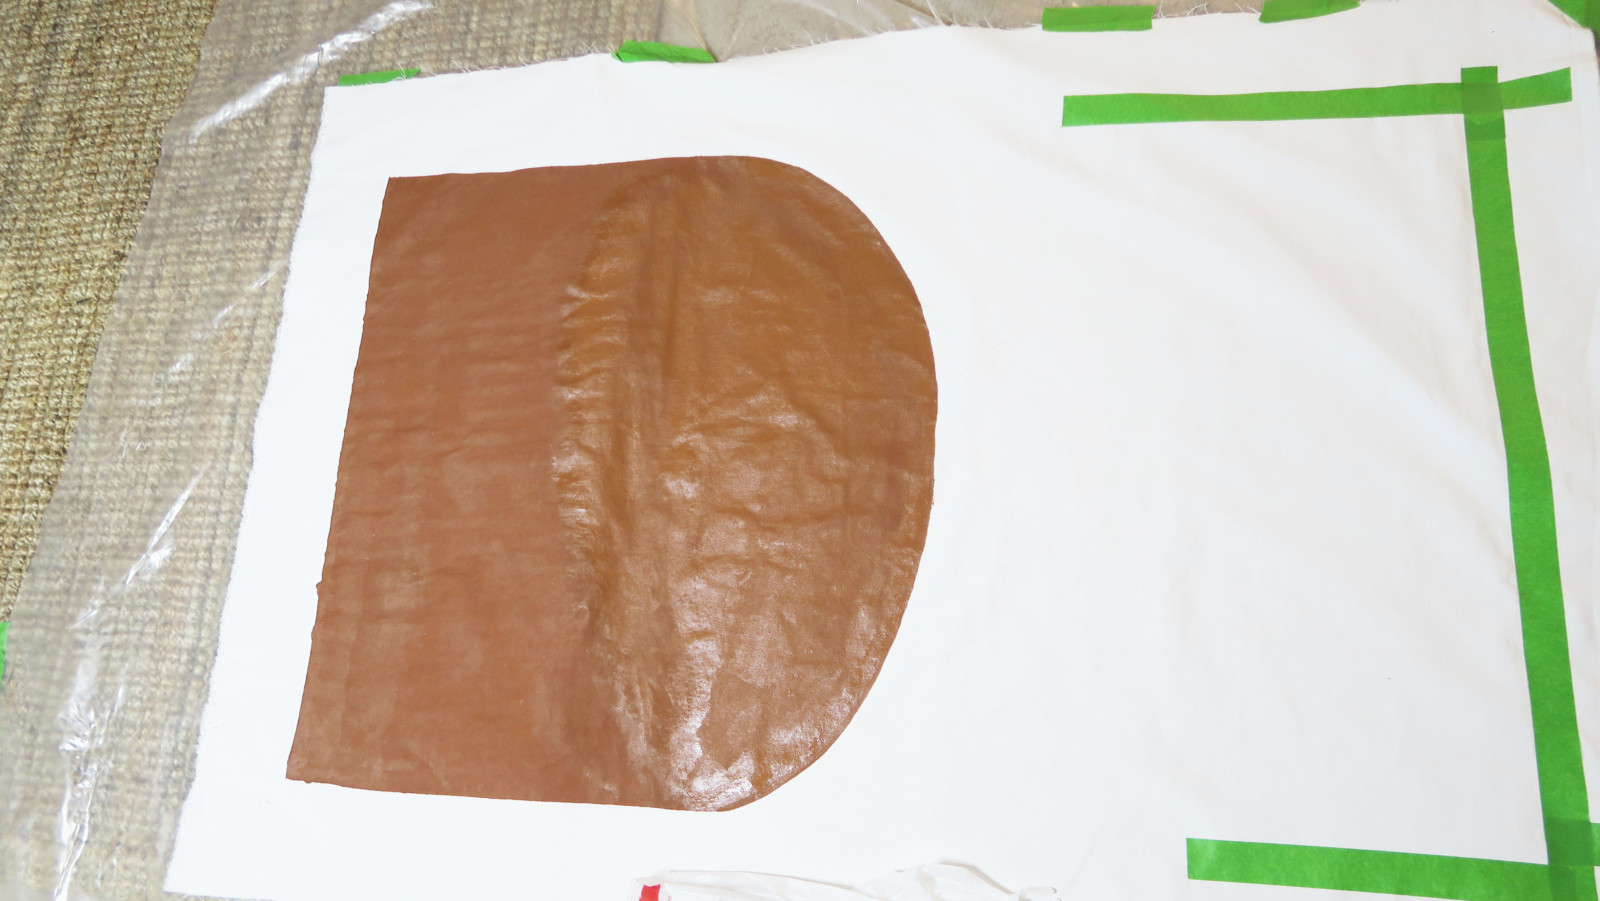
So what you’ll do is measure out the space where you want your canvas to go and have the fabric cut to fit. Then figure out the shapes and colors you’d like (we really tried to mimic Molly’s shapes but how mine turned out more mushroomed shaped rather than domed) and then use a pencil to lightly sketch the shape out. We used the tape to a) hold the fabric in place and we crawled all around it b) create straight edges for the flat portions of the shapes c) remove any debris or lint that got onto the canvas painting from all the crawling around them that we did.
We used the measuring tape to measure out the width of the canvas, and with that number decided where each side of the shapes would end and where on the design the dome part would begin. I knew one shape would be slightly smaller than the other so I had to map out where that shape would begin and end… hallelu pencil. Then we began to paint, then we ran out of paint, then we ran out to get more paint and by the time we got back half had dried up which you can see in the final product. So now I’ll have to go over it with a second coat at some point. Or leave it as is and say f*ck it.
We learned a few things along the way, so we’re just gonna call these Pro Tips 😉
PRO TIPS:
pencil pencil pencil. Sketch in pencil so you can easily erase way any errors or miscalculations. My painting still has some pencil stenciled on it but it doesn’t bother me
the measuring out bit is so important unless you don’t really care about straight lines or even shapes. Some people don’t care, I would’ve been that person a year ago but on this day I spent more time measuring than I did painting
it’s better to have it and not need it than to need it and not have it so I suggest to purchase more paint than you think you’ll need and you can always return what you don’t use. We ran out to get more paint and now you can clearly see when one half was painted and when the other dried on up
if it ain’t broke don’t fix it and if there’s a mistake don’t try to wash it out. Oh hai, we did that and it allowed the paint to bleed out onto the canvas and discolored the fabric. Sooo, I say if you make a mistake i.e. a flick of chunky paint lands onto the canvas (meee), or if paint slips underneath the tape and makes a jagged line versus a straight line (meee), it’s okay! And if you don’t get enough paint on the canvas and some of the canvas shows through (meee) well I actually think that gives it some personality, just leave it 😉
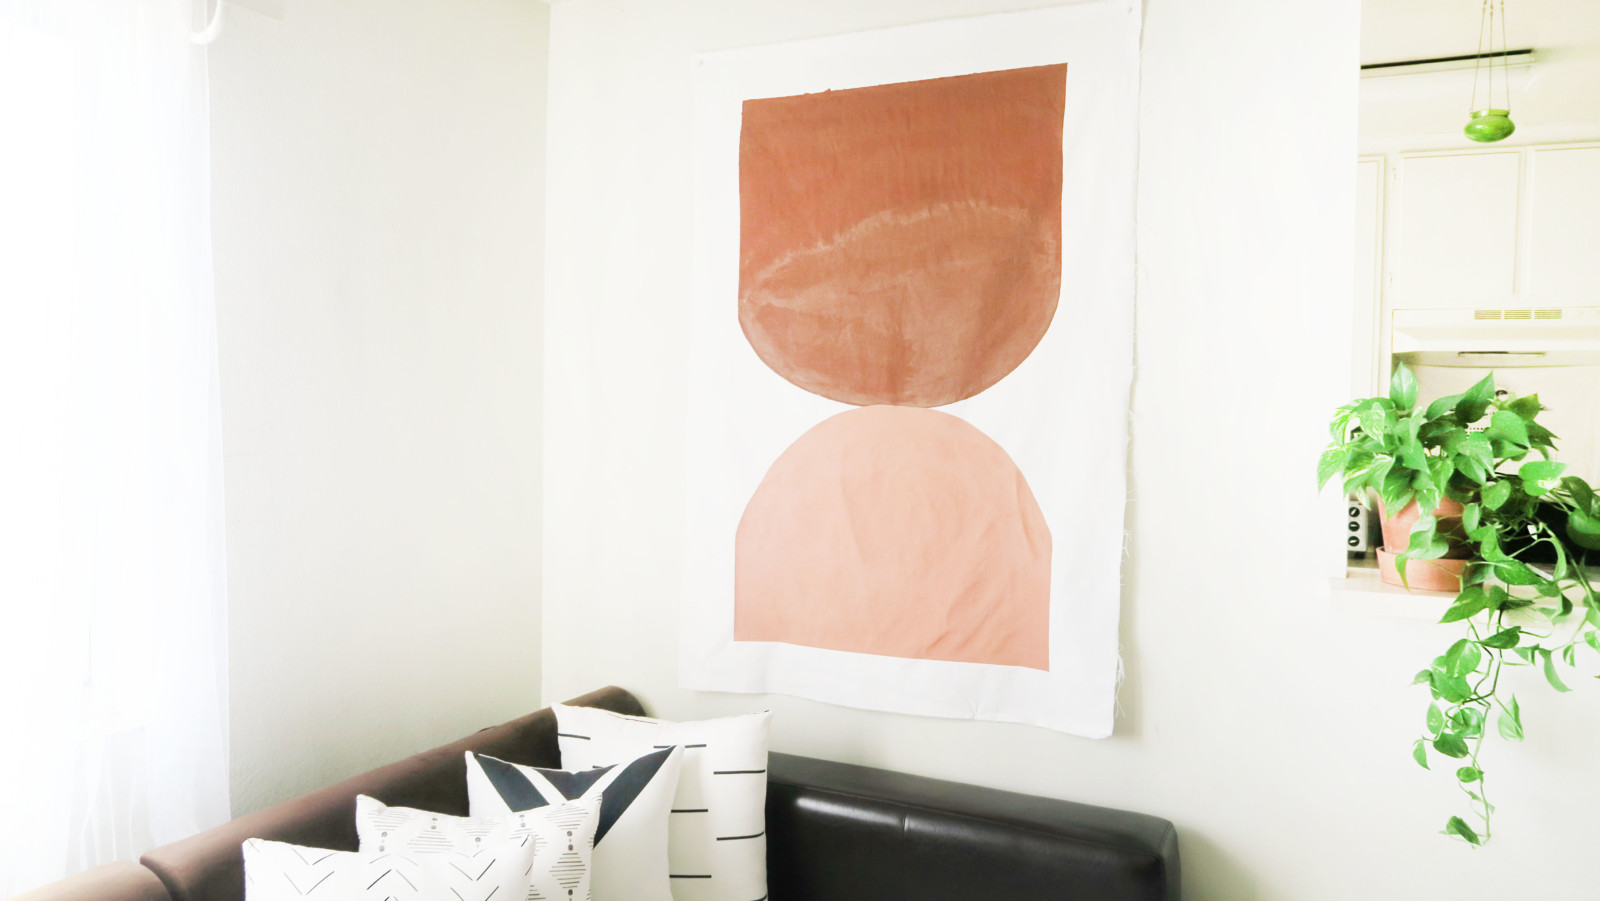
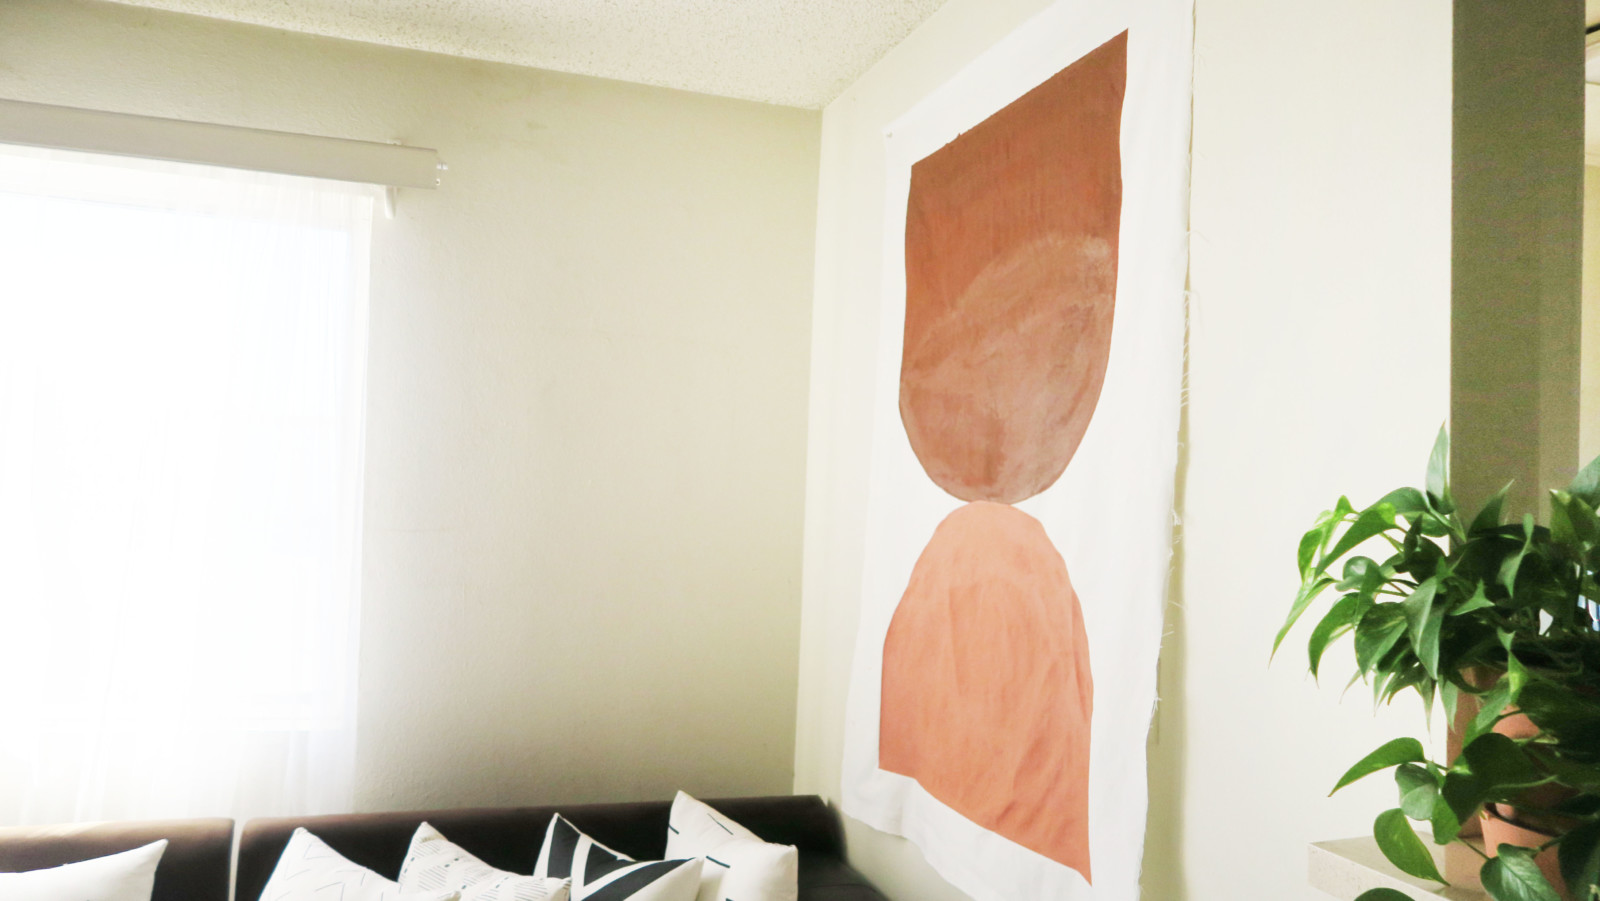
All in all we spent less than $40 for two canvases, some paints, and some fun. Now Corrine and I have some personalized paintings decorating our walls <3 We listened to Generation Why while we completed this project and got through 3 episodes… so we were painting for 3 hours and it was honestly so fun, so therapeutic! If you mess up, you can repaint, add paint, or start over, just have fun.
Thank you again to Molly and her creativity for sparking this inspiration, I hope you all get crafty this weekend!
What color palette would you choose? Are you a shapes kind of person or do you need a scene to be happening? We’re obsessed with all things earth toned and rattan right now and I couldn’t be more excited about it.
SPRUCING UP YOUR HOME FOR SPRINGTIME – You’d be so proud! I’ve been a DIY queen over here because DIY-not am I right?! Ahem, that is in reference to my series on YouTube where I take a Pinterest idea and do it my way. ‘My way’ usually means that things end up pretty janky, yet surprisingly fun and functional! This week has been all about revamping my space, from my bedroom to my kitchen and the spaces in between. I gave myself a $200 budget, put Pinterest on repeat, and behold, here is the magic that was created!
I combined my favorite color schemes to refresh my bedroom, my vanity area, my kitchen, and my dining room table. I kind of sprinkled pops of color around each nook of mine and put lights on just about anything I could get my hands on! Pastels, yellows, blues, pinks, oranges, you name it, it’s here! And guess what?! I also built a headboard WITH MY OWN HANDS. Yes slightly burned with hot glue hands, but with these bare hands of mine nonetheless! If I can do it, trust me, anyone can! So here’s the sitch …
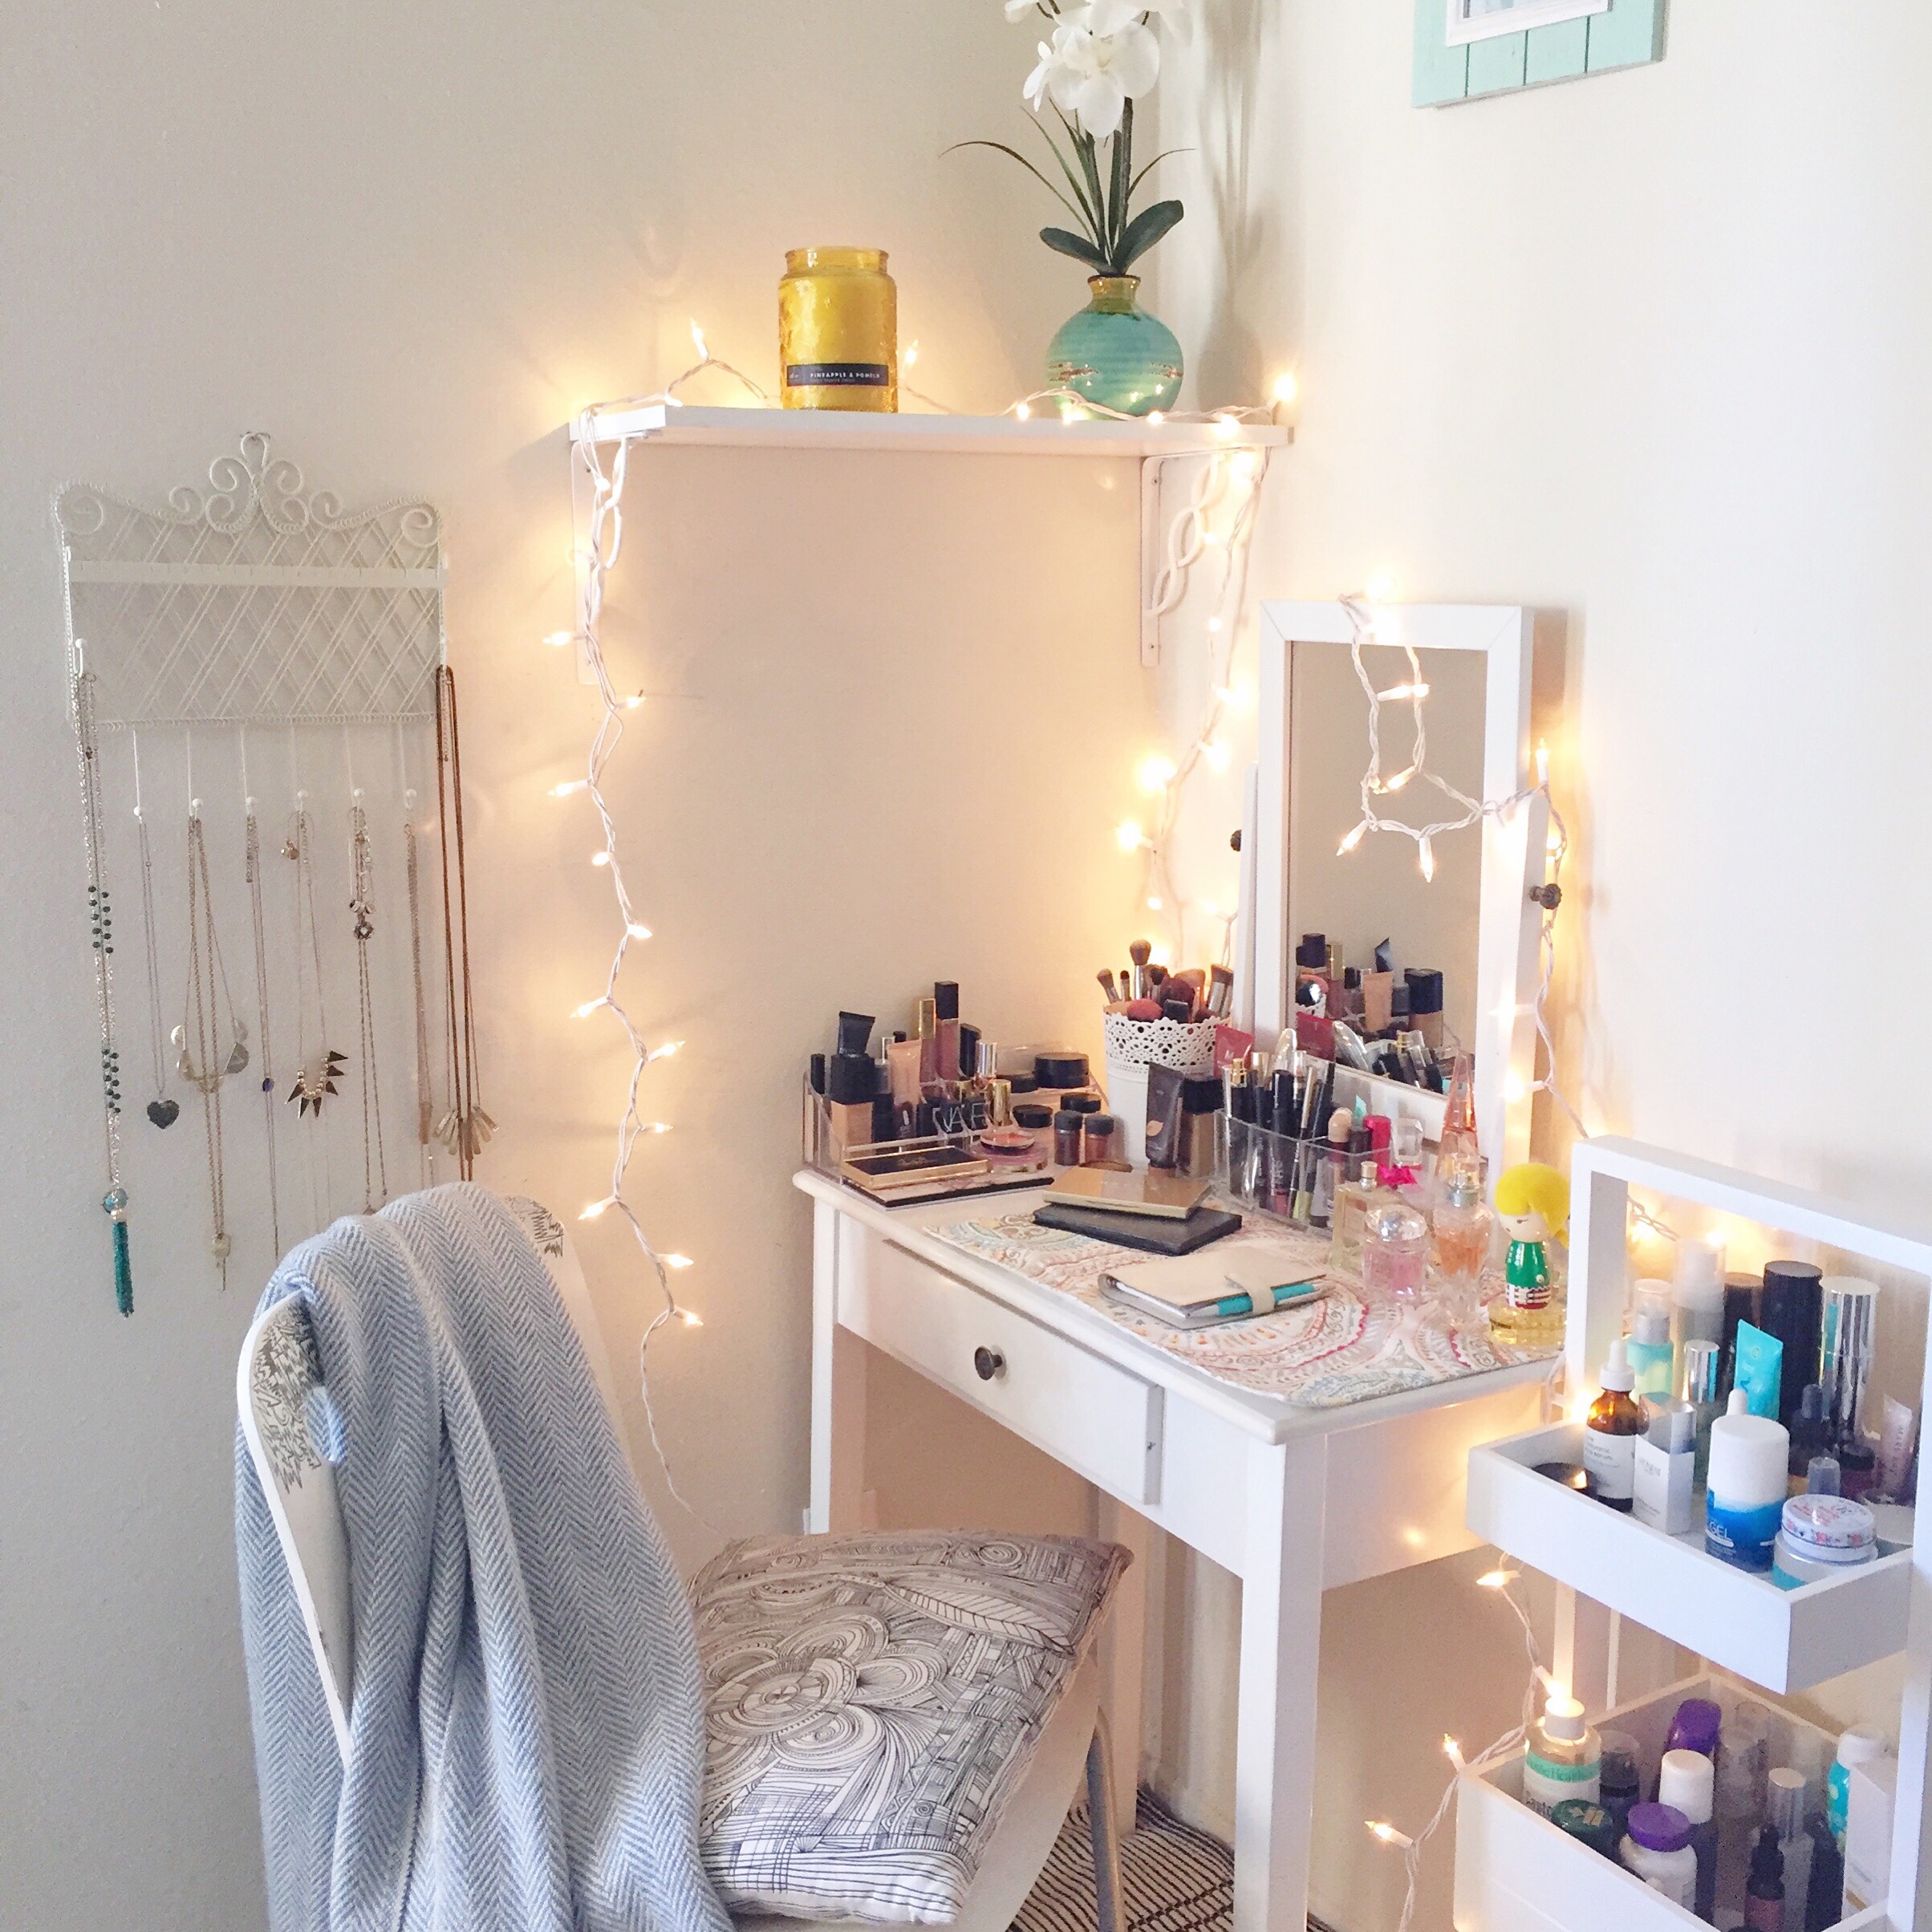
MY VANITY
I’ve always wanted a space in my bedroom that I could get ready at, film at, and decorate in a way that made me feel organized … ya know, like a real adult! Since I’m borderline hoarder-status over here, my vanity up until this point has always been covered with product and spritzes and sprays, and I never really got a chance to use it. I kind of just sat on the floor NEXT to my vanity and got ready each day. Joe got this set for me a few years ago and I’m happy to say that it is finally being used for all its intended purposes!
Organized chaos, that’s what this is! I kind of sectioned out all of my foundations, liners, perfumes, and palettes. I love this place mat that I got from Marshalls because it’s bright and colorful and fits in perfectly with the rest of my color scheme. If you haven’t noticed, I’m all about that bright, poppy, happy kind of feel!
So in a fit of creativity I ran out to TJ Maxx and picked up the double sided area rug, 2 makeup trays, a 3-tiered shelf organizer, and the hanging jewelry display. Marshall’s, just down the street is my go-to for accessories! The candle, photo frame, and planter were all on sale for less than $7 each! Also, IKEA is pretty great for DIY home projects, and from there I purchased the chair, pillow, blanket, shelf, and white planter. I thought the planter was so pretty with it’s lace detail that I used it as a makeup brush holder and filled the inside with beads to hold my brushes in place. You can get the shelf and lights at IKEA or even at Home Depot depending on your location.
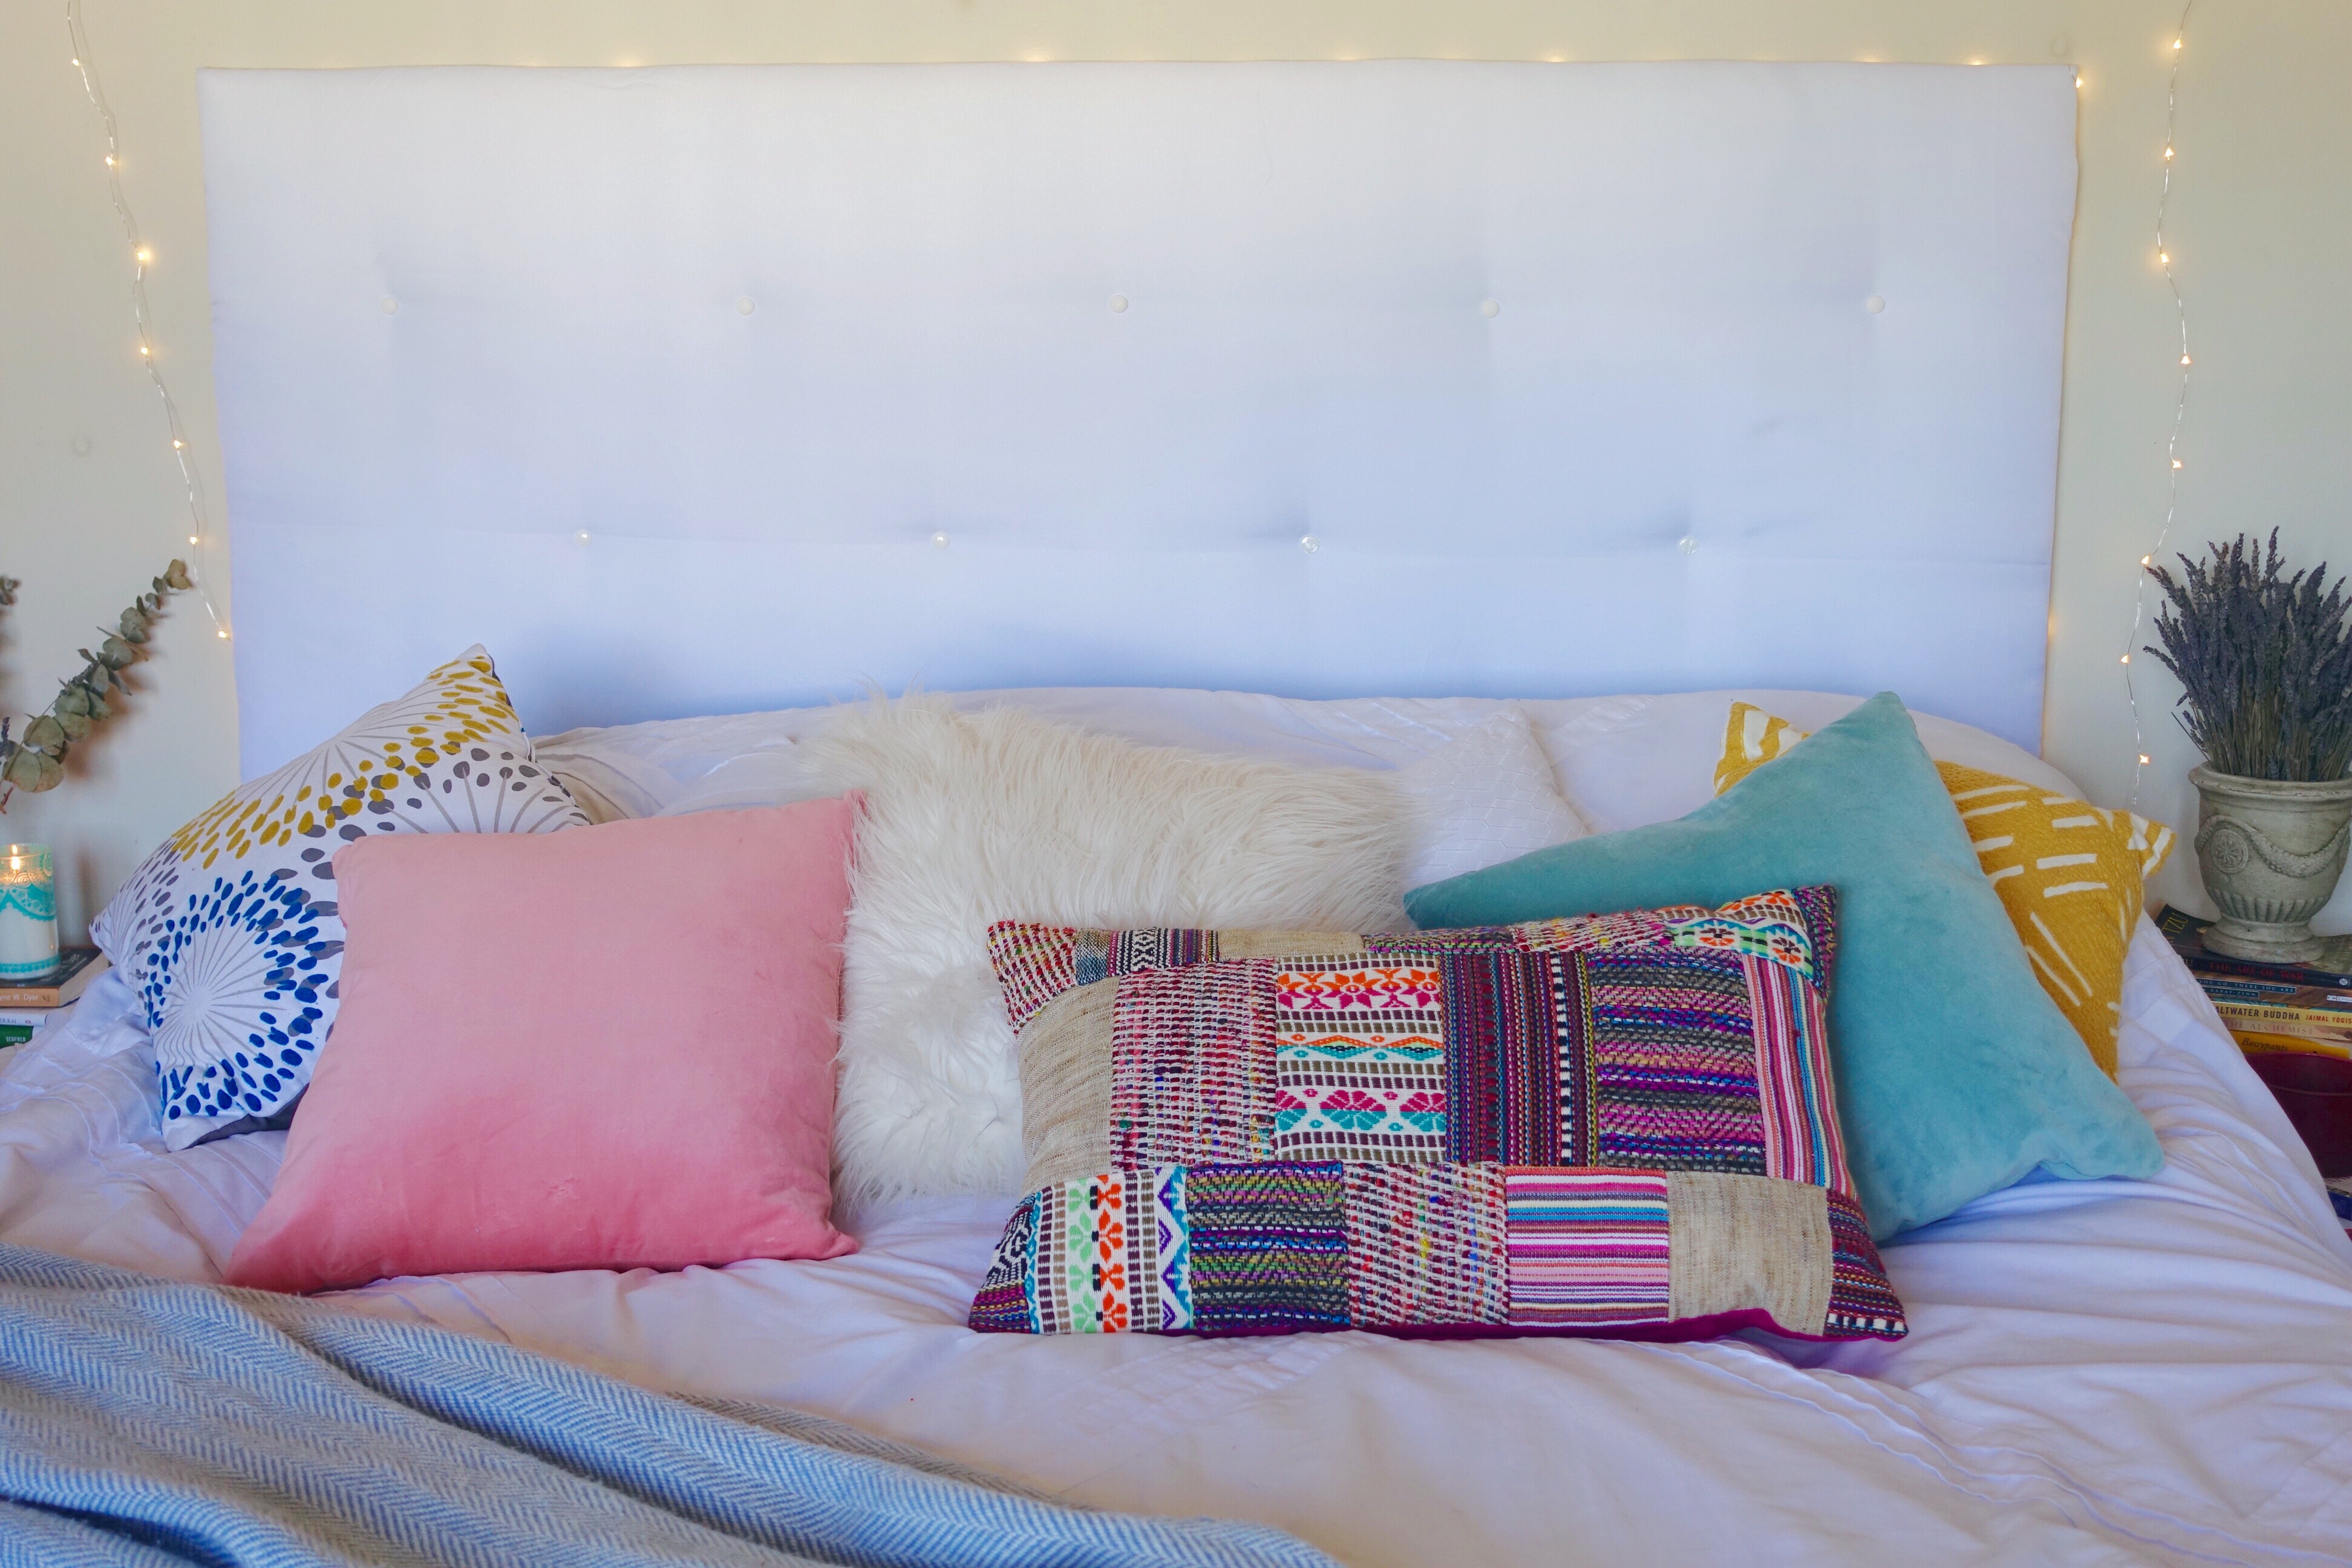
MY BED
Why yes, this IS a homemade headboard put together by yours truly! I watched YouTube OF COURSE and made this headboard from two poster boards … a BUTT LOAD of tape and all of my hot glue! You can check out the video I followed for this headboard here! I doubled the stuffing to really give the buttons that ‘pierced’ look. From $500 to $50, this headboard is the way to go! The fairy lights I got from Amazon and the pillows came from both World Market and Marshalls. Any chance I get to add color or lights, I’m all over it! Also, thank you Corrine for letting me steal your foliage, it really completed my whole ‘bo-ho’ theme!
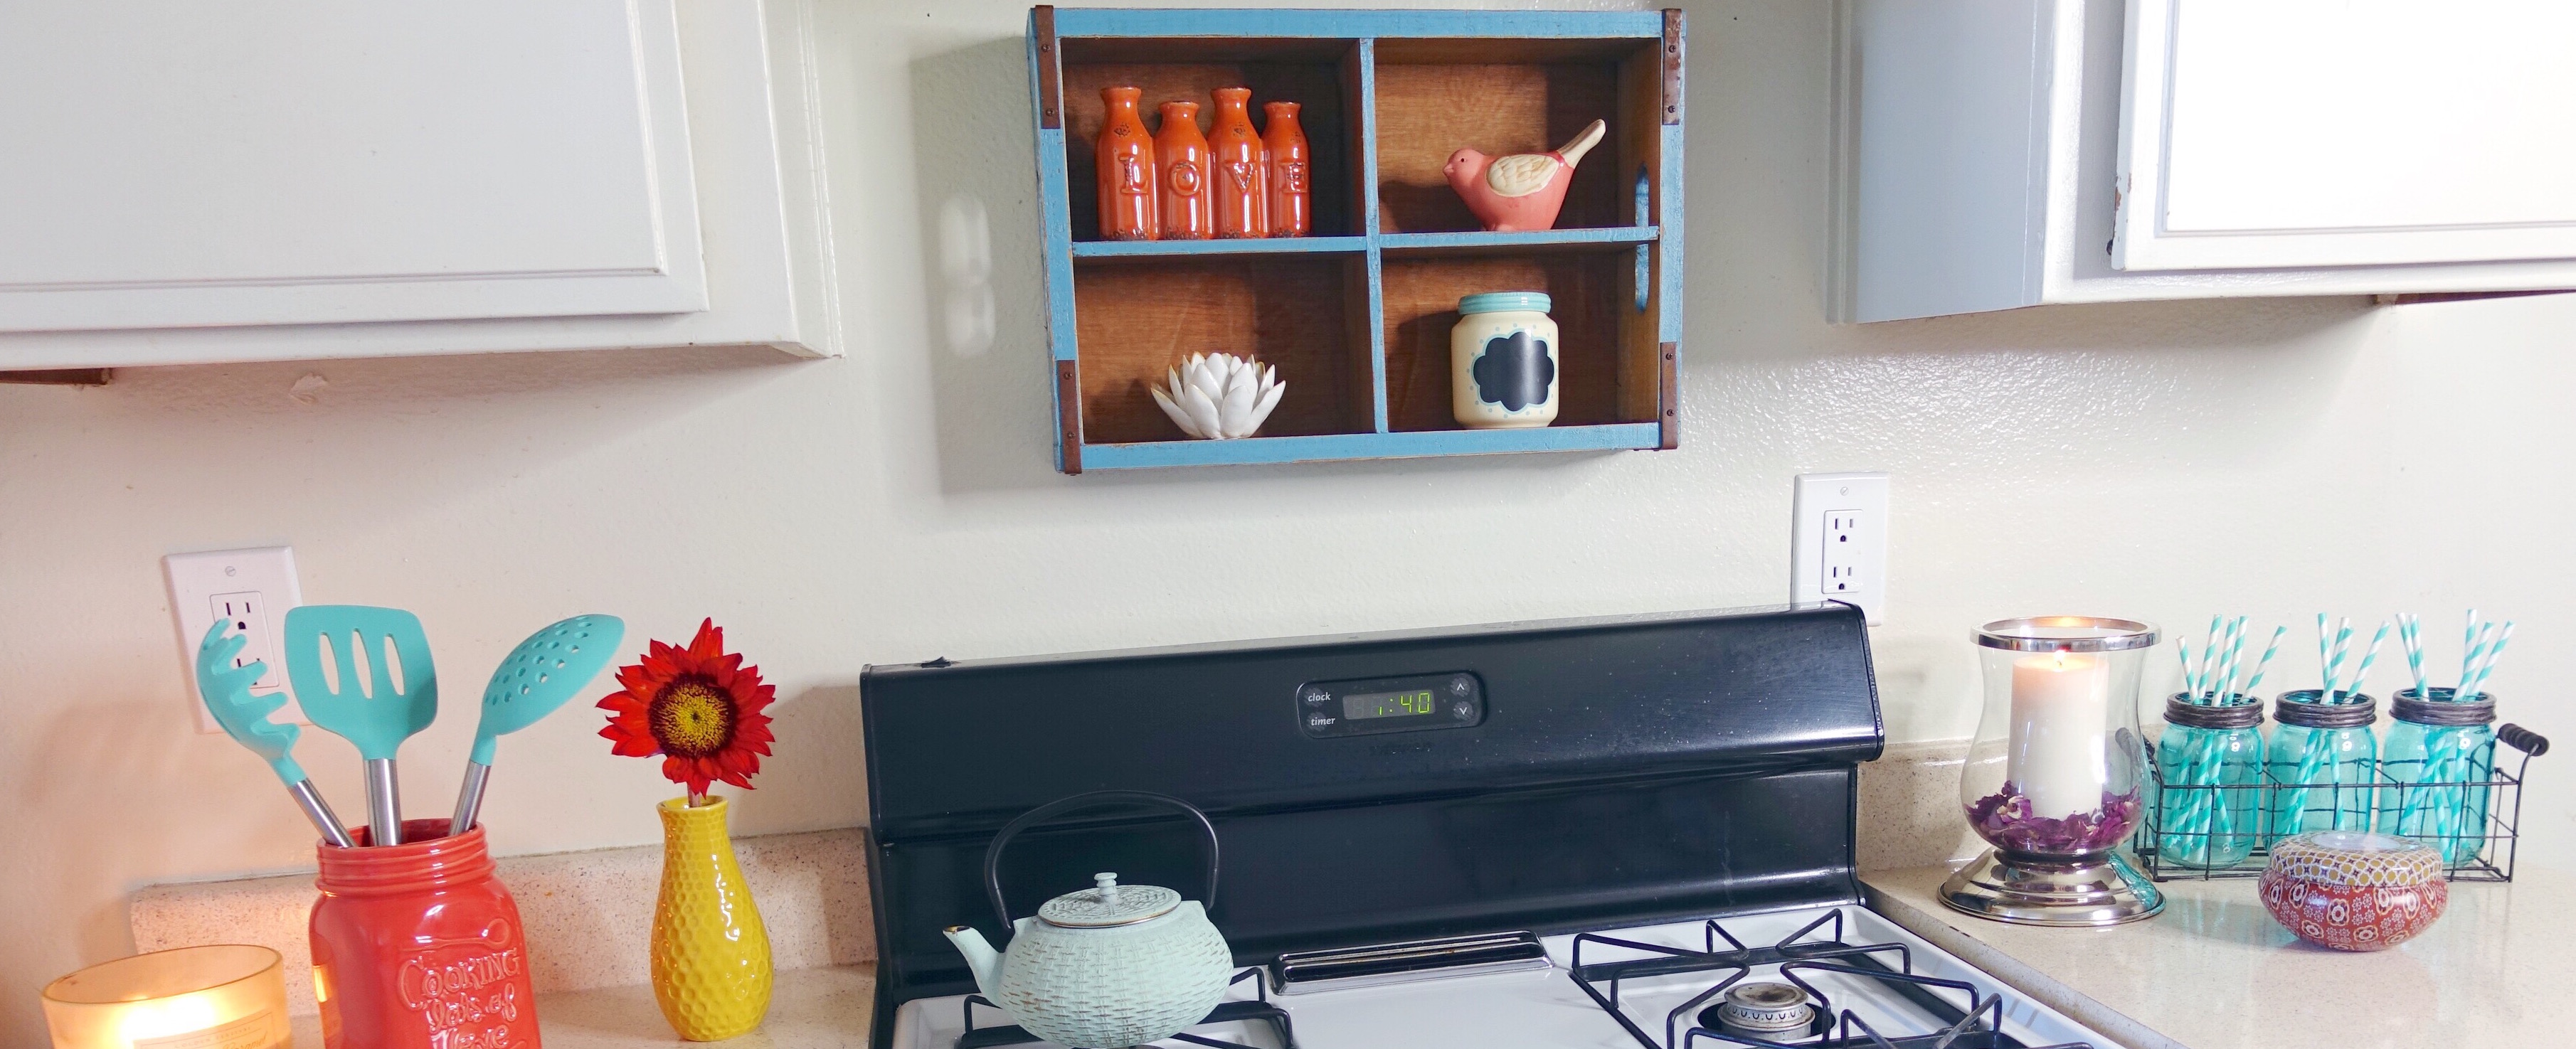
MY KITCHEN
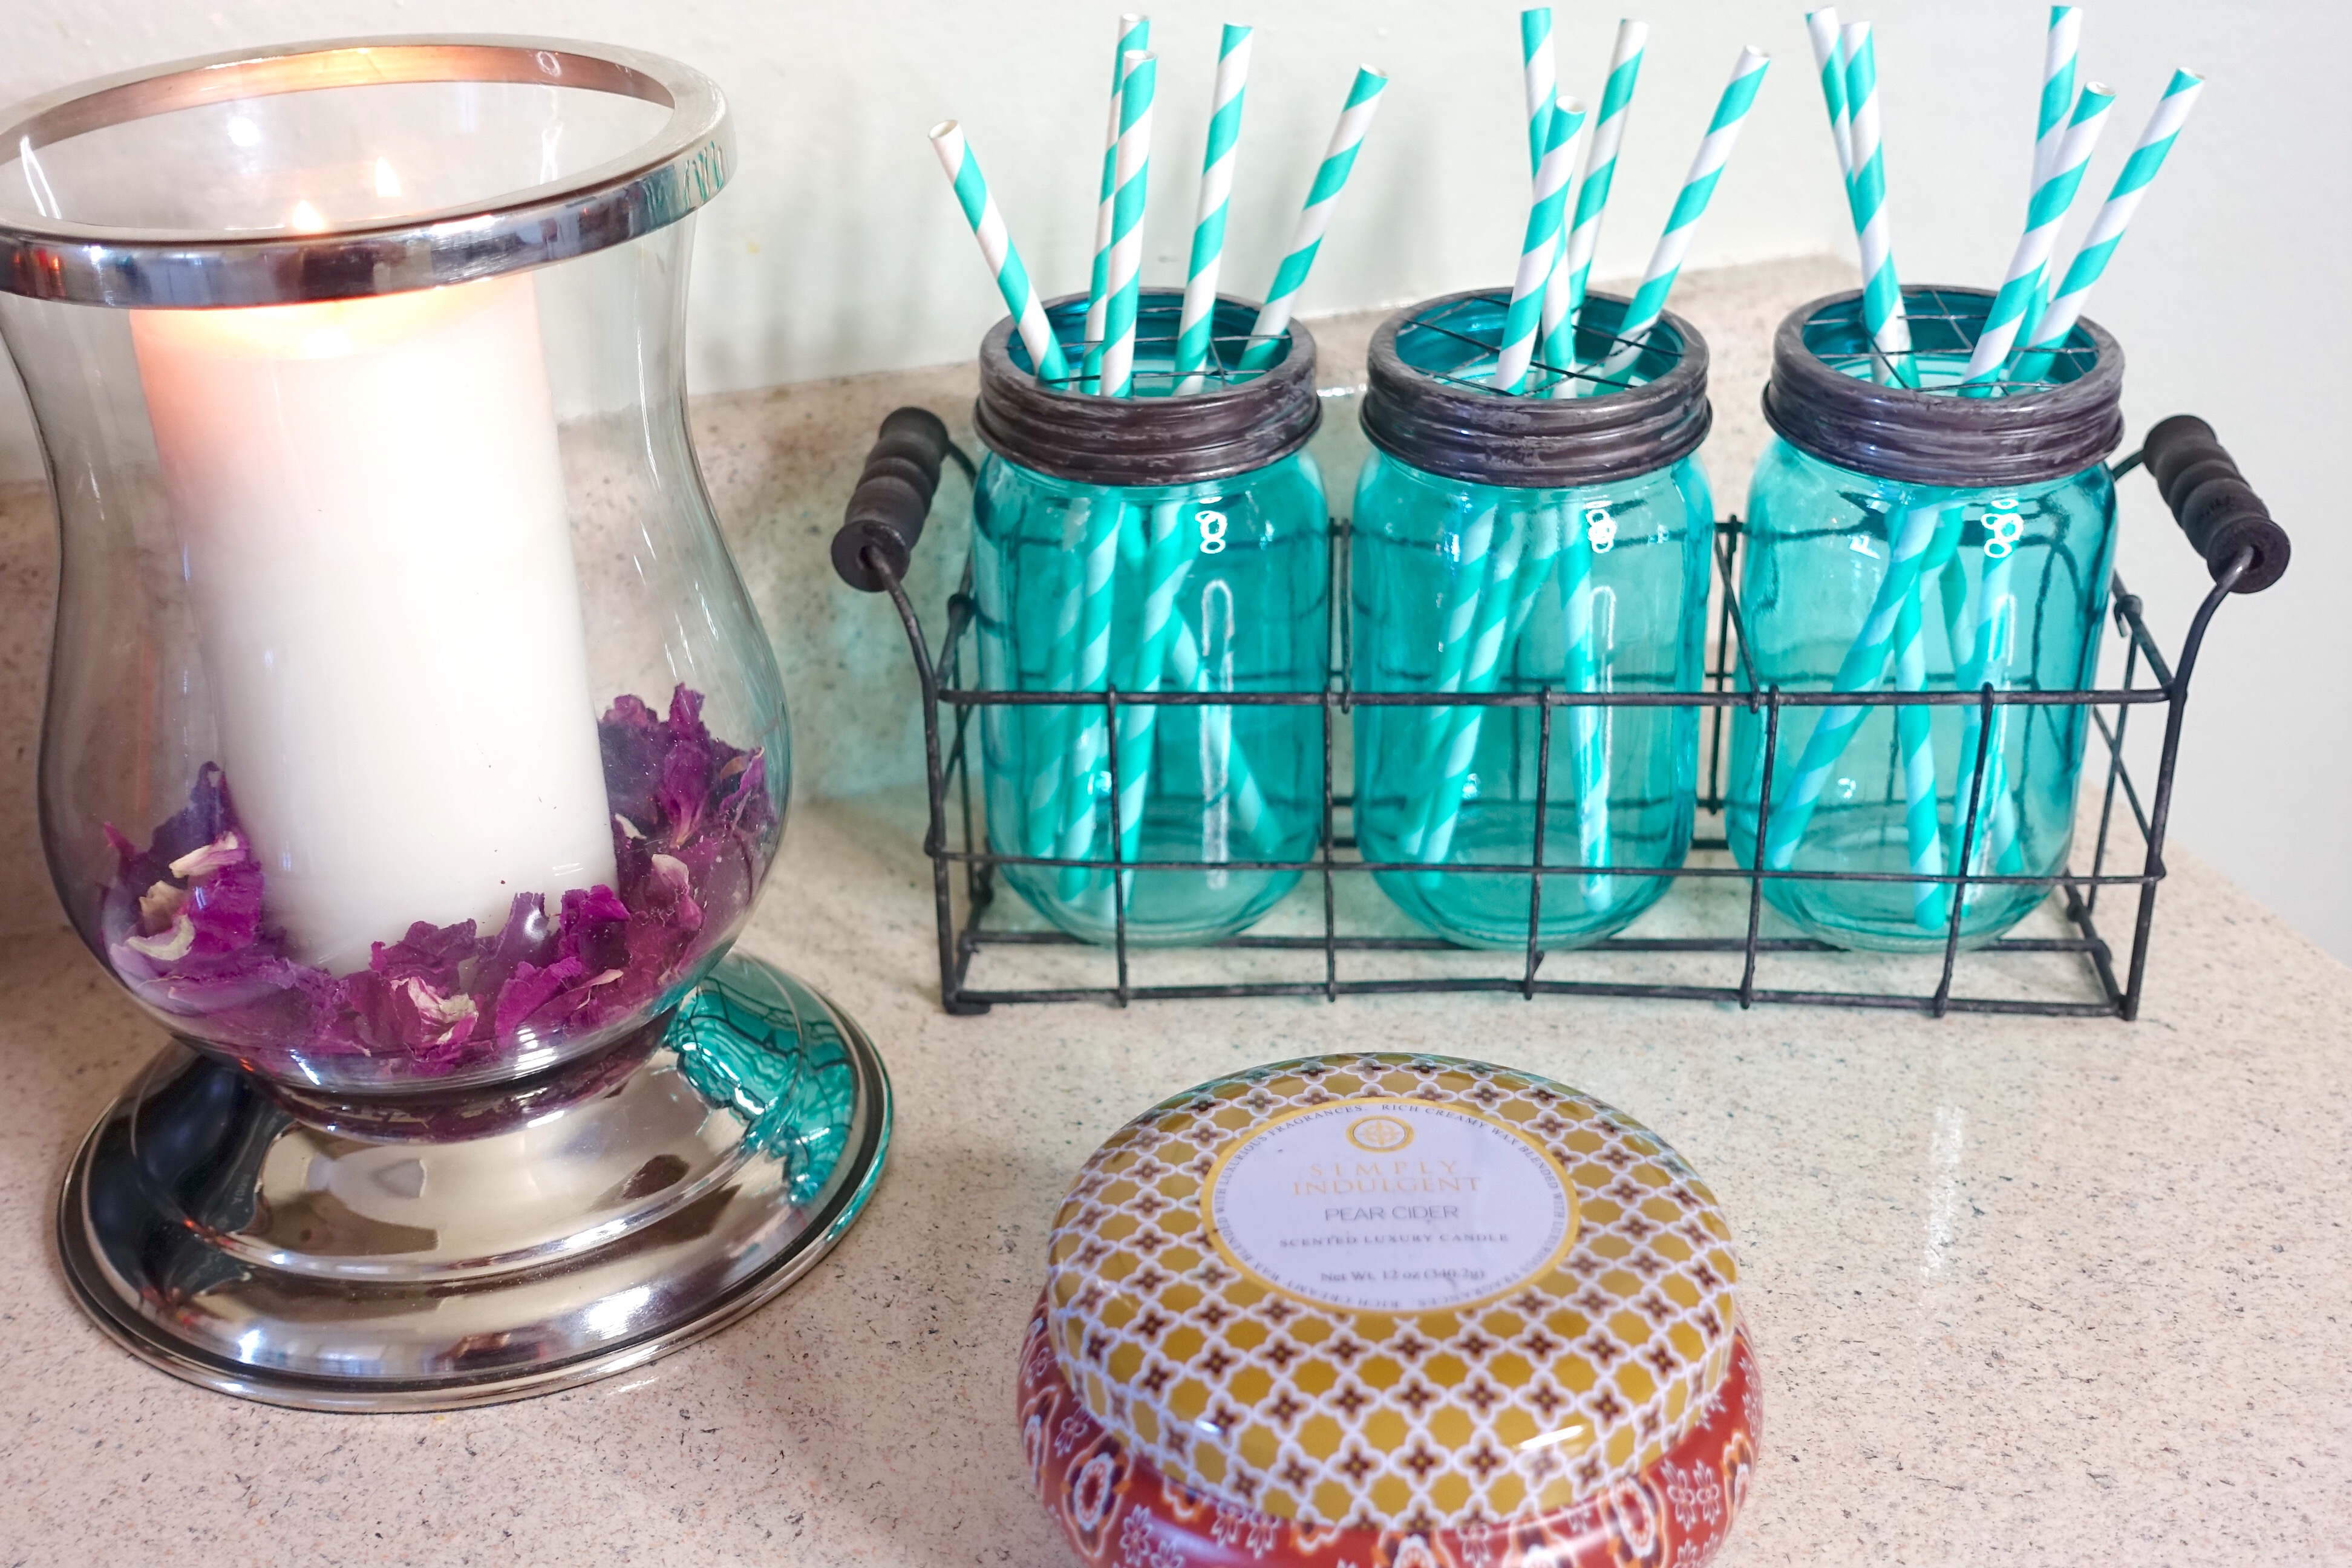
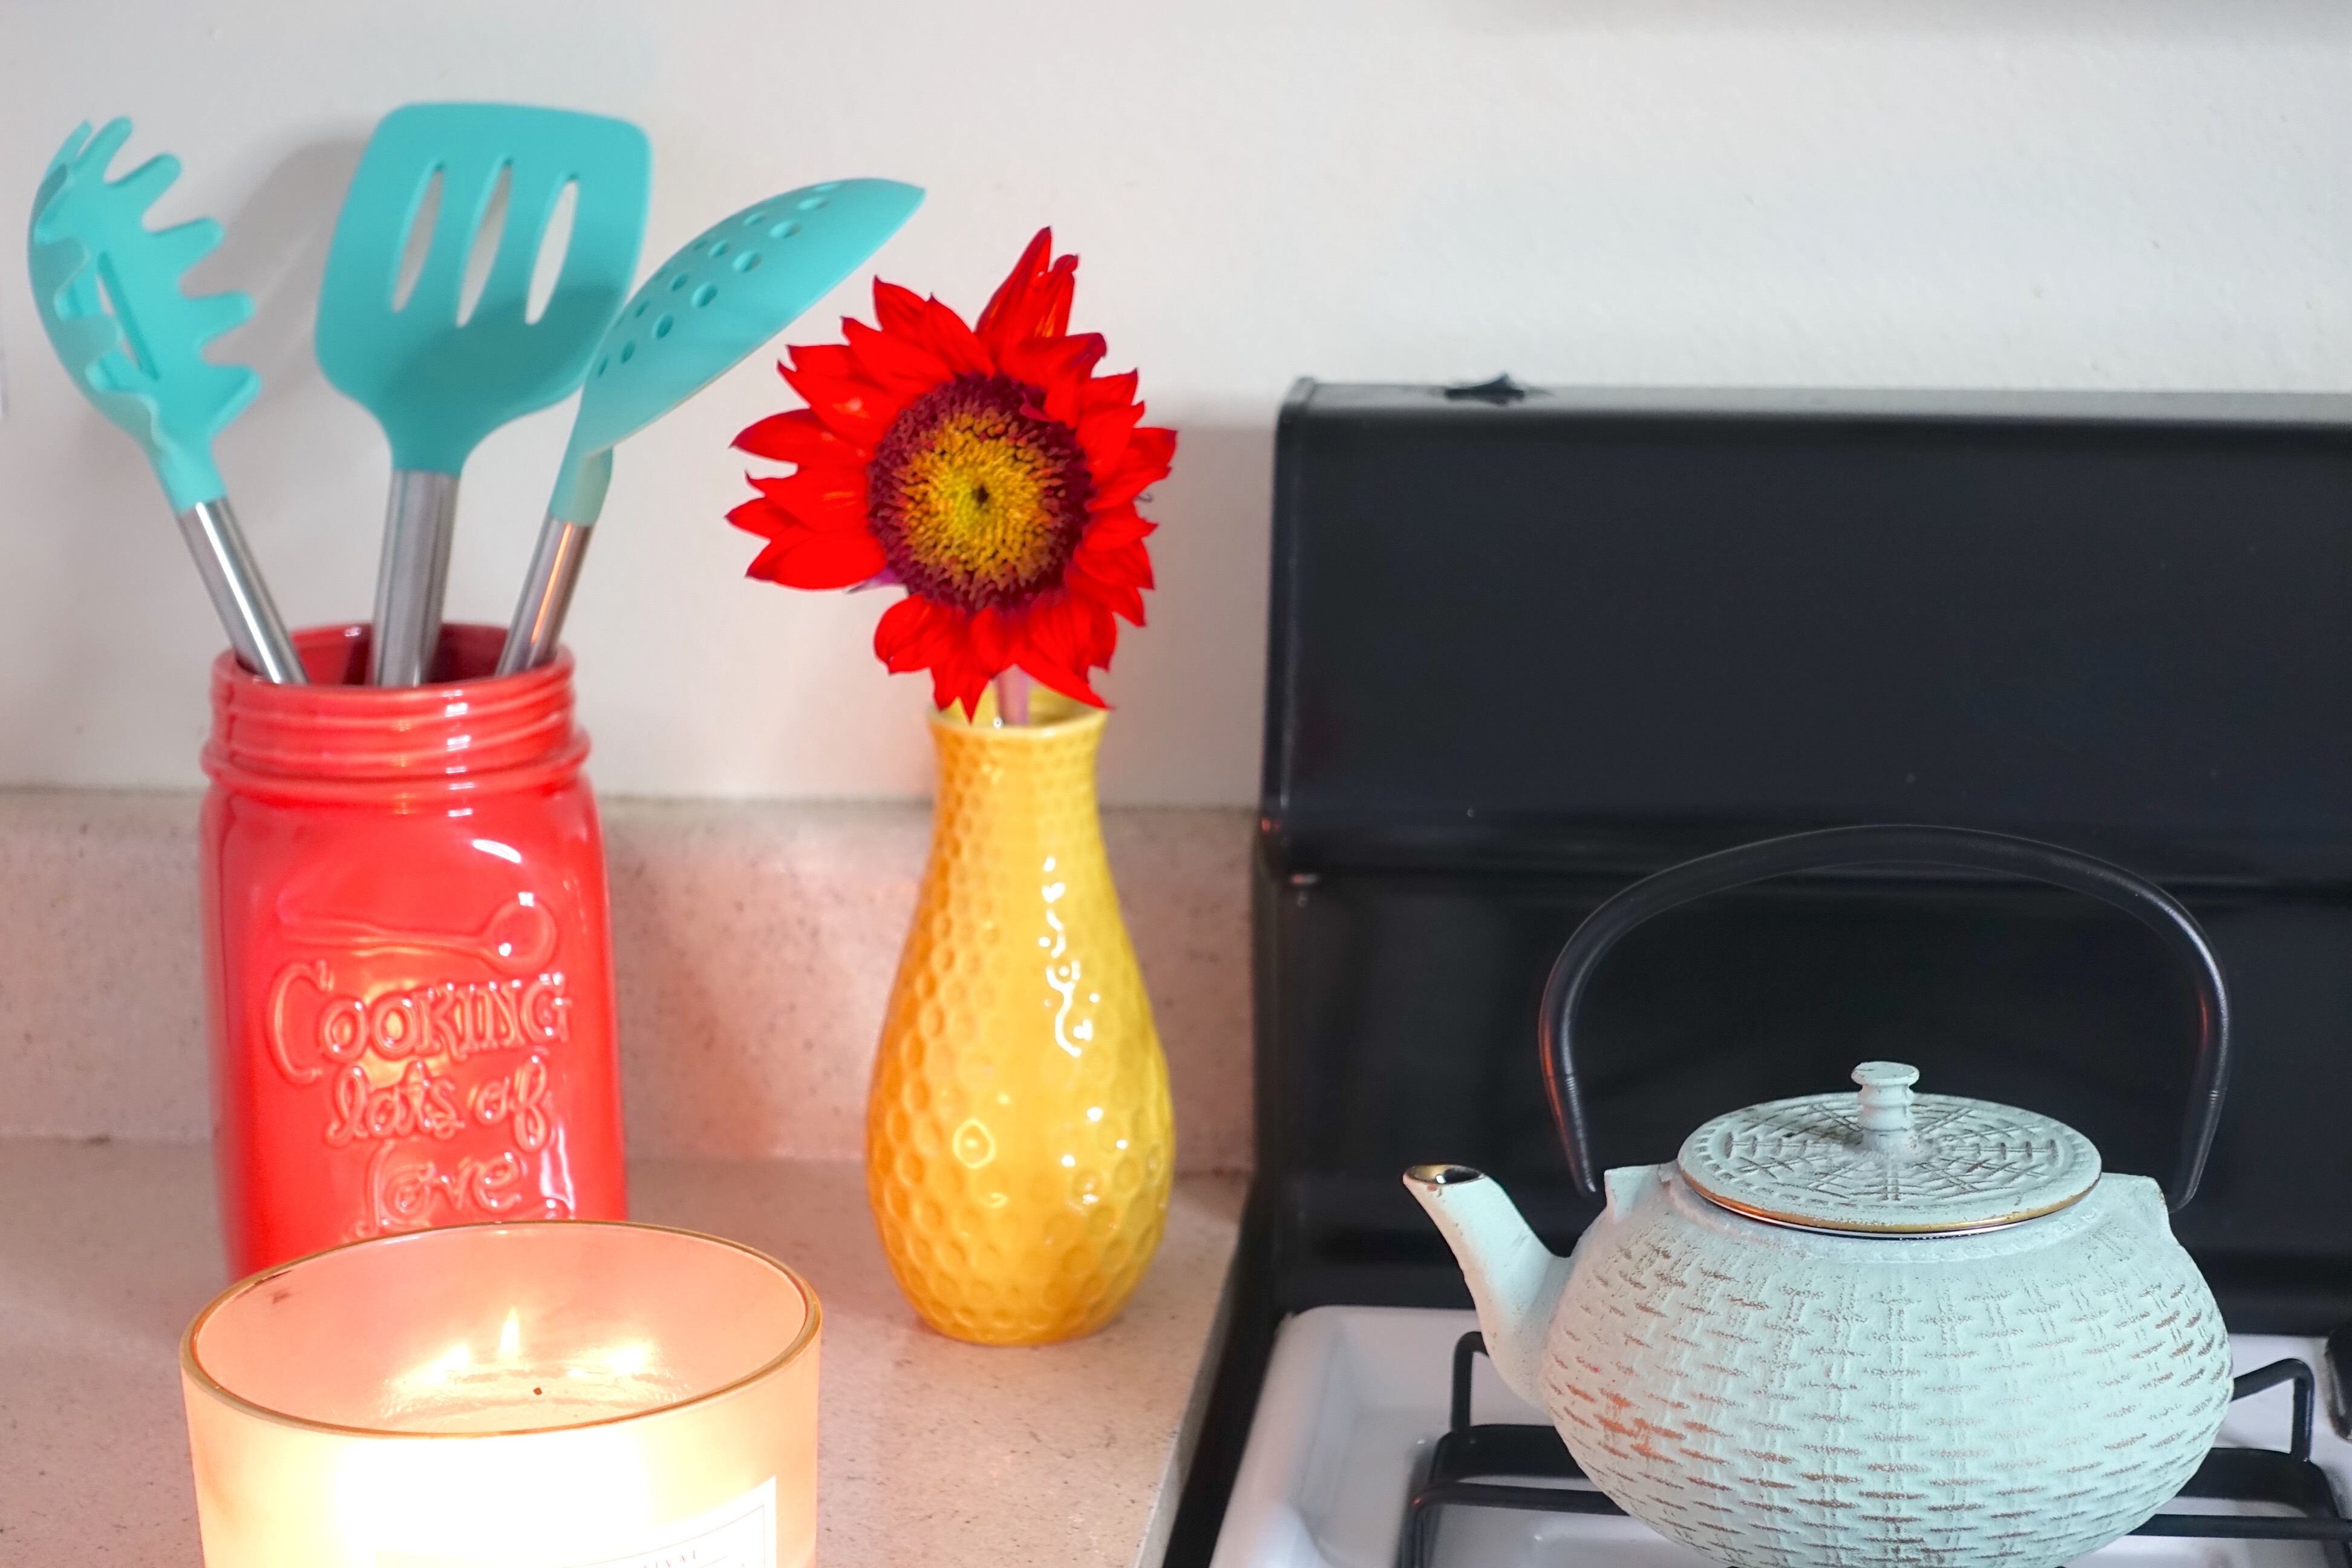
Moving out of the bedroom and in to my kitchen, this space was my favorite to spice up! Yo check out my play on words! *I think I’m so funny sometimes! I hope we’re still friends* Everything here was on sale at Michael’s, 40% off to be exact, and the candles, tea pot, and mason jars were also on sale, at World Market. It’s incredible the things you can find when you sift. Head to the back, it’s the last place people will rummage!
Some paper straws from the Dollar Store, placements of color from one end to the other, and you have a kitchen that’s ready for company! I love hosting dinners and cooking for Corrine’s friends and my kitchen is completely ready now!
There’s something about these bright colors and pastel combinations that make me so so happy. I’m a complete product of my environment and if I’m having a bad day you’ll know it, black is my favorite color but not for home decor. It feels bigger in my kitchen some how, brighter, and more inviting.
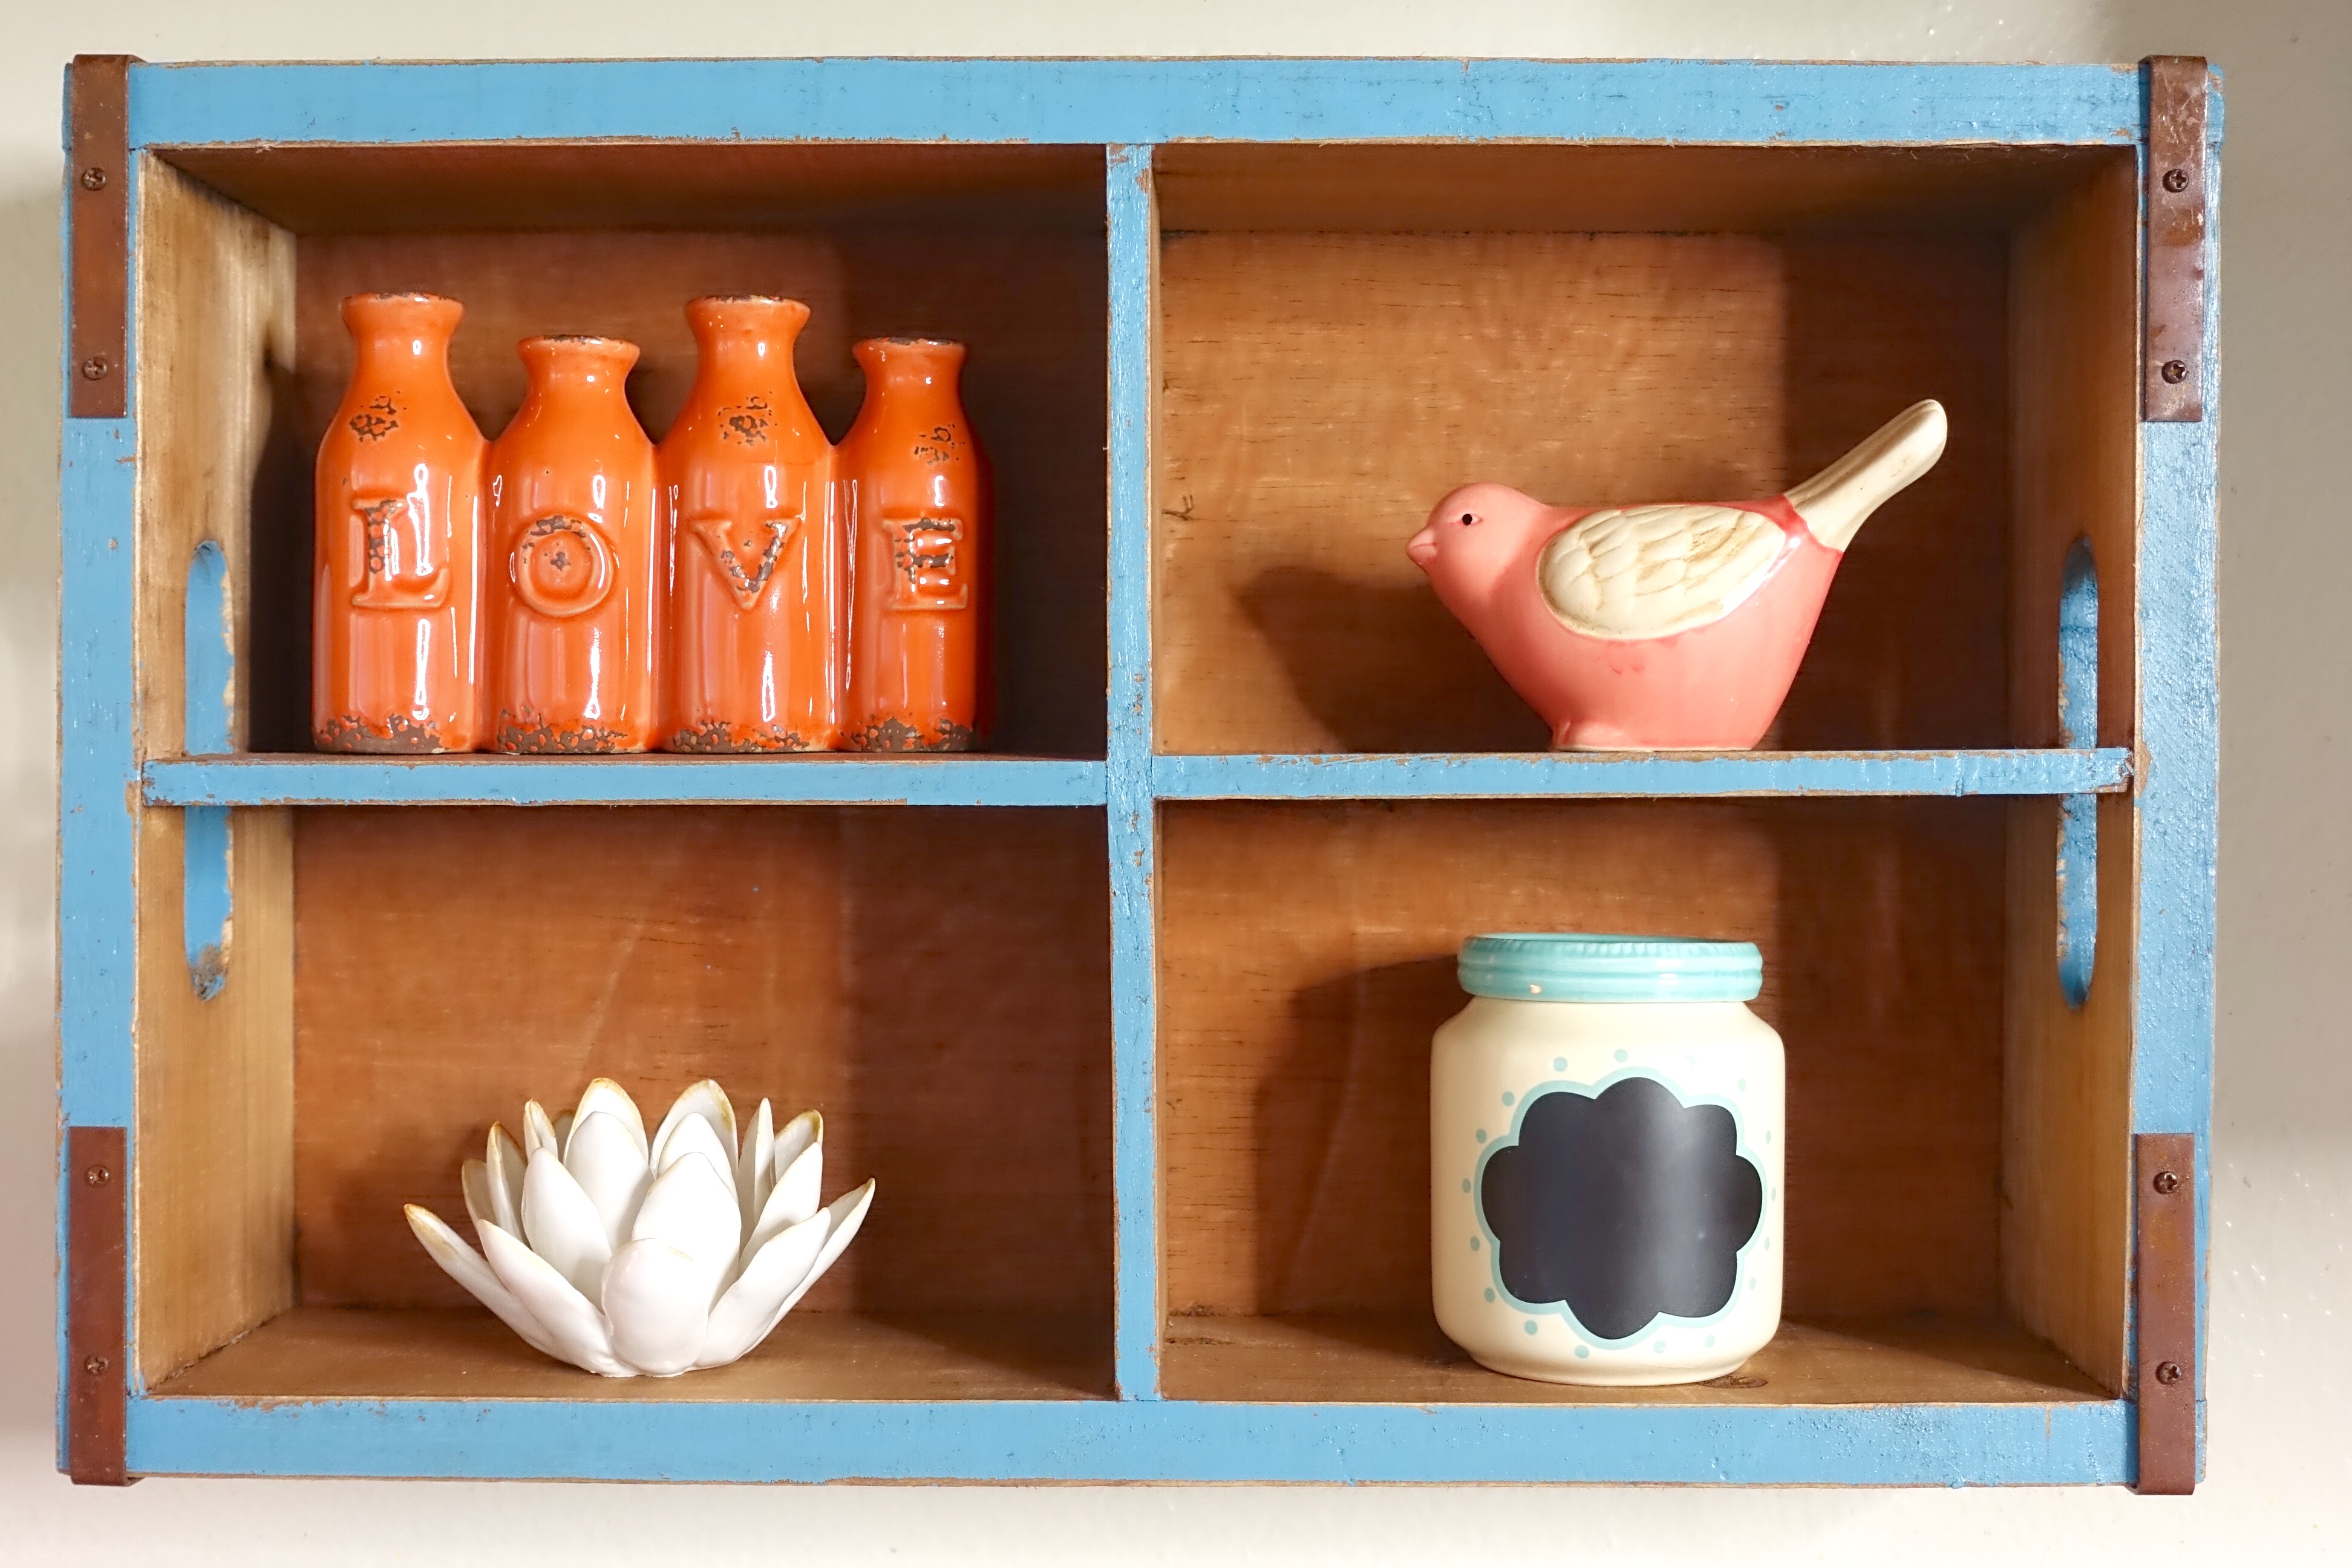
If you’re really into DIY, you could probably make this sectioned shelf and paint it whatever color you like. I really loved this distressed vintage blue color and Corrine helped me pick out the tiny arrangements for it. I think with each season I will switch up the items that it holds, and paint it a chalky white so that it’s universal no matter what theme I choose.
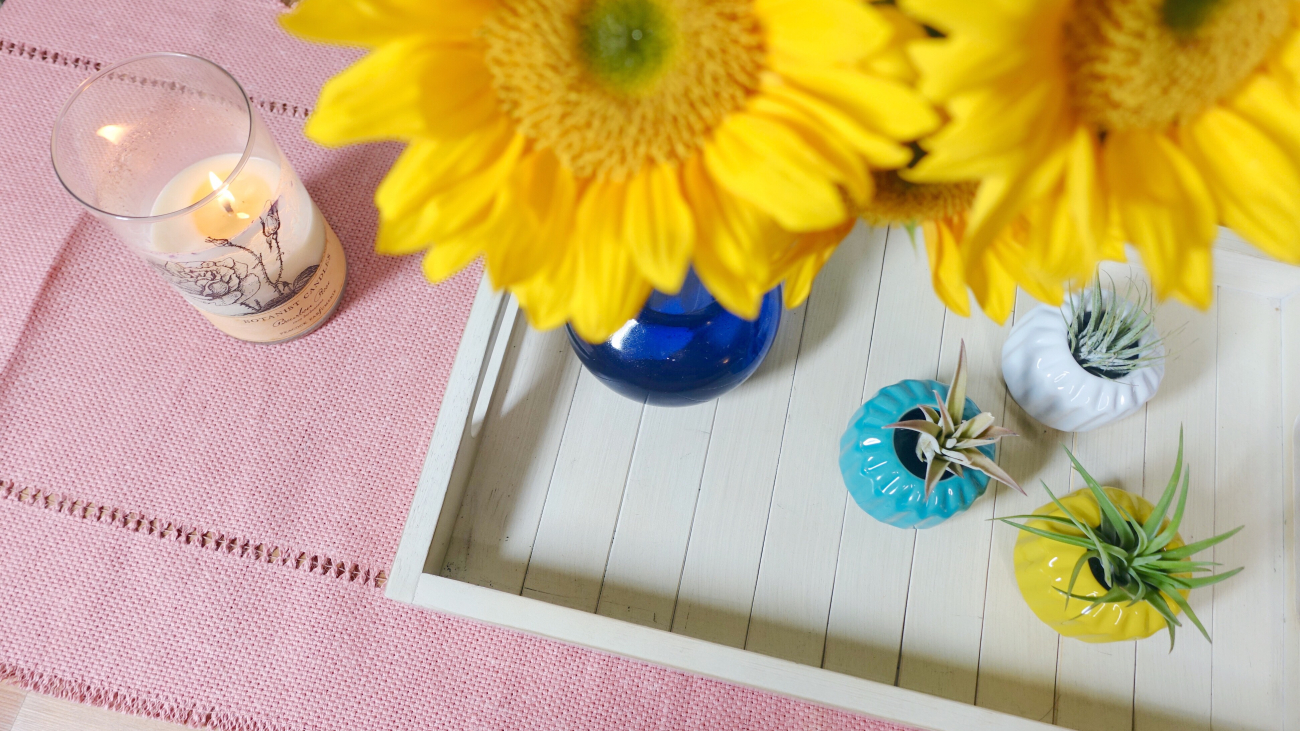
MY DINING ROOM TABLE
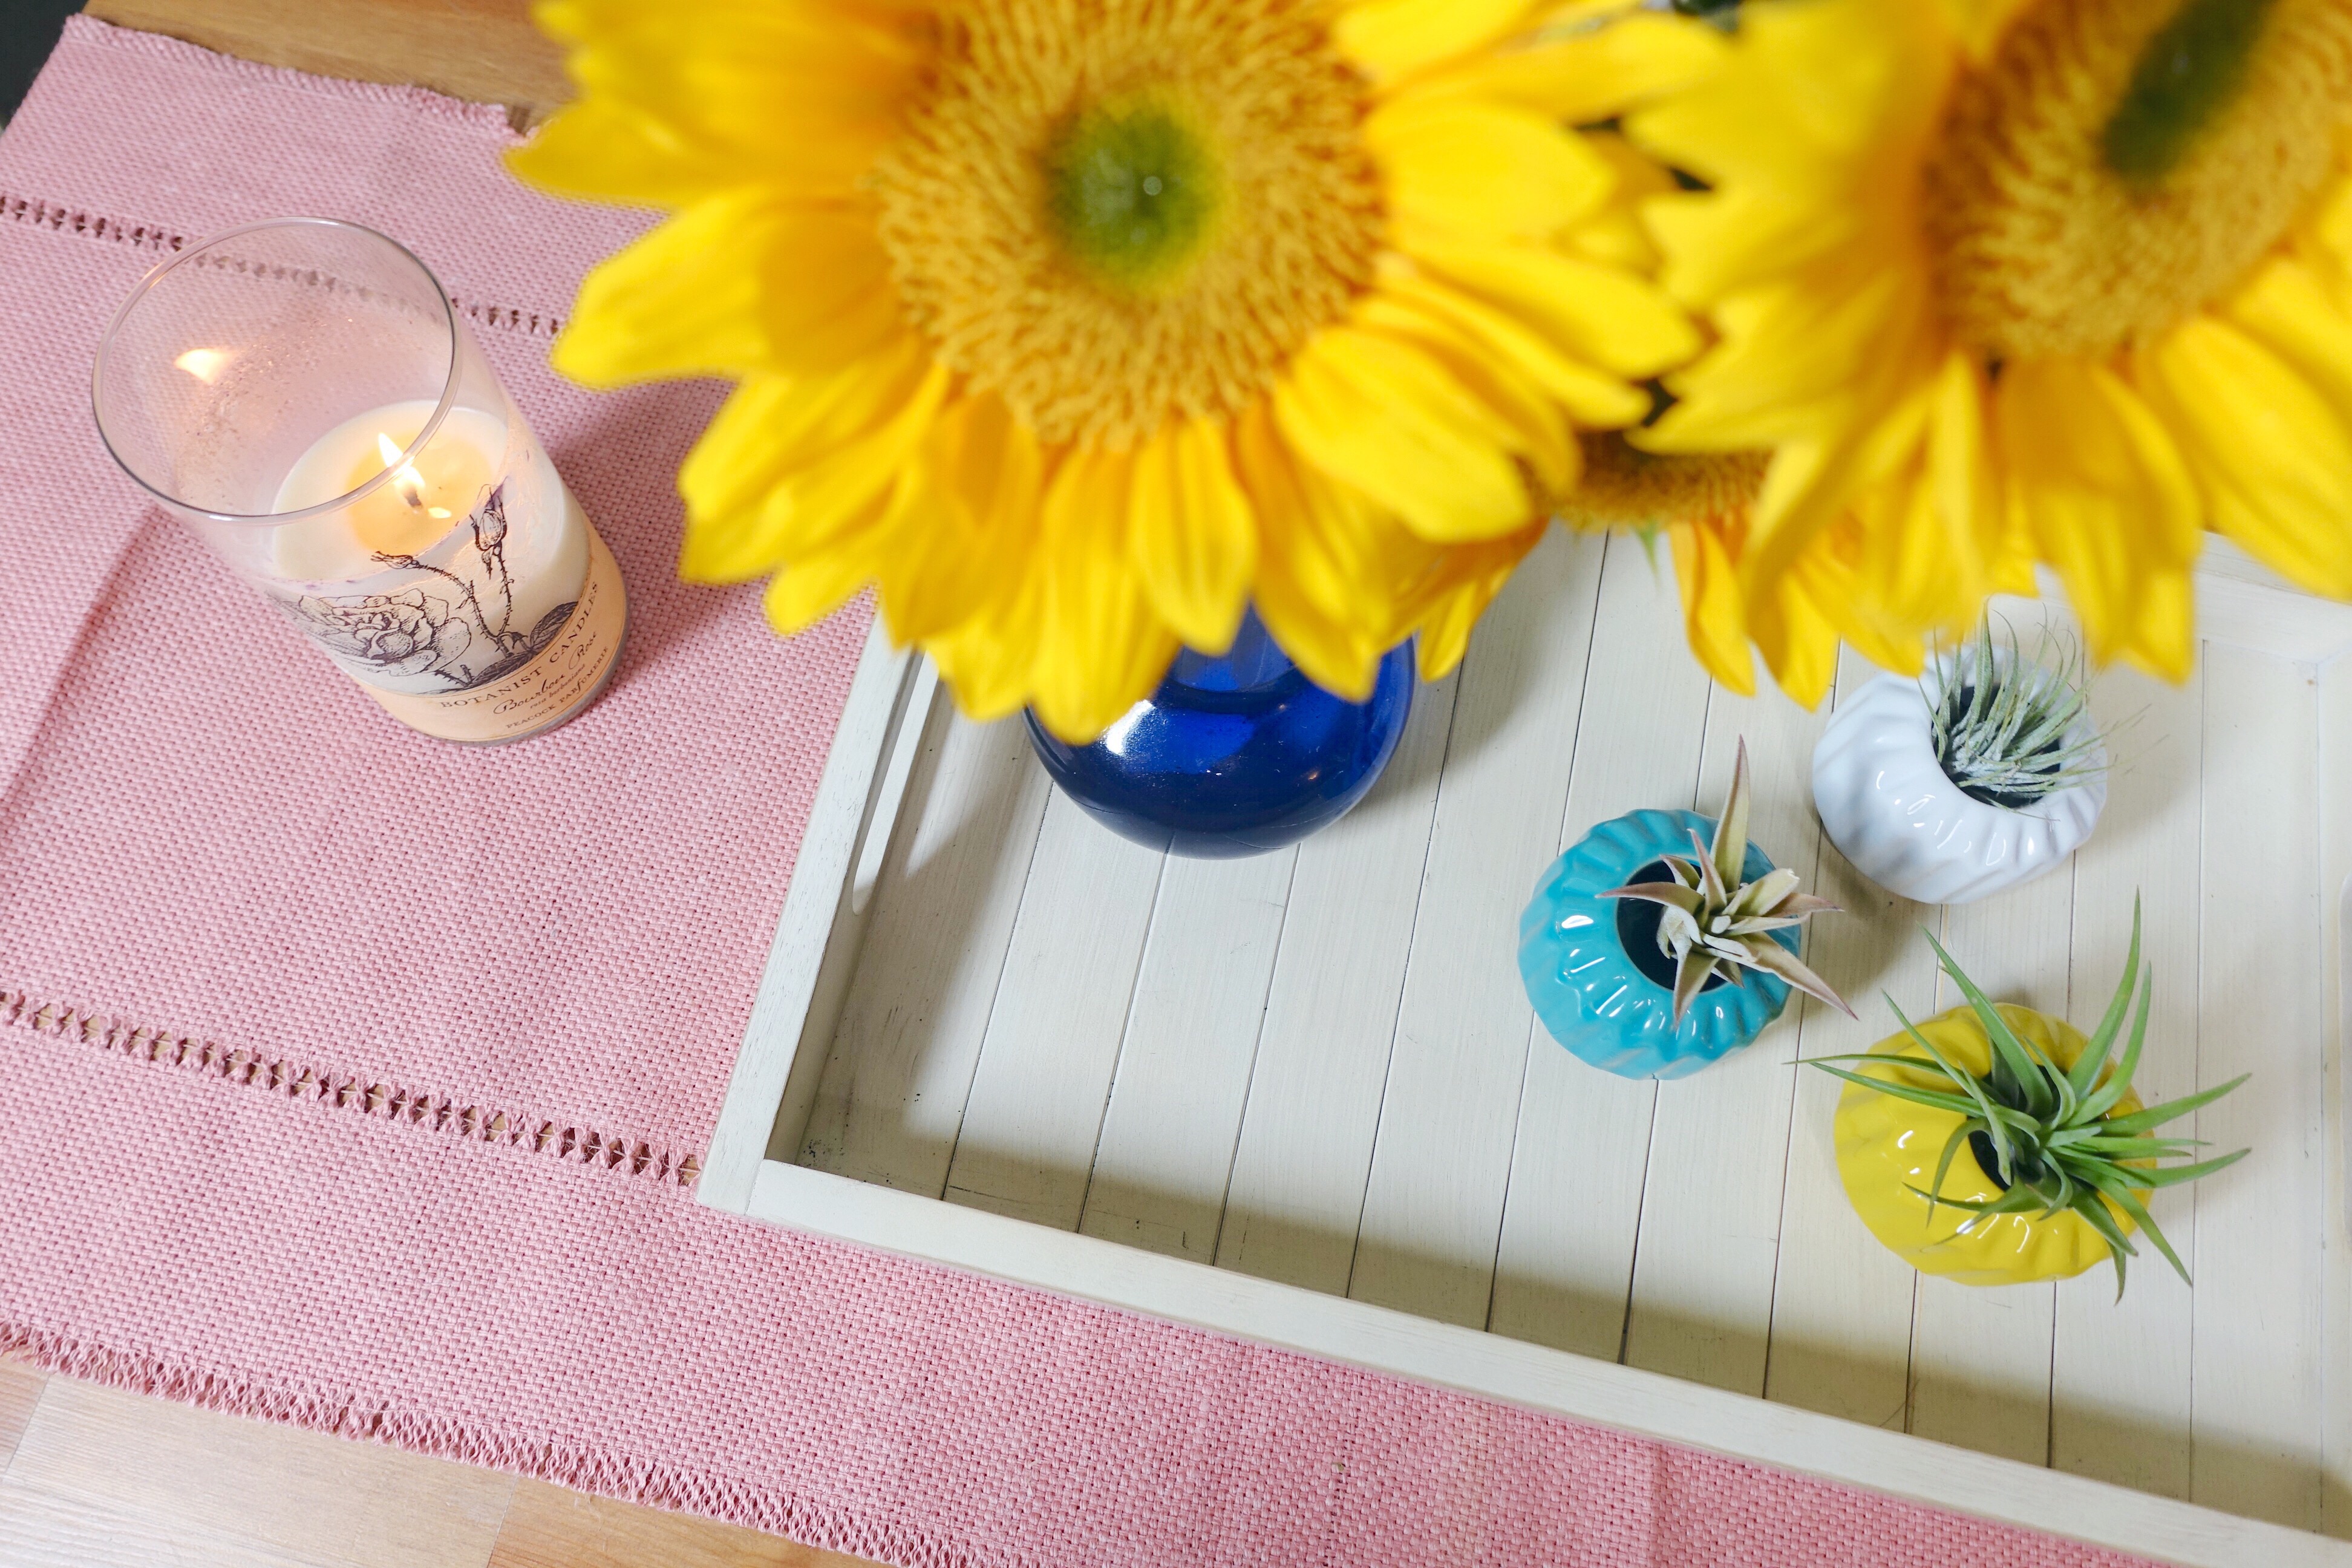
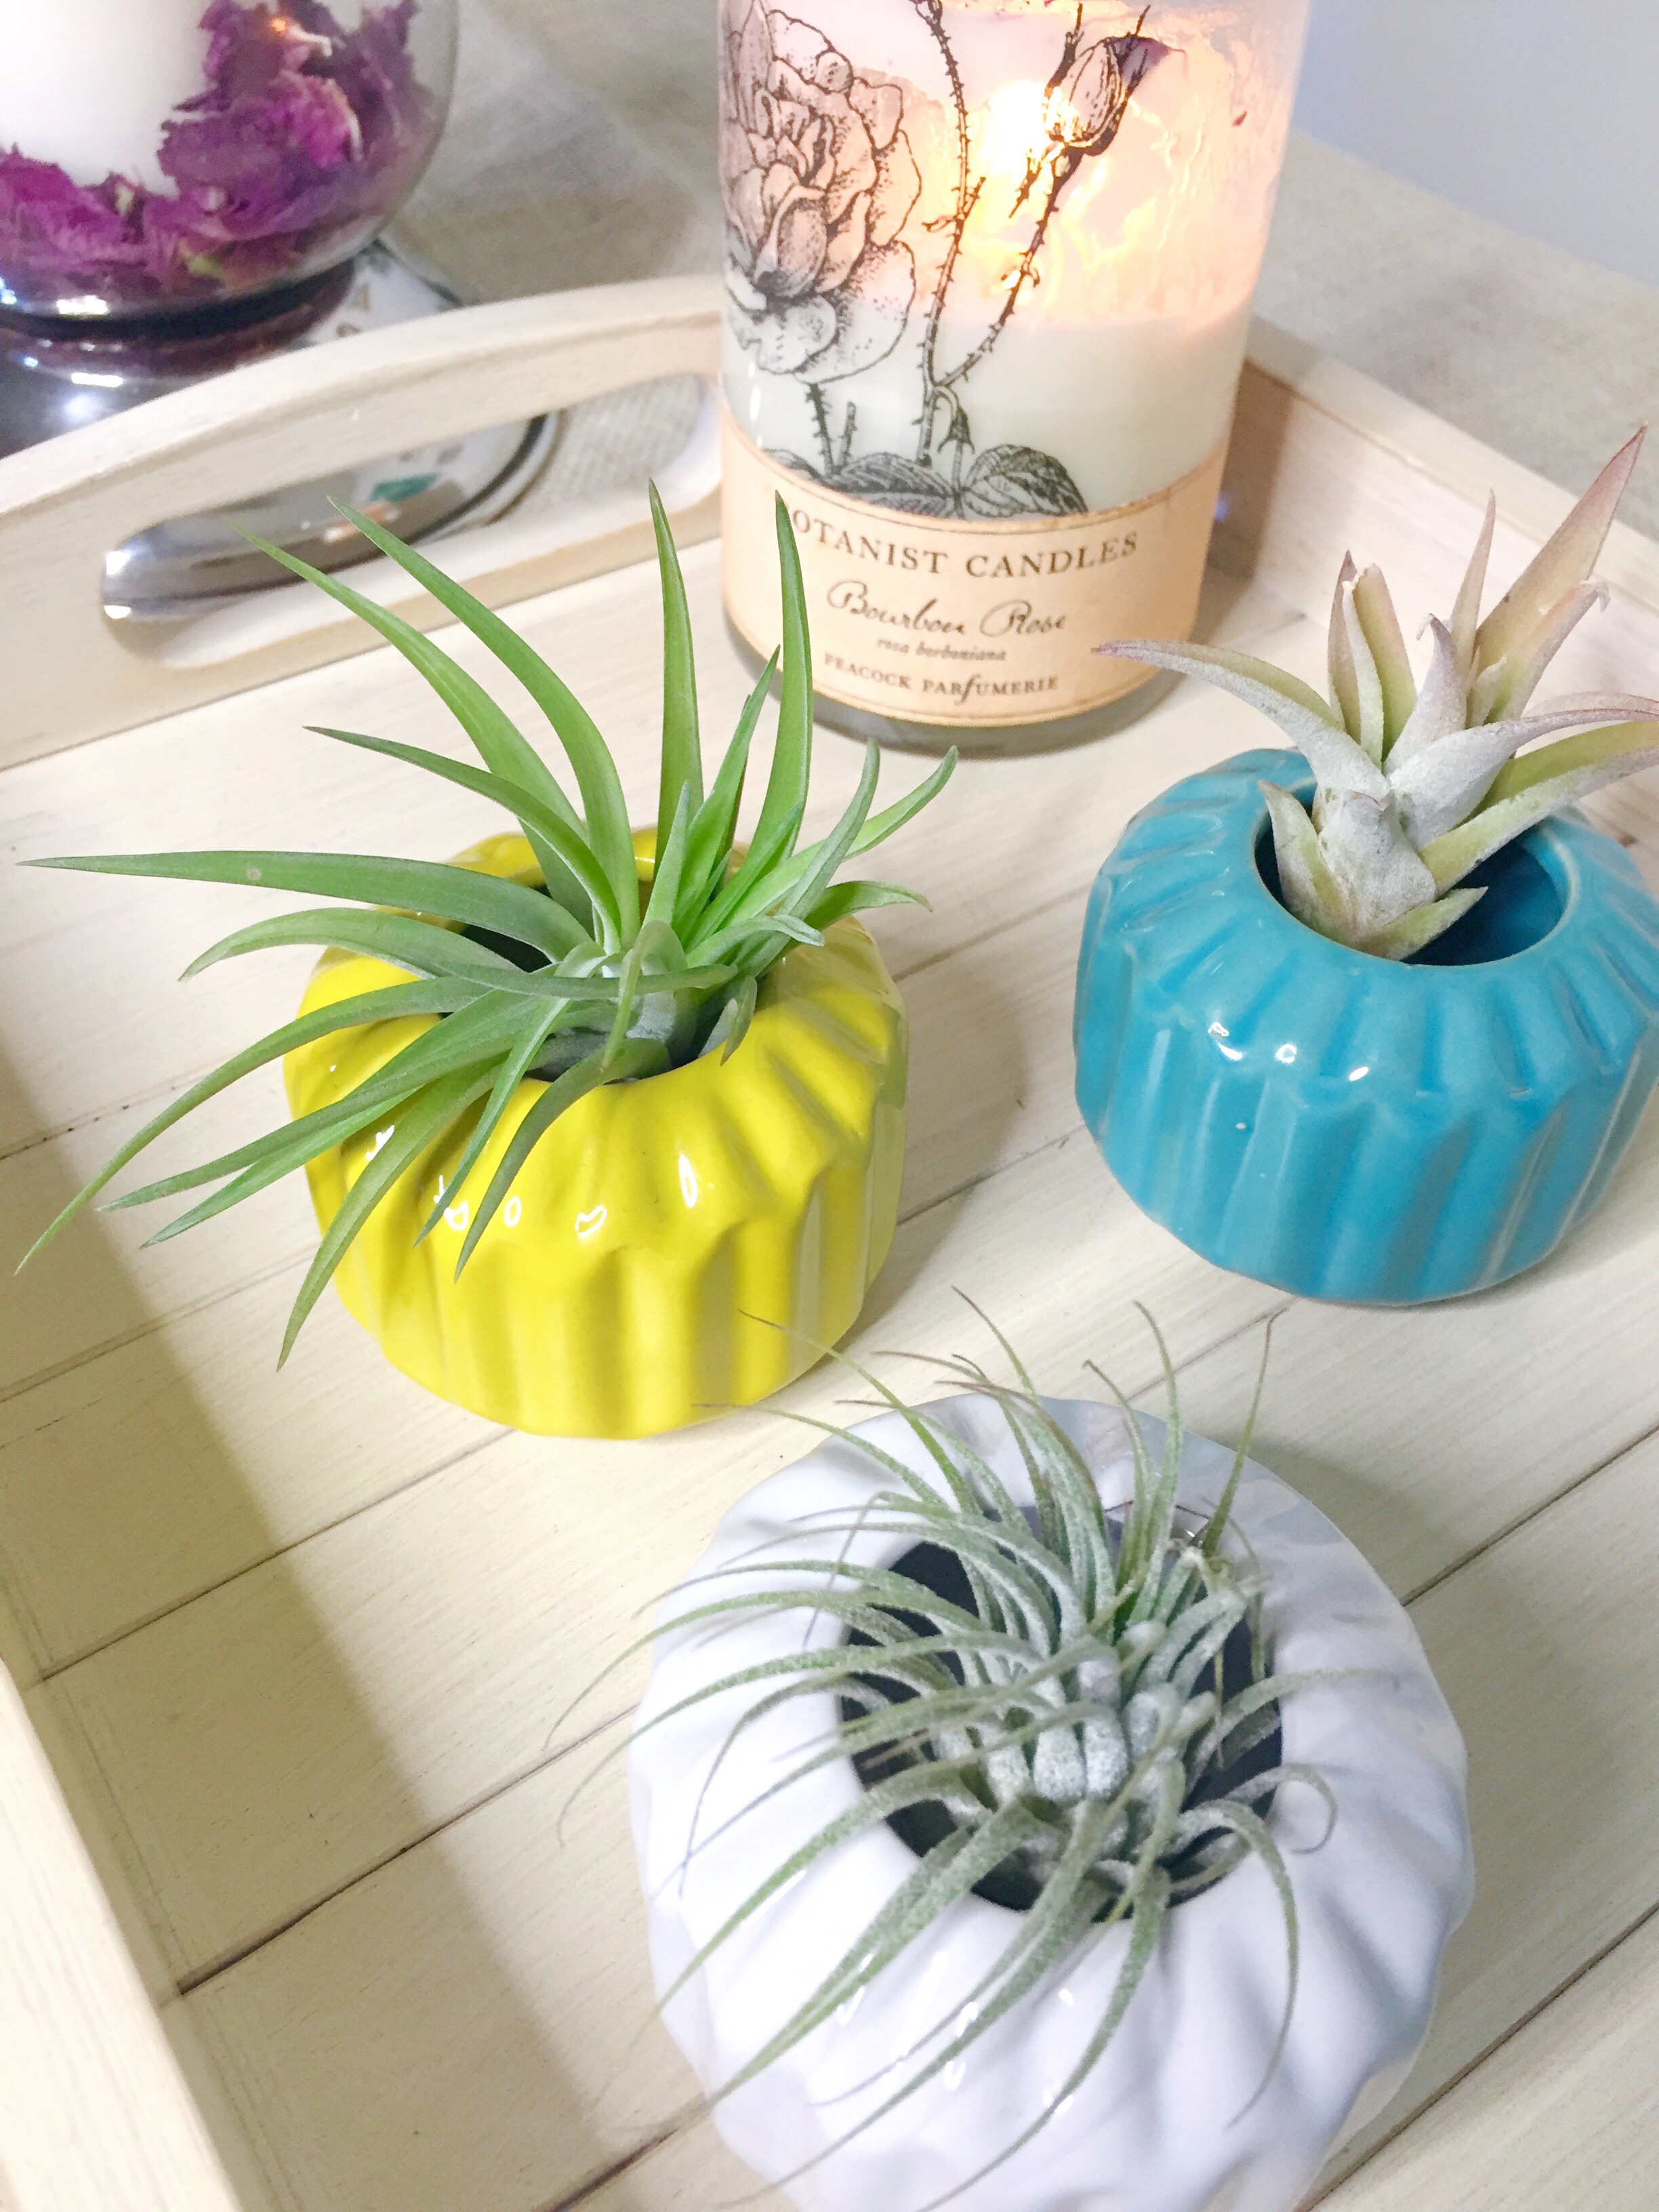
Last but not least, our dining room table. I have a video and blog post coming soon where I paint this wooden table a white-chalk and distress it with sandpaper and tape. Until then, I decided I wanted a pastel pink runner and I couldn’t pass on these air plants from Trader Joe’s. They were only $2.99 each and I was told that I CAN’T kill these, no matter what! Water them once every two weeks, I think I can handle that!
Sunflowers make me smile and this tray from Marshalls was a nice separation from the plants and the table runner. See how I came full circle with the pastels and color combinations again? … Poor Joe, he gets a corner. ONE corner. Haha!
I’ve never been great at interior design, it takes time and money. It also takes patience and knowing what you want and where to get them without breaking the bank, home improvements can be costly and we’re saving for a wedding over here! Besides the excitement over Spring and all things color pop, a driving force behind all of these modifications was that I didn’t feel confident about my space.
I love hosting parties but when you aren’t happy with how things look it detours you from inviting people in. At least for me. See, I like everything, and I love color and I love print, so we really didn’t have a cohesive theme in our apartment and I was okay with that. Until Pinterest happened! Then I got all motivated to do our ‘Pinterest DIY-not’ series and it pushed me to try some DIY projects for myself to see how expensive or inexpensive these kinds of ventures would be.
I’m happy to say that you can take on these tasks and complete them in an affordable way. If you set a budget for yourself you can do just about anything within those boarders. What once gave me grief and seemed to be an eye sore I am now most proud of. I kind of just sit back these days and stare at each room the way a five year old stares at a bouncy house … with excitement and awe. Sounds crazy because it’s just an addition of color here or an accessory there, but for me, I’m so proud of these changes and this kind of thing is necessary. It makes me feel so refreshed.
Do you have any particular plans for your home and this next season? What are your favorite color schemes and where are your go-to places to find the things you create with?
I love updating our areas surrounding the different seasons of the year and I can’t wait to show you what I have in mind for Summer! Thank you for indulging my DIY side and all things bright, blinding, and beautiful!
The other day I realized we have waaaay too many candles in the house. Out of the desire to make something simple with my hands and steer away from our candle-overload problem, this little DIY came about. I’d always read about making your own smudge stick and seen so many Pinterest DIY’s but I’d never taken the plunge and just did it. So I finally decided that would change and just went for it, and it was super easy and inexpensive!
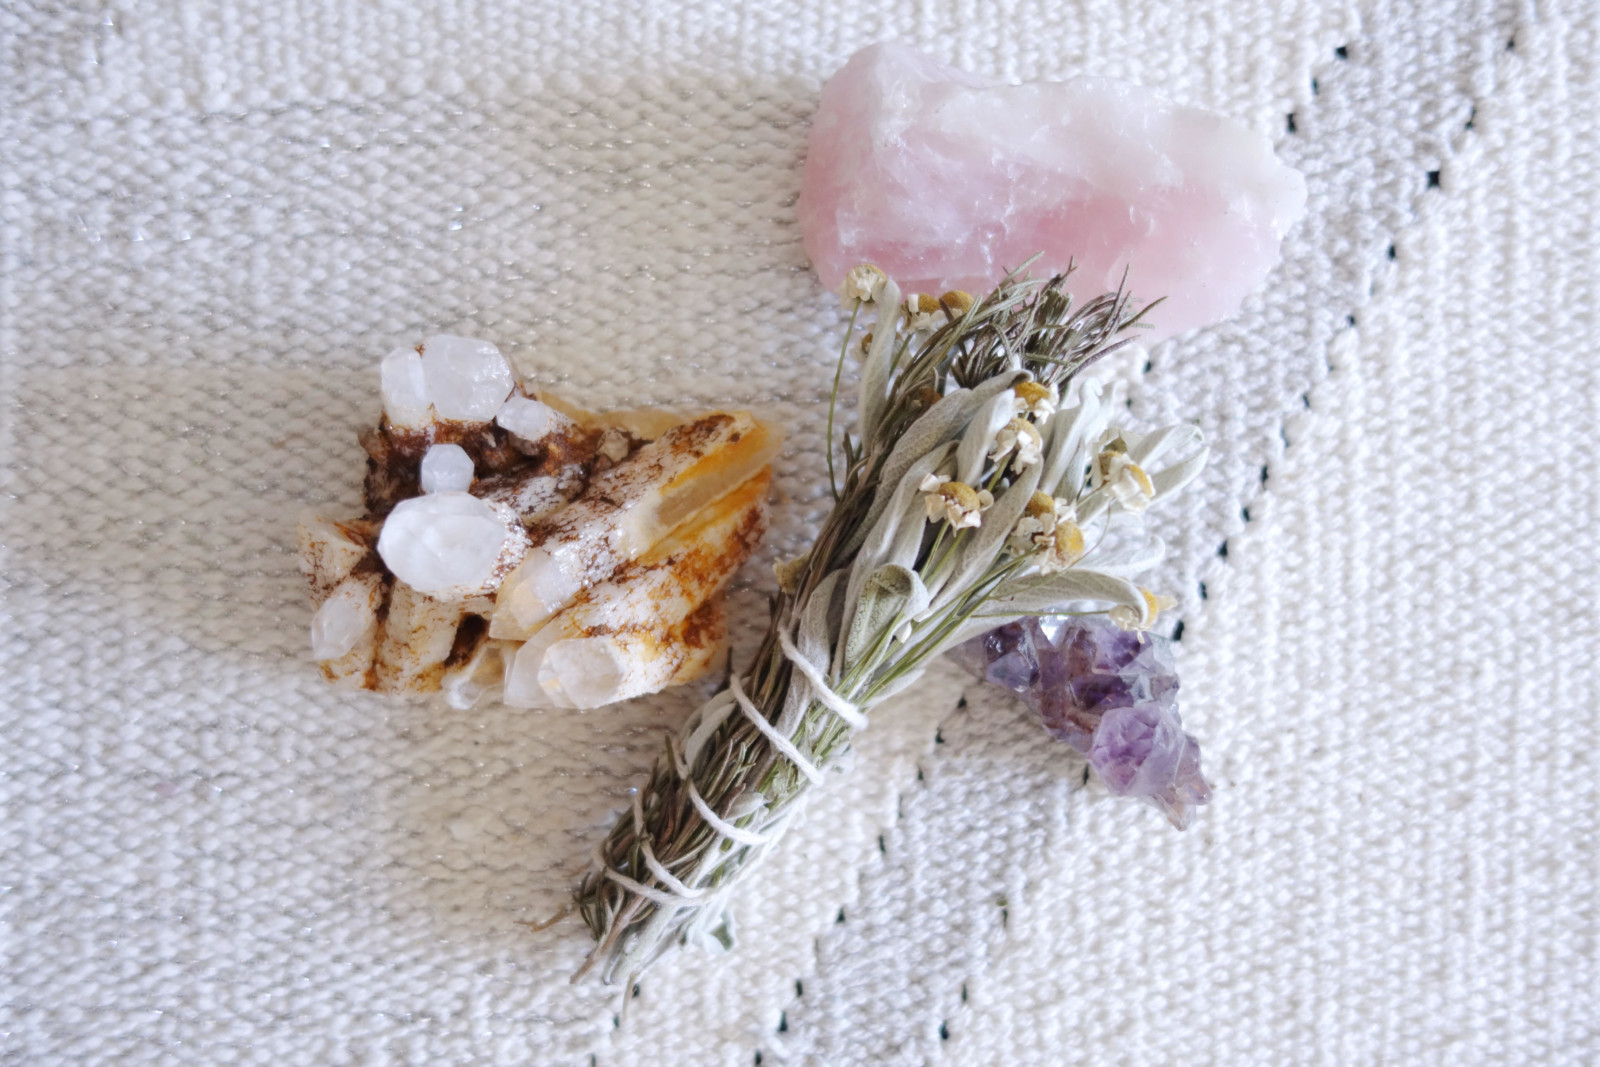
Aside from being visually appealing and all around lovely, smudge sticks are a fantastic way to get any indoor or outdoor space cleansed, energized and smelling great. They’ve been used in sacred rituals for centuries and I kind of hold a little place in my heart for them because they’re magical and so easy to make.
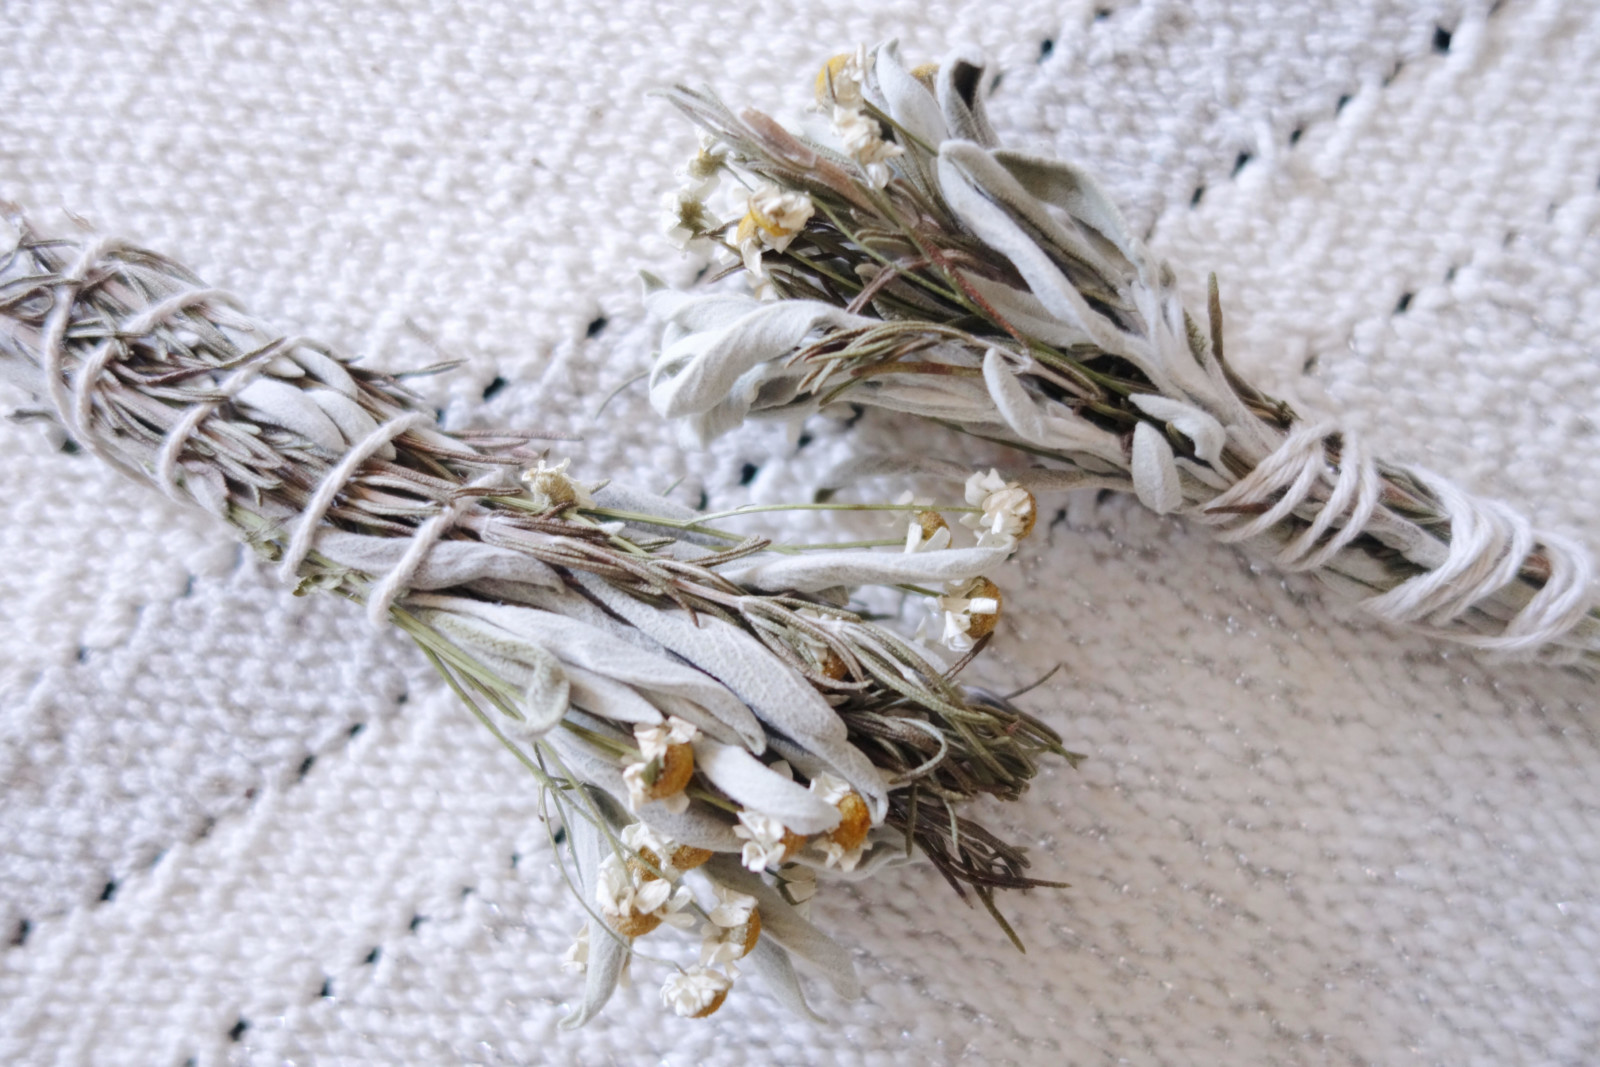
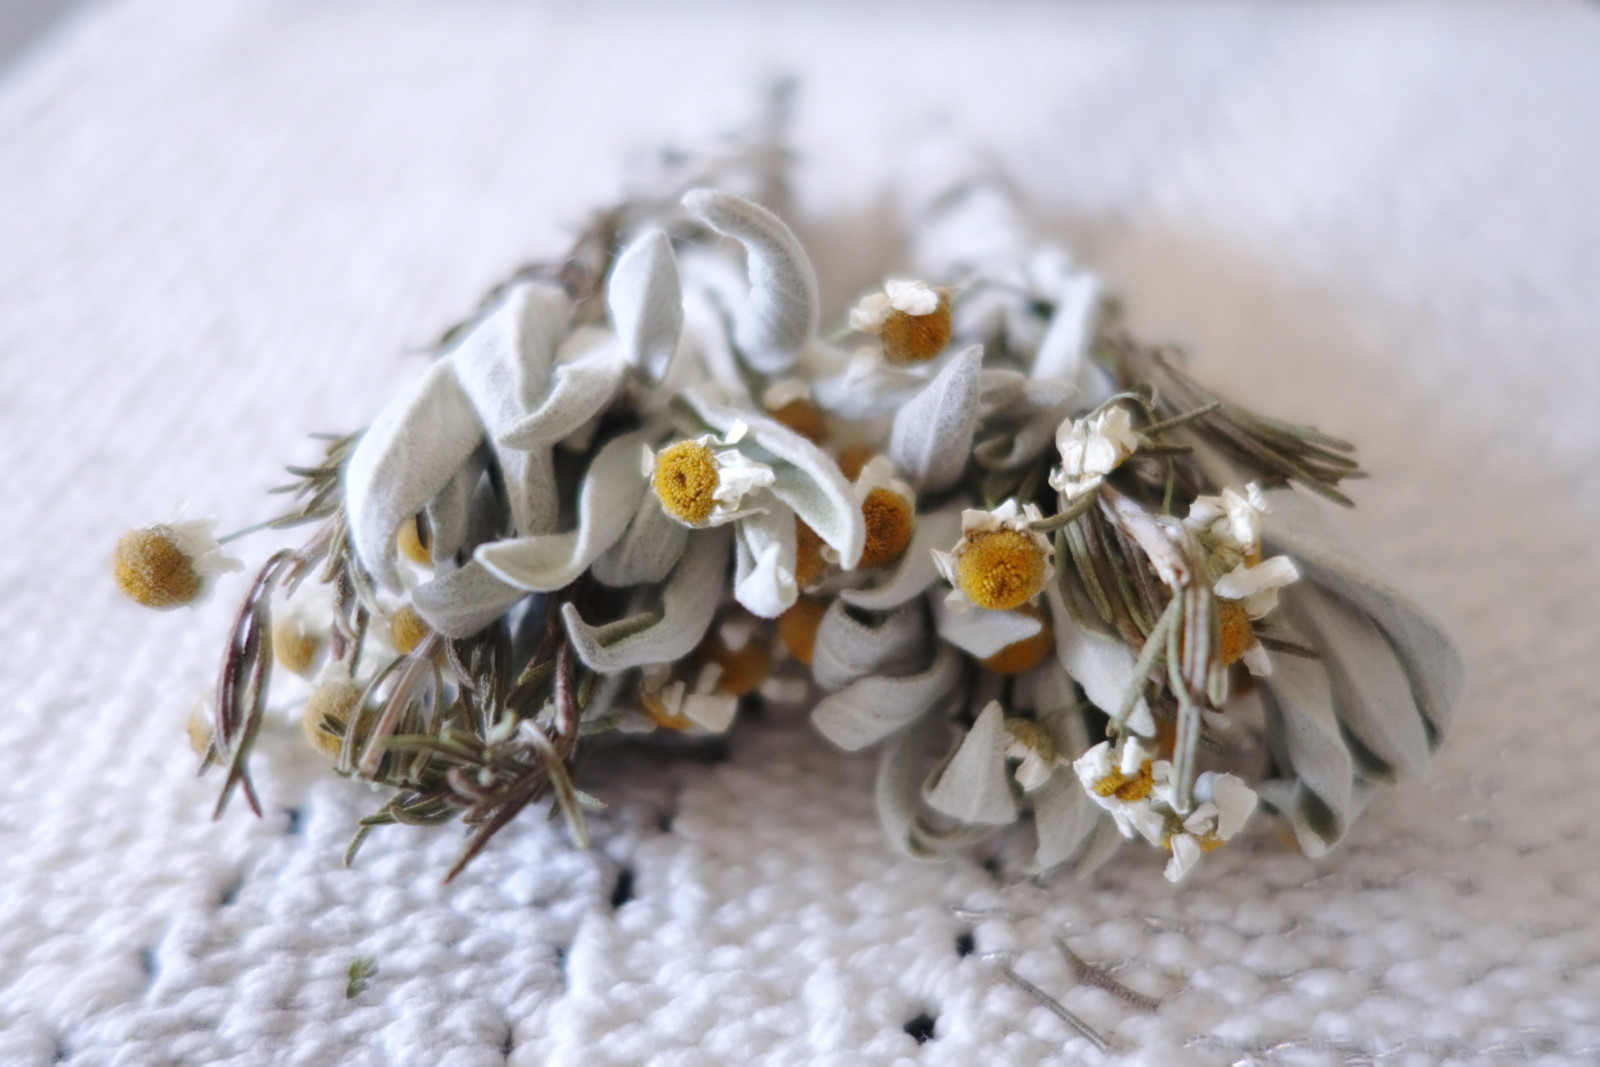
I used those little pre-packaged white sage and rosemary sprigs from the fresh produce section because they were easy to find and inexpensive. You’ll only need one package of each herb you choose, because one package will be enough to make at least two smudge sticks. You can switch it up and add cedar, sweetgrass or any other herb that you please. Flowers are a great idea too, they’ll add some color and smell wonderful, so I also added chamomile to mine. Roses, lavender and pretty much any flower with soft, bendy petals will work. You wouldn’t really wanna use tulips, for example.
It’s really as simple as you’d think. Take your herbs and flowers and arrange them however looks best to you. There really is no messing up with this one, because it’s going to look beautiful and smell so good. You can’t even be mad at that! You may have to cut the ends and modify them to match one length. When you’ve used up all your herbs or you’re content with how it looks, wrap it in twine and tie it up nice and safe. Voila! A beauty is born.
As far as letting the herbs dry out, I hung mine upside down for about a week and a half. When they’re all dried up, they’re set to be used. Burn them in your space or outdoors for a good energy cleanse, give them as gifts or put them in the bathroom for whenever someone lays a stinky one. They even work as decor, just lying around on the coffee table.
Last year on Easter’s Eve I slipped bunny tracks under Corrine’s door, they led to the living room table where her basket was waiting filled with her favorite things. To say I’m dramatic about holidays is an understatement! I still do these fun, cheesy things for her and she’s NINETEEN! lol
It’s Easter weekend in a few days so I wanted to share one of the yummiest and EASIEST Easter treats with you! It’s a fun DIY activity you can do with the kiddos and only takes 10-15 minutes to complete!
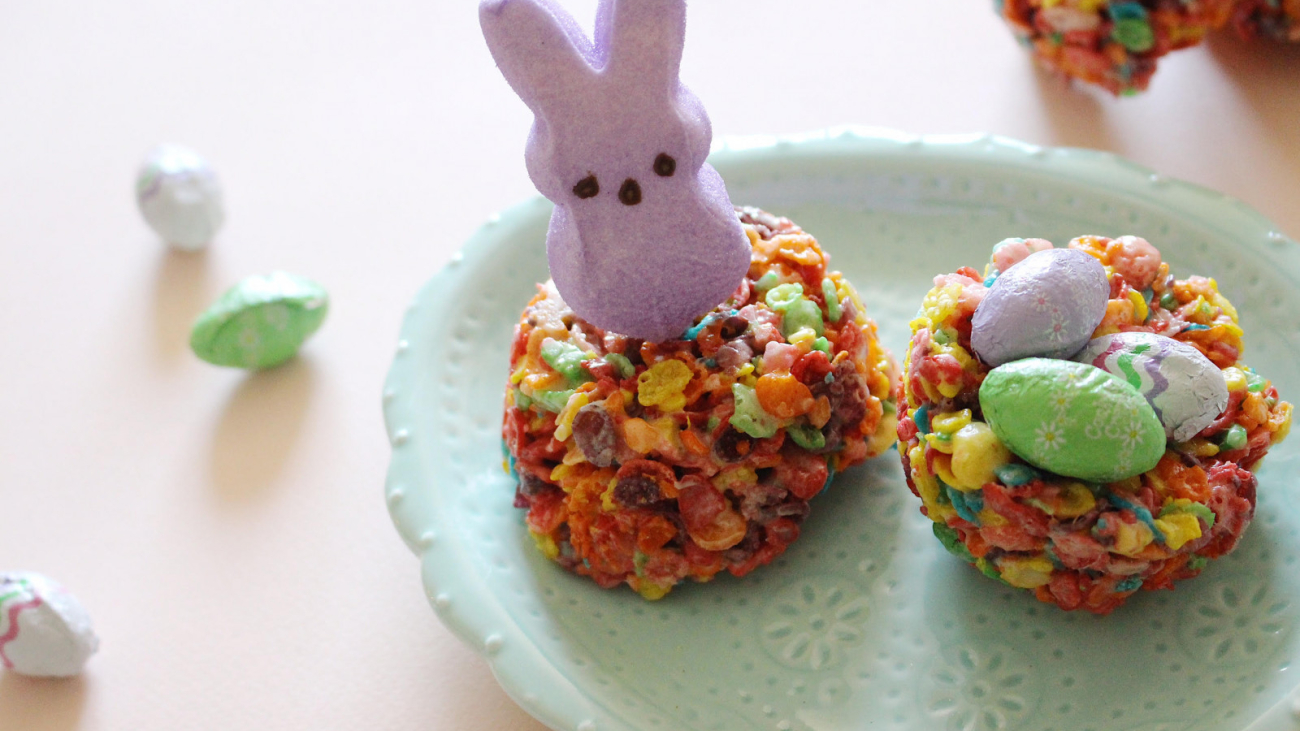
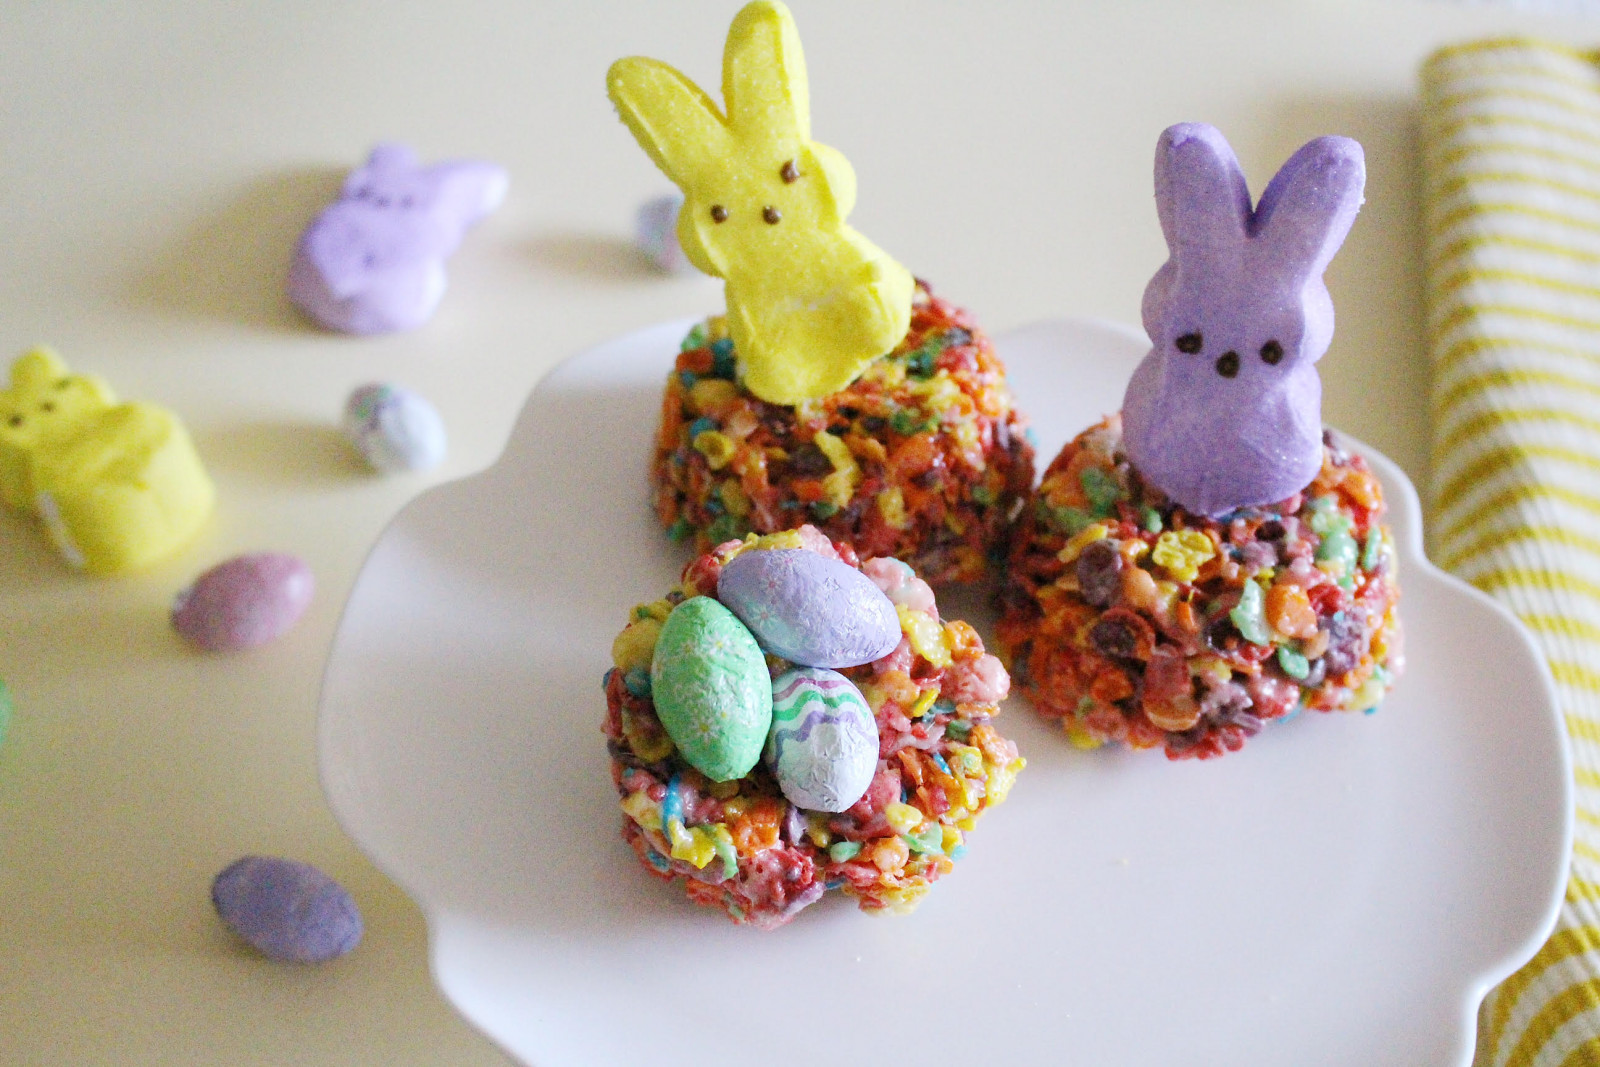
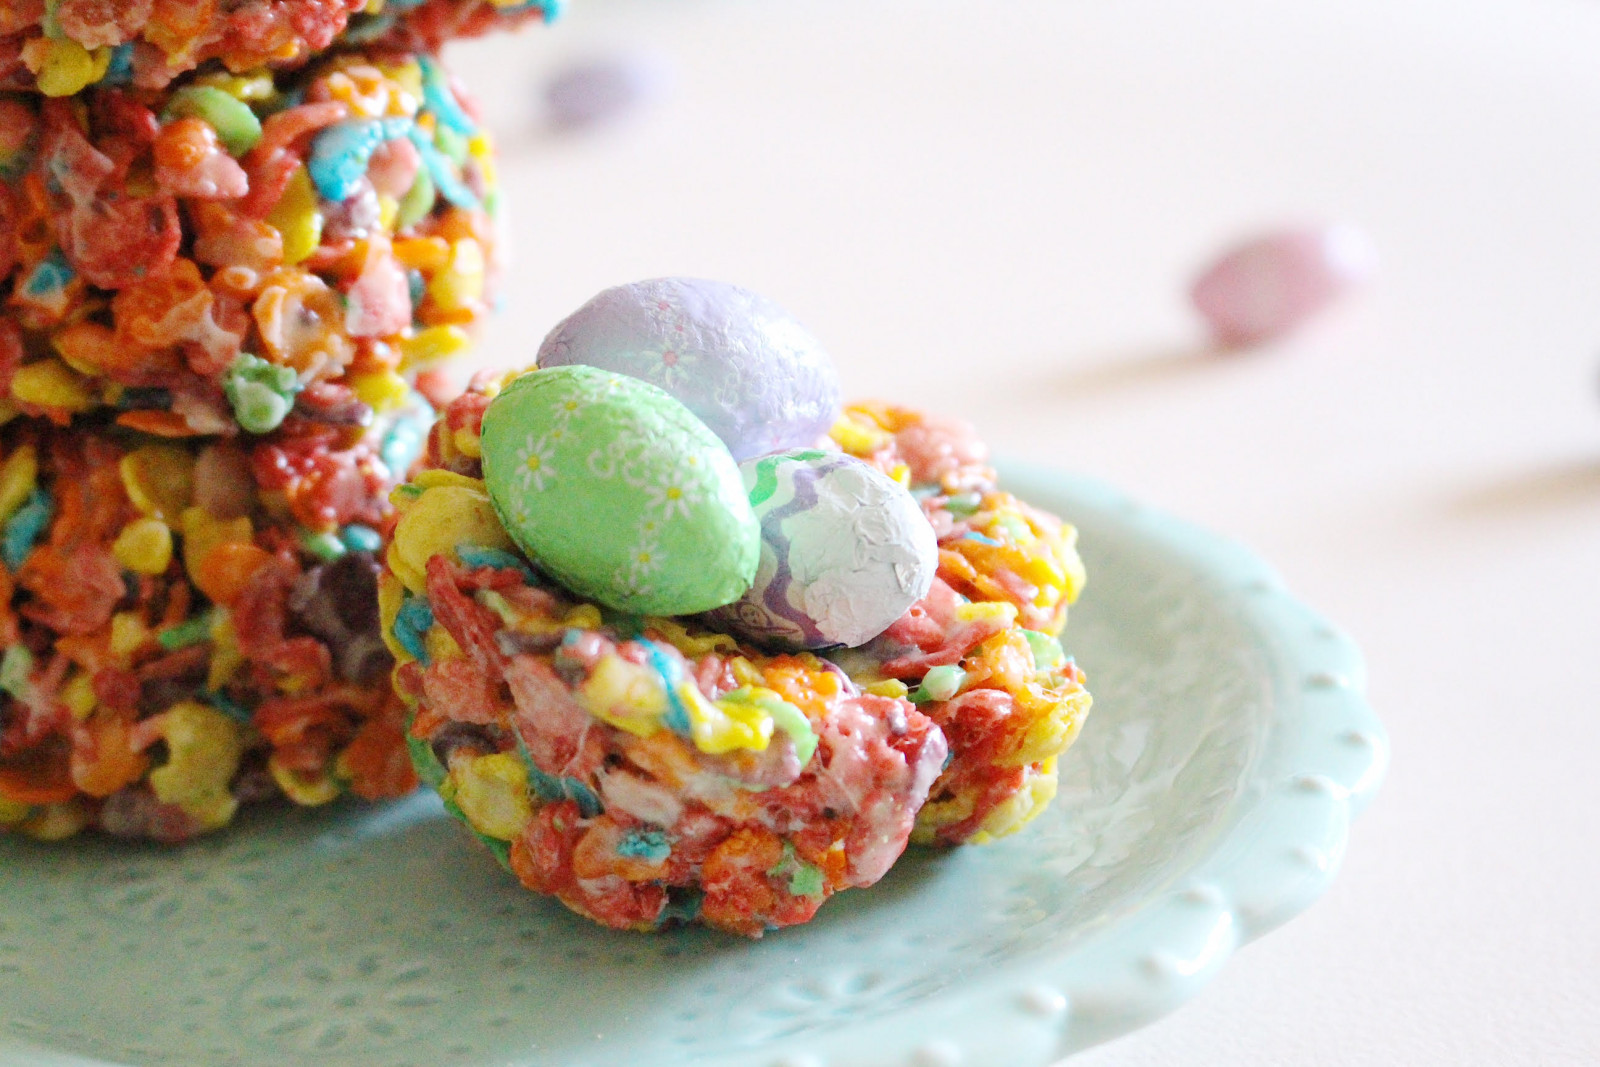
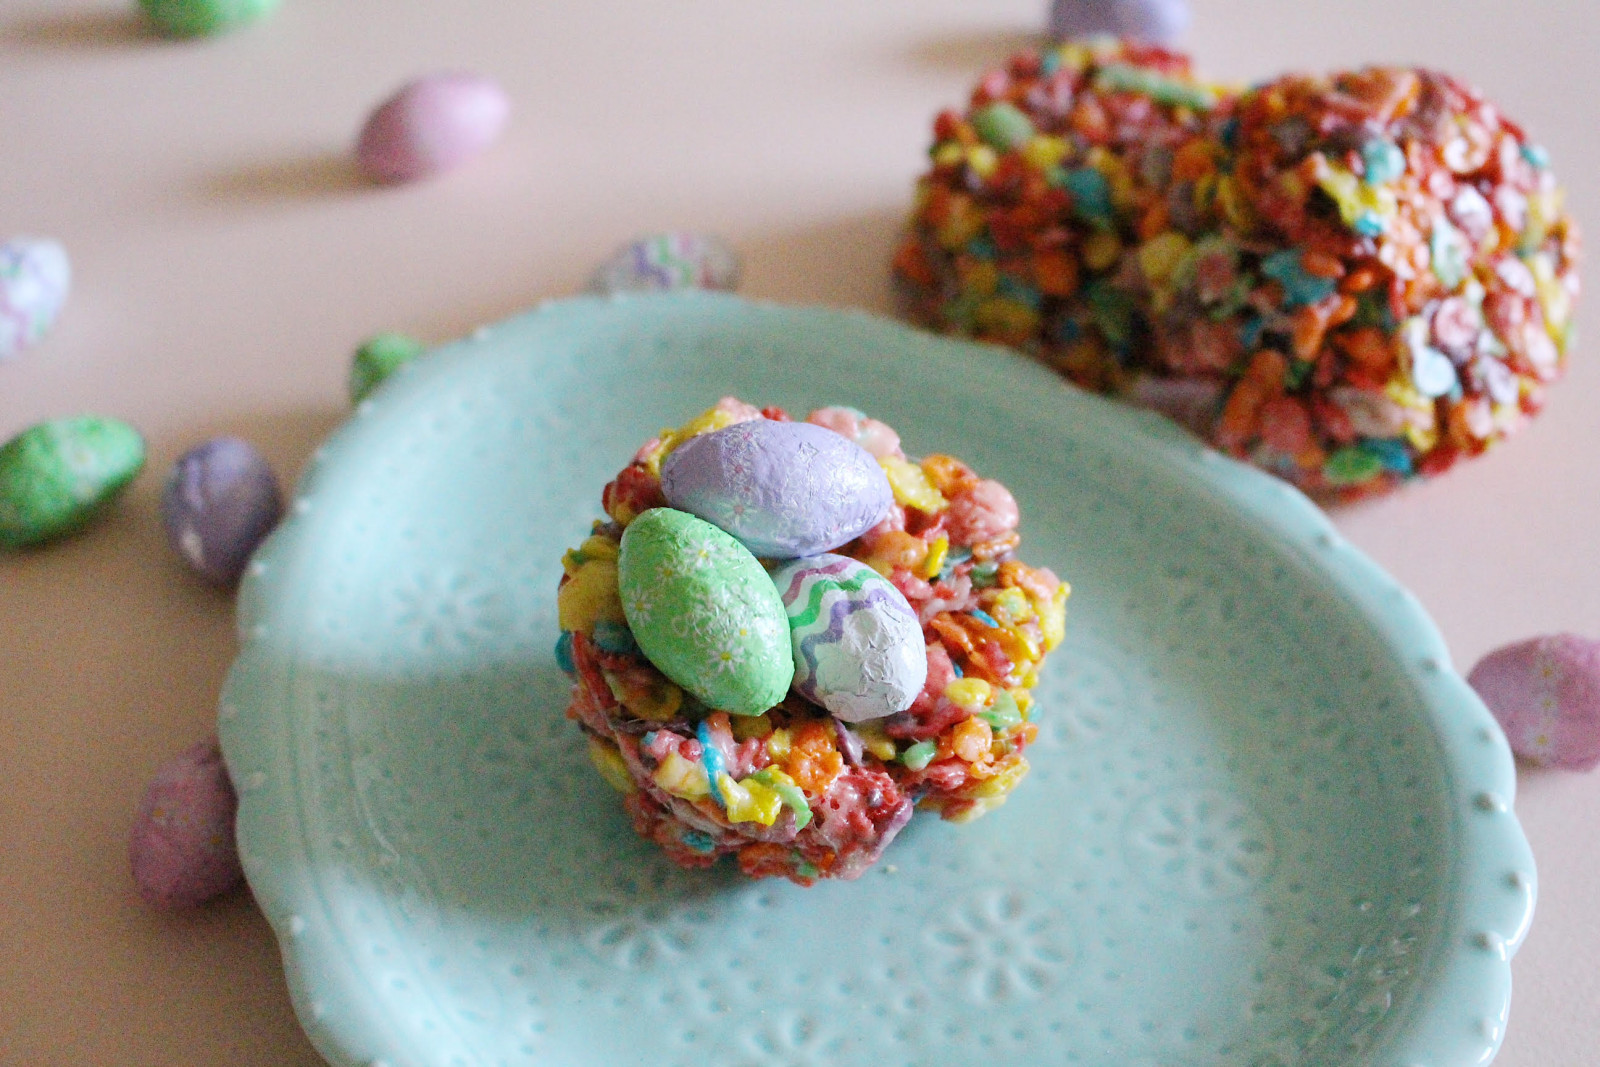
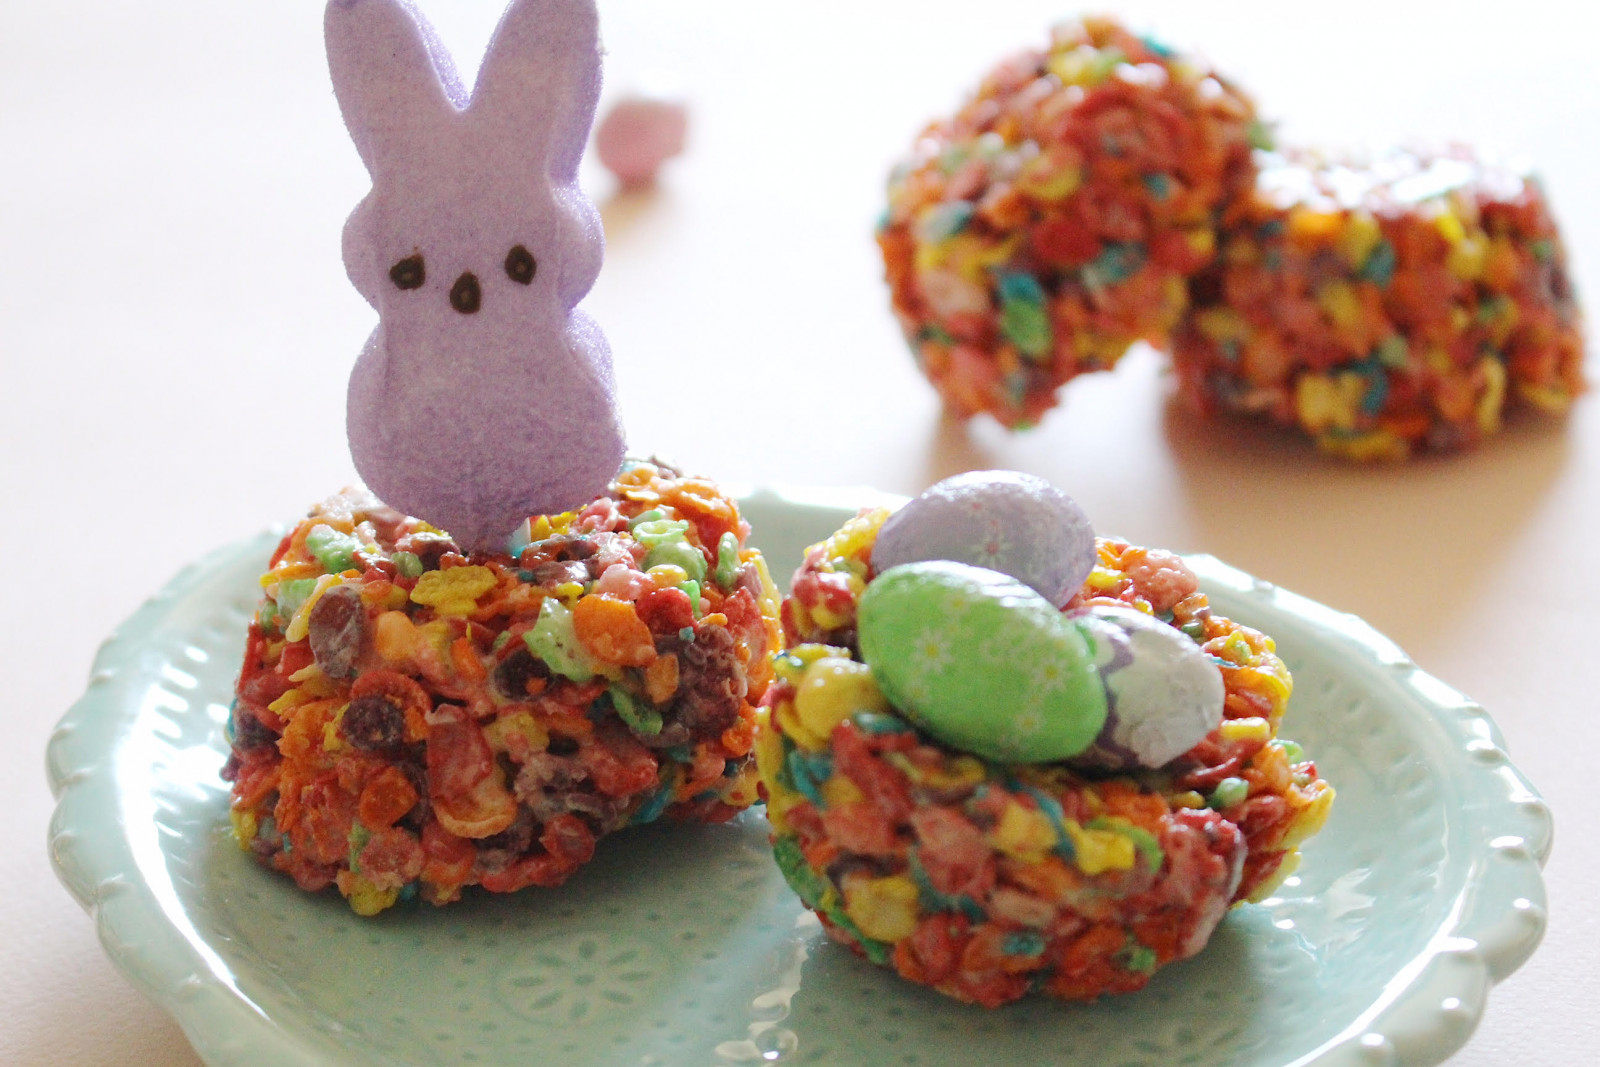
How stinkin’ cute are these fruity pebble treats! We hand formed them into nest shapes and filled them with chocolate eggs topped with Peeps! Sugar overload but soooo worth it, I swear I just wanna make rice crispy treats with every cereal out there!
You’ll simply make the traditional “rice crispy treat” recipe and instead of the original rice crispy cereal, you’ll swap it out for any cereal you like. In this case we used Fruity Pebbles because the color combination was so pretty and festive, not to mention it tastes tangy, sweet, and all things delicious.
Top your ‘nests’ with the chocolate eggs of your choice and pop a lil Peep bunny on there to complete this yummy and easy Easter treat!
What’s your favorite Easter dessert or recipe? I personally cannot wait until we get to tye dye eggs with Corrine! Even though she doesn’t seem as excited as we are, I know she loves that I’ve continued the tradition with her.