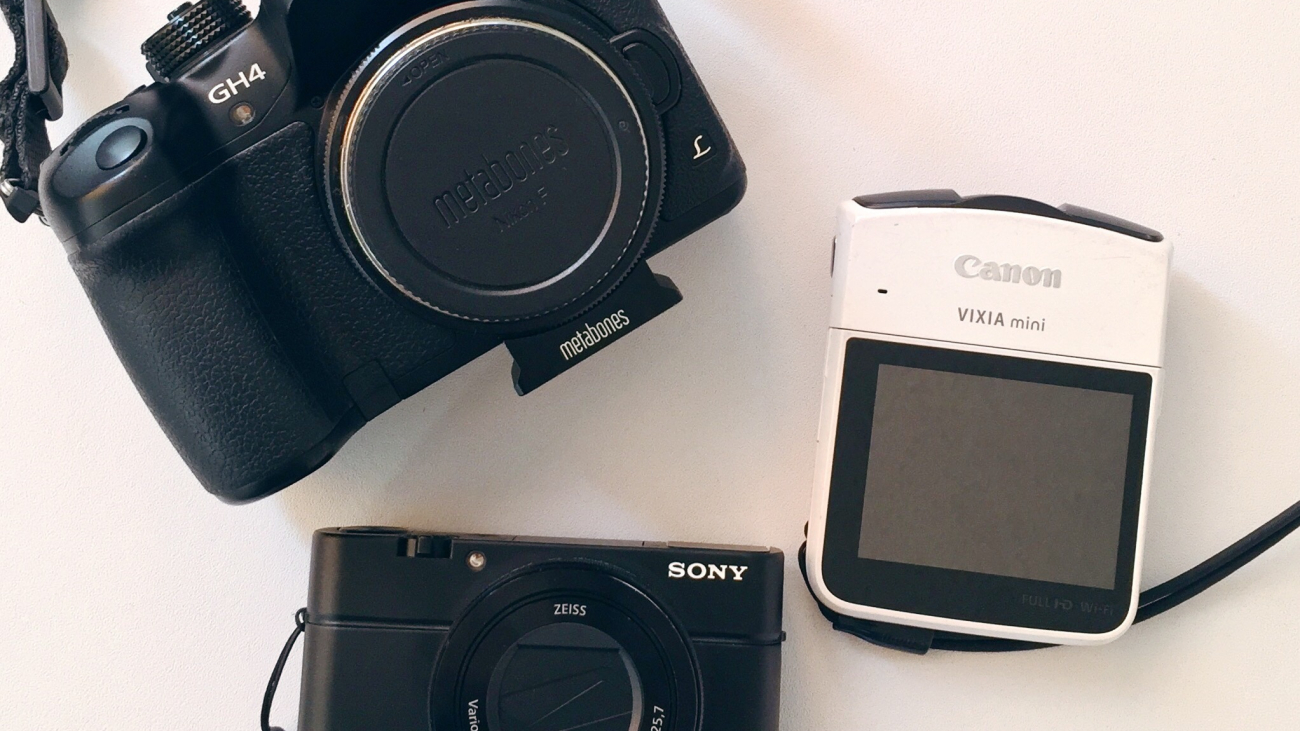
I like to do things nice and easy *said in the voice of Tina Turner* So when it comes to recording videos for my channel or taking photos for my blog, I TRY to stick to one piece of equipment because, convenience. However, in true form- I also really love having options! So this past year it’s really been dependent upon the type of content I’m creating and the type of weather conditions … can we say wahoo for an adventure series?! My ONE piece of camera equipment has turned into TOP THREE. I thought today I’d share with you my recent camera set up wheeee!
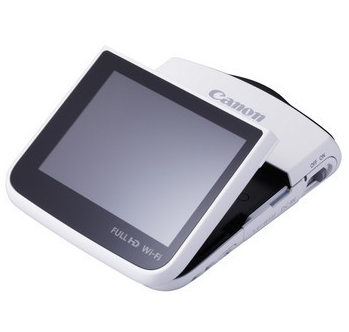
First up is my handy dandy vlogging camera. If you watch my video blogs and wonder how I get so much of the background in one shot, it’s this lil guy! I’m no camera expert but I know what works for me and what I do, and these are my tried and tested suggestions. If you’re just starting out, this is for you!
Price: $ Features: Auto focus, auto lighting, auto sound, auto is my new favorite word. Optional modes; low light, indoor, outdoor, sports. Perks: This is a great starter camera and for its capabilities it’s on the lower end in terms of price points. It also takes stills, so you can do video and picture, it has an adjustable touch screen, fits in the palm of your hand, and it’s tripod compatible. I know, you’re in love I am too!
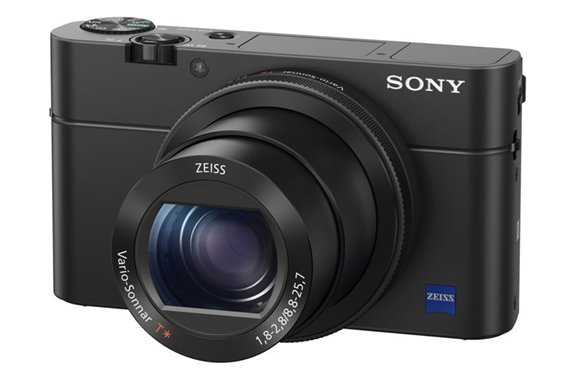
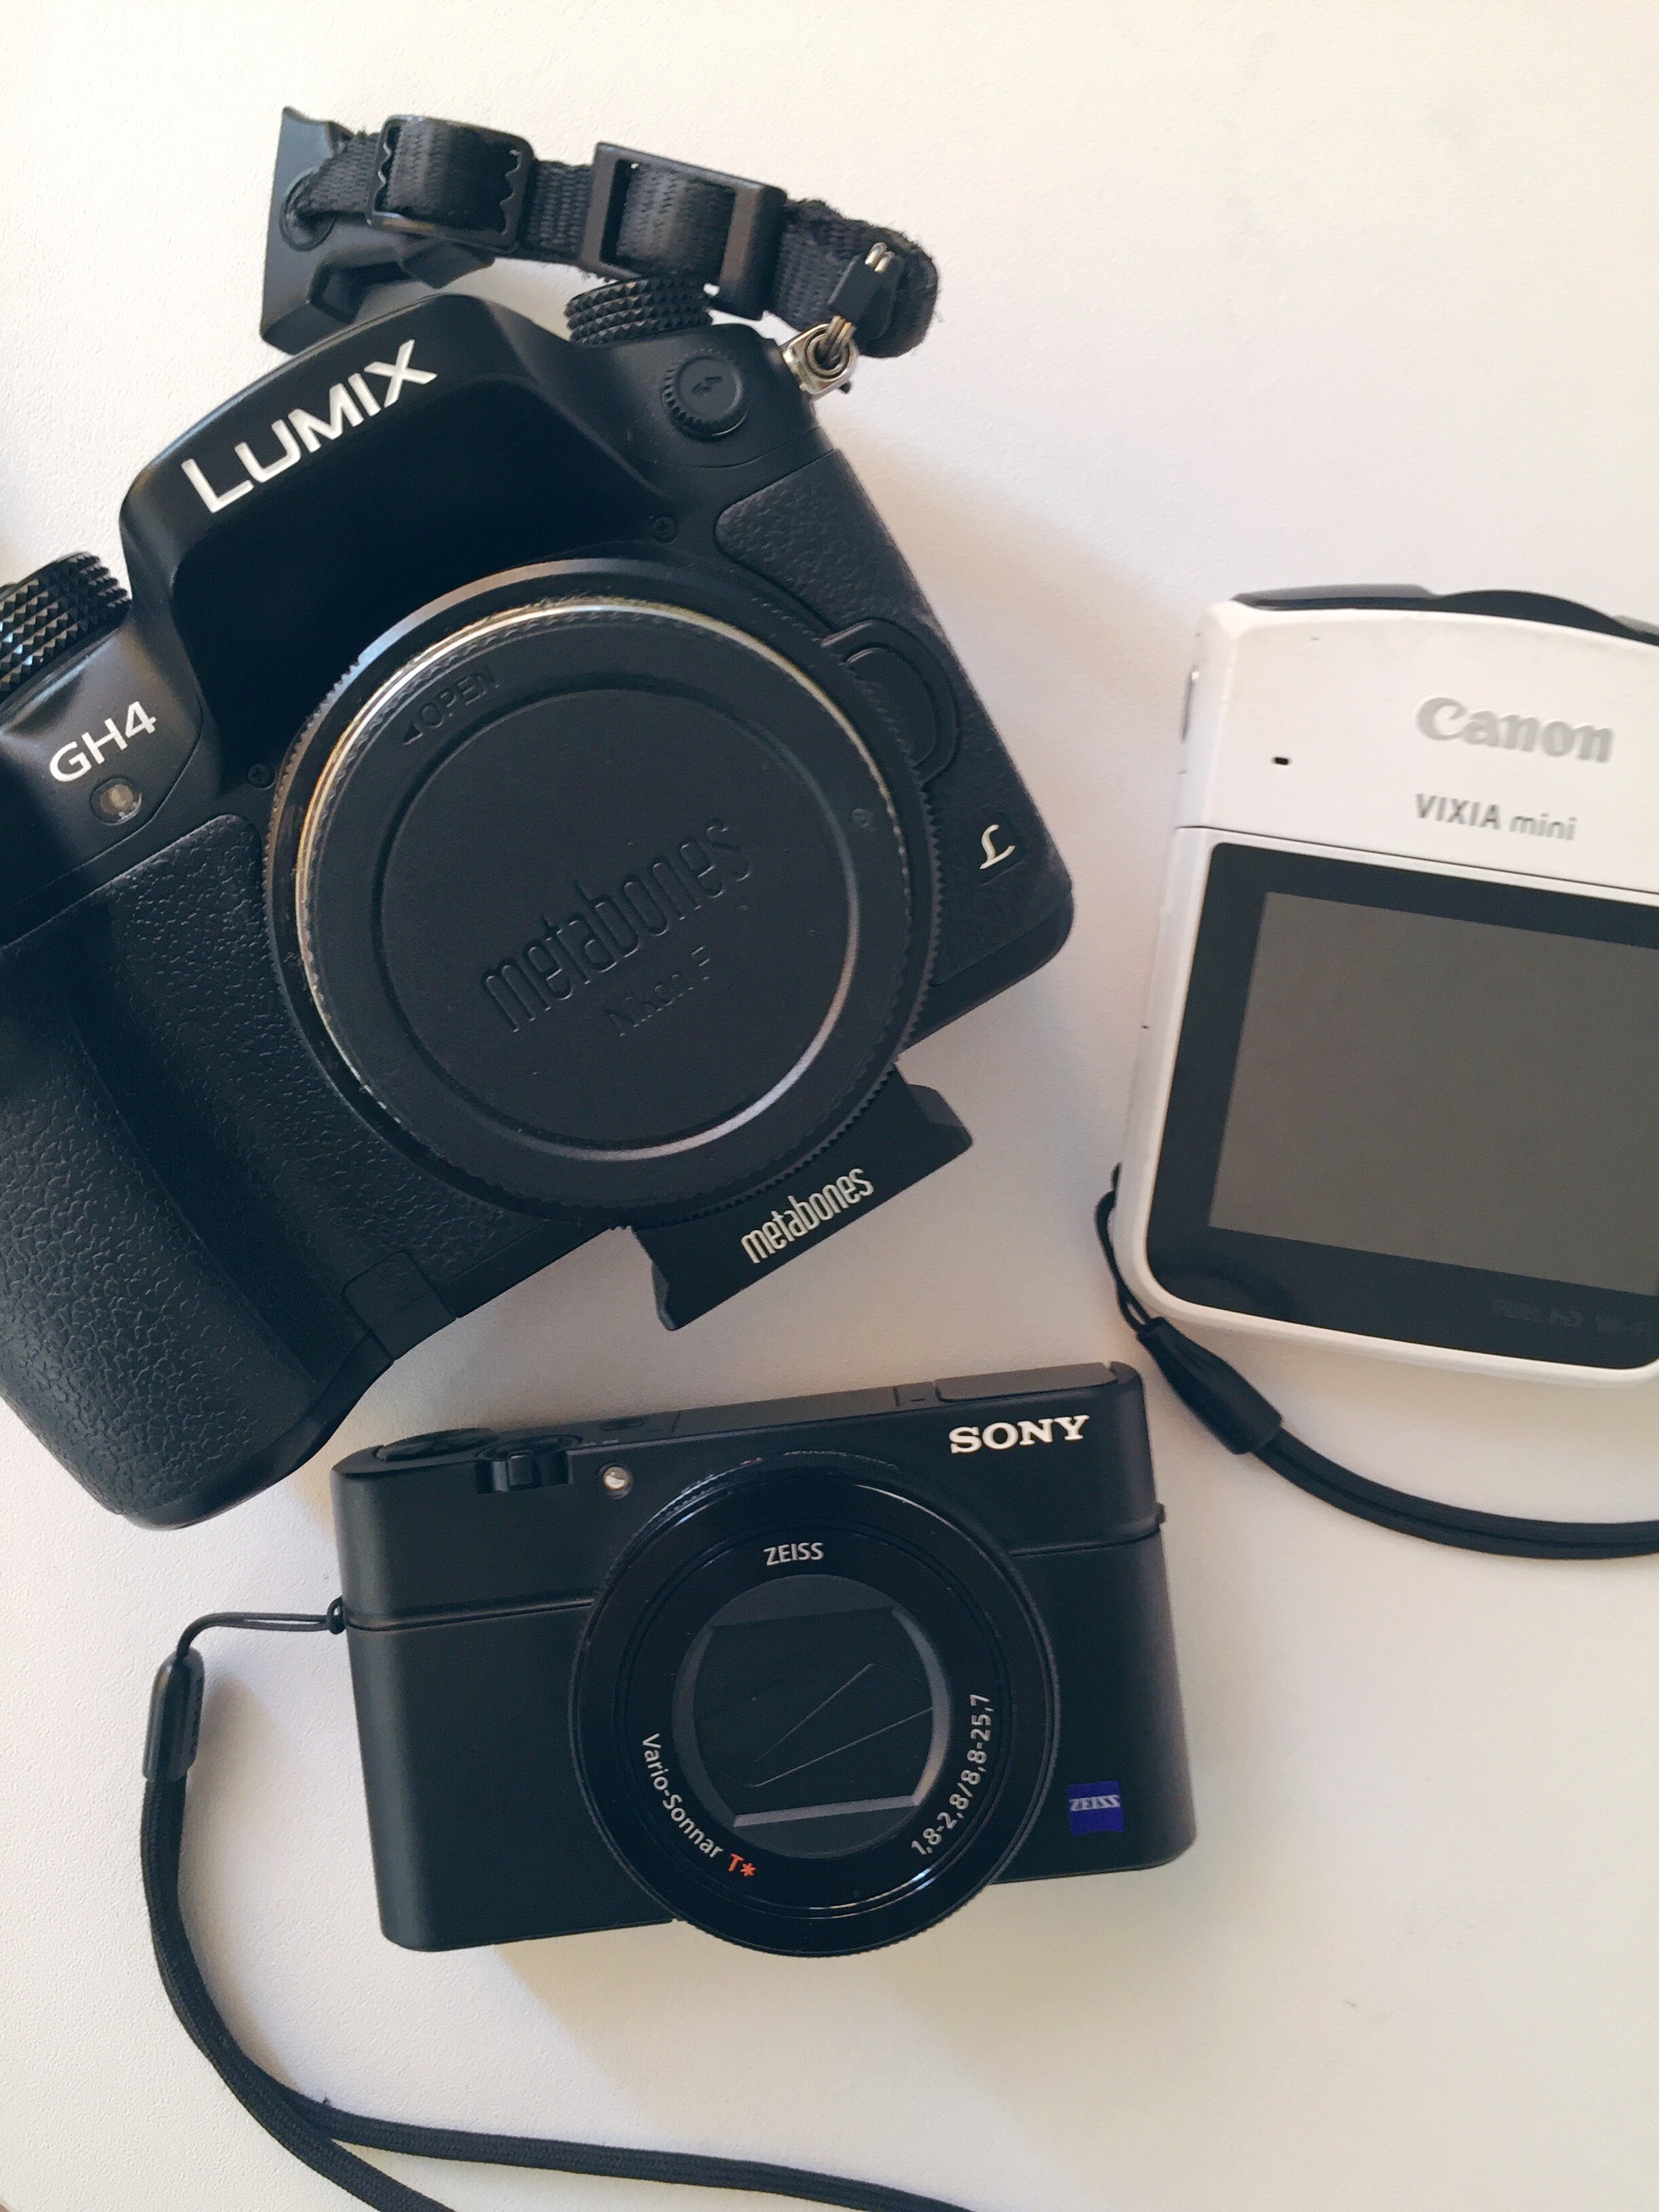
 My sketch comedy and more produced videos are shot on our Sony RX100 which is our most recent purchase. I was a little intimidated when we got it tbh! I got spoiled with my Vixia which does auto-everything for me. Having to learn how to adjust exposure and focus settings was like learning a foreign language. It was worth it though, image freedom to capture beautiful landscapes and keep its quality is everything! Price: $$ Perks: This camera is a beast. It can record in slow motion and 4 k- so you can crop and zoom in on your images and it’s still ultra crisp! It’s also pocket sized so you aren’t lugging around this huge contraption! You can see some of that in action with videos we’ve done here!
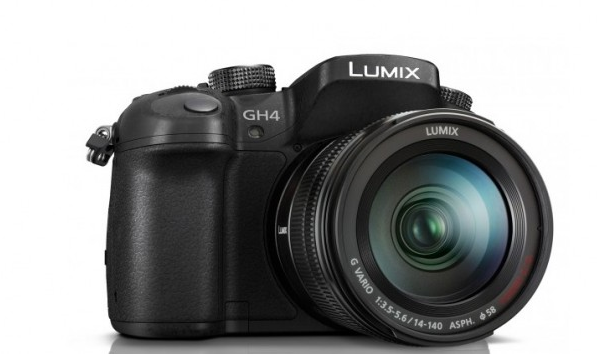
Bustin’ out the big guns here, we have our GH4! When I saw we, I mean Joe! There really isn’t comparing the GH4 to the other cameras we have, it’s in its own realm. The videos we’ve done with this camera are more cinematic looking, and in reference to quality, Joe shot some of his film with it. I really like how it feels like a heavy duty camera (I mean, it is) but it’s also user friendly for someone less experienced with DSLRs like yours truly. A lot of my travel series for the Parks was completed using this camera, and I can actually switch out the lenses and feel like I know what I’m doing! Full disclosure, Joe is sitting behind me making sure I give you all the right information on these because he’s the expert! I just bat my lashes and say, “can you light me, and is the sound on, oh oh and how’s the memory on the card?!”
On the day to day I lean more towards the Vixia and the Sony because they require less set up and I can whip them out in moments of quick capture! Now on to lighting! This is HUGE! My set up at home requires day light and a window! But since I’ve been doing more beauty and lifestyle videos I decided I needed to up my game so that my up close shots were bright and clear.

1) My ring light is perfect for this, it’s bright and gives off a fluorescent glow, yes magic! The light is concentrated on my face giving it a halo effect and you’ll notice that most beauty videos on YouTube feature a ring light of sorts. This one is great because it’s adjustable so you can be sitting on your bed or vanity, or stand up and film. It also has a dimmer on it so you can go all in on the brightness or lessen the intensity. If you’re looking for a more fancier approach, here’s another option and it features a smartphone mount. P.S. Tripod not included so you’ll want to pick one up and this one is inexpensive and gets the job done.
2) Flo lights are a wonderful addition to your lighting kit, I use 1-2 depending on the lighting in the room. There is usually one sitting off to the side that acts as a hair highlight and backlight. You kind of want to create a triangle of lights around you so that there are minimal shadows cast and you’re nice and bright. I lean more towards daylight lighting vs tungsten, because I like to mimic the natural light coming through my home. Again, if you’re feeling fancy, here is another option for you!
3) My travel gear is different from my home gear because at home I have endless storage space. When we’re on location and we’re traveling around I try to pack as light as possible. This small light is ideal for travel because it’s about the size of your palm and fits snug around your phone or laptop. It radiates a hefty glow for its compact size and is reasonable in price. My monkey tripod peaks perfection in moments that I need an extra hand or am forced to wrap it around a vacuum handle to imitate a tall tripod! And it works!
I’ve really enjoyed learning about equipment and how to use each to better my business and I hope this helps you set up for your next session! There are so many options out there that it can be a bit daunting, I’m lucky to have Joe steer me in the right direction so take it from me, these are definitely investments.
Have you worked with any of this equipment and what is your most coveted? Any options out there that I should try? I love trying new things and reporting back my experiences so share your suggestions with me.
<3