I’m that girl! Any time anyone talks about avocado and its many uses, I go, “oh I put it on everything!” But I really do! My hair, my skin, my food, I just put it on anything I can.
I love that avocado is not only delicious but it also has beauty benefits when applied topically. So today I’m going to share with you my top 3 favorite things to do with avocado!
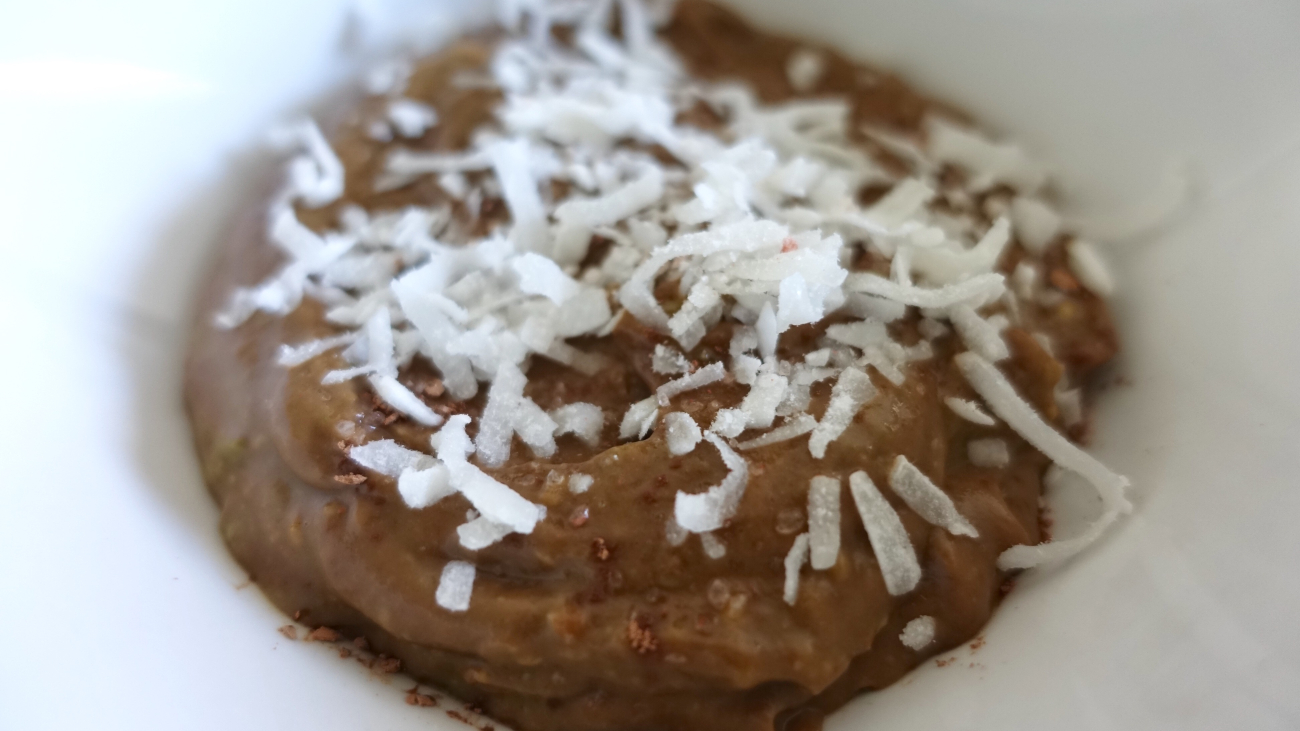
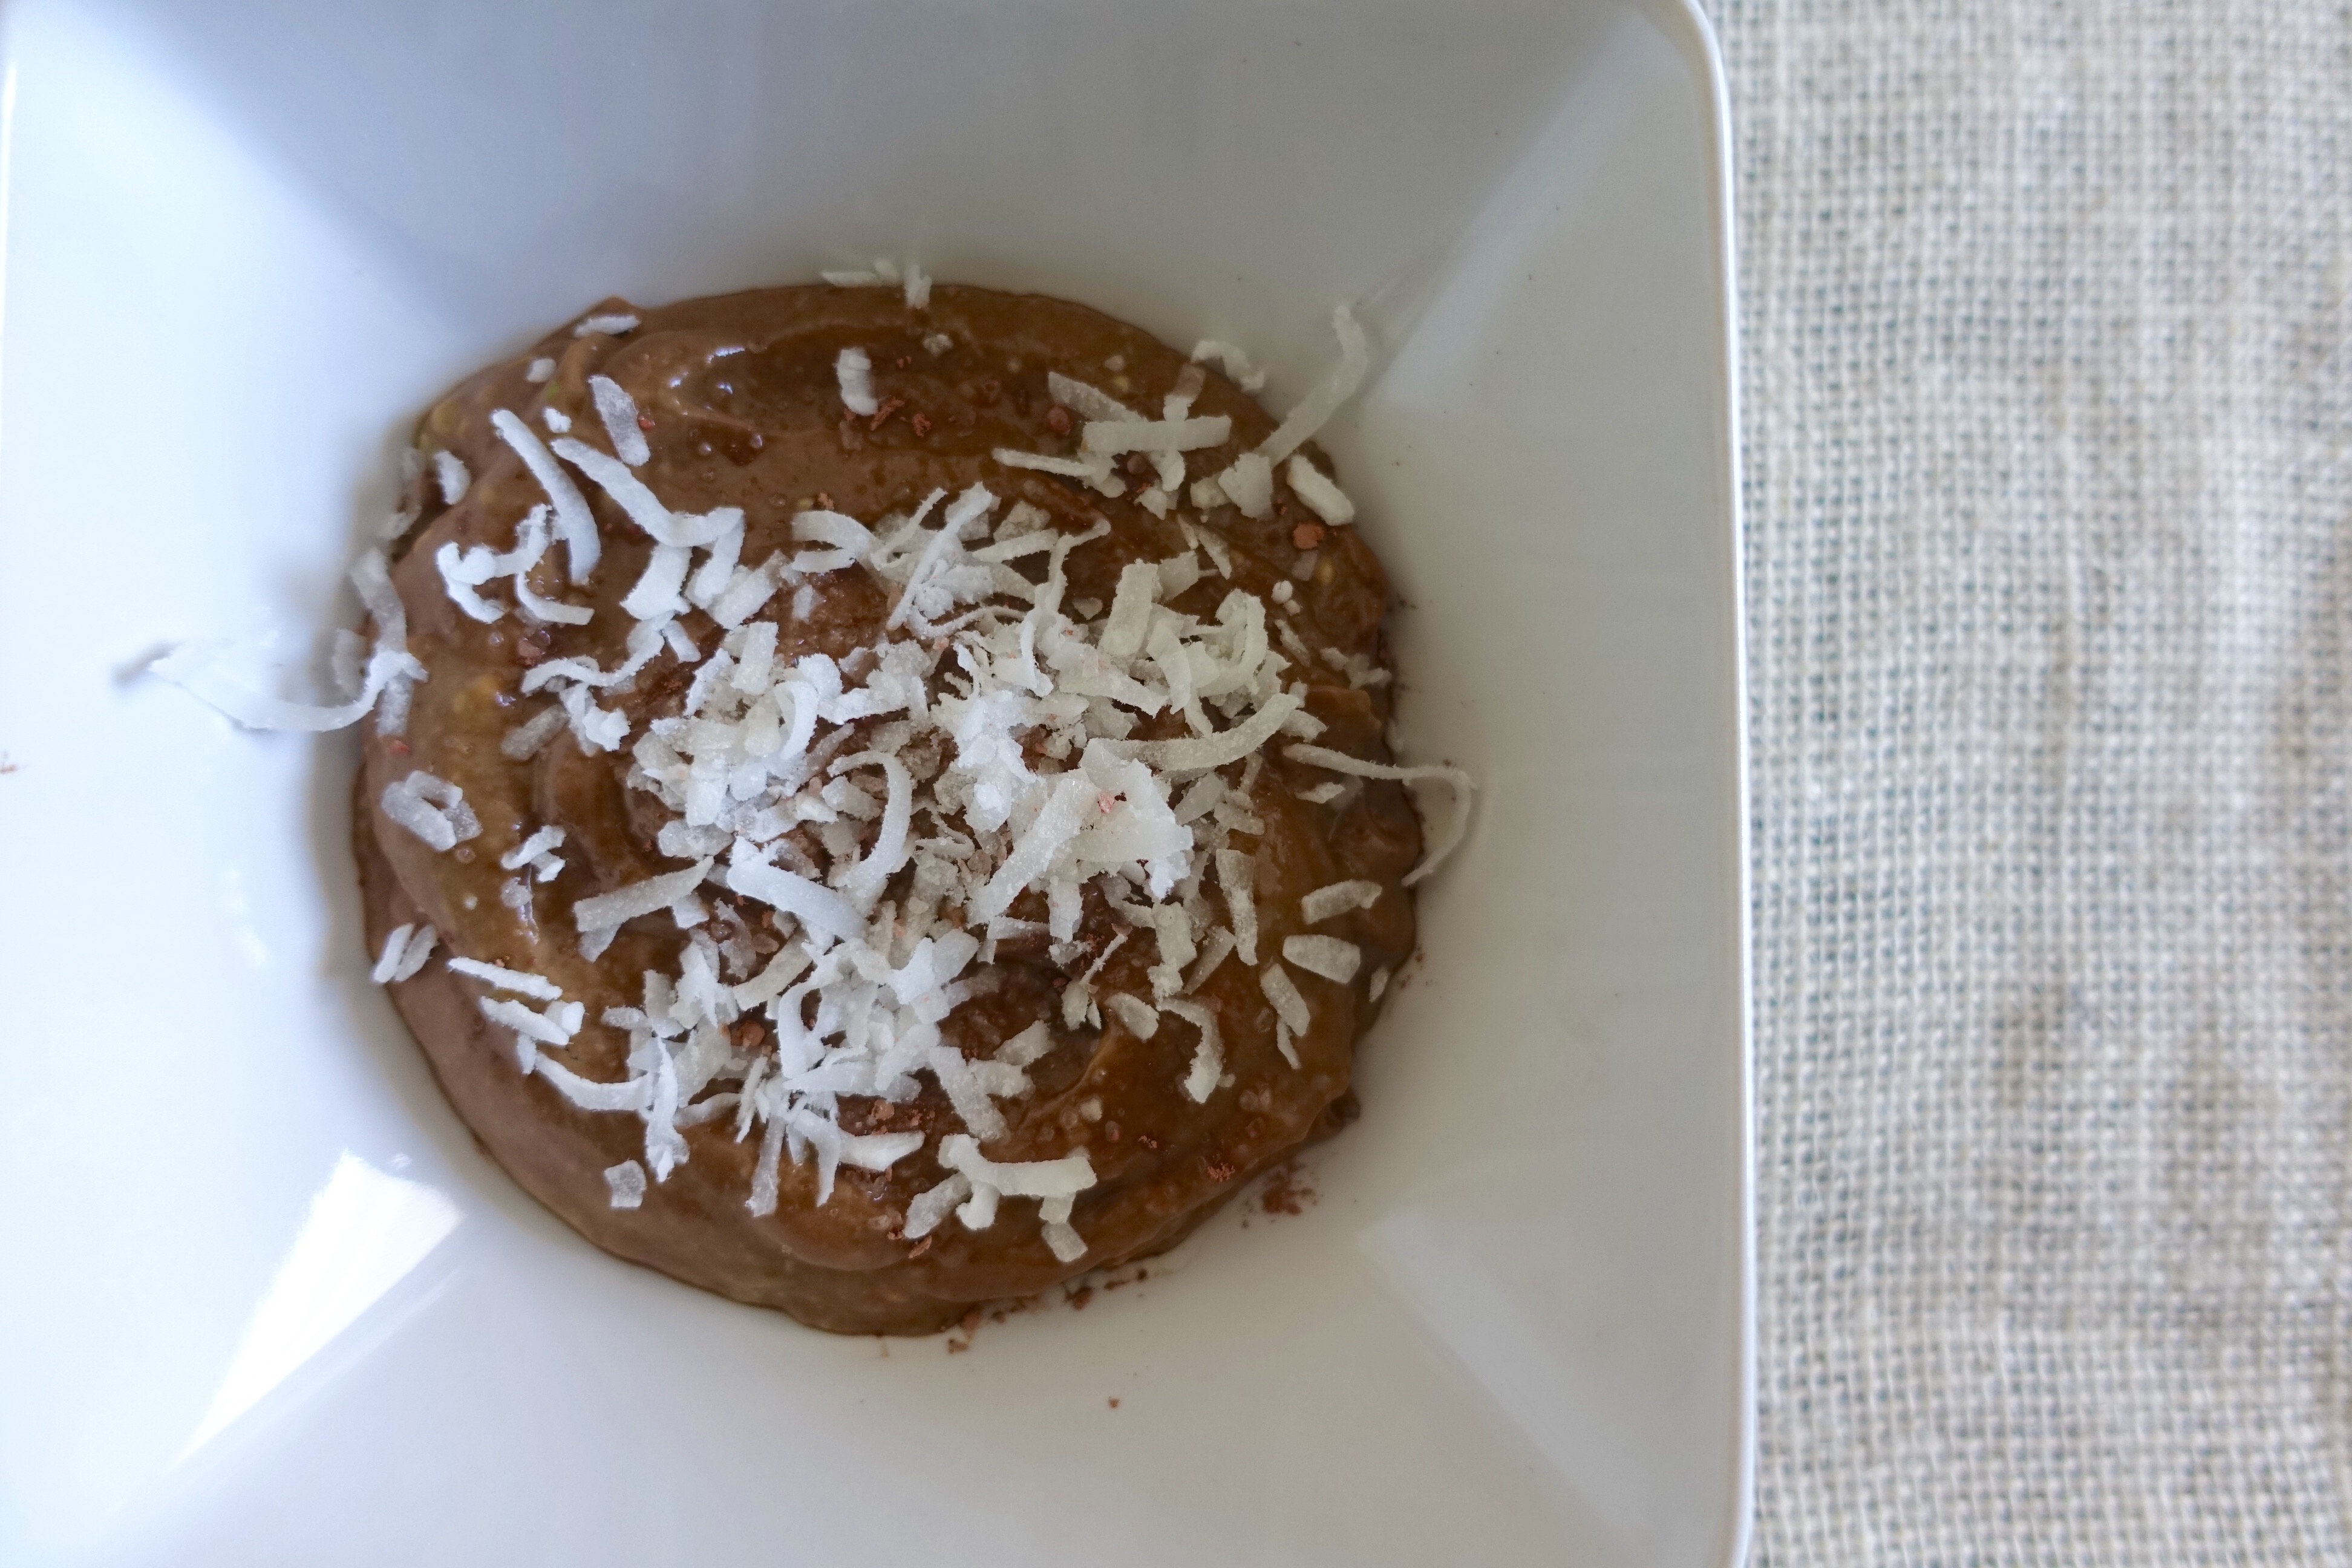
Just like with most of my meals, we’ll just start with dessert first! So this is a healthy version of pudding, a cocoa avocado pudding! Now this doesn’t taste exactly like the pudding you get in the lil plastic cups at the grocery store! But it IS just as creamy and for me, when I’m craving something chocolatey and indulgent, this does the trick!
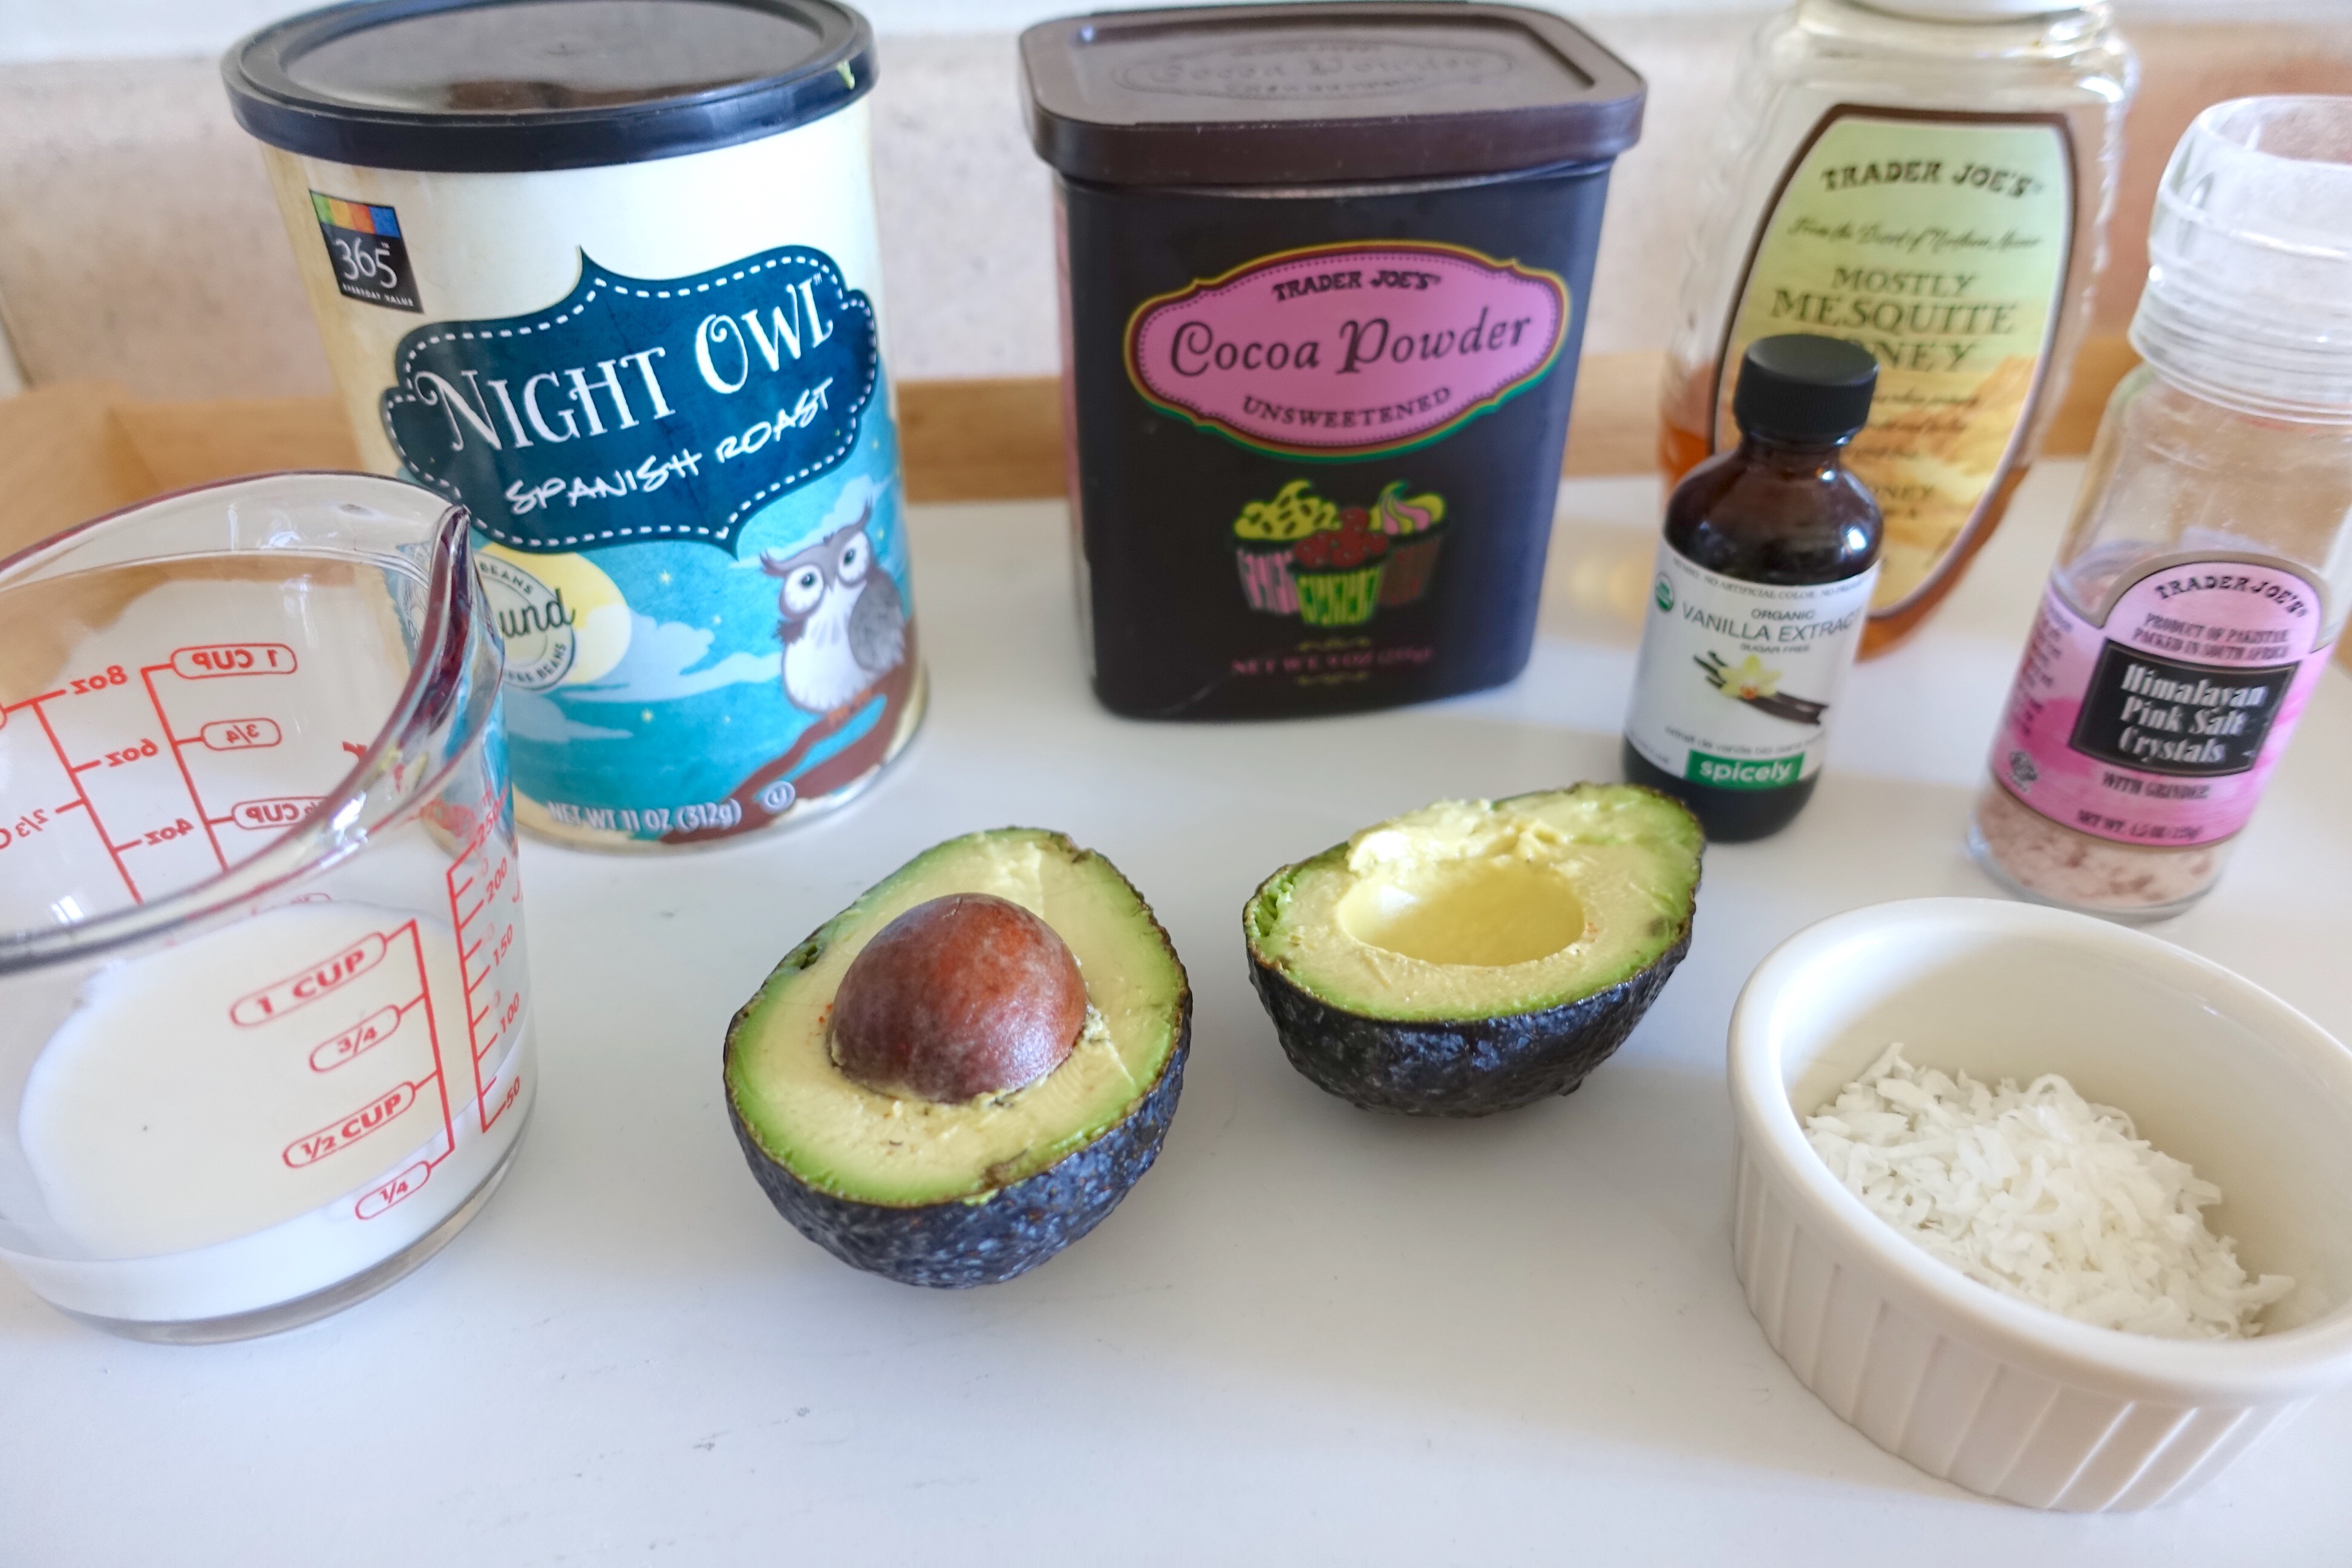
You’ll need:
– 2 large avocados
– 6-8 Tbsp agave or honey
– 1 tsp vanilla extract
– 1/2 cup cocoa powder
– coconut flakes for garnish
– 1/4 skim milk
– coarse salt to taste
Method:
Into your food processor, toss in the peeled and pitted avocados along with the rest of the ingredients. Blend until smooth, chill for an hour and ENJOY! Garnish each bowl with coconut flakes and some salt, you’re in for a treat! Joe says he’d rather not mix chocolate with a vegetable, but I say … don’t knock it ’til you try it!
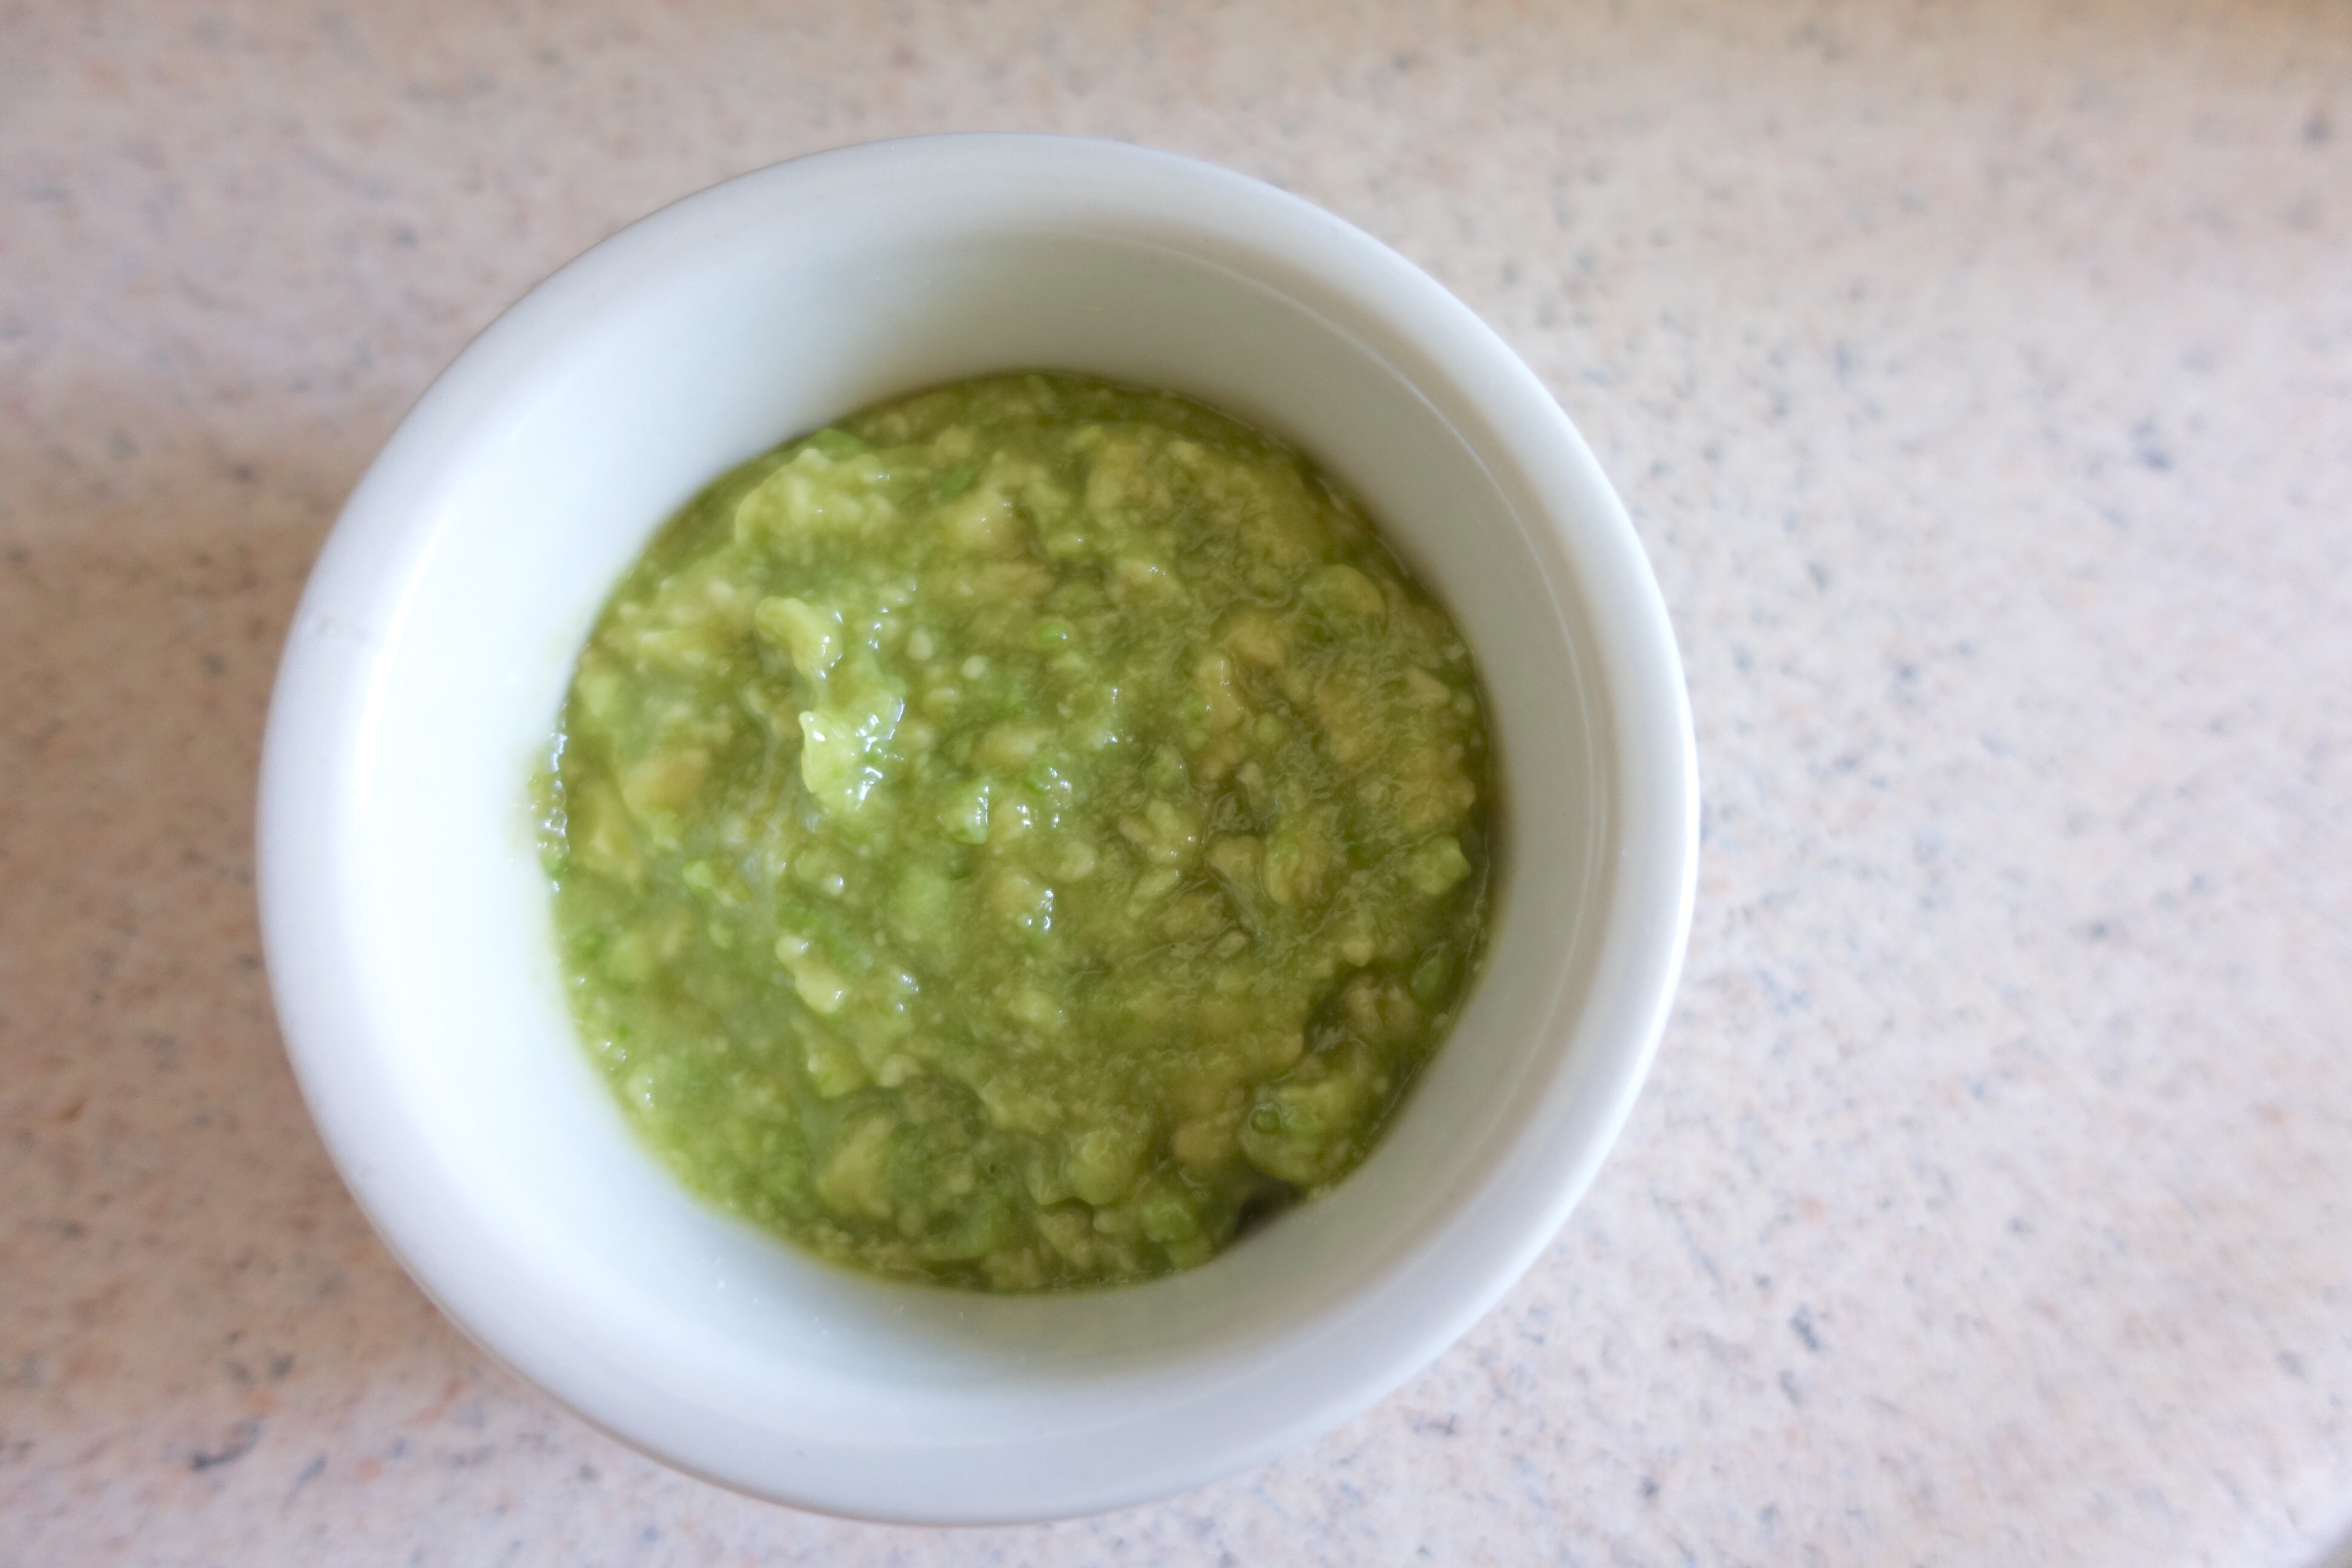
Next up, a hydrating mask that will leave you feeling moisturized, refreshed, and smooth! The natural oils in avocado mixed with a few ingredients you can find in your pantry make a wonderfully whipped up cocktail for your hair and skin!
For this you can use any variation you fancy, but I like to keep it simple, just avocado and honey! I put all of it into a bowl and smash it up! Then I apply it to my face for ten minutes and my hair for 30 minutes. Rinse and relish in the softness!
You can add in coarse sugar for a nice face scrub! Then when you rinse it off your skin, massage gently, and you’ll exfoliate and hydrate all at the same time!
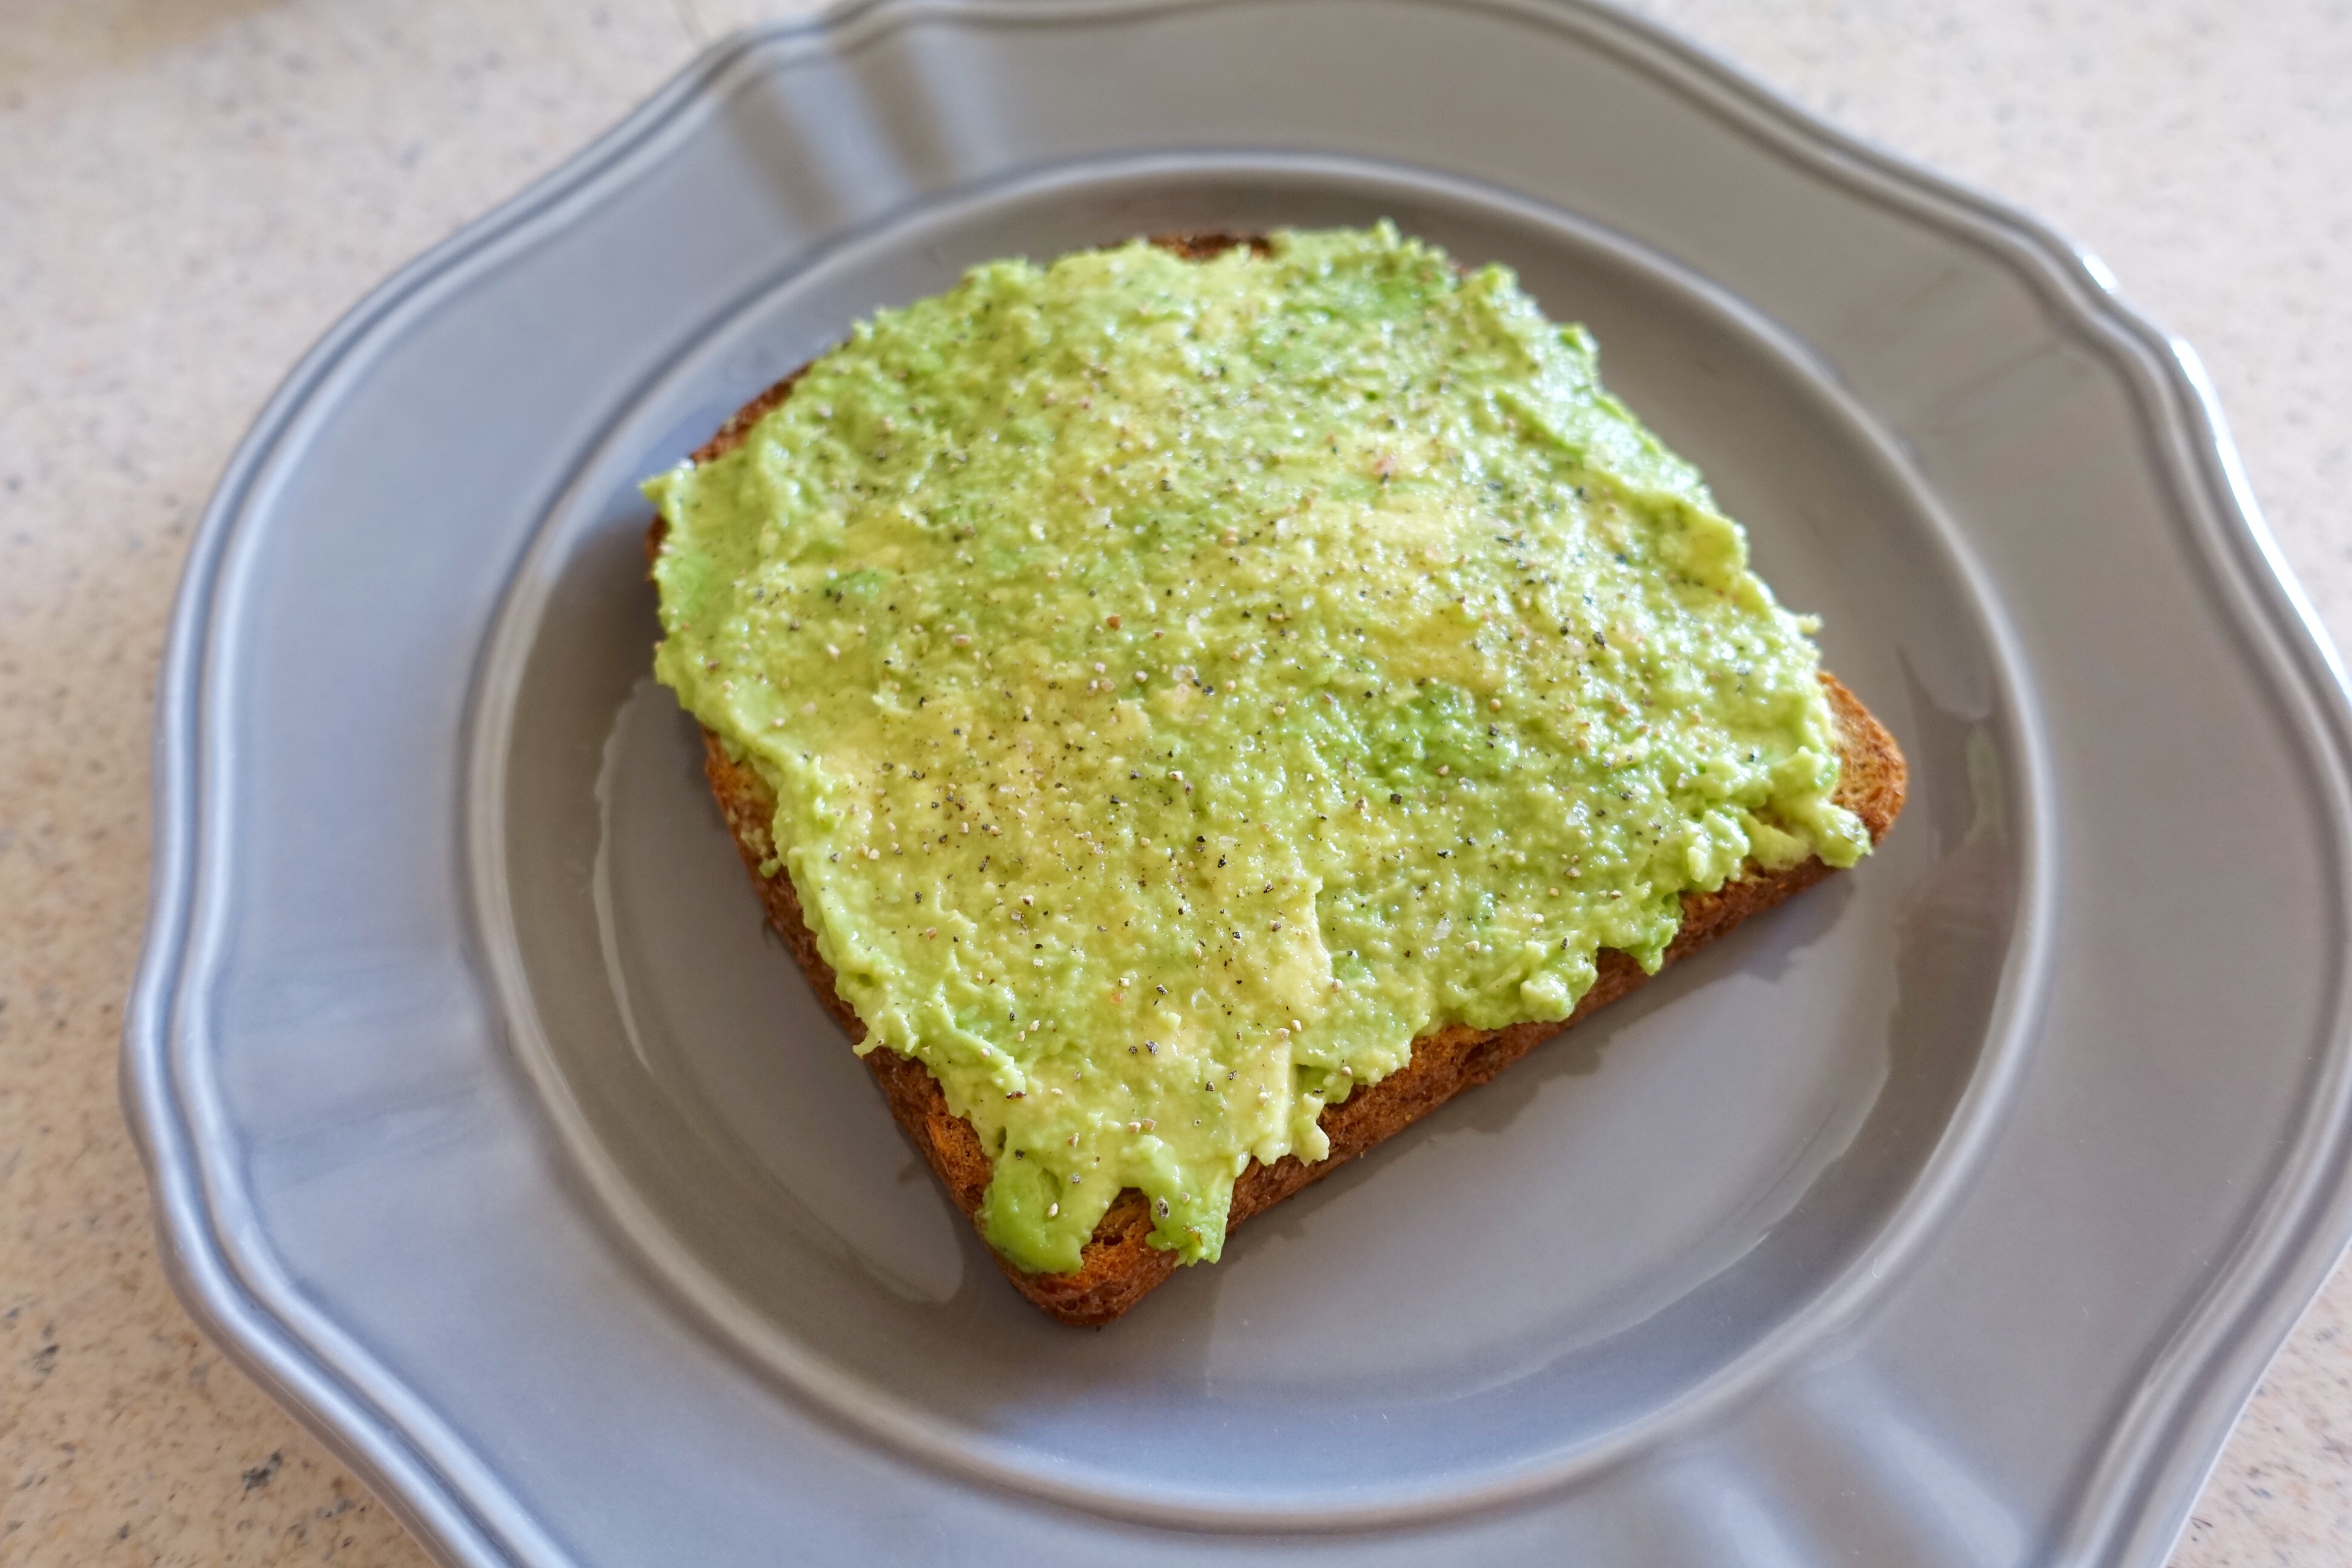
Oh the yummiest thing to do ever! Take a ripe avocado, plop it onto your favorite toast, spread it around, crack some black pepper and Himalayan pink salt on top. Eat. Repeat until all the foods are gone! This is the best thing to do before a work out for me, it’s super filled and fuels me for my weight training!
Give these a try and let me know what you think! What is your favorite thing to do with avocados? I’ll try them all!
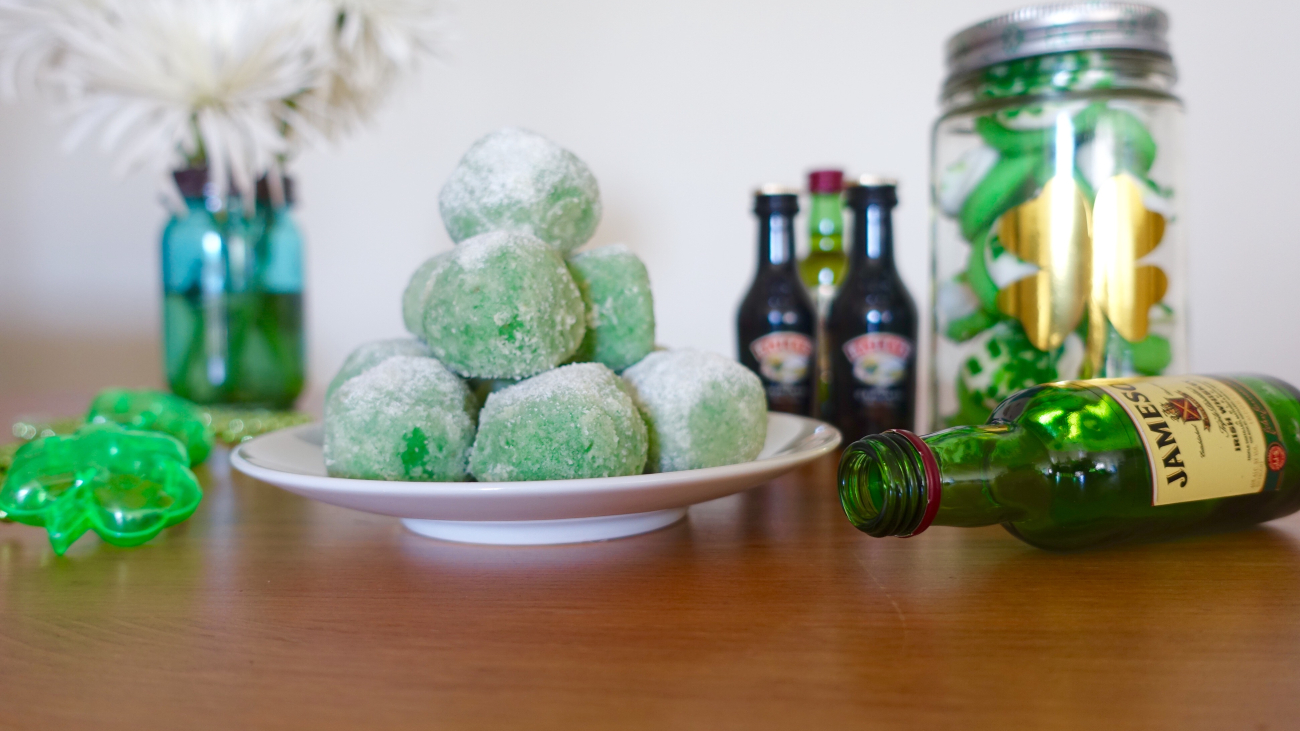
Today’s the day of green pancakes, green beer, pinching, and Irish kisses! In honor of my partial heritage … I’m half Irish ya know … I decided I’d make some shortbread yumminess with a twist of holiday, and a festive mason jar that you can give away or keep for yourself!
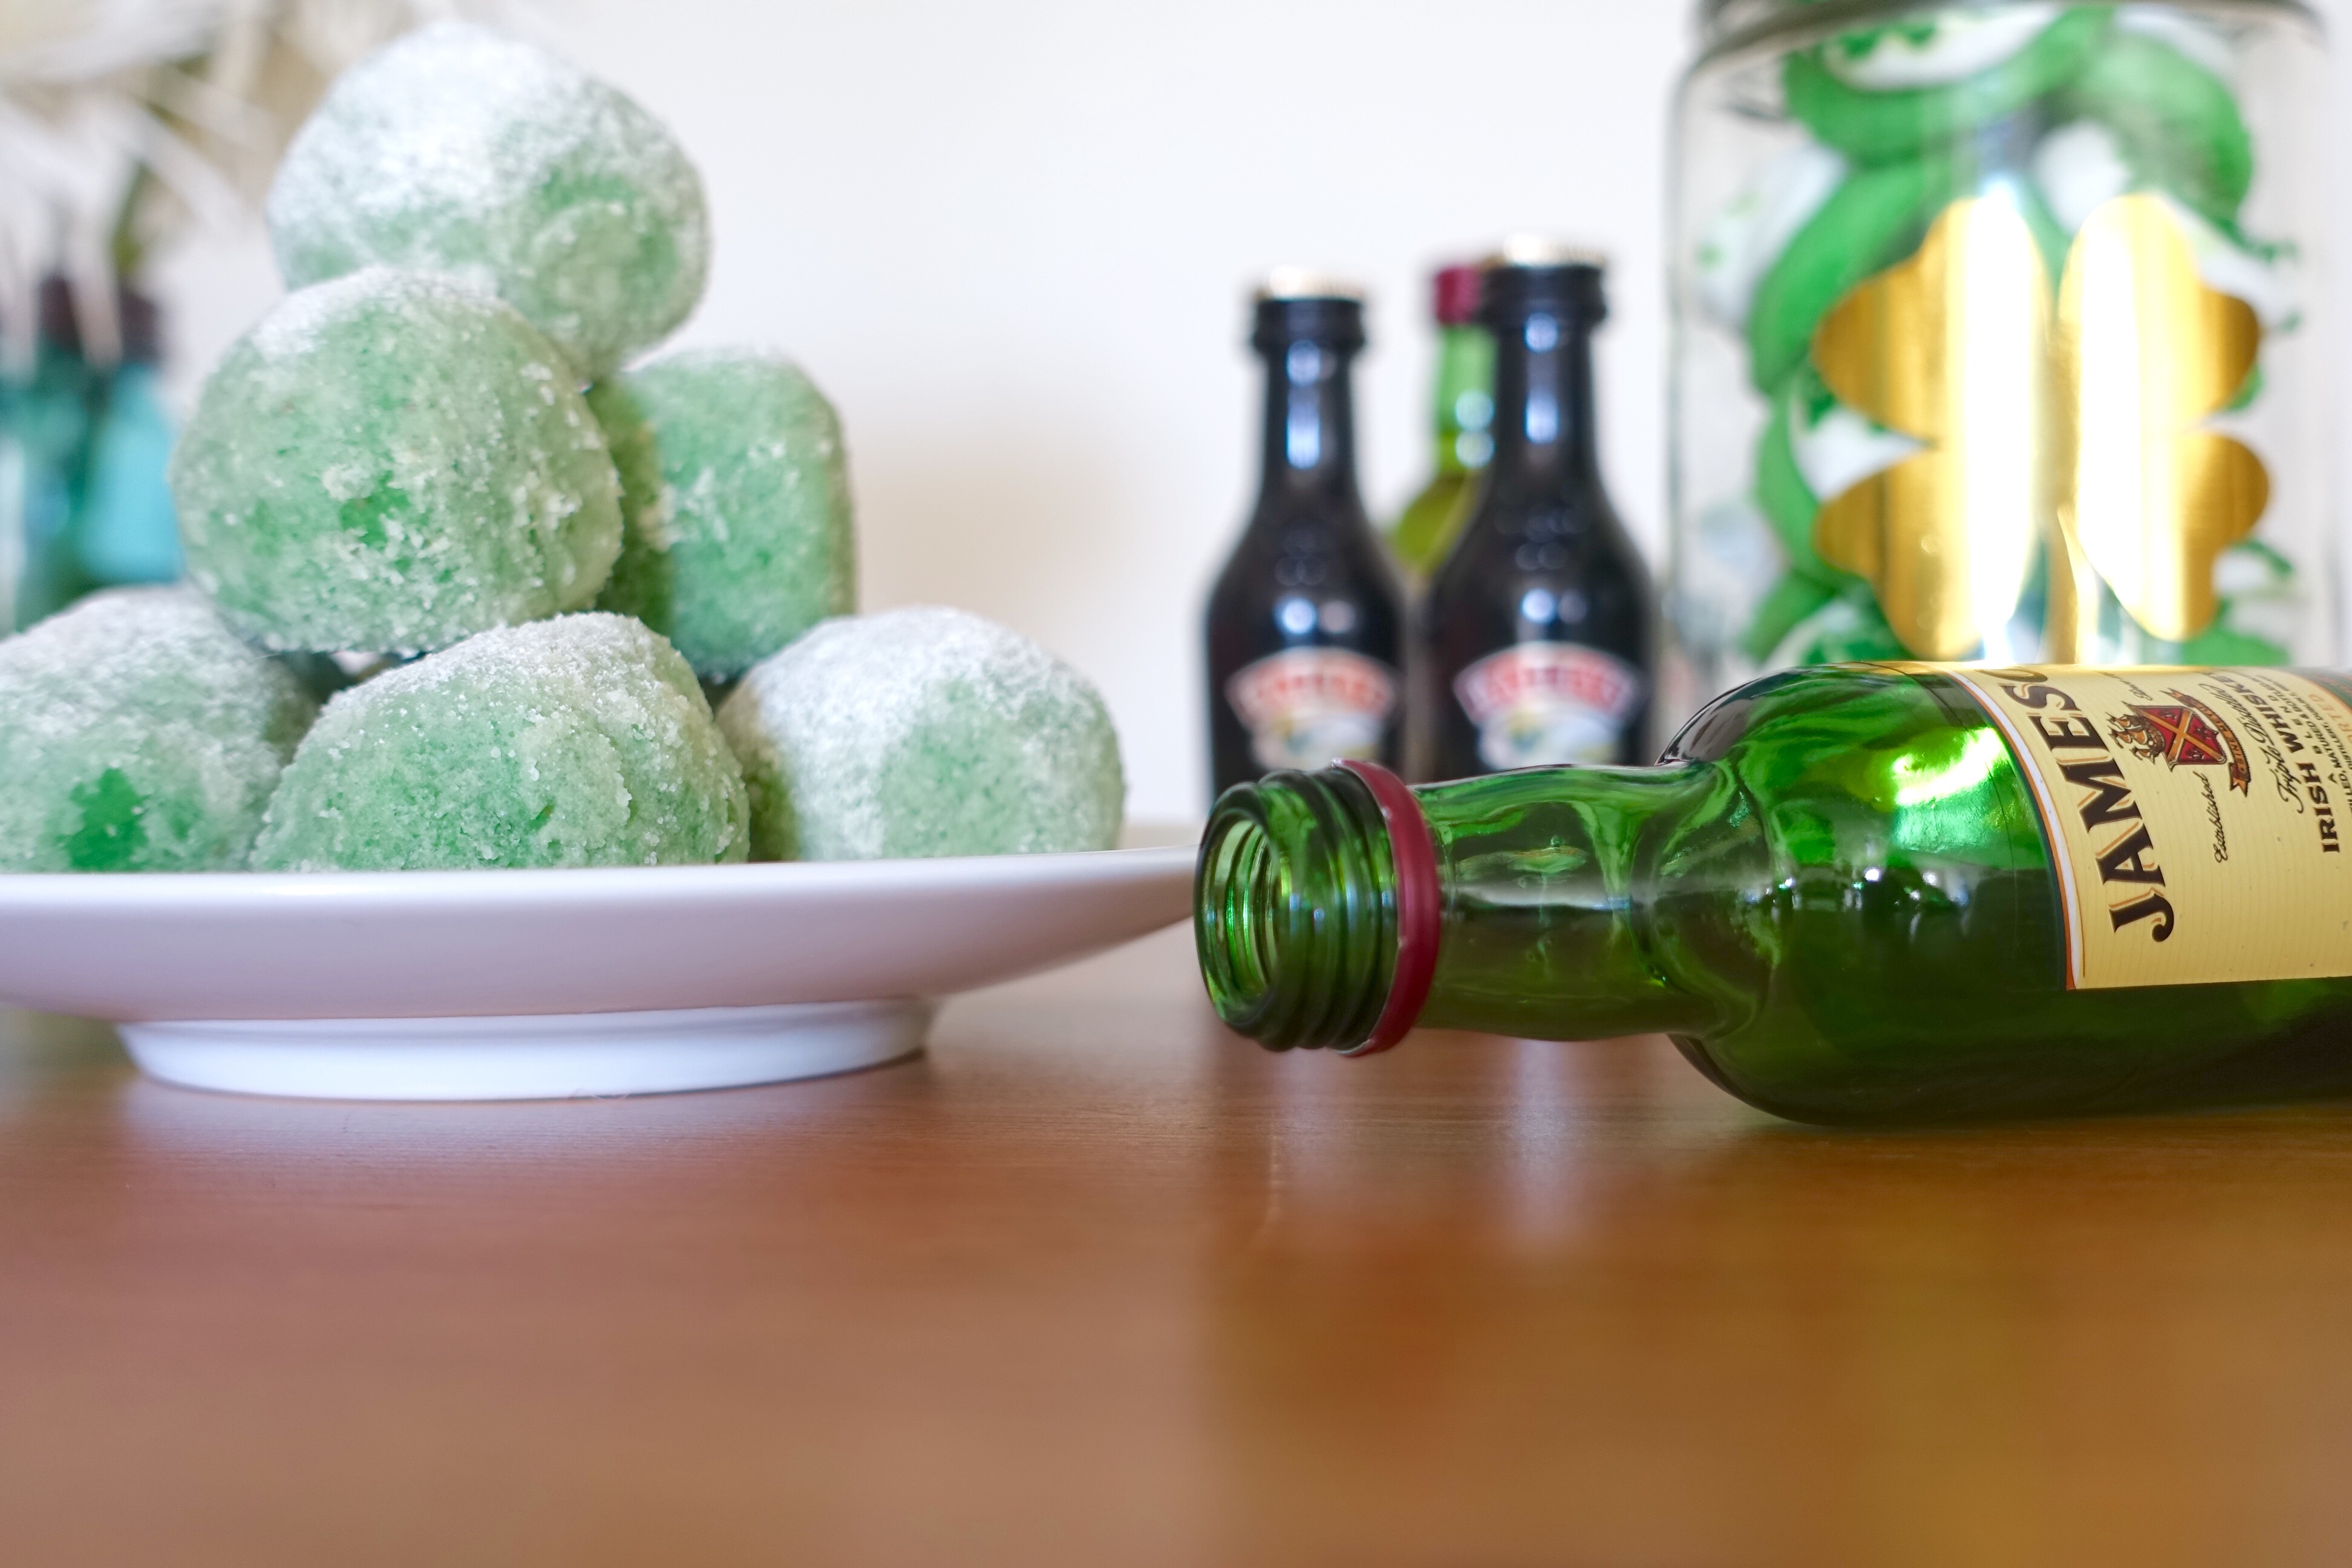
If ever you needed a reason to drench everything in whiskey, here’s your chance.
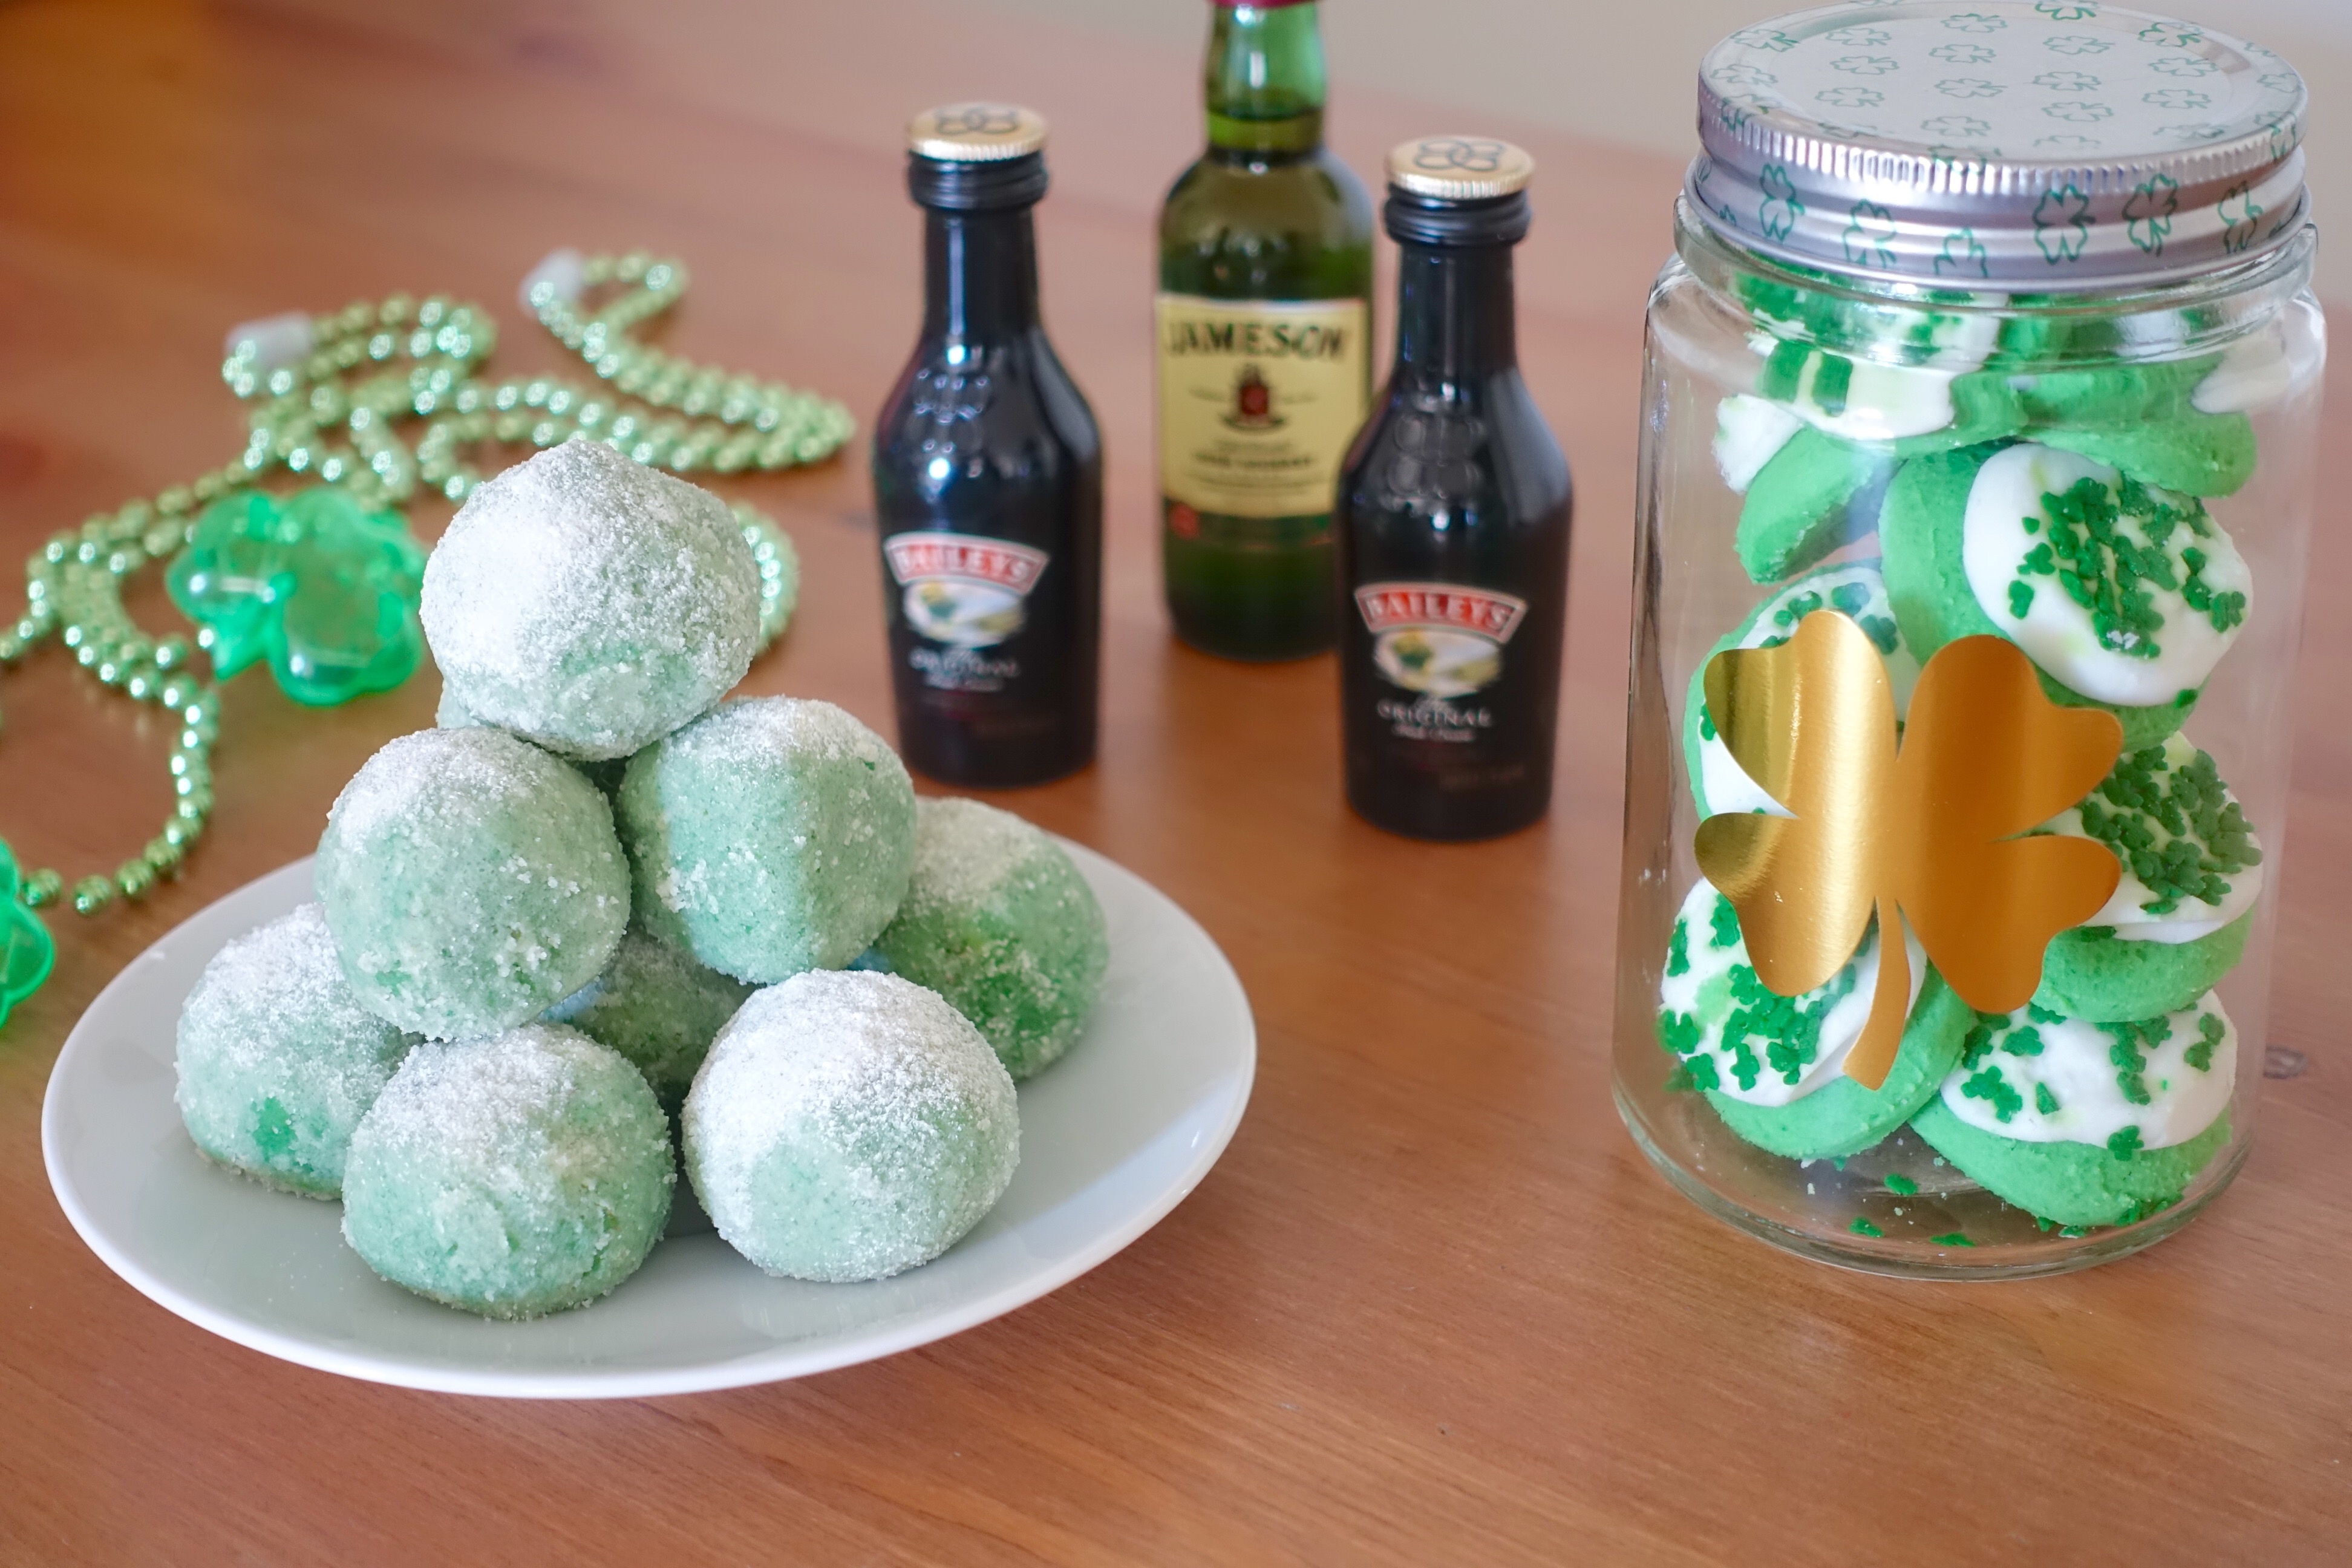
Notice the bottle of Jameson, it’s drunk and should go home, but before I get into the debauchery of our dessert dish, I’ll share with your my St. Patrick’s day munchie filled mason jar! I got this festive jar at Target for $0.99, yes under a dollar for this cuteness and I filled it with the world’s softest and most sugary sprinkled cookies I could find because, time saver.
Keep it for yourself or take it in to work or school and give it to someone as a gift, a sort of Valentine’s Day-esque kind of exchange and it’ll be sure to make them smile … I mean, it’s a sugar cookie! 😀
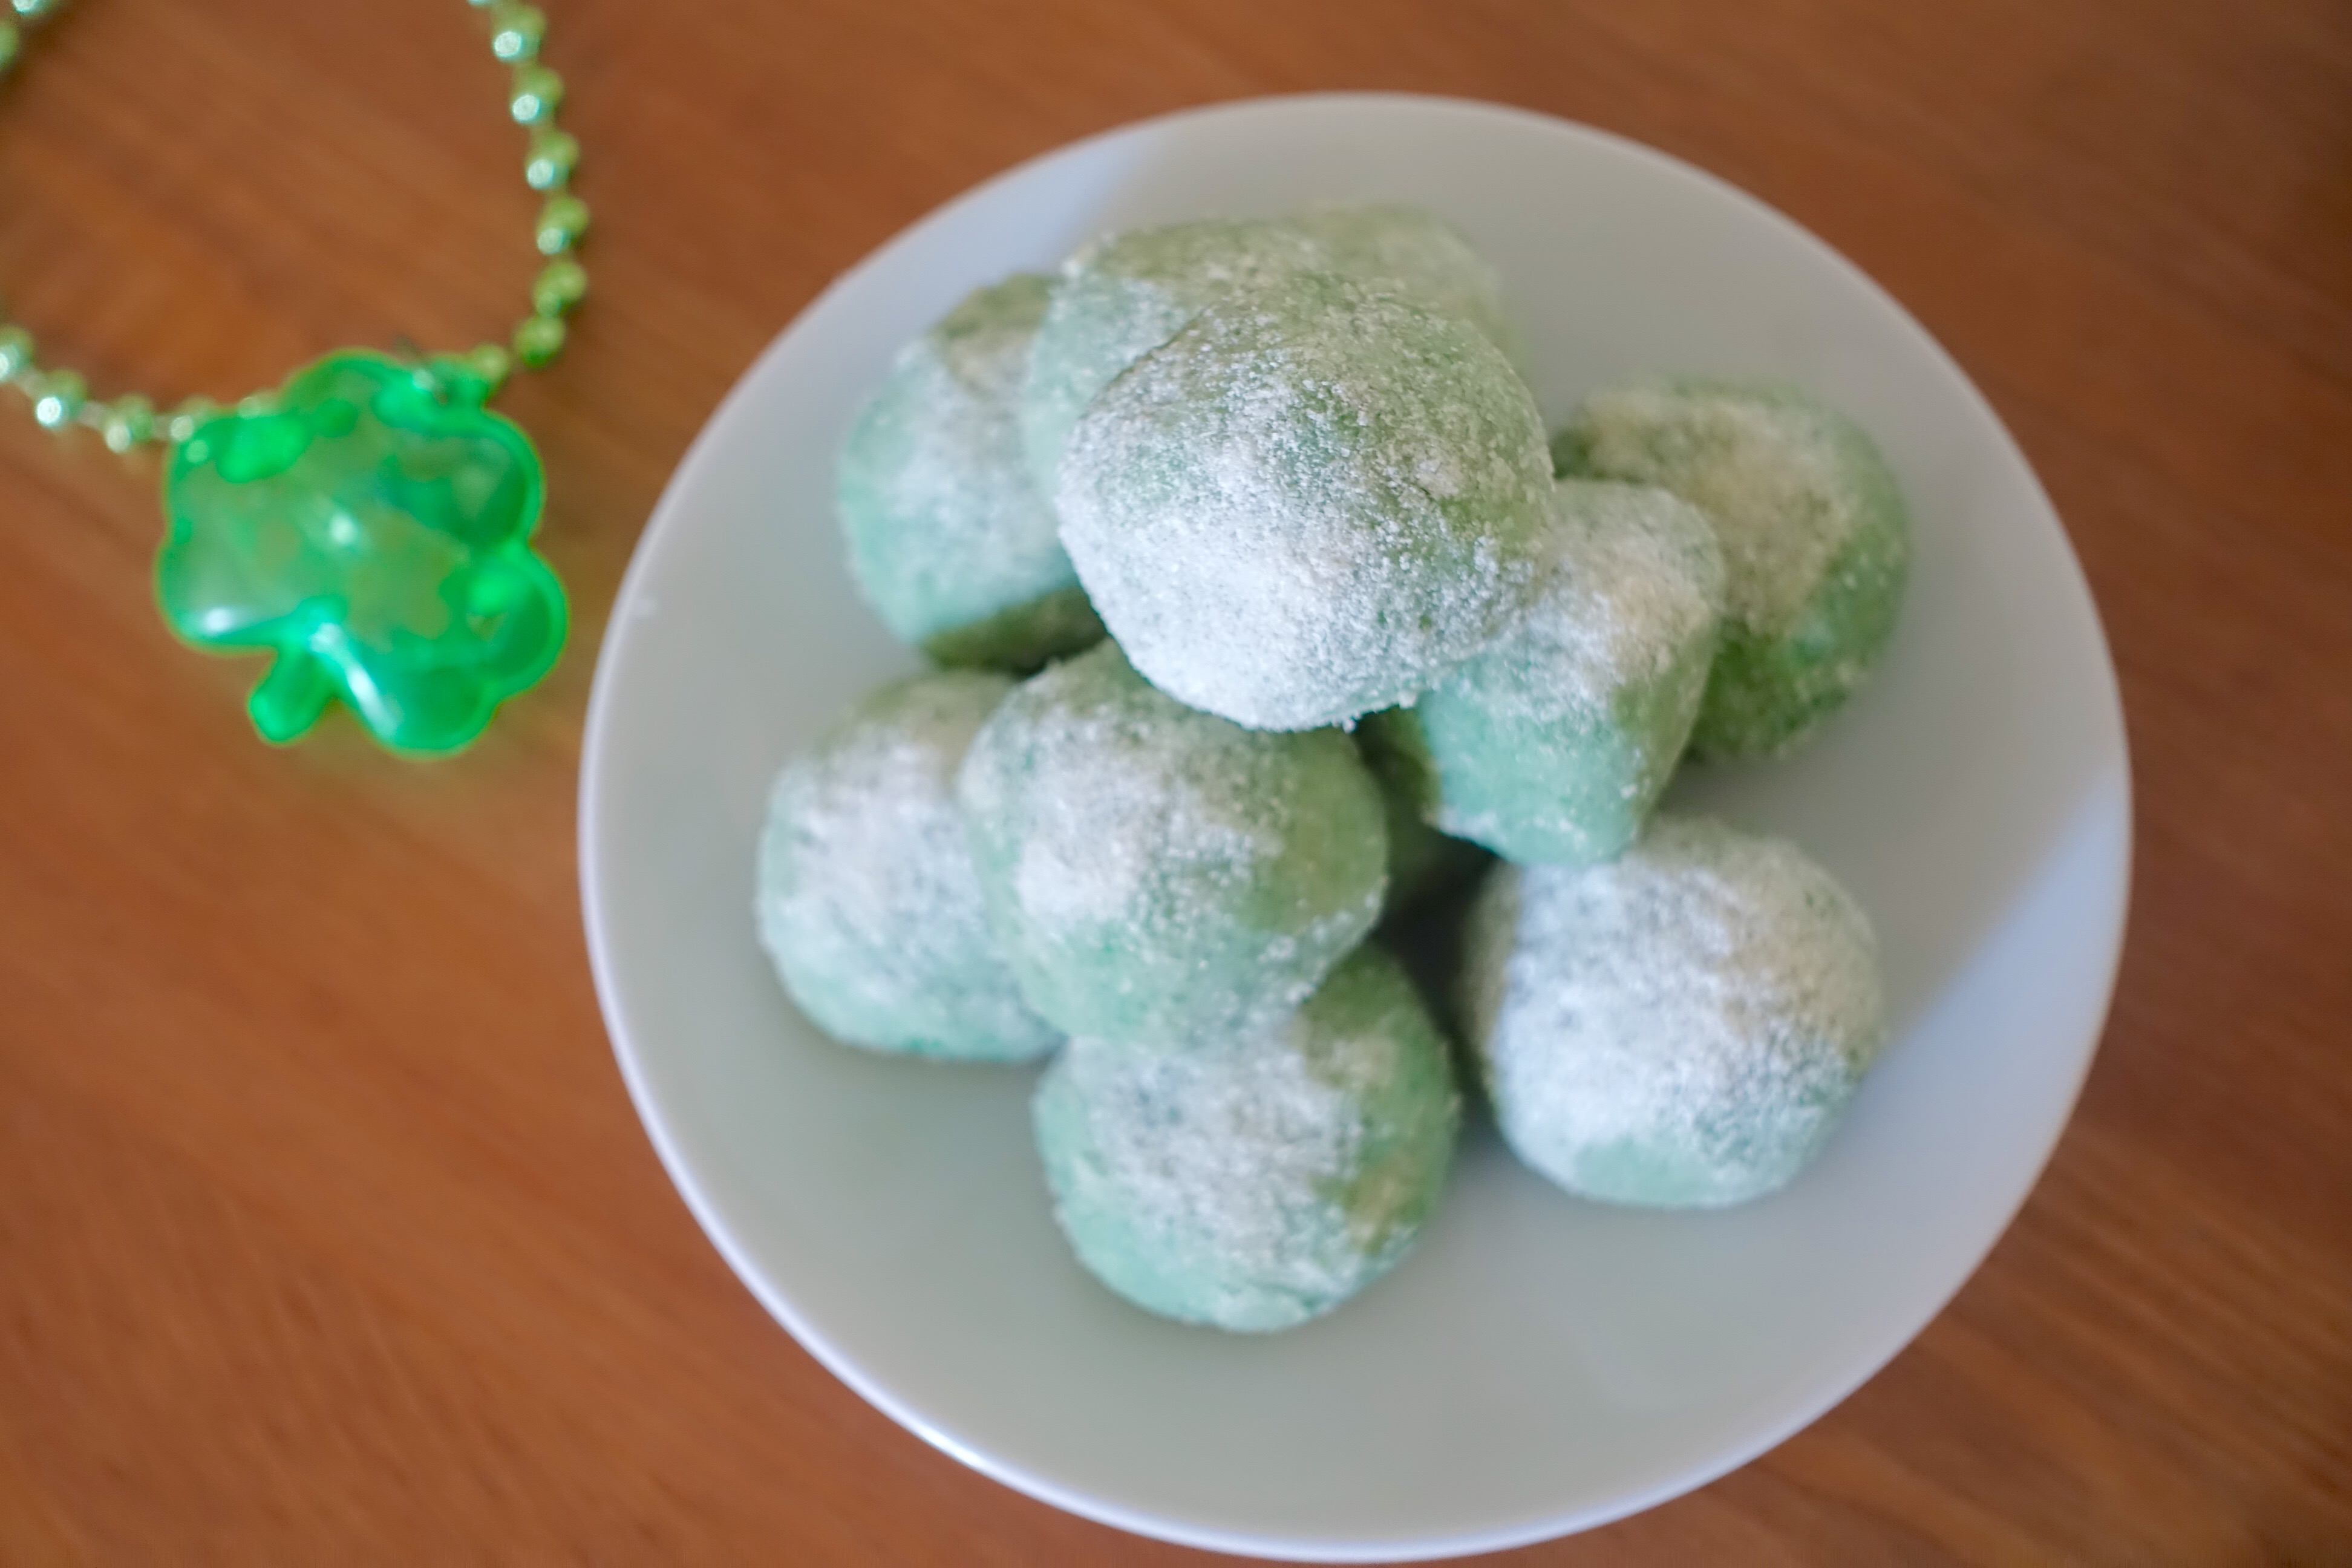
Moving on to the drunken story part of it all, these are Drunken Leprechaun Balls, I got the recipe from Pinterest and it’s rich like a fudge and creamy … like a shortbread dipped in powdered sugar and drenched in whiskey would be. Side note, these cookies are not minor friendly, you don’t cook the alcohol out at all, in fact you can really taste the whiskey in them which is awesome for adult whiskey lovers, not so awesome for 21<ers.
The taste of these reminded me of Italian wedding cookies except less crunchy and more tipsy! I’m sure you can make these without the alcohol, perhaps a sugary substitute or milk would work? Turn to Google if you want to recreate these for your family or the work place and let me know how they turn out! P.S. yes that would be a light up four leaf clover necklace, because why be at a bar if you can’t glow in the dark.
To see me make these live and in action, here is the video on my YouTube channel! Please Subscribe if you haven’t, more recipes to come on our Pinterest DIY-not series 😀
I hope you have a happy and safe holiday, as a mom it’s my duty to tell you not to drink and drive and to not let your friends do it either, so I’ll step off my soap box now and give you a half Irish green hug. Green like the color not green like the clean.
What are you doing today or this weekend to celebrate St. Patrick’s Day? Do you have a tradition like green pancakes or green beer? Let me know xx
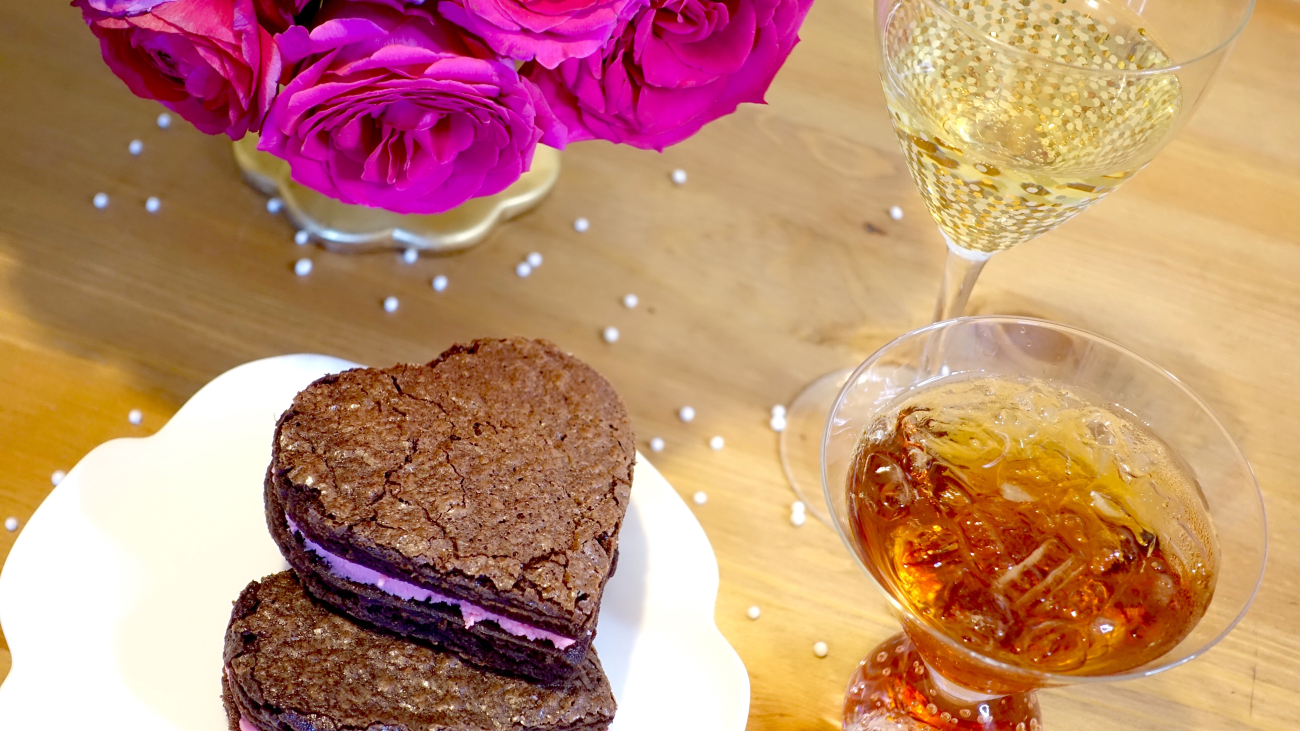
Happy Valentine’s Day! I hope you’ve been enjoying all of the themed recipes and videos that I’ve been posting lately, all in the name of love! Well this is for anyone who thinks today’s celebration is more of a corporate holiday … anyone who thinks today can suck it … and anyone who loves oreos. And brownies!!! We’re making “Bleeding Oreo Brownie Hearts” because everyone deserves a reason to love Valentine’s Day. Even if it’s for desserts and ‘the day after’ chocolate sales!
Imagine a brownie filled with oreo cream filling … yes it is just as mouth watering as it sounds! We ate 6 of them! SIX and zero regrets were had. Your mission should you choose to accept: make these, eat these, thank me later!
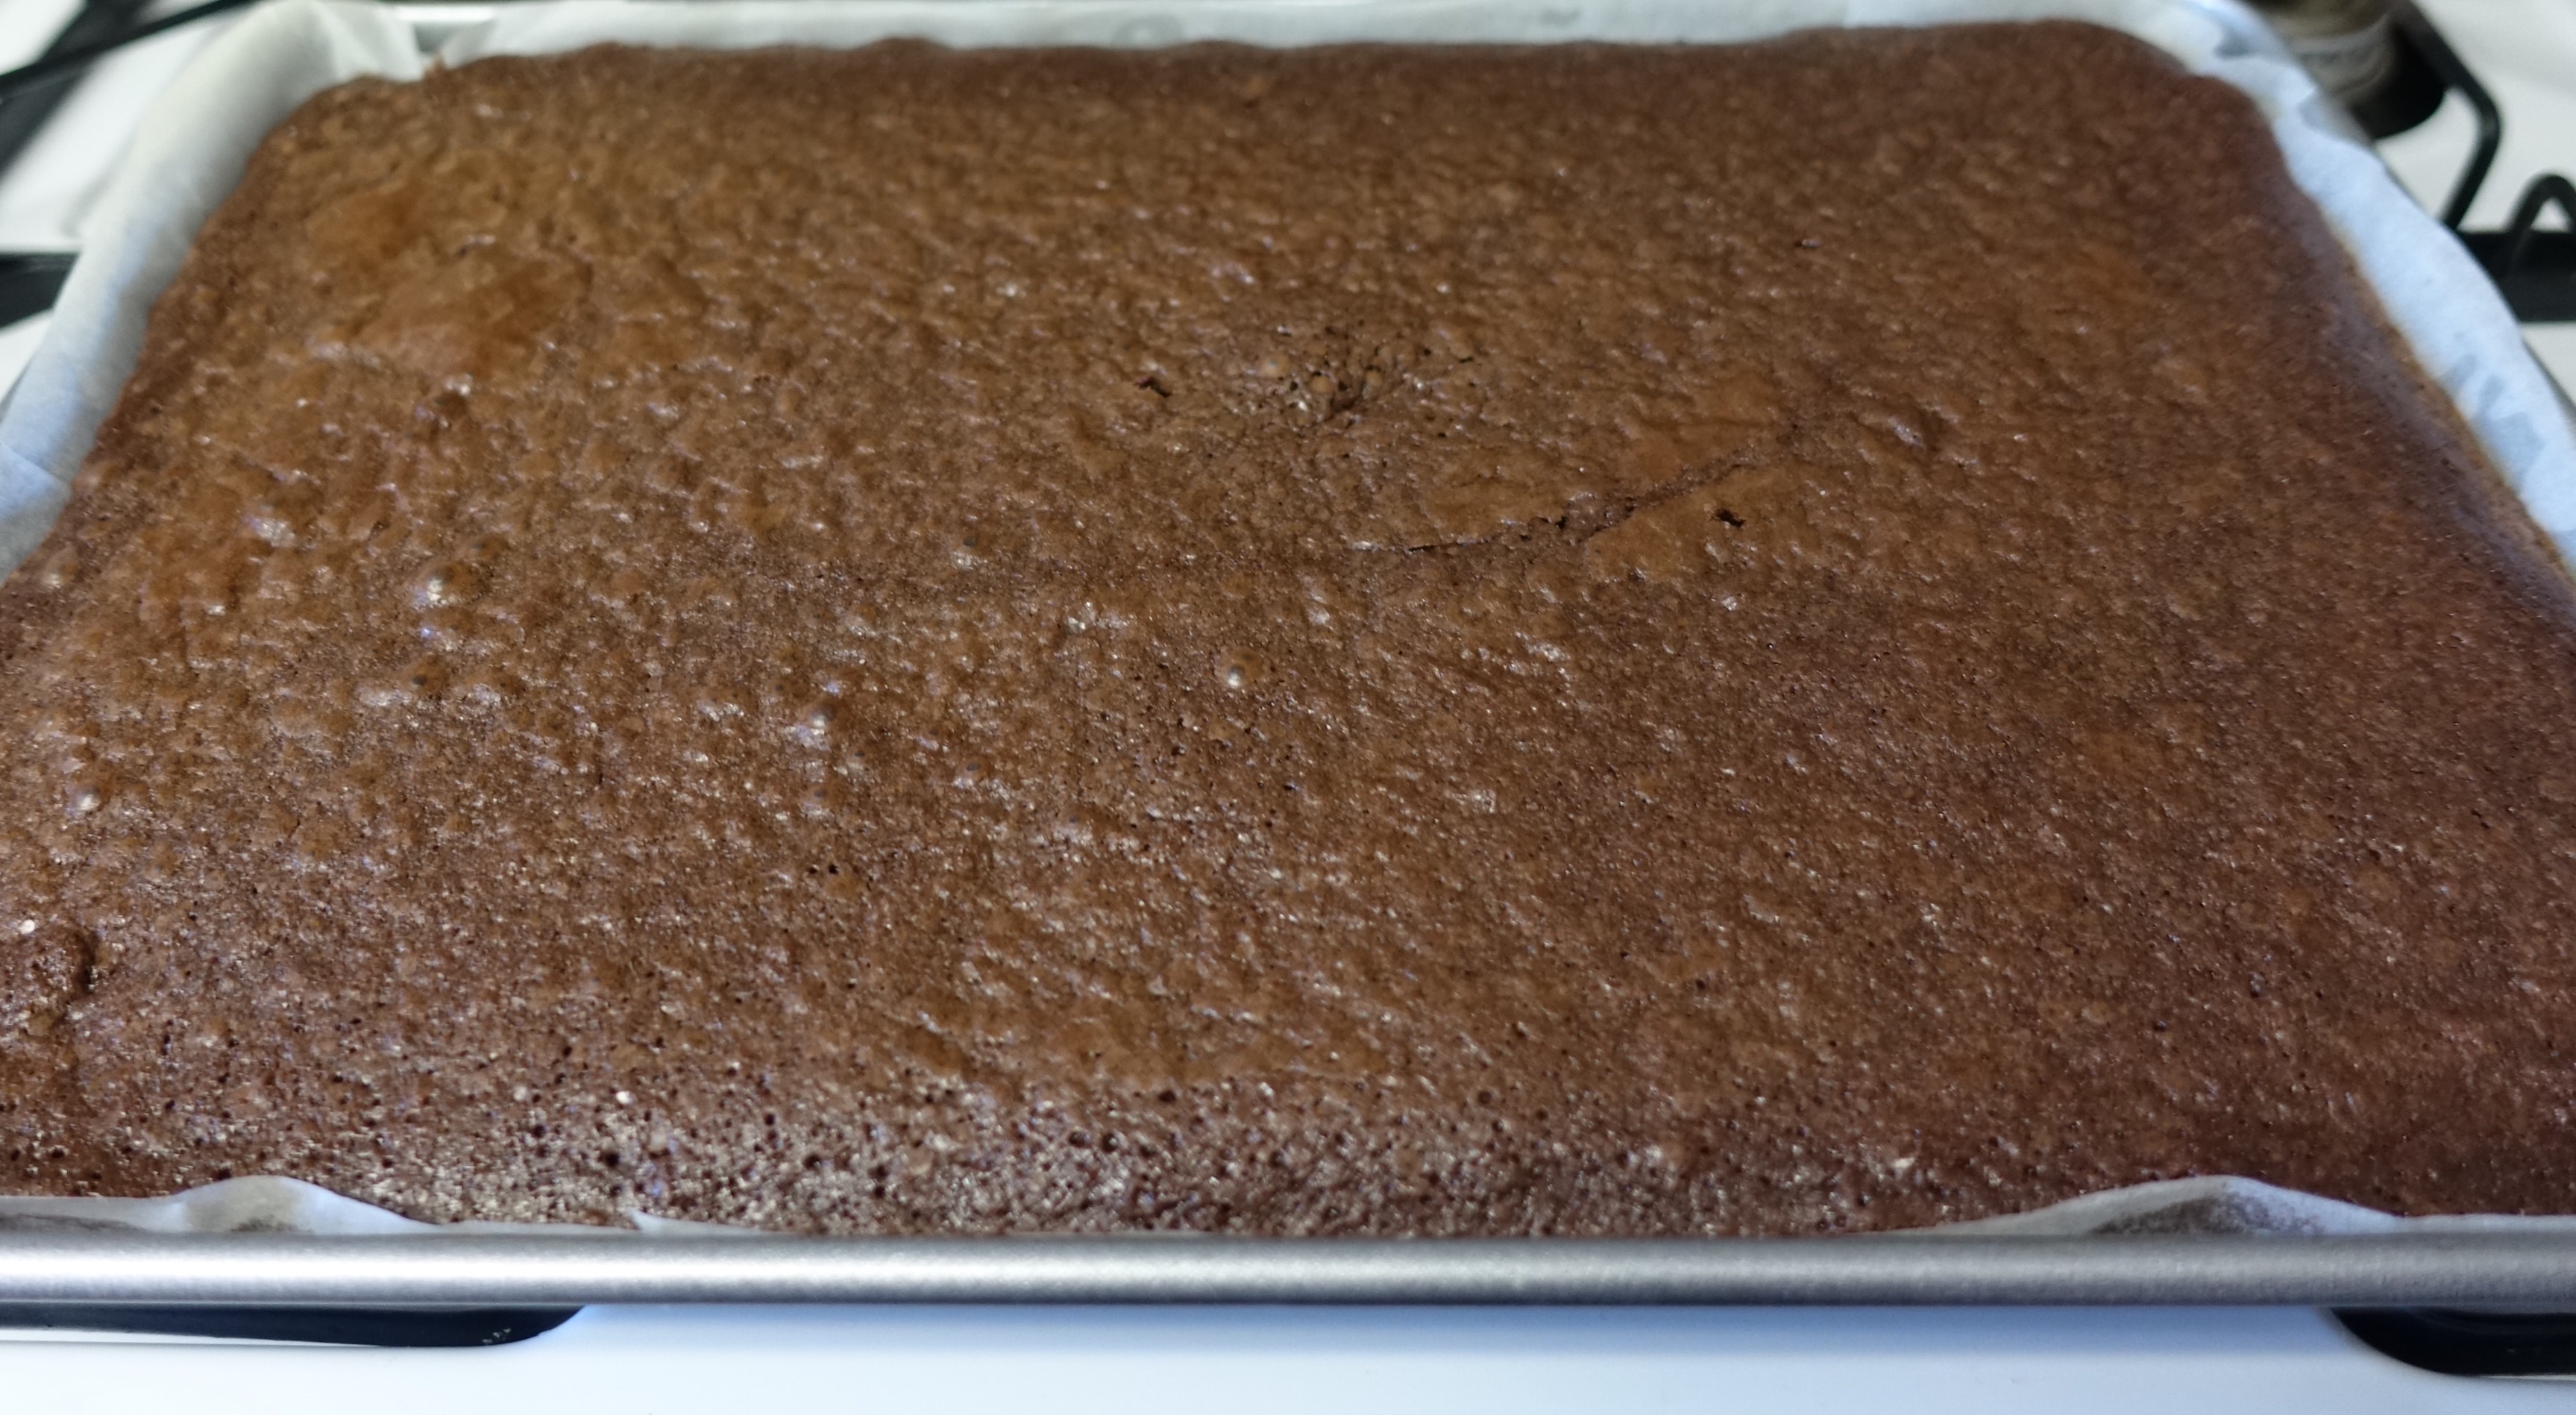
For the brownie part I just got a box of brownie mix (family sized) and made it according to the directions. I sprayed a 10×16 brownie pan with oil, lined it with parchment paper, and then sprayed it again just to make sure the hearts didn’t stick once I removed them. No one wants a crumbly broken heart, in life nor in theory.
Let the brownies cool before taking a heart shaped cookie cutter to it, and in the meantime make your oreo filling, the ‘bleeding’ part of it. You’ll need:
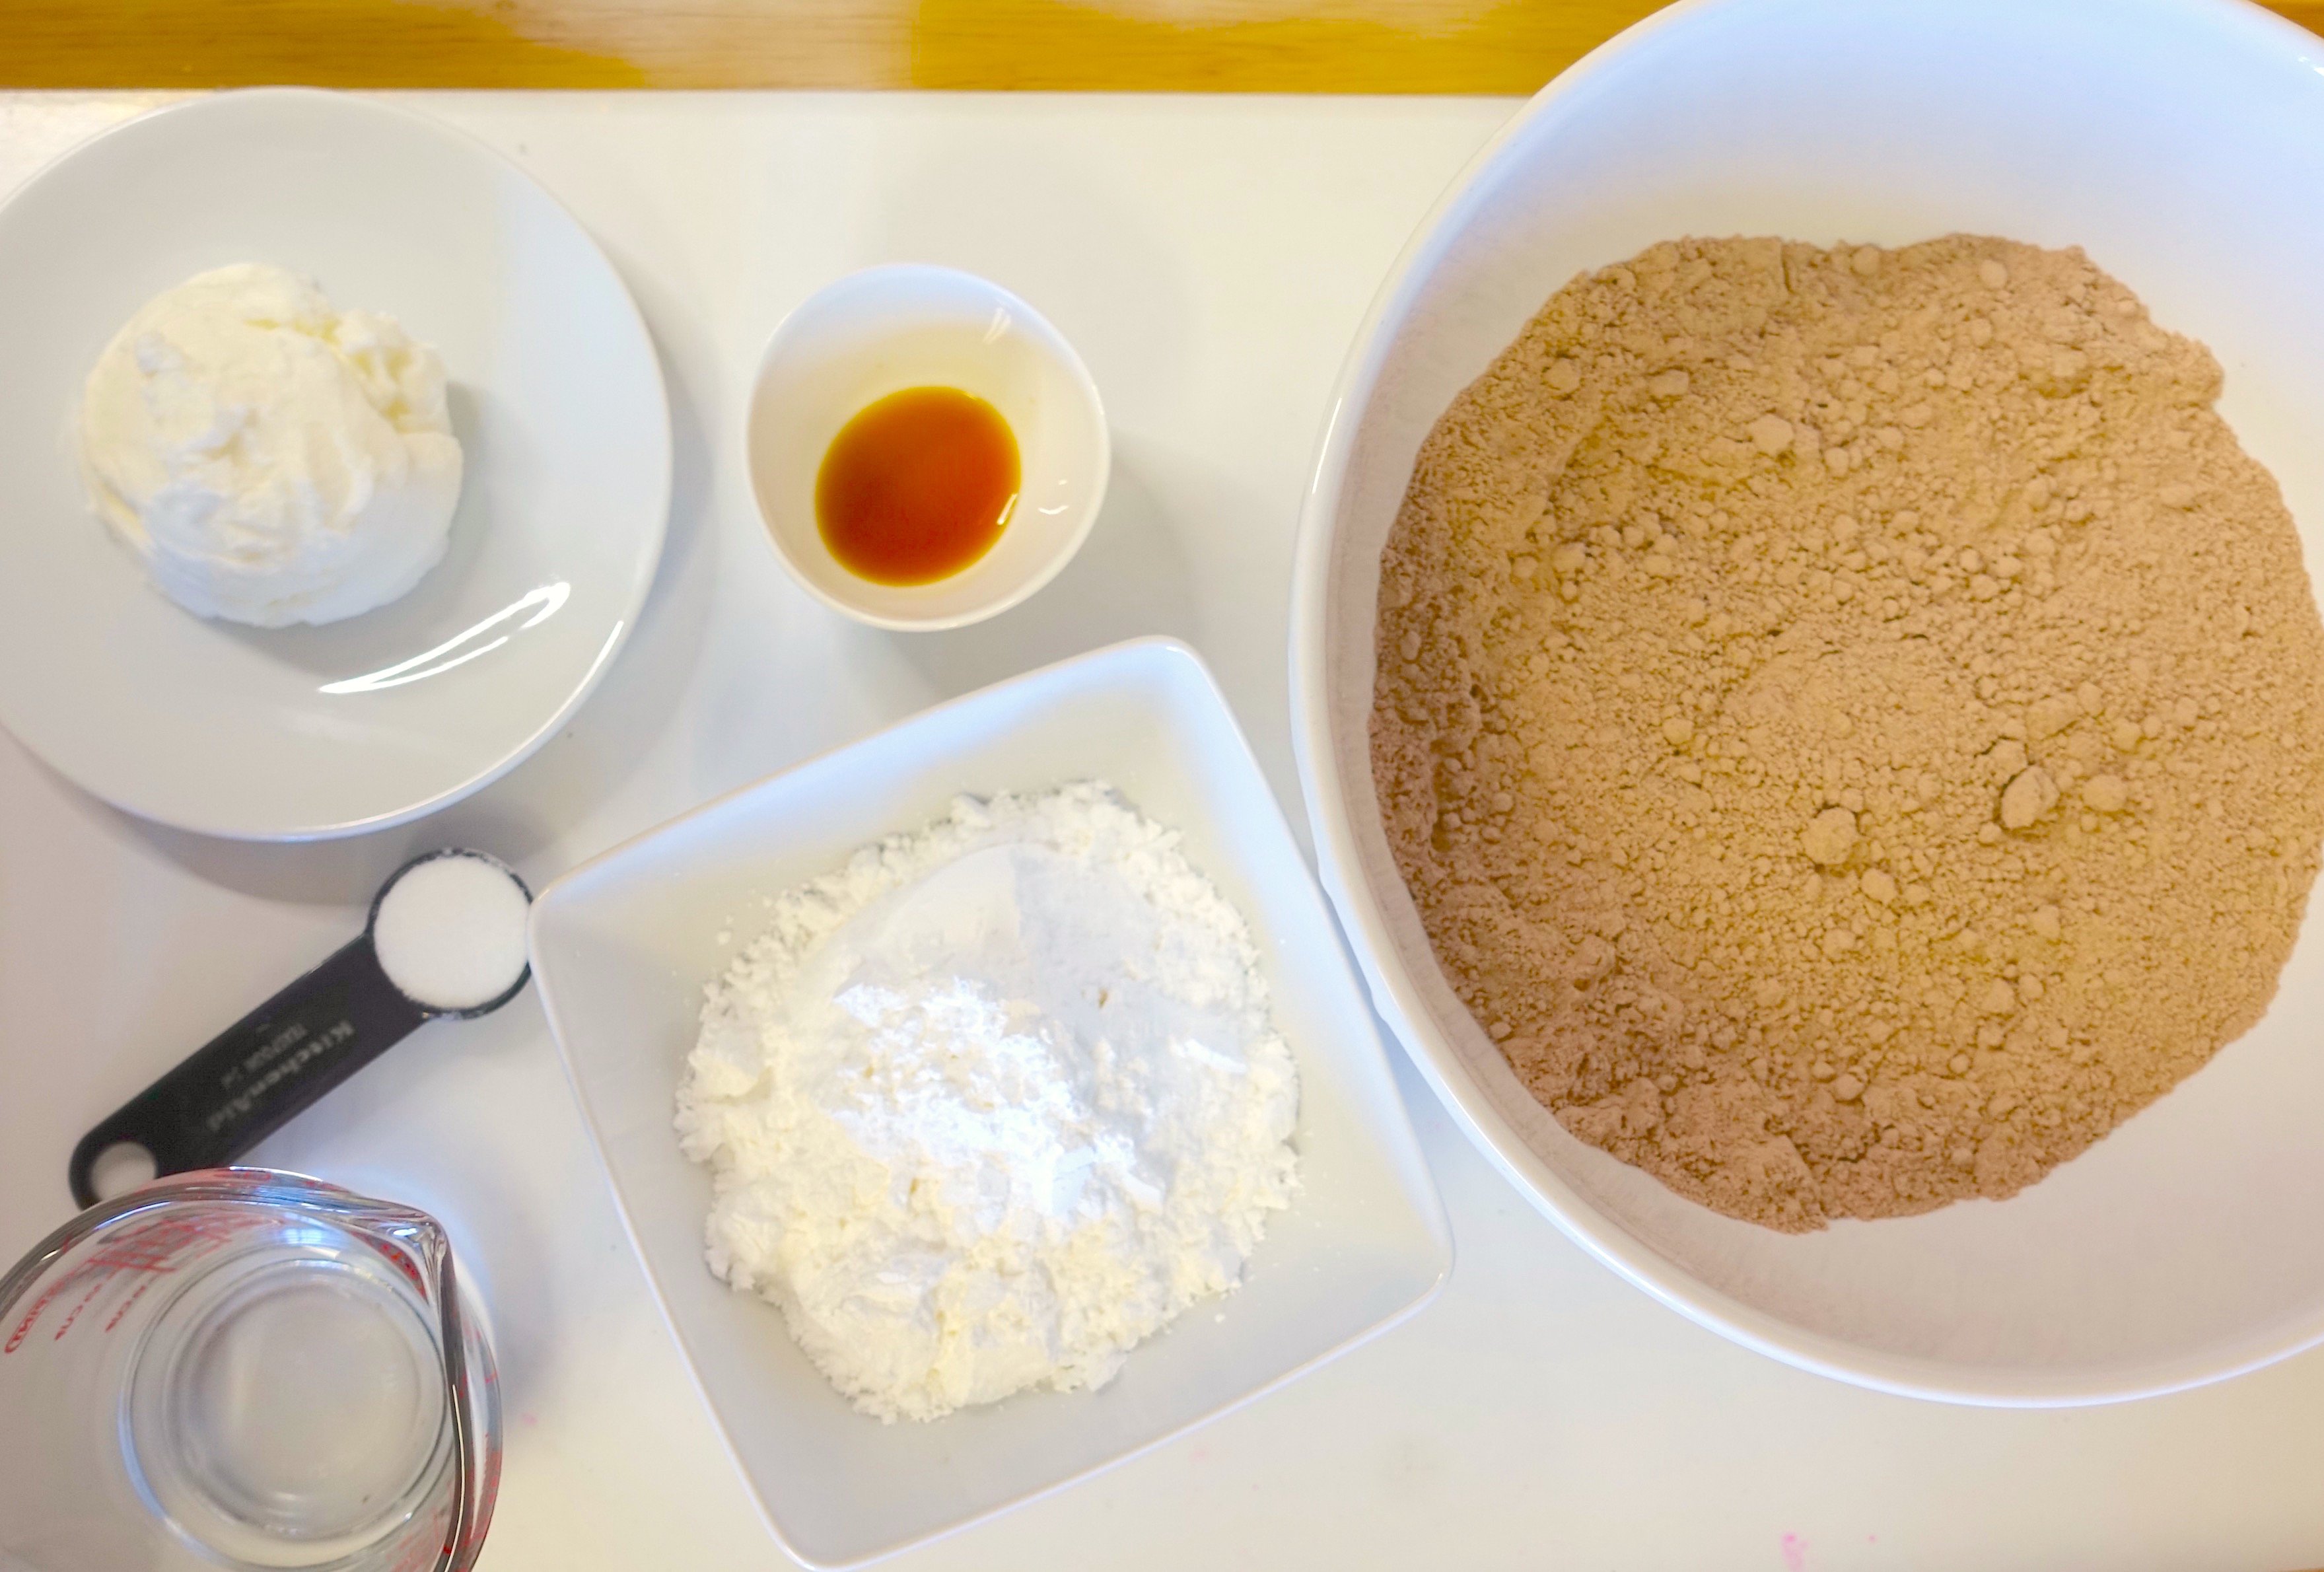
3 cups powdered sugar
ABOUT 1/2 vegetable shortening
5 tablespoons hot water (you will eye ball this when you make it)
1/2 teaspoon vanilla extract
Red food coloring
1 teaspoon sugar
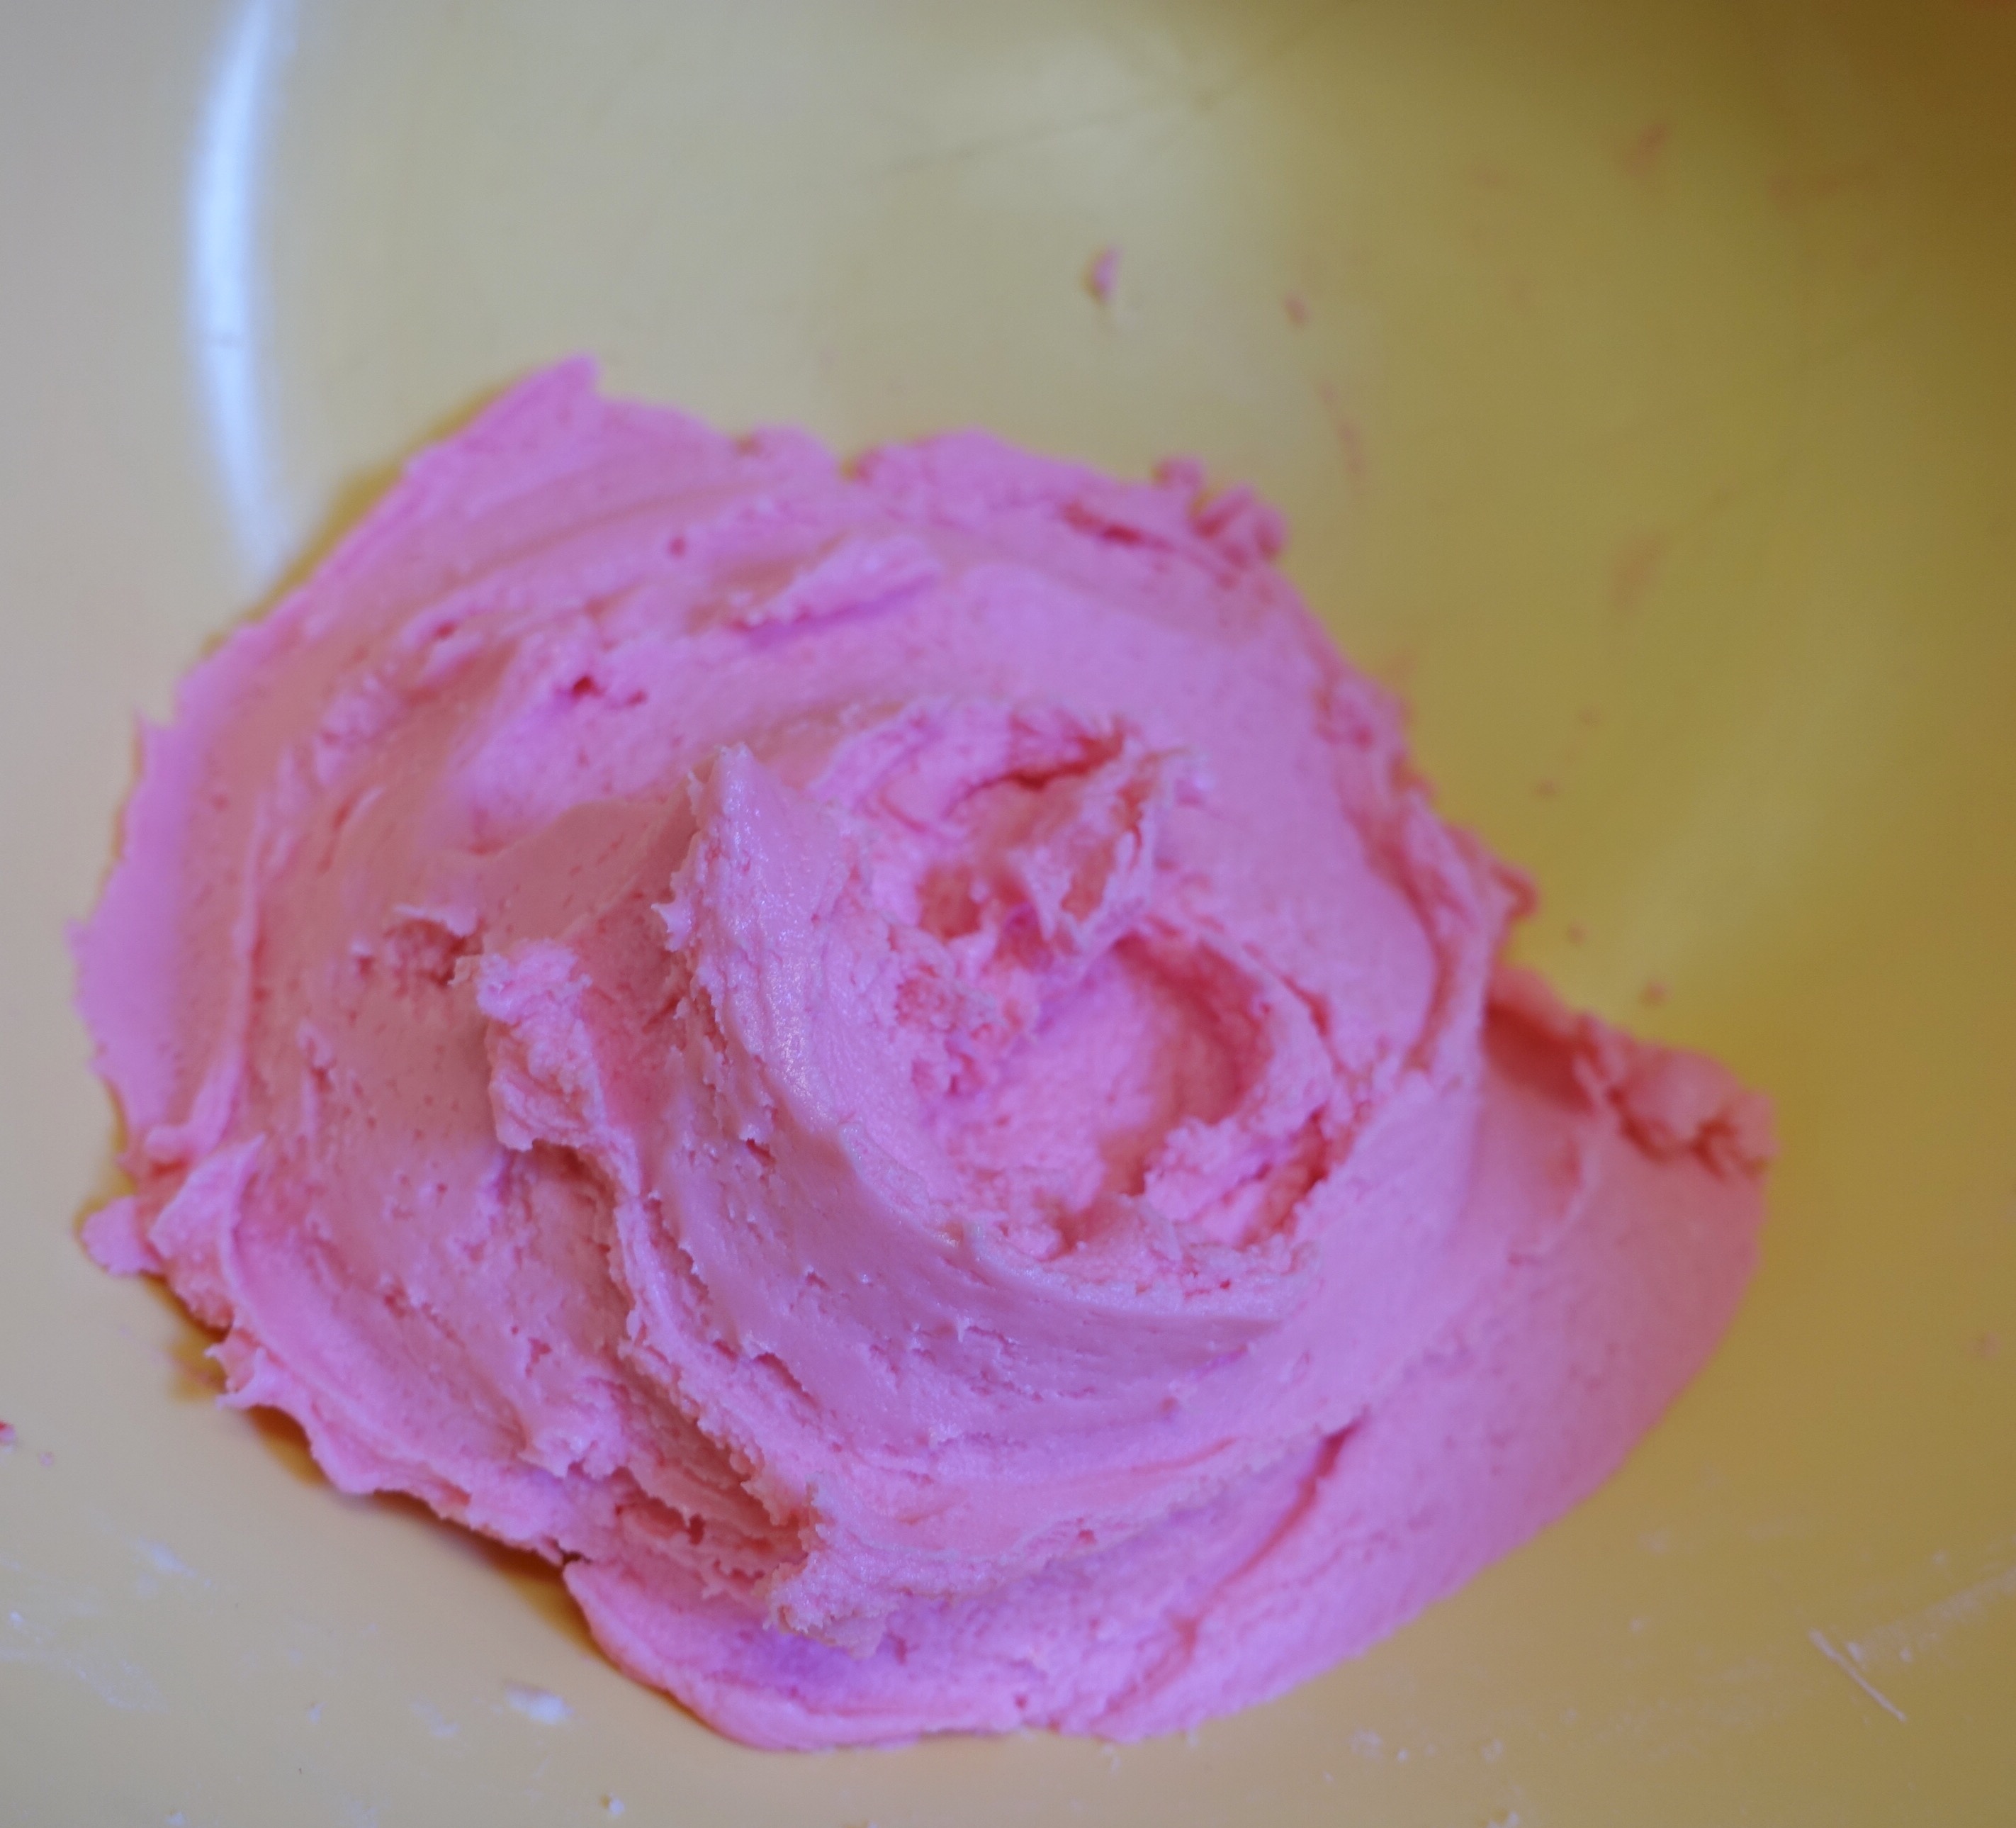
♥ Combine all of the ingredients in a bowl and save adding in the water for last. Start with 4 tablespoons of hot water and if your mixture is too thick then add in 1 tablespoon at a time until you get the desired consistency. Which is pretty thick yet smooth, like an oreo filling would be.
Once you’ve added the red food coloring (I used about 7 drops) you get this really pretty pile of sweetness! I had about half a cup of this just from taste testing! Note: This makes a lot of filling, enough for 2 batches of brownies if you’re using it in this ‘sandwich’ style.
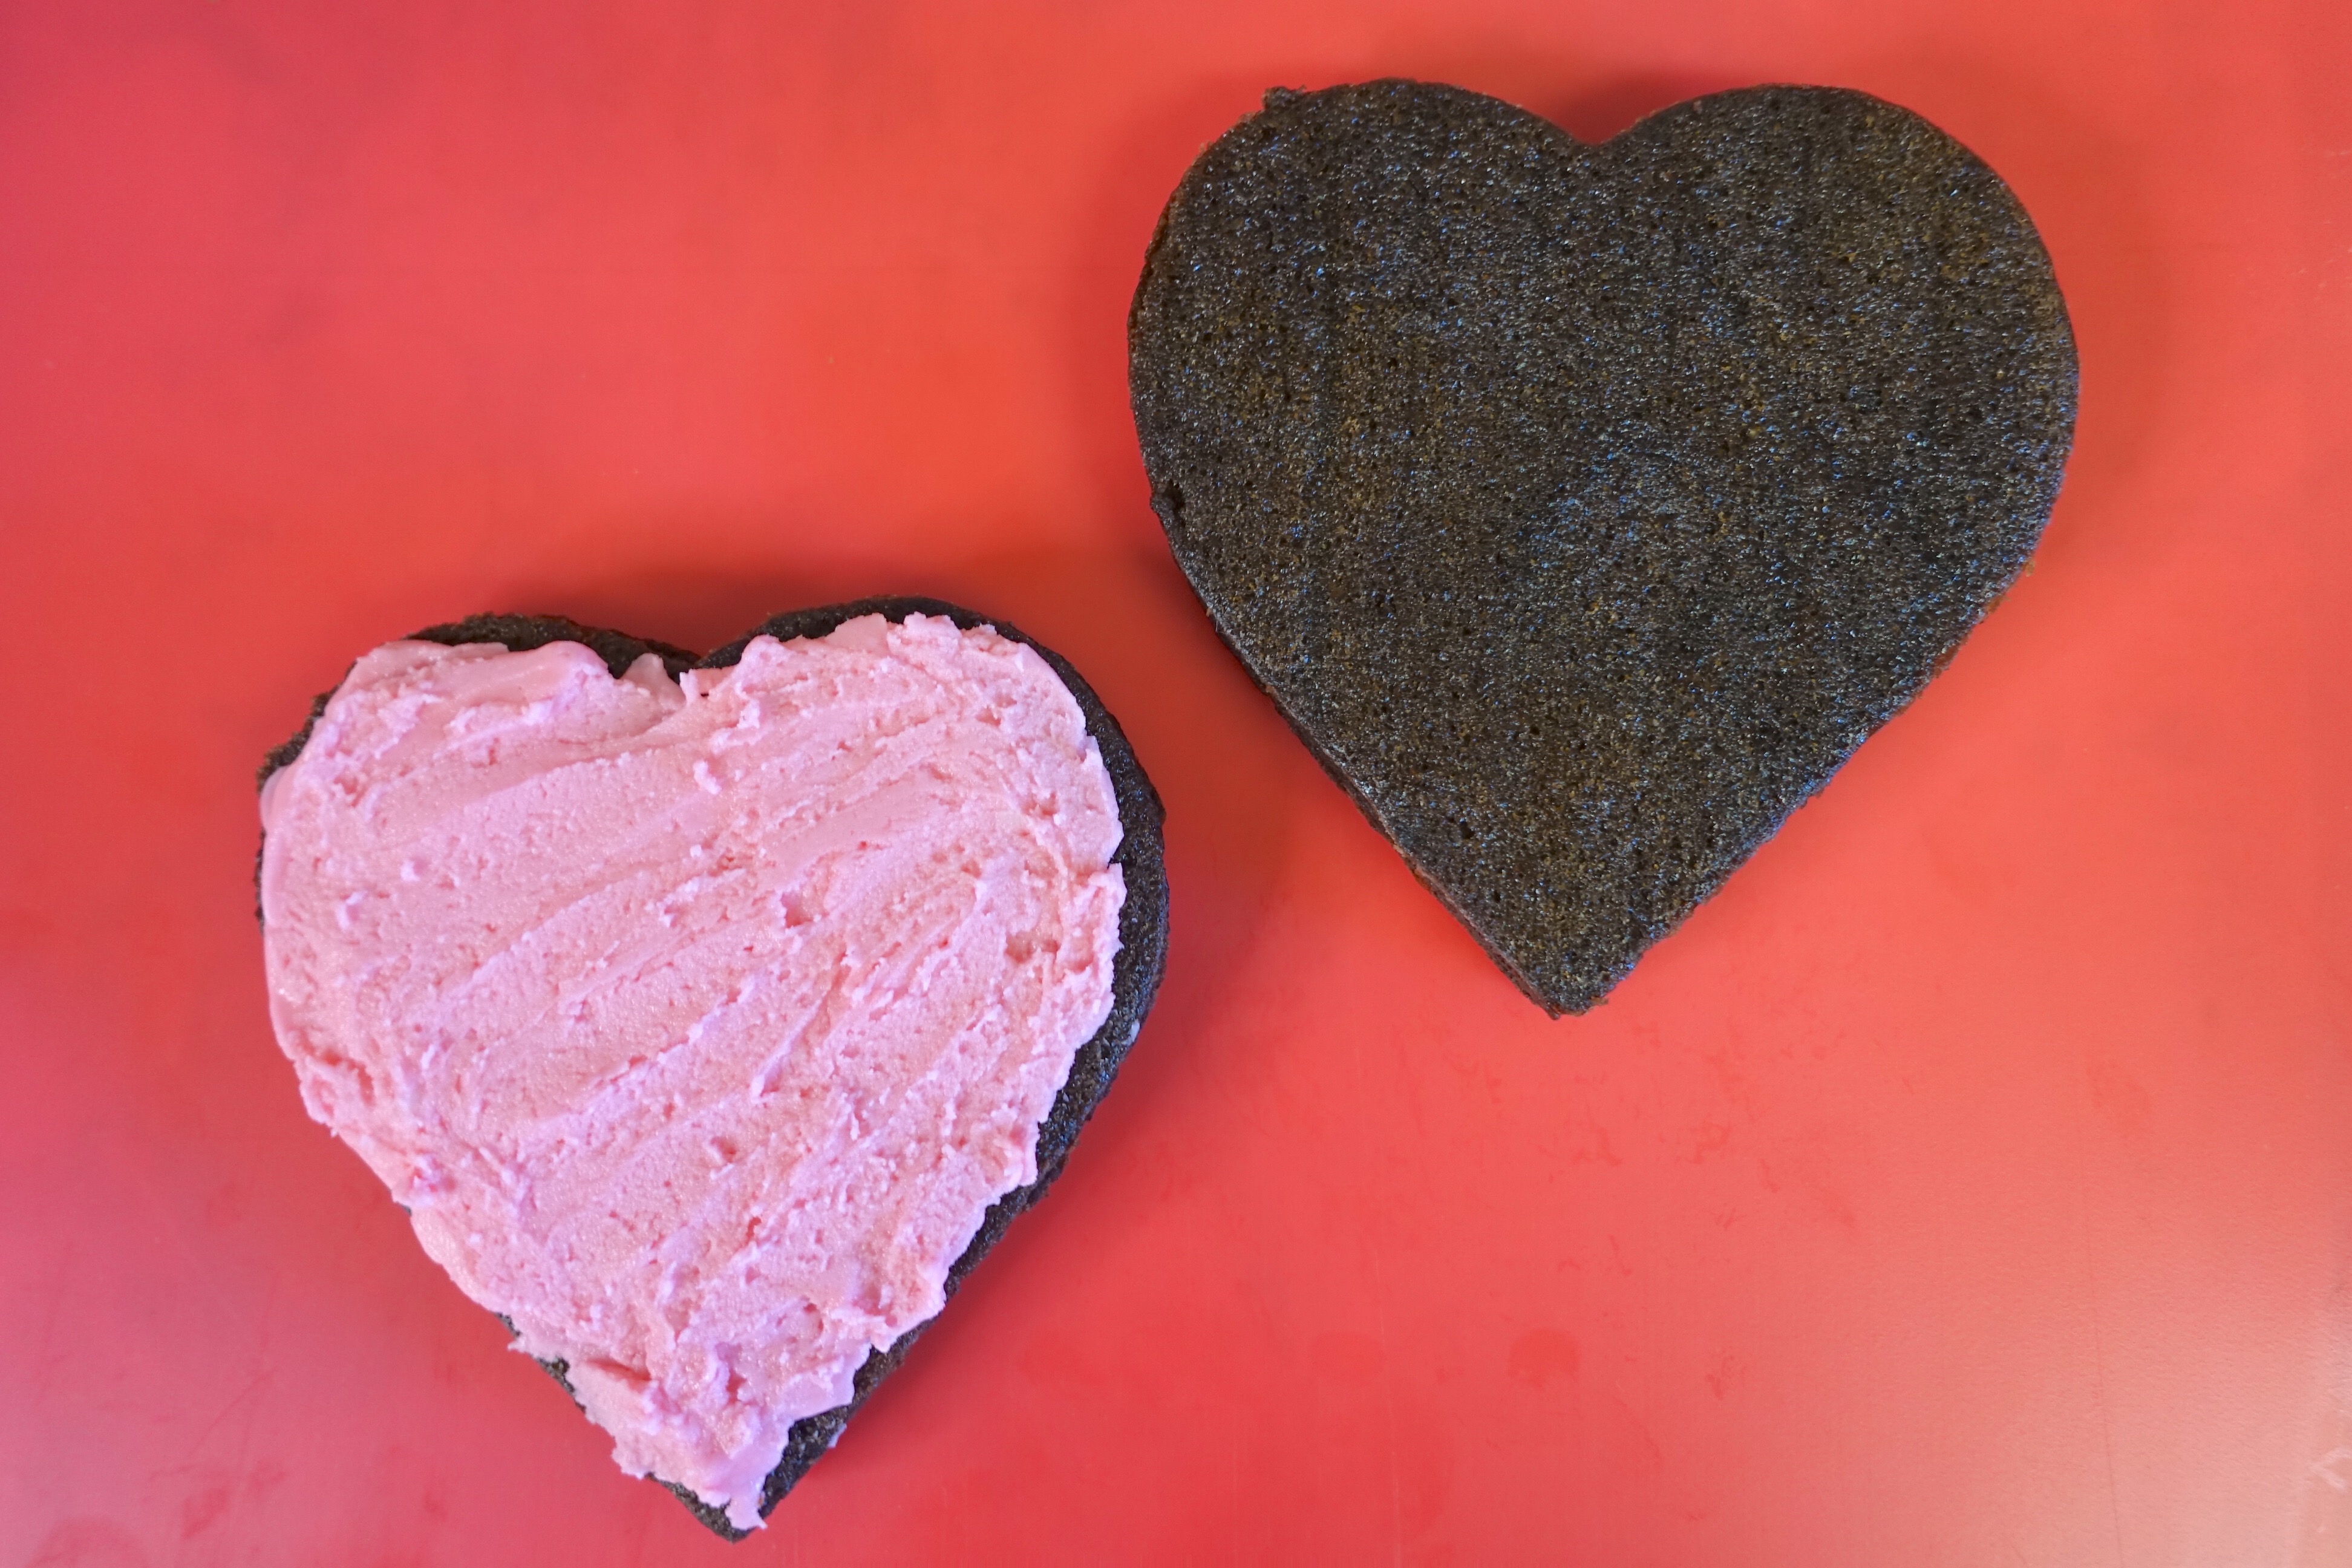
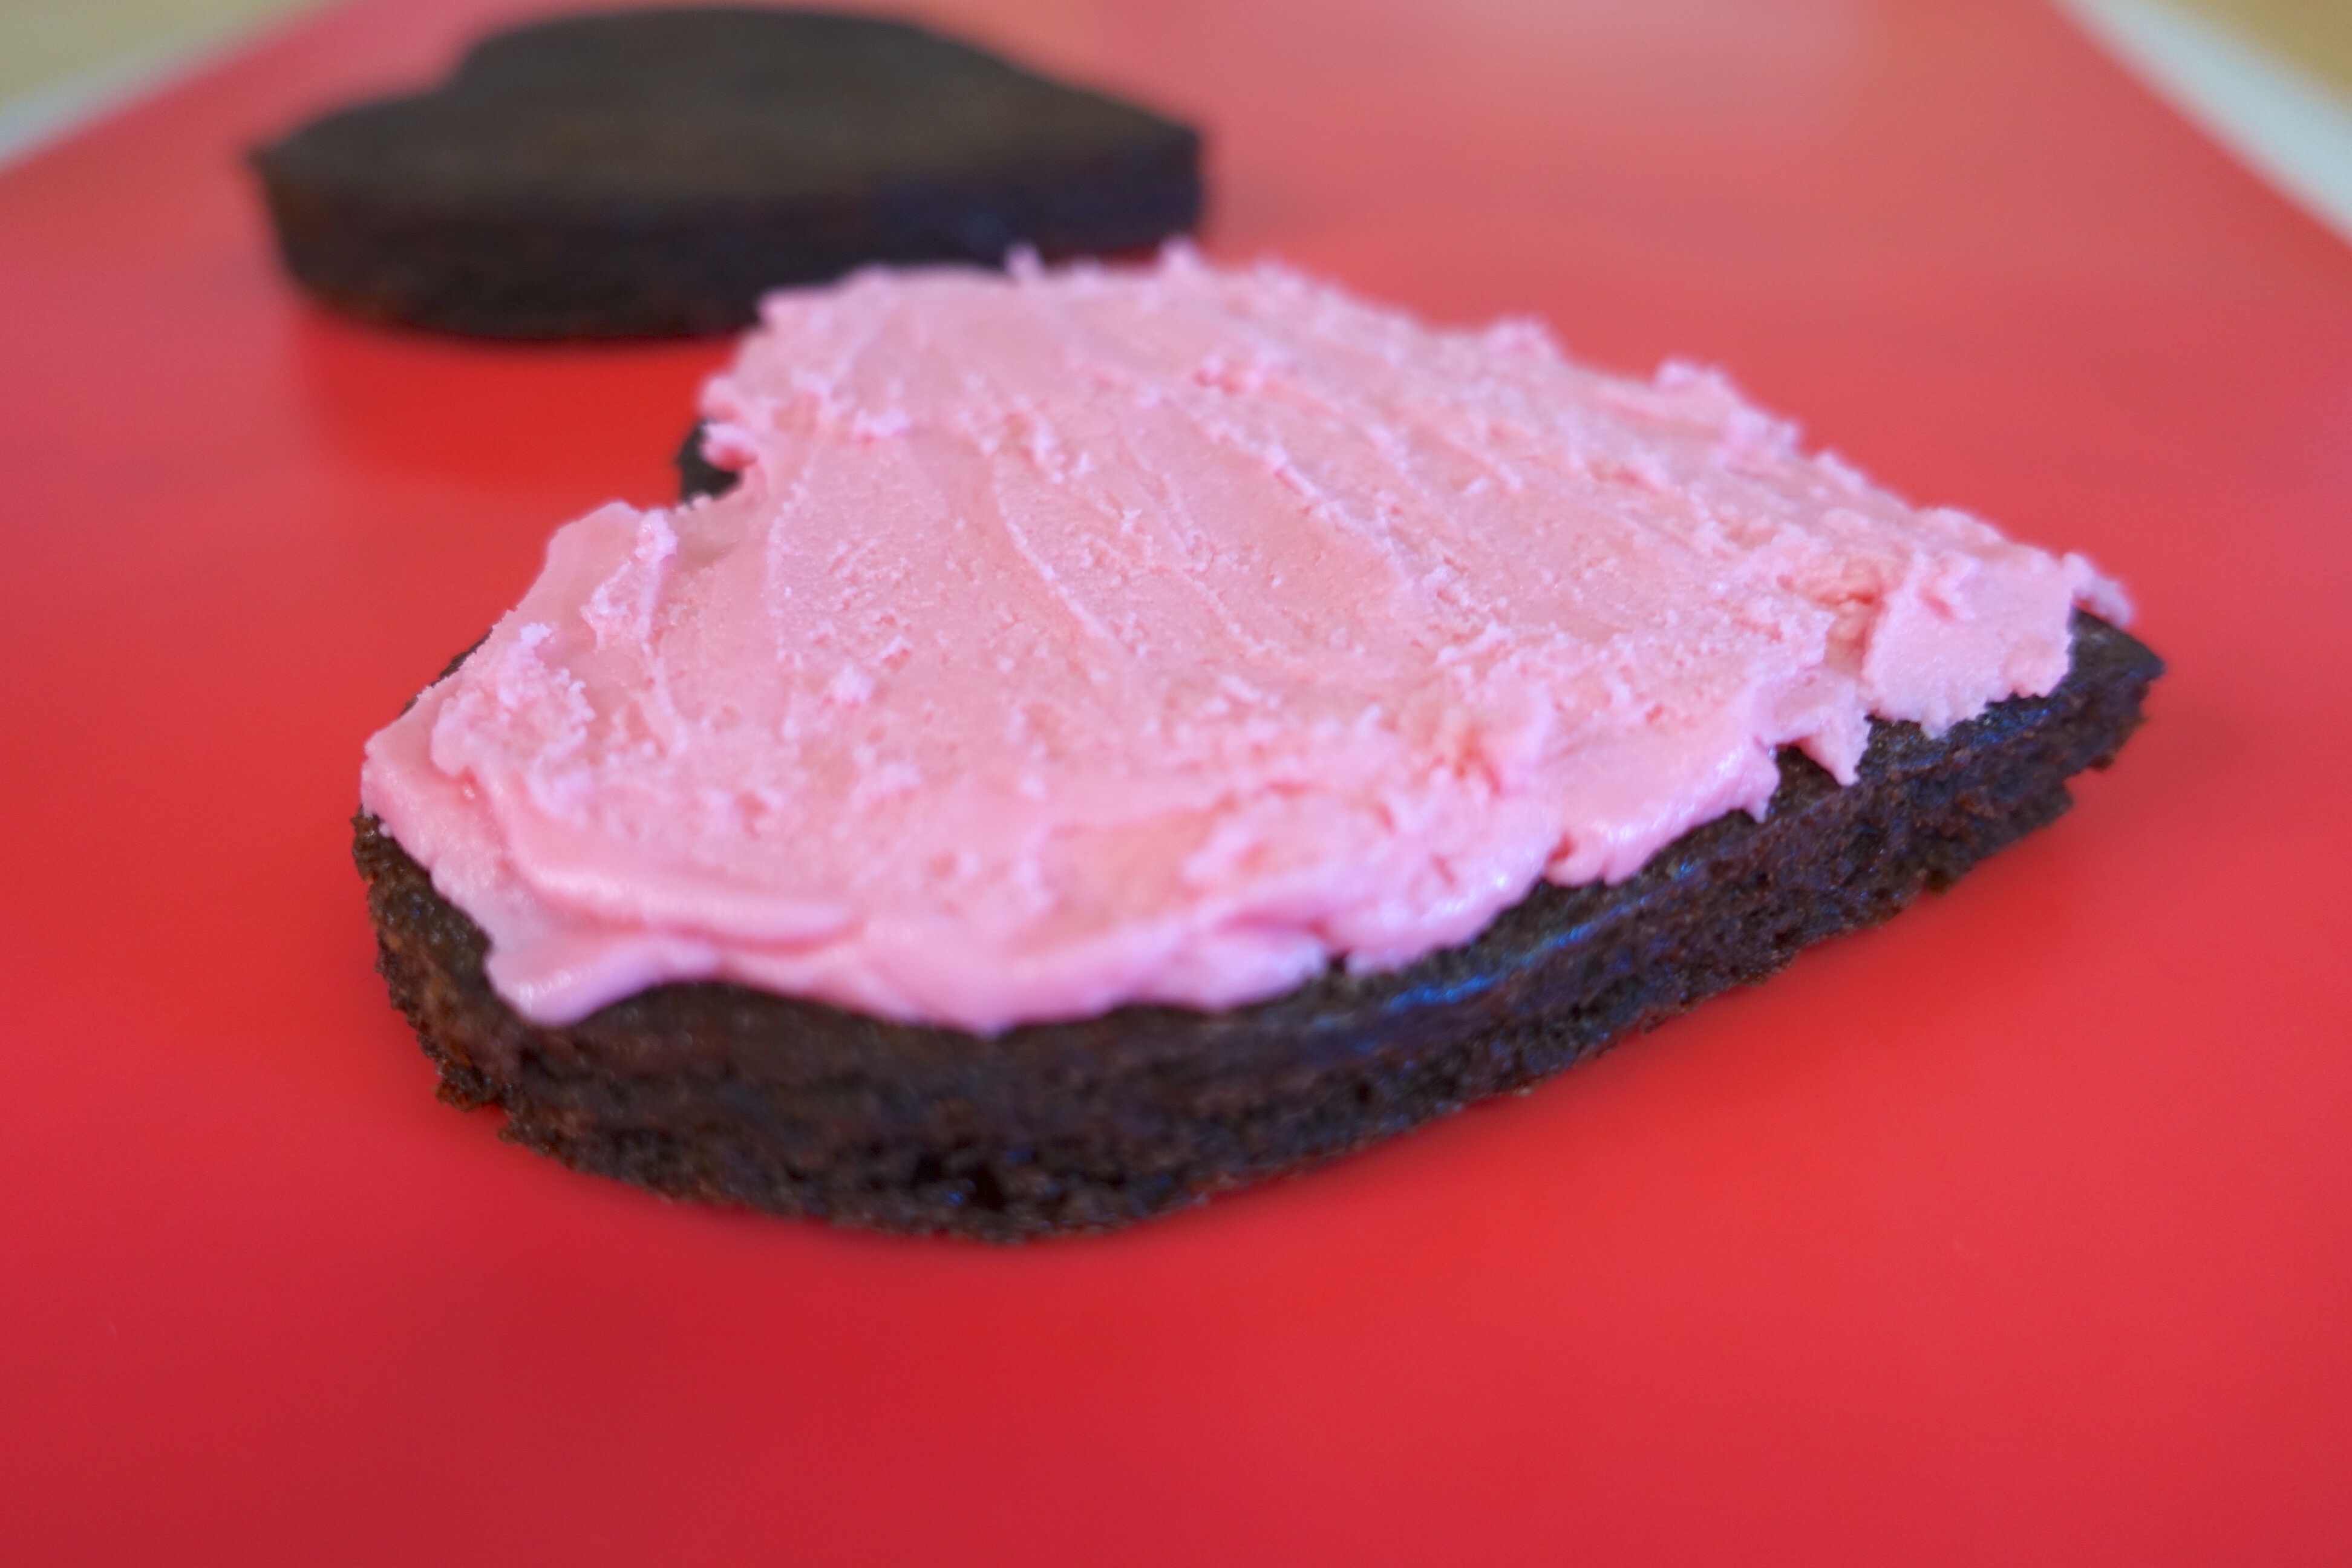
Once your brownies have cooled, take your cookie cutter and remove the shapes until all of your brownie pan has been used up. The brownies will be fairly thin, this is a good thing though because you’ll be stacking them once they’re filled.
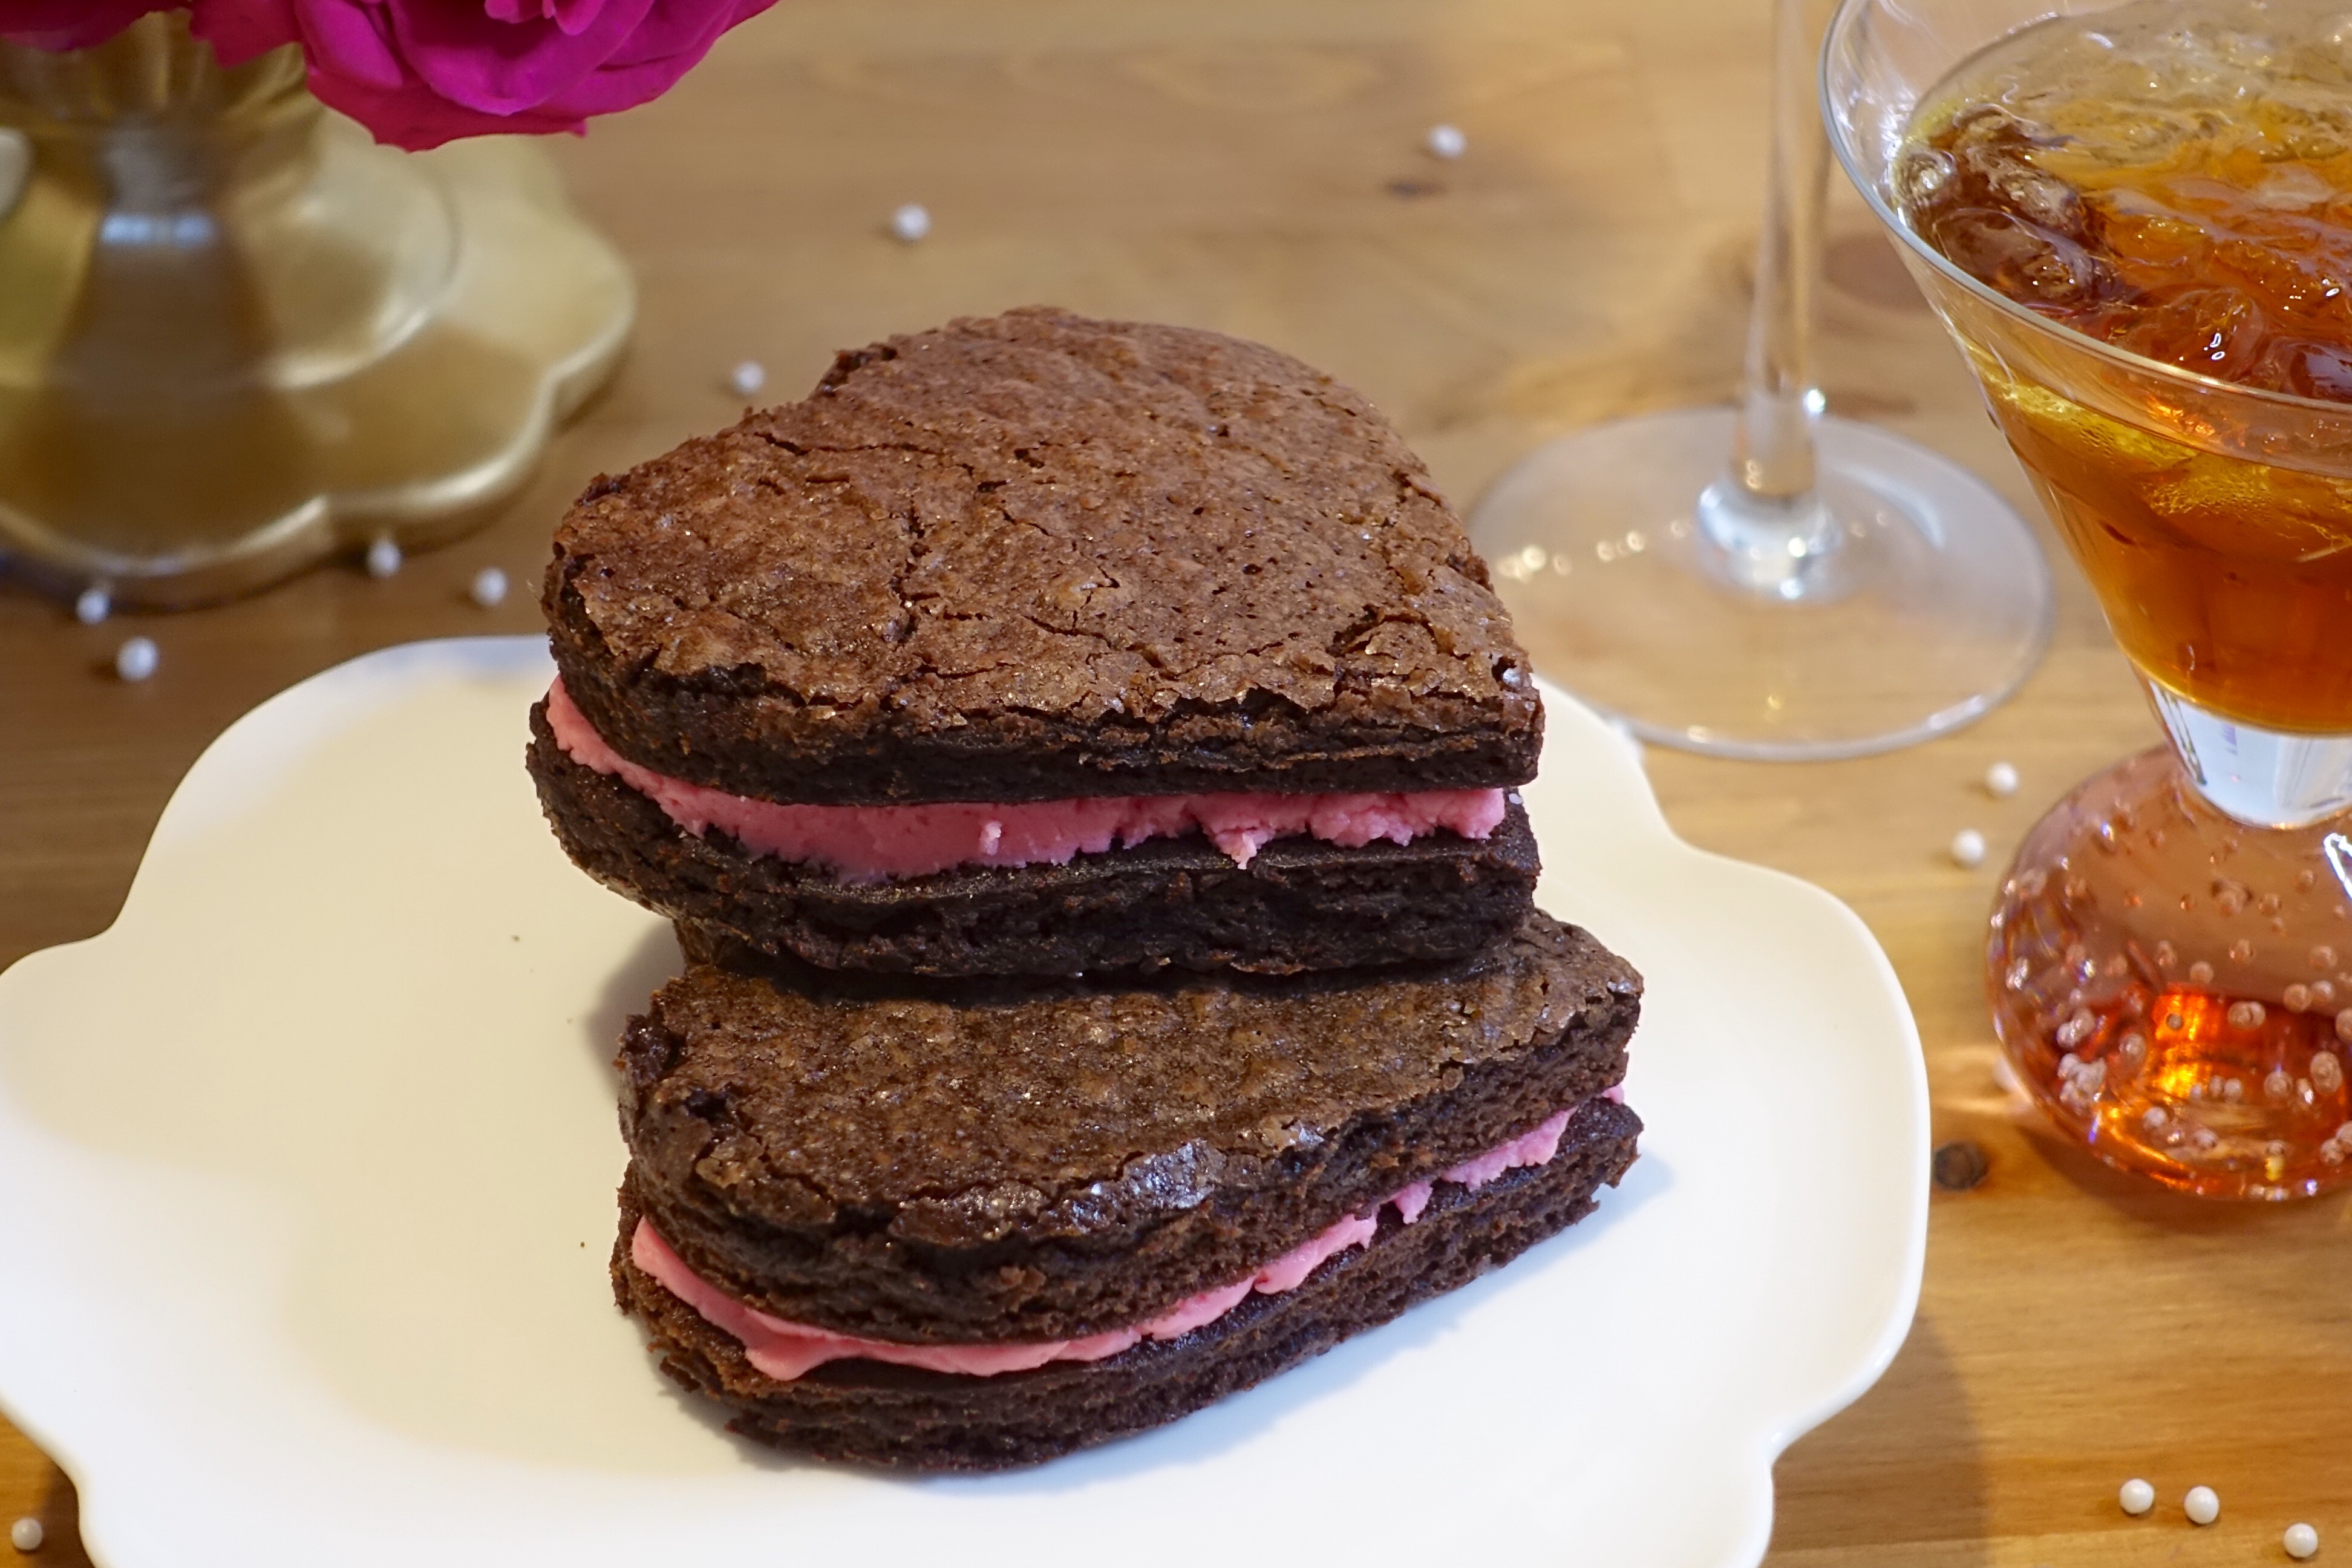
Spread a dollop of the filling between two hearts and then close the heart sandwich by placing the other half on top (smooth side down). Continue with this until you’ve used up all of your heart brownies. You can make the filling part as thick or as thin as you’d like depending on your sweet tooth preference.
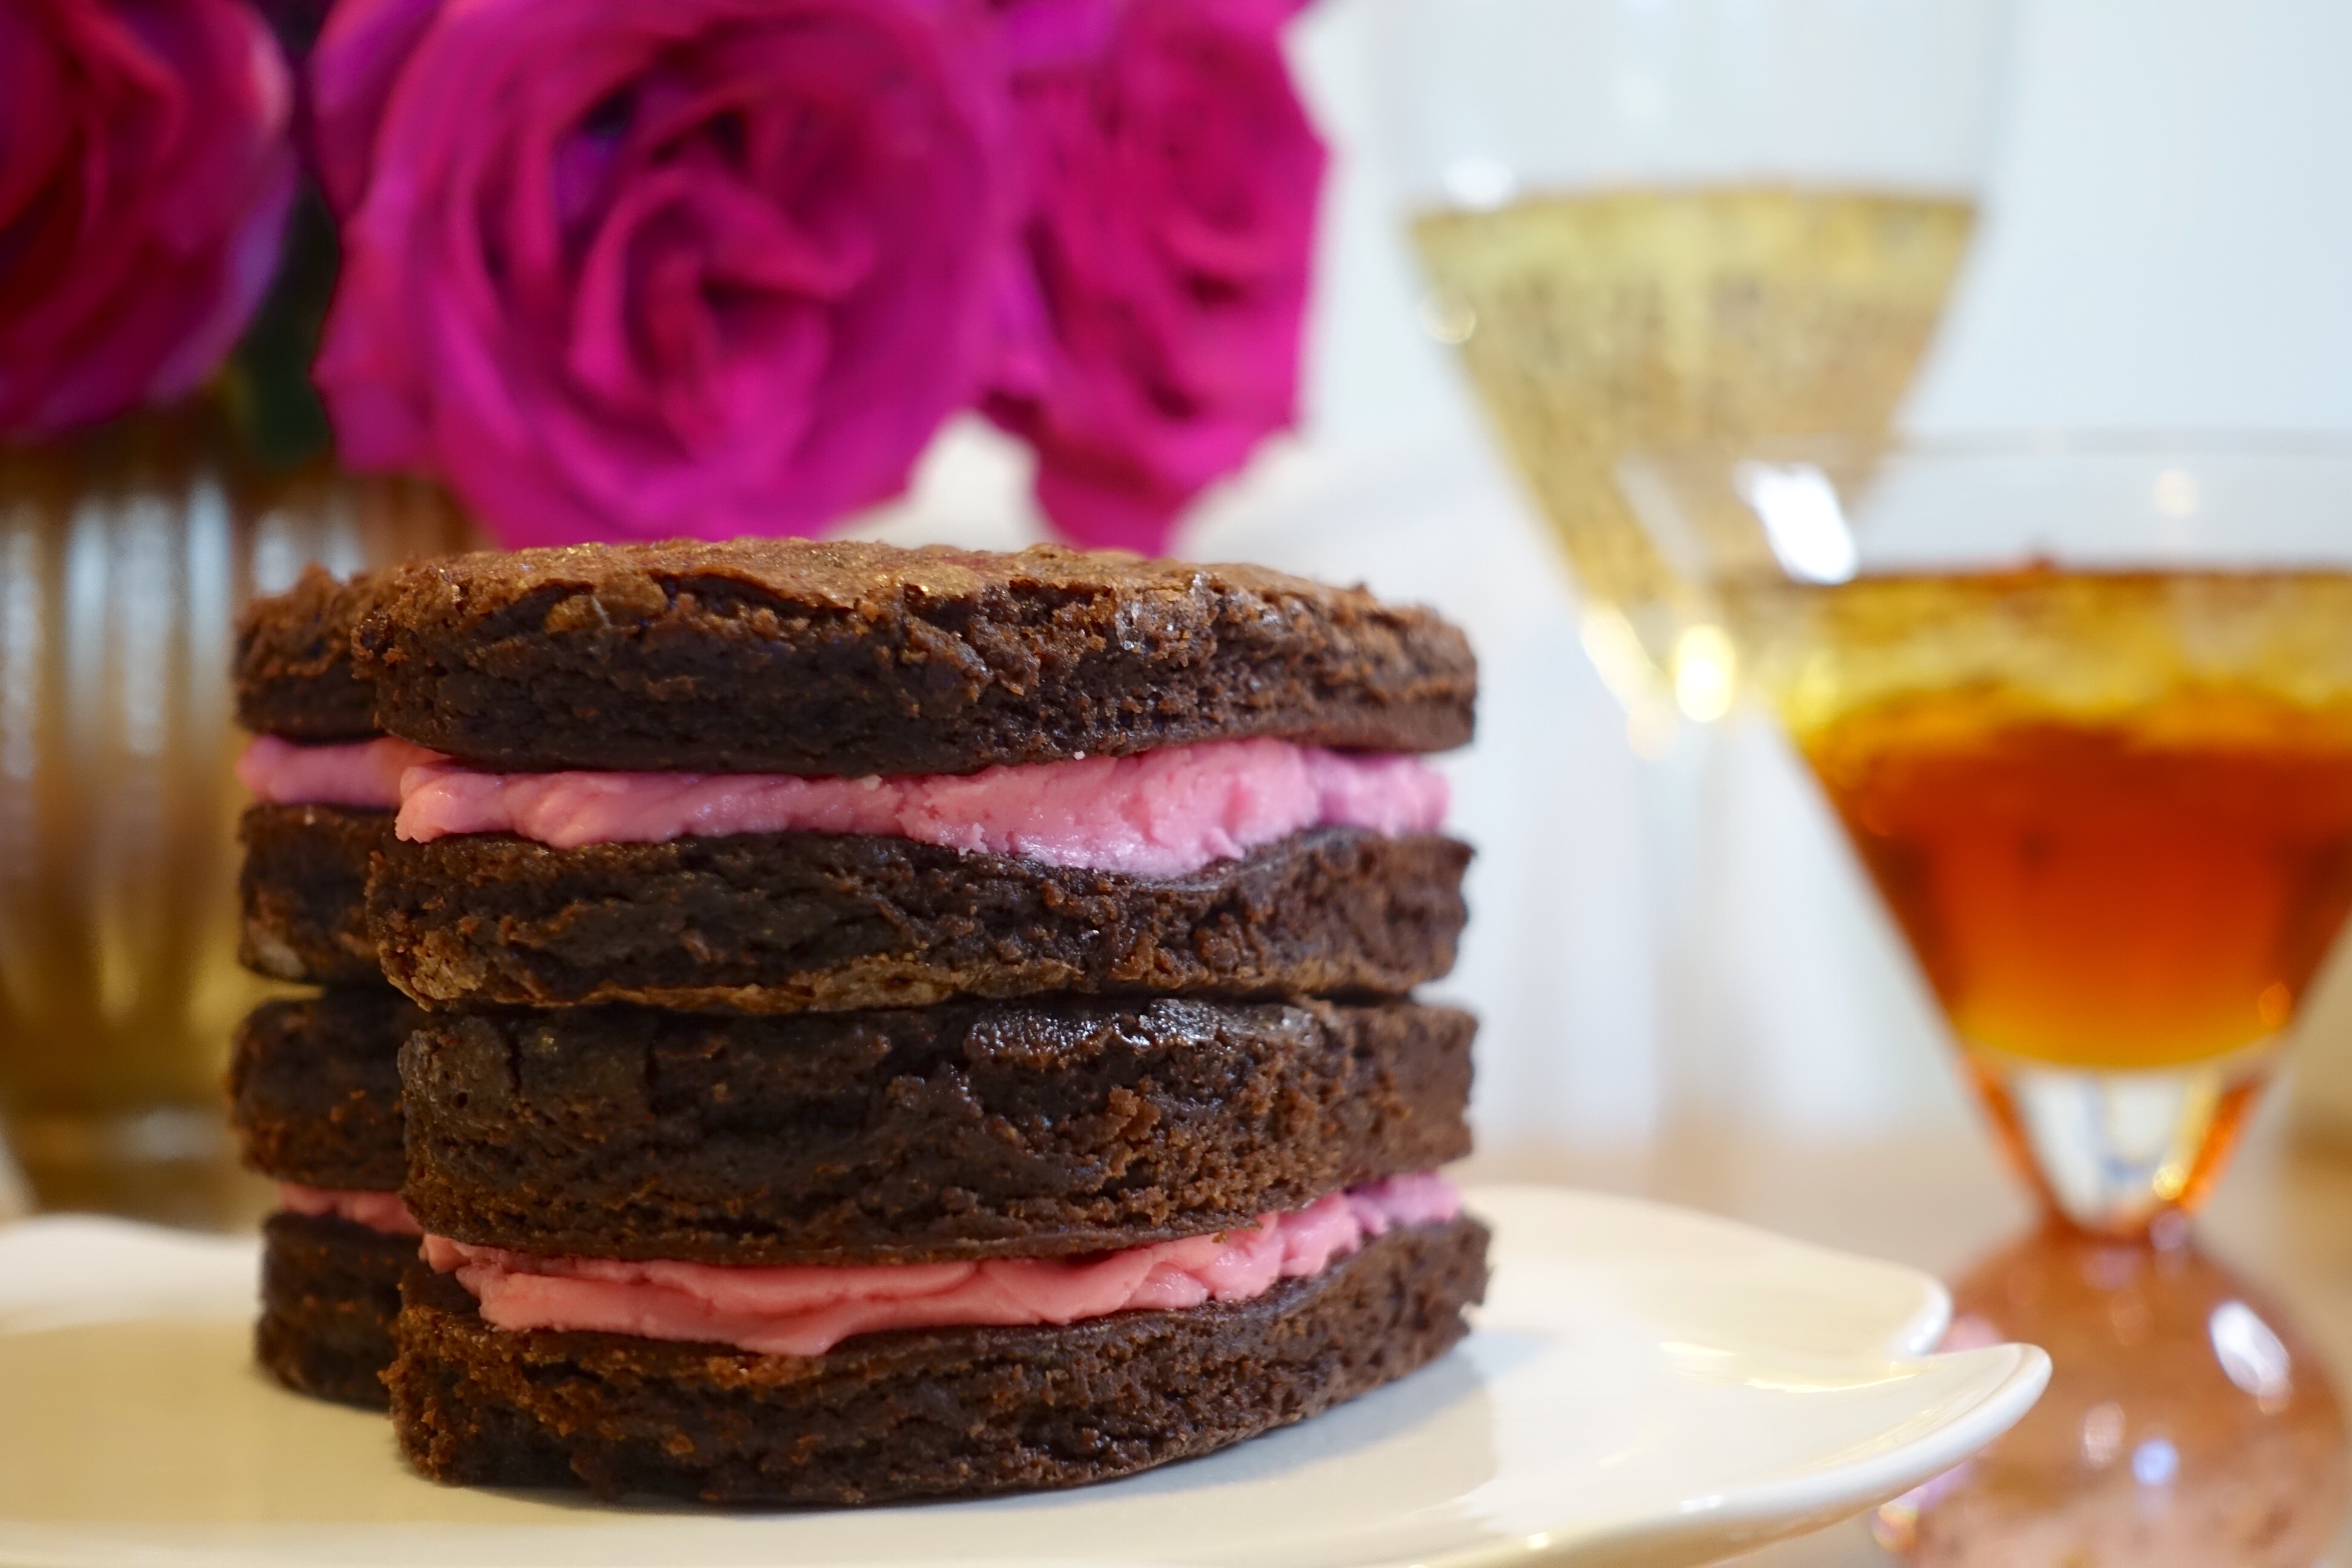
The combination of these two flavors is indescribable, you have to make them for yourself and indulge in order to believe me. It’s a cream filled brownie and the cream is OREO FILLING! Did I say that part enough? Ha! Try it, so so so good!
I paired this deliciousness with a “Sour Kiss” cocktail, keeping with the whole ‘Valentine’s Day Shmalentine’s Day’ theme here. It tastes like sour patch candies in a glass! Mix together an ounce of each of these ingredients and enjoy!
Sour Kiss Cocktail: Vodka
Grenadine syrup
Blue curacao liqueur
Sweet and Sour Mix
Limes
Here is my Pinterest DIY-not Valentine’s Day episode, and if you missed my Galentine’s Day post you can read it here!
What are your plans for this weekend ?!
Go enjoy these recipes and Happy Valentine’s Day from stupid cupid <333
Let me preface this with ‘my’ truths, ha, thought I should put that out there! So I recently wrote an article about the conscious choices we make in regards to what we do and don’t share publicly about our lives. Much of our audience has watched Joe and my relationship grow, but from a distance as we’ve been very private about it. Well on Christmas Eve Joe proposed to me in front of his entire family and I ugly cried through it y’all. It’s been 5 1/2 years and I think we’re finally ready to open up about our future plans, why we haven’t been so open until now, and what we think about sharing your life with the internet.
People are either all for marriage or all opposed, or so I’ve been hearing, and today I’ll explore both sides of it. Personally however, I was somewhere in the middle, yes leaning more towards the “if you’re a bird I’m a bird” mentality, I mean I’m a hopeful romantic. But I’m also the girl who’s been married before so I’ve got issues with marriage whether you see them or not. When I was 18 I married Corrine’s father. That didn’t last forever and I’m a “make it work no matter what, marriage is forever” kind of person, so that was ouchy. After the dust settled though, I knew that eventually I did want to get married again. If the right man came along and changed my mind about this forever business I’d do it, besides, I’m a hopeful romantic remember? Regardless of my feelings, I also didn’t want us to feel pressured into getting married just because it was the ‘next step to take’, even IF I’ve wanted to marry Joe since our 1st date! *more on that soon*
So many people get married for the wrong reasons. You reach a certain age or you date someone for a certain amount of time, and all the sudden everyone and their mother wants to know when are you finally going to tie the knot- especially your own mother. Don’t get me wrong, marriage can be AMAZING, but the pressure to do so is not so amazing.
Here’s the ‘opposed’ side of me. There are people who get married because they think they have to, it’s all that’s left to do… shit or get off the pot kind of thing, or the ‘oh crap we’re pregnant’ kind of deal. There are also those kinds of people who marry for opportunity and those situations are too heated for me to touch on in just one post, so I’ll save it. Then there’s those who do it because they want that huge wedding that is for everyone ELSE except for them. So firstly, shout outs to all my happy couples out there wed or not wed, and secondly, through all the BS and past mistakes I’ve made myself, I wanted to get married because I’d finally found my person, who is my life partner, best teammate, biggest cheerleader, and ride-or-die best friend when we have it all or nothing left. You sure do learn a lot when you get it wrong the first time. If you can’t be best friends with your partner, what do you have after the buzz from the wedding planning and honey mooning settles off?
With my first marriage I learned a lot about myself. I learned that I needed to grow up (a crap ton), that I was co-dependent (a crap ton), and that I had ZERO clue about who I was or what I wanted outside of this other person (#baggage). Mind you, I had a little human looking up to me for life coping skills, all the while- I myself was trying to learn how to navigate through life.
Here’s the ‘all for’ marriage side of me. Today looking to the future, I can confidently say (17 years later whew) that I love the person I’ve become, I love the man I’m with, and I love how healthy our relationship is. No relationship is perfect, but I think we work because I’m the hot head and he’s the calm and logical one. I’m the loud mouth and he’s there to shut me up when I irrationally roid out. I can get down with marrying that! Also, when he’s having a crap day I can be the rock for him too, and lastly, (and this is a big one) we’re not allowed to go crazy at the same time! Rock Paper Scissors for that if you have to! Life is too short to fight and it’s also too short to be with someone you really don’t like as a person.
So if I could share with you one thing about being in a relationship; not just being engaged or getting married, but being in a healthy relationship- it’s that the only person you can control is you. No one will ever change just because you want them to, and when you aren’t a whole person (we all have baggage don’t we now) you can’t expect someone else to fill that void. Marriage is a big deal and it should be the happiest of moments, not a forced or uncertain one. Lets be real though, I’ve been putting the pressure on Joe for like 5 years! When ya know ya just know!
This post somehow turned into a self-help for the emotionally-unavailable/ rant on love, but the point is that your relationship and your kind of love, is nobody else’s to judge or weigh in on. So you do you and don’t let marriage posts (like this- oh it’s about to get lovey) or FaceBook updates, make you feel like you aren’t a cool kid or hurried into doing something that you aren’t ready for. Also the point of this post was to share with you that we’re ready to share! The pressure of having a big wedding is big (I write these for me too), but we’re going to do it our way and I can’t wait to show you!
We’ll be answering questions on my YouTube channel about our wedding plans soon! I’ll also be creating posts for you here along the way in reference to my DIY happenings, or mishaps you be the judge, and posting my tips on how to stay sane because planning a wedding can be a BIT overwhelming! So until then, here are some photos we had taken while we were in Yosemite last weekend. Pre-engagement photos if you will, that we did spontaneously with our new friend Karl who just so happens to be an uber talented photographer! Thank you Karl for hiking up hills with us during the blizzard! Ha! You guys can check out his work here and give him a follow on Instagram!
Just before the moment pictured above, I fell into a 3 foot pile of snow and then jumped out of it to have that photo taken <3
Awww, just a couple of love birds in a snow storm. That is the metaphor for our life!
I hope you’ve enjoyed this rant of mine about love and my thoughts on marriage and unity. My heart is full and I feel content in my life for the first time in my life, and I’ve been here before, in this marriage place. So if you’re going through hell, keep on moving. *thank you dear country song for that one*
Boy oh boy is writing therapeutic!
SO, is marriage something you’re for or against? If you’re currently married, what’s one secret you can share with other couples? If you’re neutral on the subject, what do you think the hubbub is all about, this whole woohoo we’re getting marries stuff! I got all deep about the pressure of it all, so lets hear it!
I’ll see you later this week with my first wedding “Pinterest DIY-not” post! Oh Lordy, here we go! Wheeeee!!! PS if you’re a bird I’m a bird. Whew that was a wordy one.
Having enjoyed a staycation this past weekend, in one of the most luxurious homes I’ve ever visited, I was totally inspired to revamp my room! I took these photos from a beautiful home in the hills that we stayed in that was elegant and clean with its crisp whites and pops of color!
Stay with me here, if you’re ready to flee from the pom poms, stick around because it’s a jungle in here, literally!
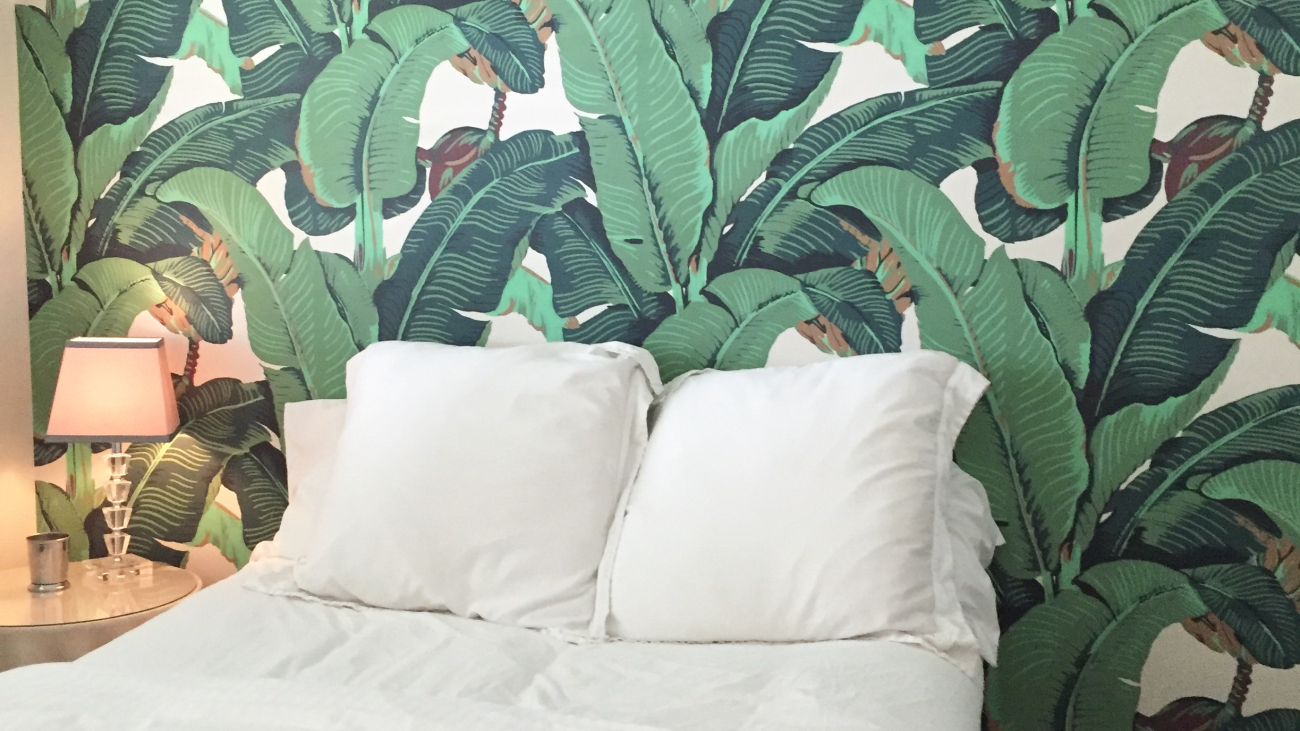
I really love this string of pom poms above this simple bed, the chandelier above, and the all that natural light coming through! It was a YouTuber’s dream to film in here … ahem no lights necessary, there was so much light coming through both corners of the room! Filming a vlog was the first thing I thought of when I saw this set up, “Yes I can sit there and face that way”. Also, those prints you see on the bed spread, that would be from puppy Luna thinking she owns the place! She galloped (she runs like a baby horse) from room to room and jumped on all of the beds. All of them.
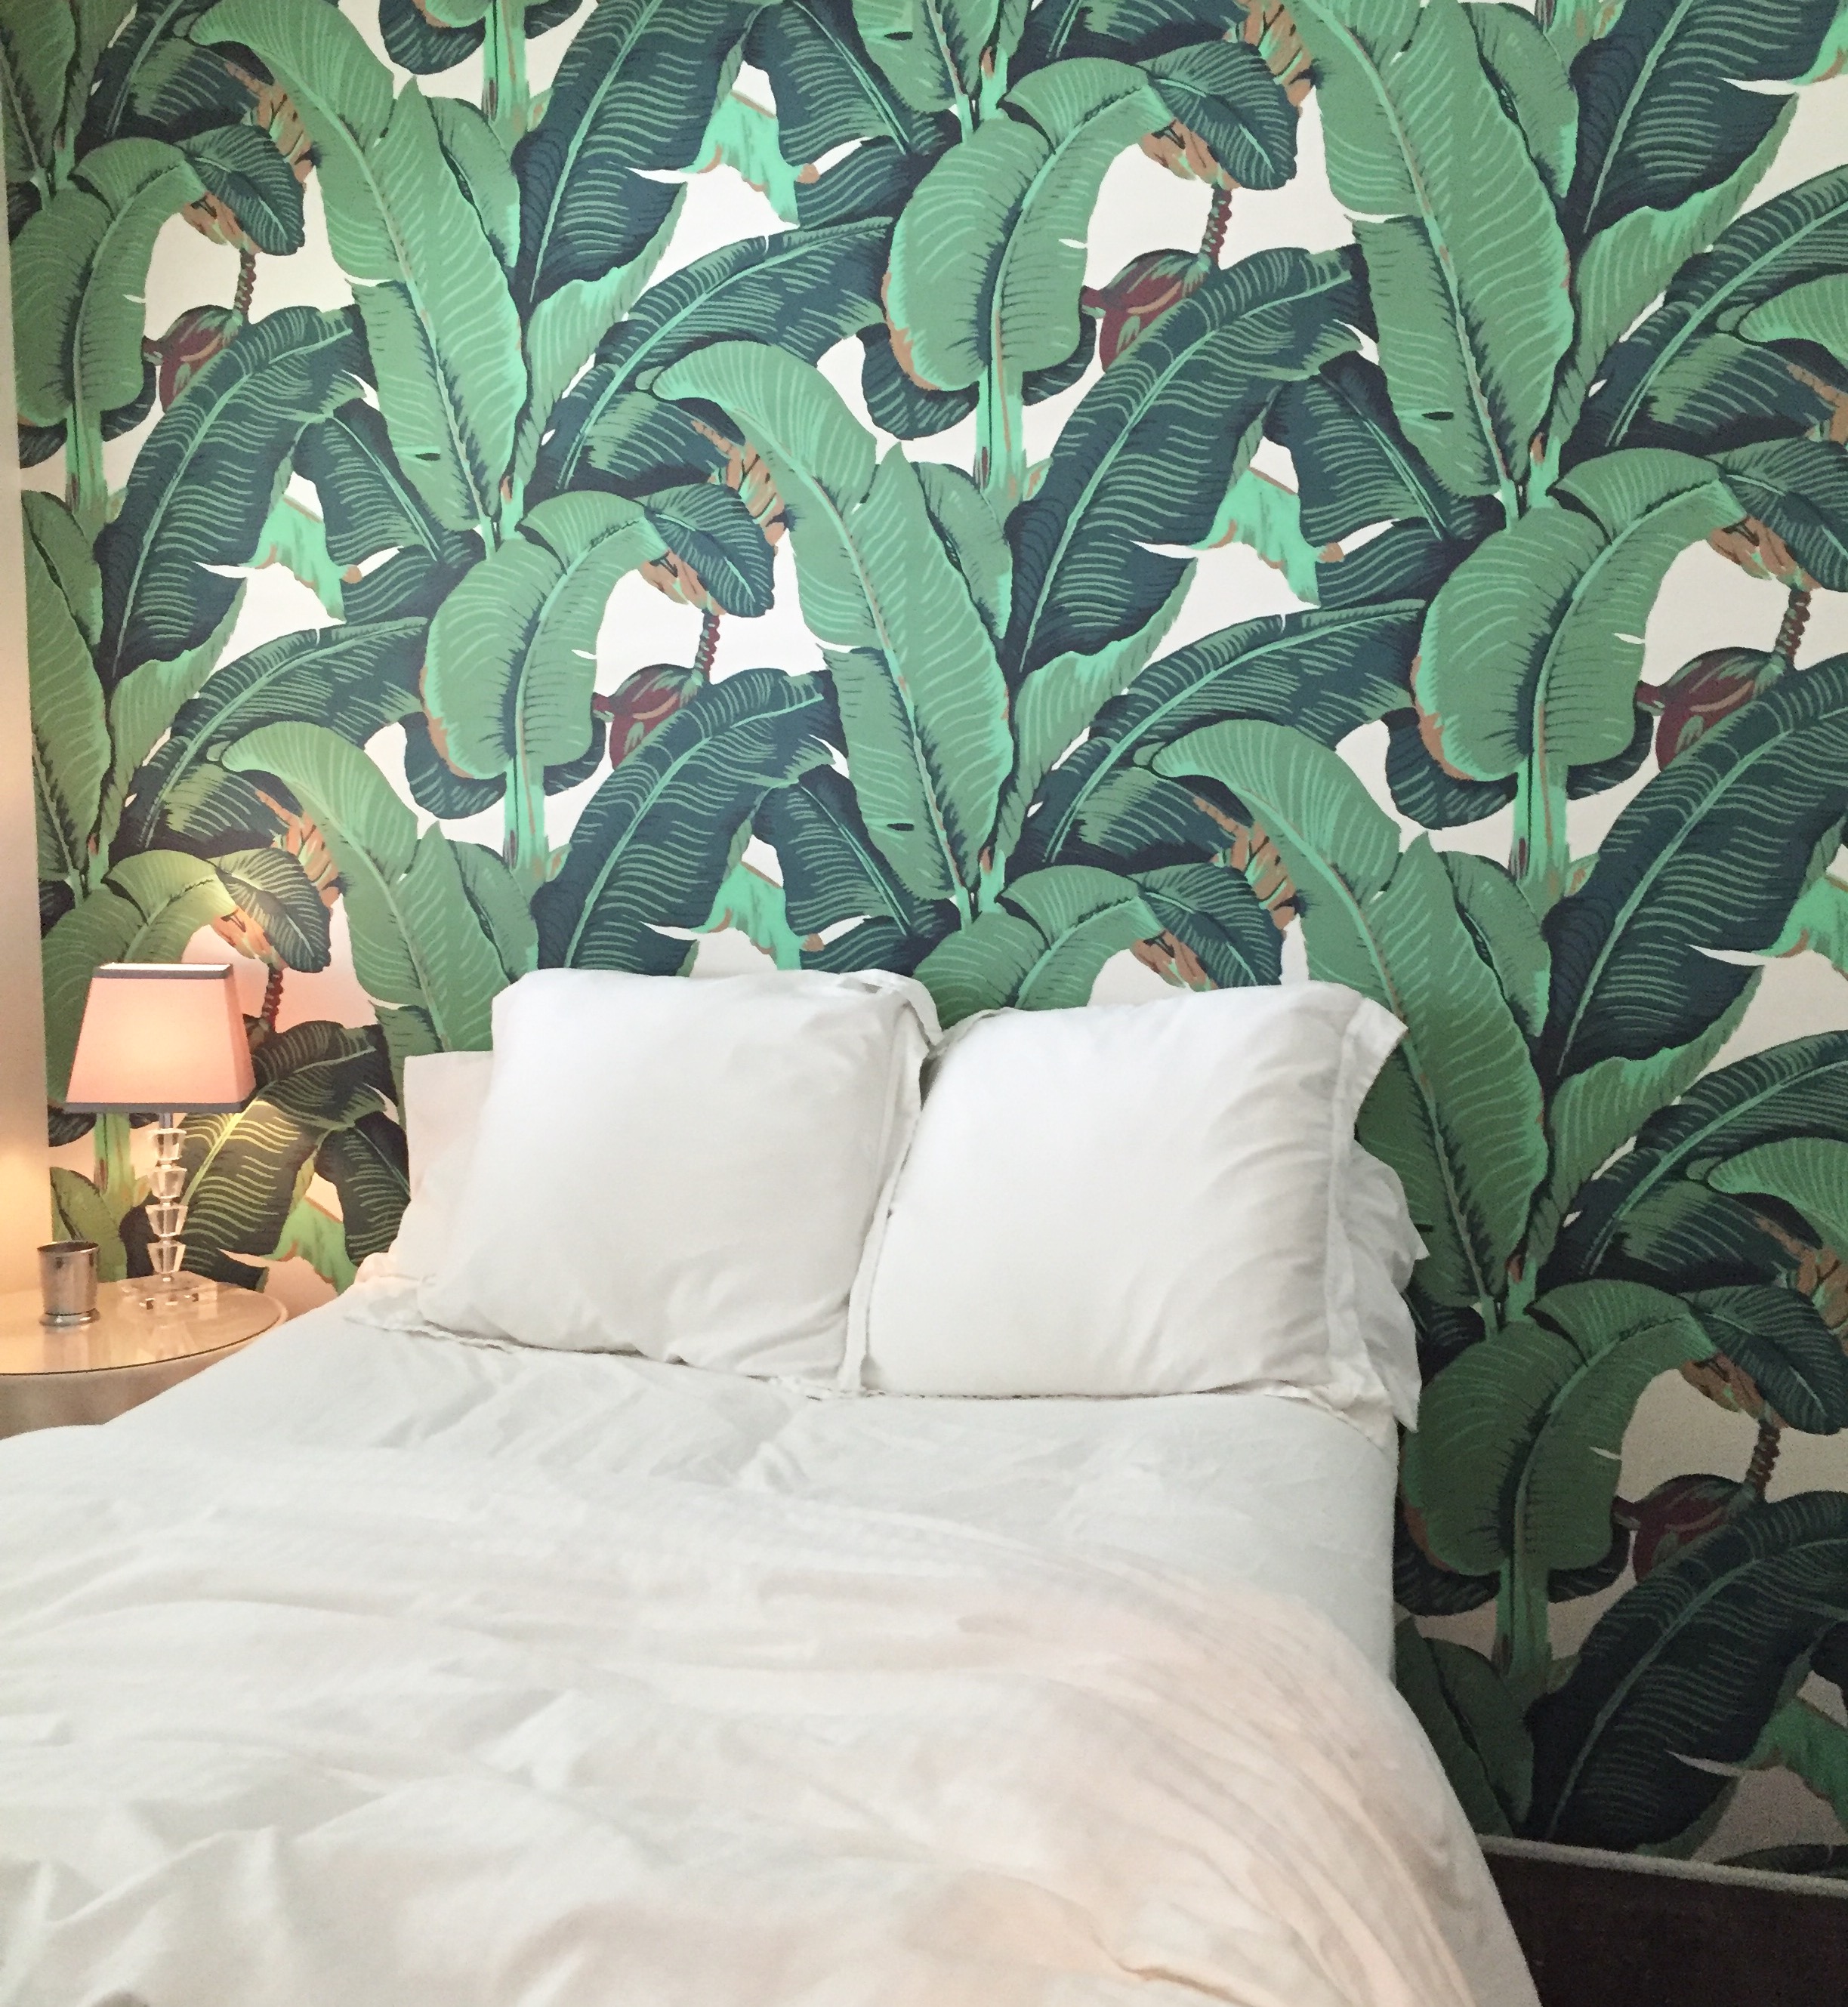
This was one of the 4 bedrooms in the house, and my personal favorite! I called it the Princess Room because that’s what it felt like to me, a doll-house princess room, so pretty and dainty. The second room I’ll feature was Corrine’s favorite! We called it the Jungle Room because the walls were covered with giant leaves and the green hue was so beautiful, I wish I could’ve really captured it’s true tone!
Again with the simple, clean, white bedspread and sheets, I love the choice here because it doesn’t take away from how busy, yet fun, the walls are. A simple lamp in the corner, two windows allowing for the day to peak through, and this beautiful set up on the far wall – we were in love I tell ya.
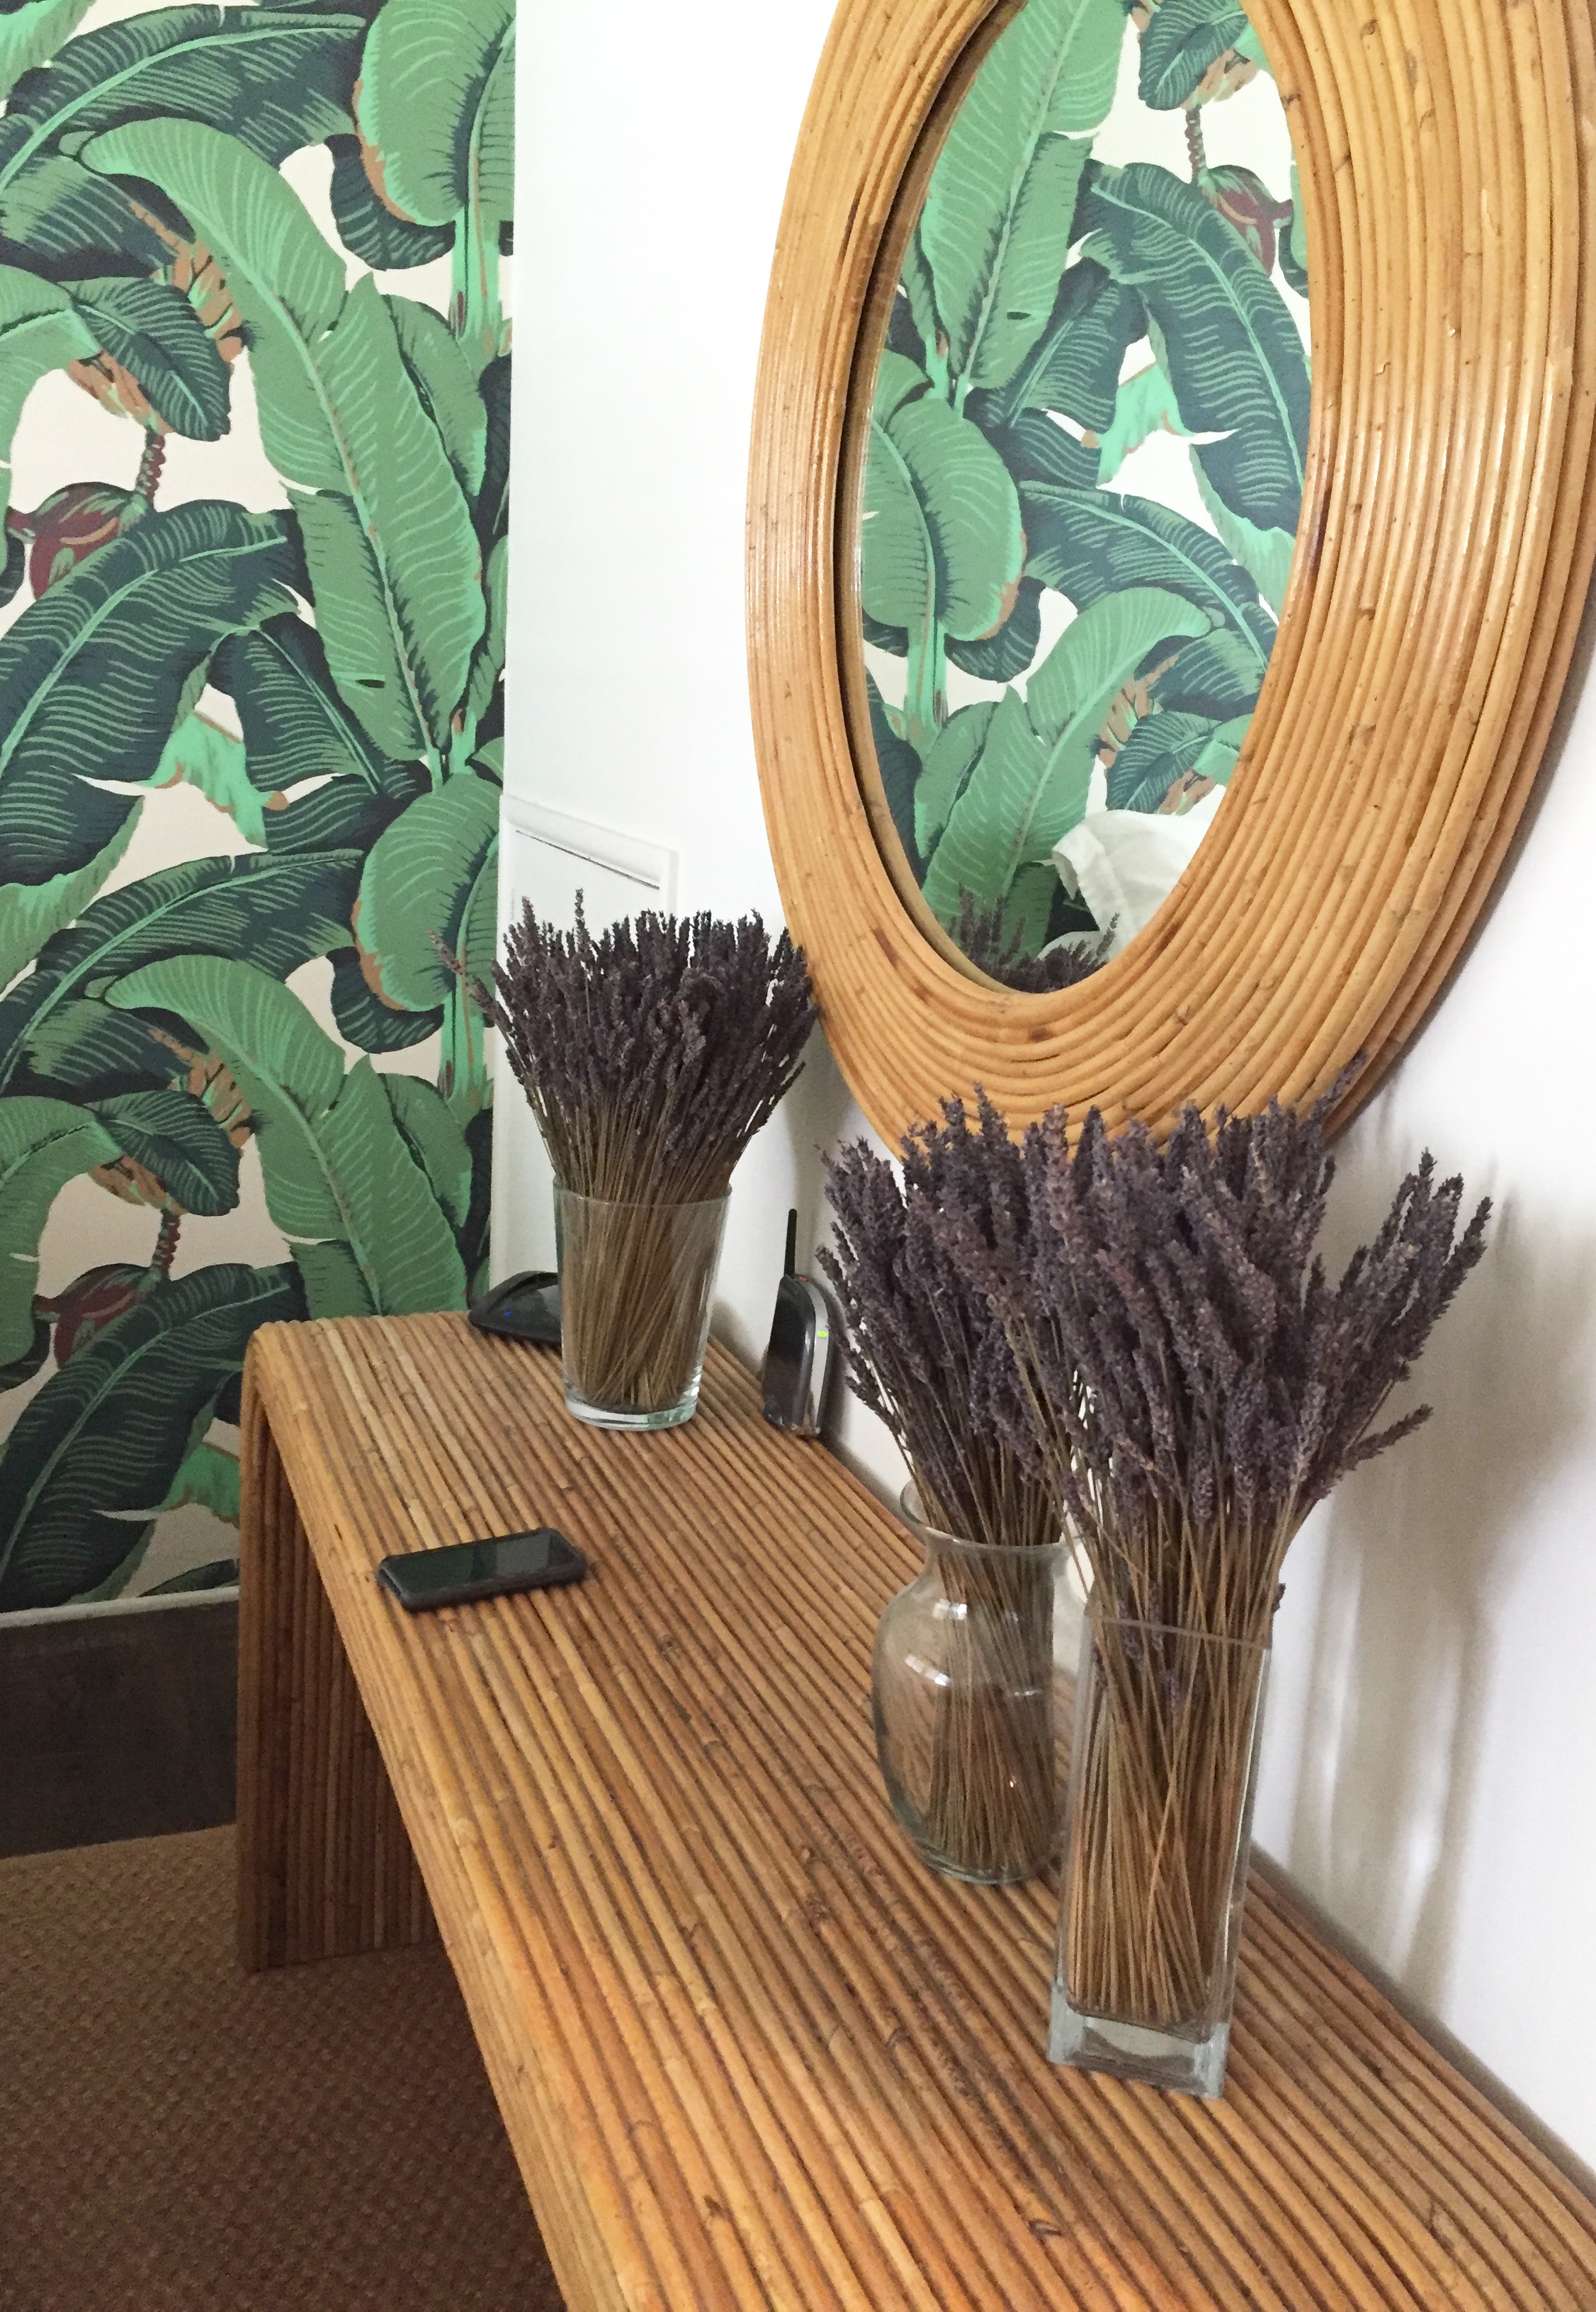
Why yes, that is my phone just candidly hanging out on the bamboo table. I had forgotten where it was until I saw this photo and remembered I’d put it down here. Lavender stems in vases sprinkled around the house was the most inviting and fragrant aroma you could imagine. Again, the decor is simple, but I love simplicity, I love the bamboo themed furniture, and I love how it fit so perfectly with the painted walls.
The rest of the home was just as beautifully decorated as these two rooms, people were bustling about so I wasn’t able to capture the home room by room. It has however inspired me to focus on being more simplistic in my decor choices, more open to big prints and bright colors, and to let light be the focus of each room.
I really loved it here and I loved how inspired we were when we left. I actually ordered some pom pom wall hangings of my own and a new white duvet cover in honor of these rooms! One room at a time, one space at time, that’s what I keep telling myself. I think it’s easy to get overwhelmed by decorating, by theming a room or picking colors. It’s especially difficult when you have zero clue what you’re doing … me!
I like to think that once my bedroom is complete, I’ll migrate into the living room and redecorate the space in there. Baby steps … if I can do it, trust me, you can too! Pick a space in your home, start small, and surround it with things that make you feel less anxious and more relaxed. That’s exactly how I felt when I walked into this house.
I hope this inspired you to get thinking about Spring decor and what colors you’re drawn to. I know that I’m really loving this white out look!
What kinds of colors or prints are you most drawn to, and are you more of a decor person or a wall and accessory person?
See you next week with some more happenings and have a wonderful weekend!
I will what I want! This is something we should say to ourselves every day. It’s 2016 everybody! You know what that means … new year resolutions and the struggle to keep them! Oh and we’ve all made them! Gyms are filling up, farmers markets are being frequented, and books are flying off the shelves! That is, if your resolution is to be healthy, to eat cleaner, and to read more! Ahem, raises hand. So today I’m going to share with you how to KEEP your resolutions this year and to why ‘the secret’ actually works!
Have you ever read The Secret, or watching the film on it? It’s the idea that our thoughts create our destiny. For instance, if you tell yourself that you aren’t successful, the Universe will agree with you, and hence you will not be successful. The Universe’s job is to AGREE with you, so be sure you’re telling it POSITIVE things! So my number one key to accomplishing your goals … vision boards! I can’t begin to tell you how much power vision boards have in amplifying motivation. To have something to look at daily, something you put together with your hands, something you thought about and sifted through … this makes a HUGE difference! For me, having a vision board puts my thoughts into one place, a tangible place that I’m forced to look at each morning. So what have we learned:
1) Create a vision board.
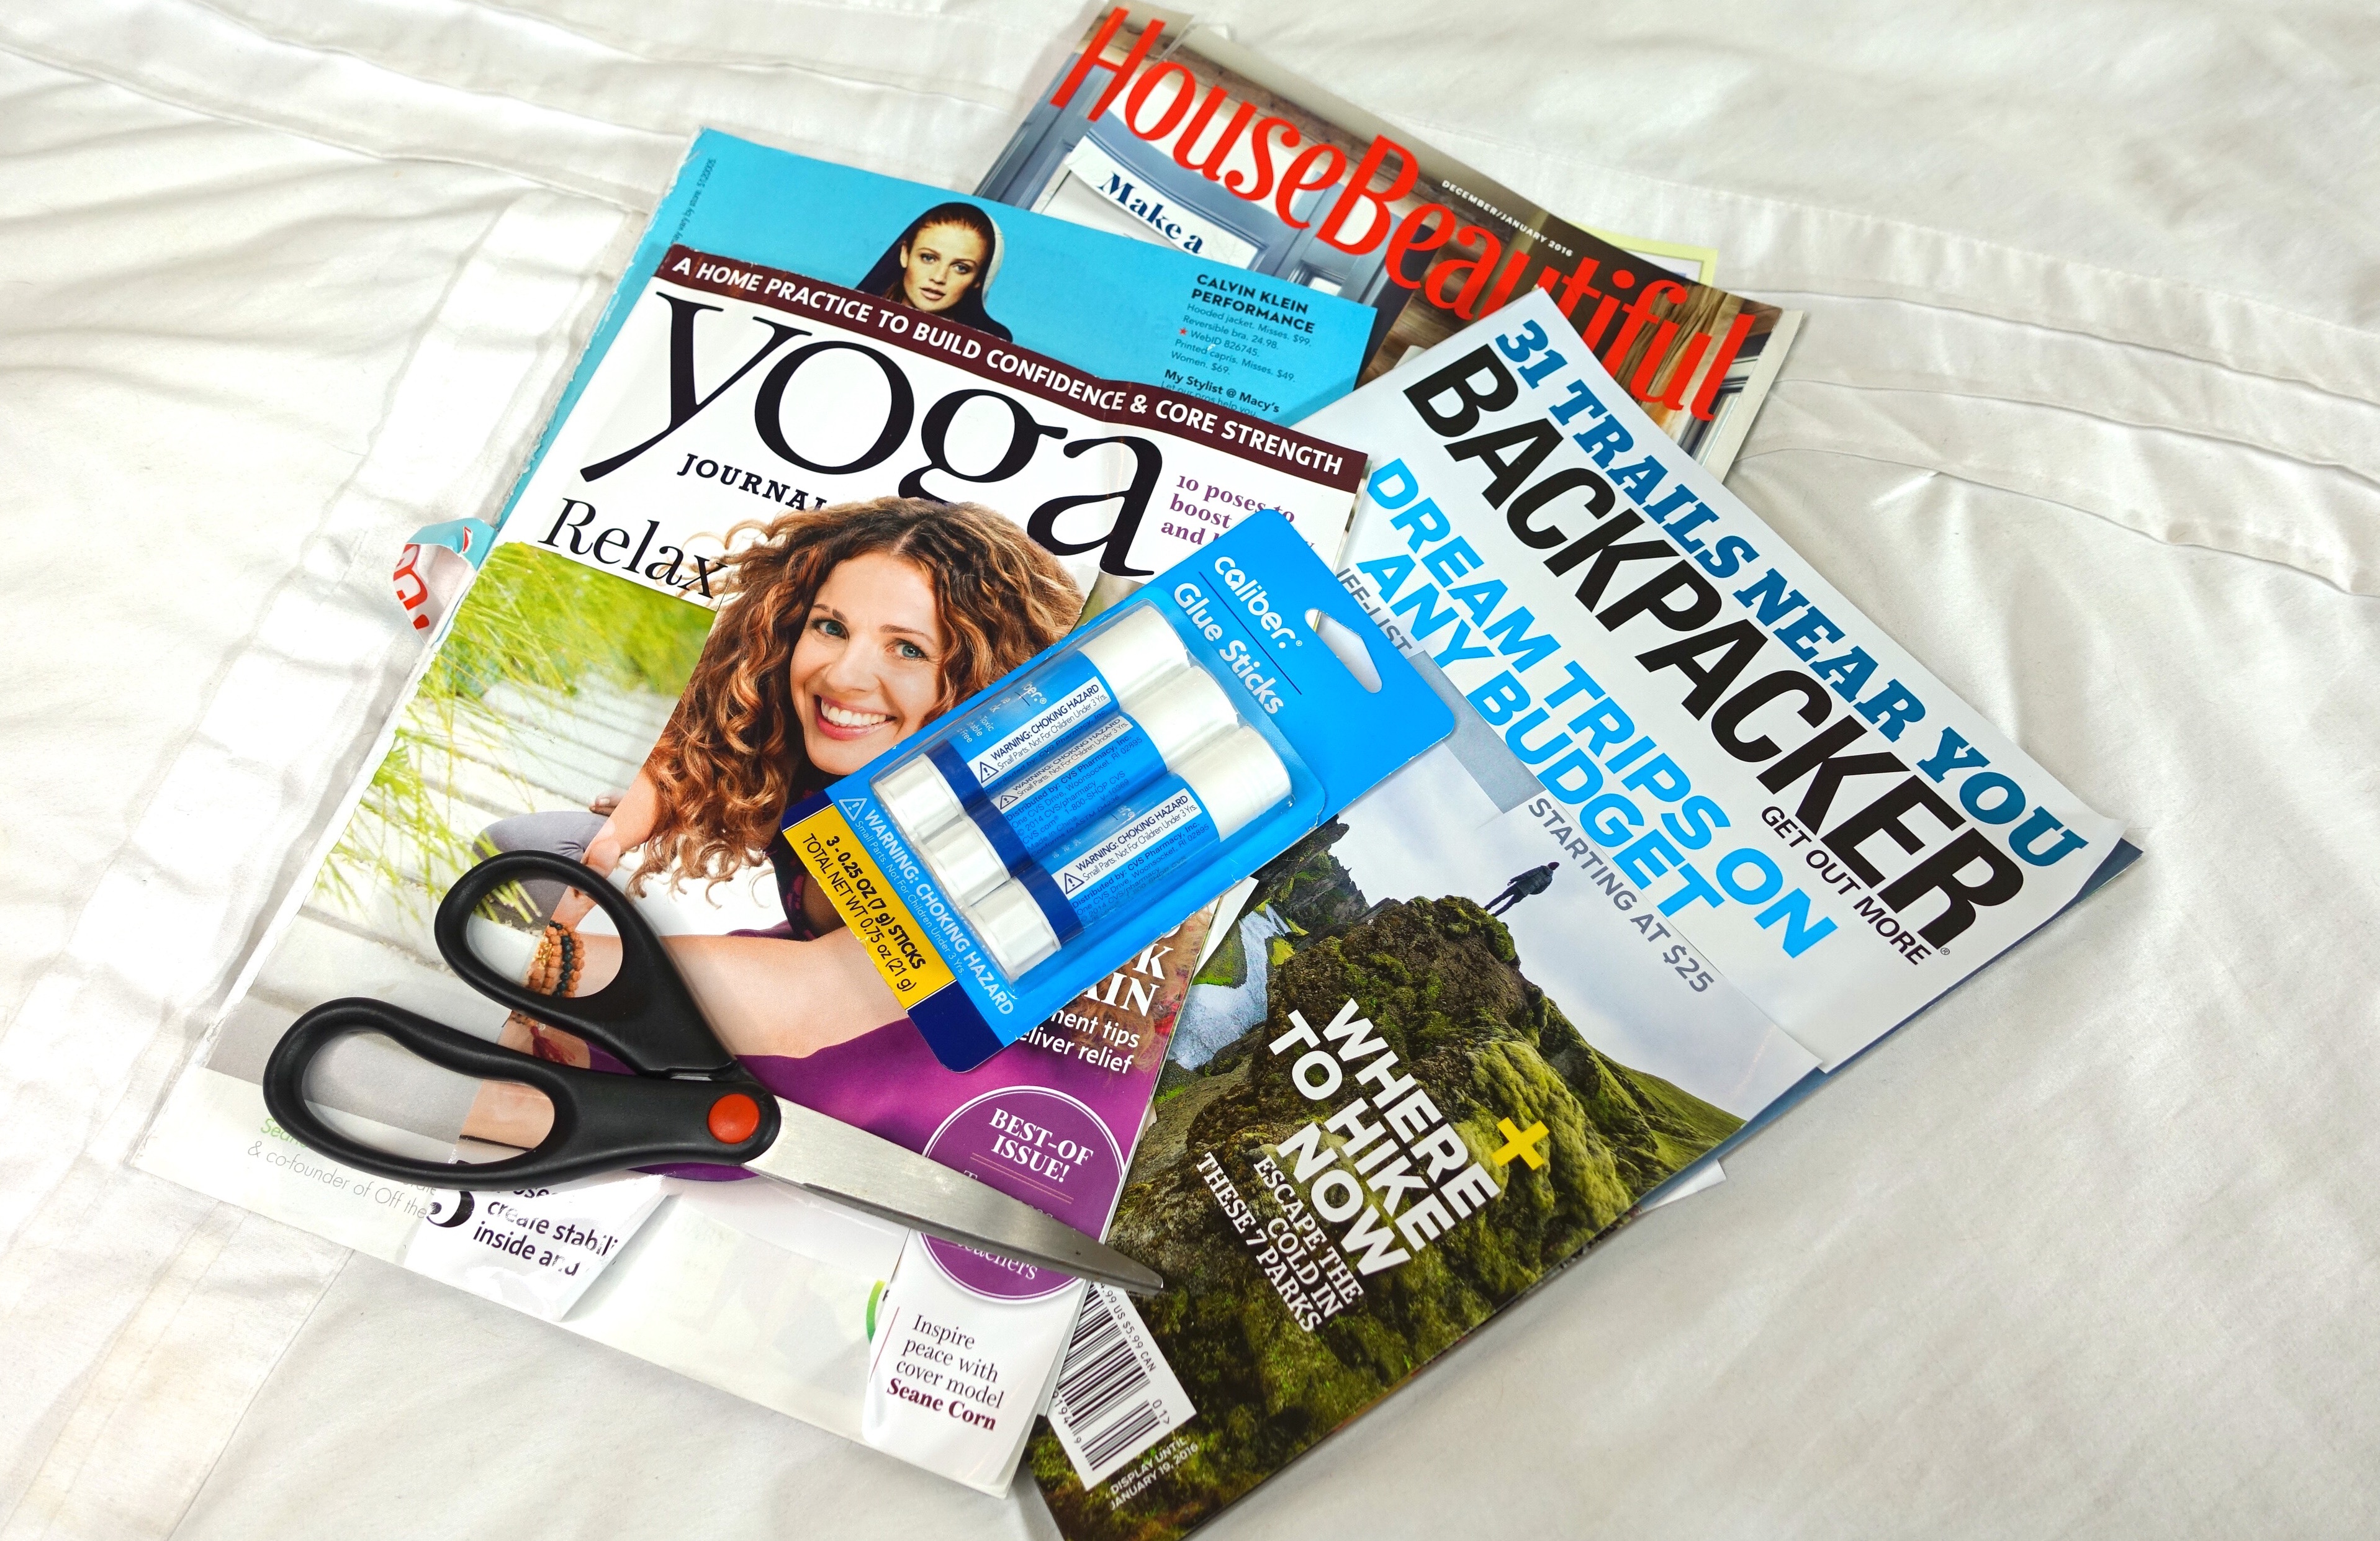
My friend Miya and I each created a vision board last week and it really set into motion all of things we want this year. They’re really easy to make too! All you need is a poster board, some scissors, a glue stick, and magazines!
Miya said it best when she said that most people think they need to look for pictures of things that represent their goals, but honestly, we found so many inspirational phrases that we put together just by finding WORDS that represented our goals. There are no rules when it comes to your vision board, just cut, glue, paste, and create!
2) Keep your vision board somewhere you can see it.
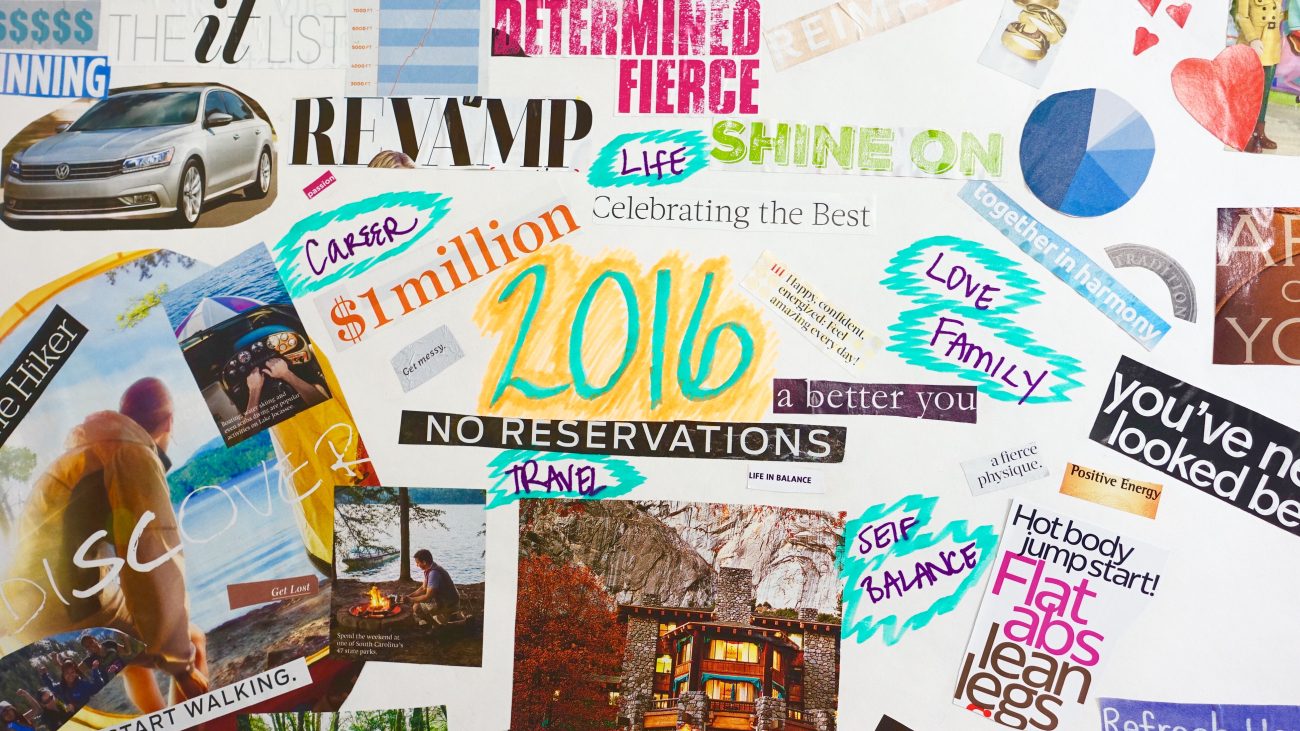
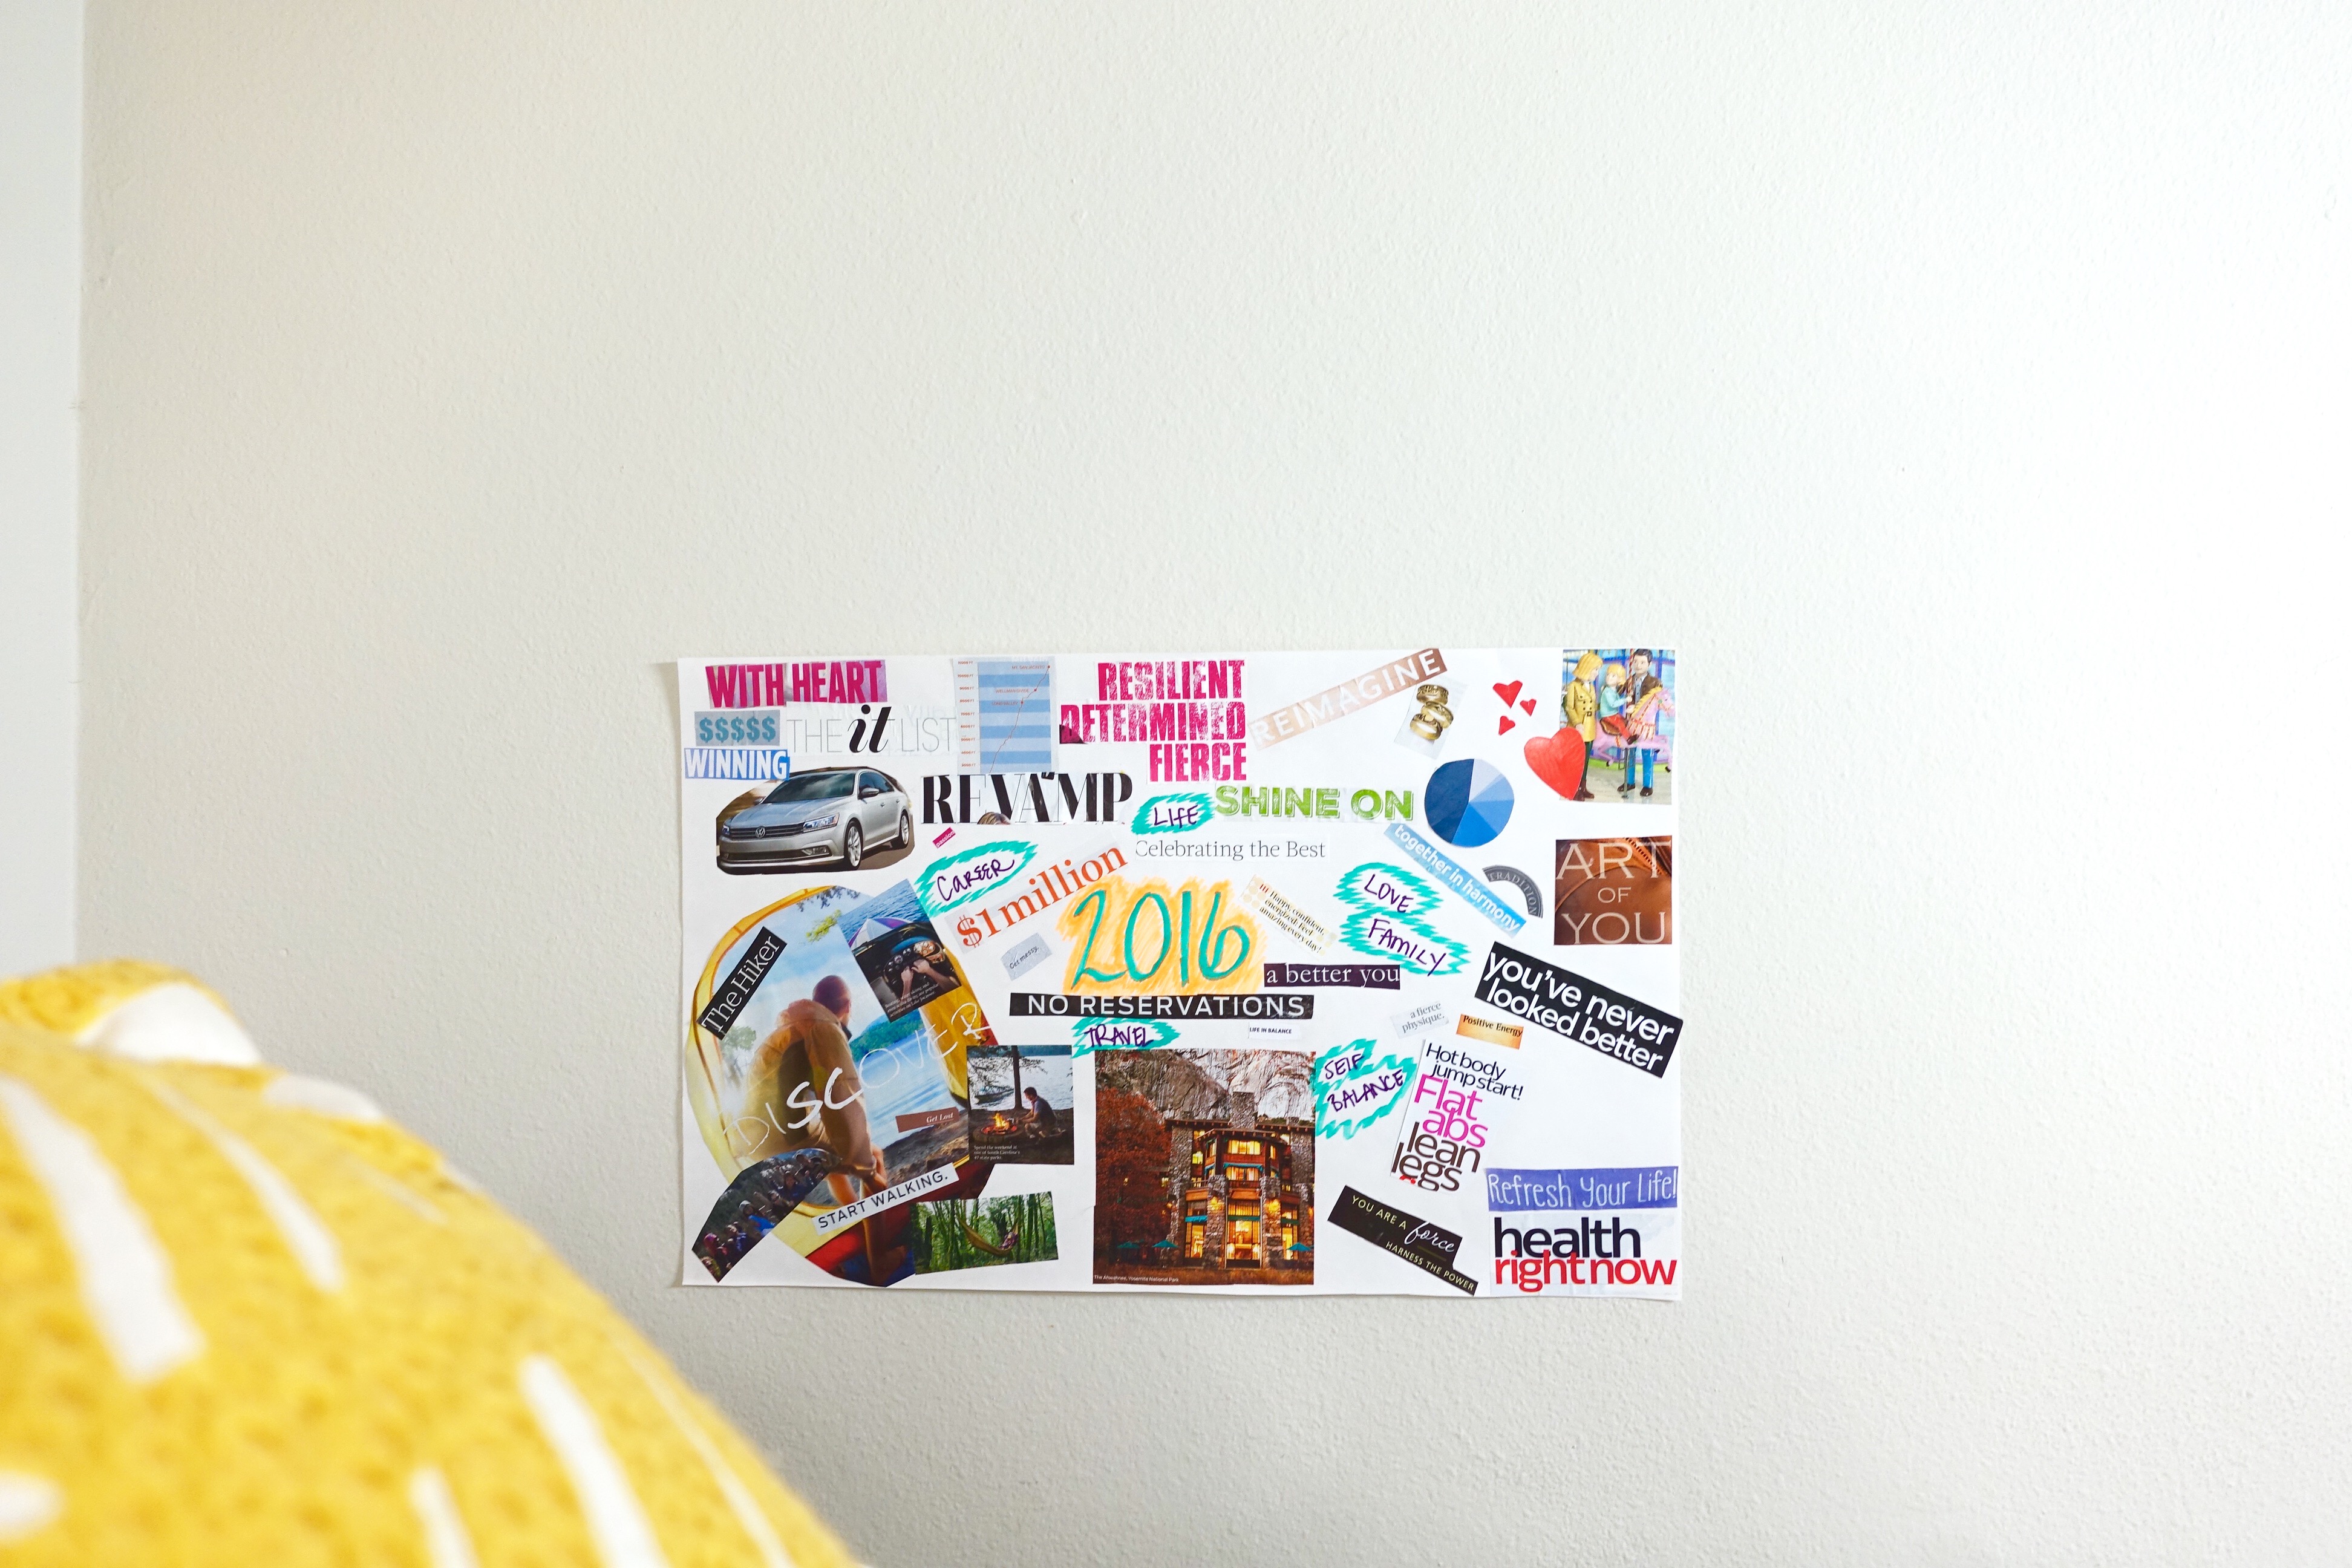
For me, hanging my vision board up next to my bed where I literally have to wake up to it each morning is the greatest form of inspiration. It’s the first thing I see when I wake up and the last thing I see when I go to sleep. To have it in a space that I’m in creates a sense of urgency within myself, something I can’t take back and something to push me forward. So here it is, the view of my vision board from my pillow!
Be realistic with your goals, yes I totally glued ‘one million’ to my vision board, but seeing all those zeros really enforced into my thoughts that I want to grow this year. I like to gather my goals into areas of my life that I want to improve; work, love, self-improvement, and travel. This works for me, if a board full of inspirational thoughts and pictures work for you, do that! So long as you tell yourself that you will what you want, you WILL get what you want. And lastly, don’t stop, keep your eye on the ball.
3) Stay focused and don’t give up.
There will be days that you want to give up, days that you’re tired and that you feel like your goals are too big, or that they’re just too far to be within reach of. Just remember that every day, do one thing to accomplish your goals and you’ll see that even these small steps turn into huge leaps towards the bigger picture. We all get discouraged, just don’t let one day turn into one year. Baby steps.
So whether it’s creating a vision board or writing out daily to-do’s in a calendar, physically putting your goals onto paper will make a huge difference in your motivation I promise! You can check out what Miya and I put on each of our vision boards and what they mean to us, here!
Miya also wrote a motivational piece on how to keep your resolutions this year on the blog we have together, HapaHour.com, so head on over there for more inspiration! She inspires me every day with her wisdom and words of encouragement. Which brings me to my last point, surround yourself with like-minded people. They say that we become the 5 people we surround ourselves the most with, so be sure that your inner circle is full of people who uplift, inspire, encourage, and empower you.
Let me know what your number one goal is for 2016 and how you plan on accomplishing it and I can’t wait to share with you a ‘mid-year’ update on my own goals! Good luck and Happy New Year!!!
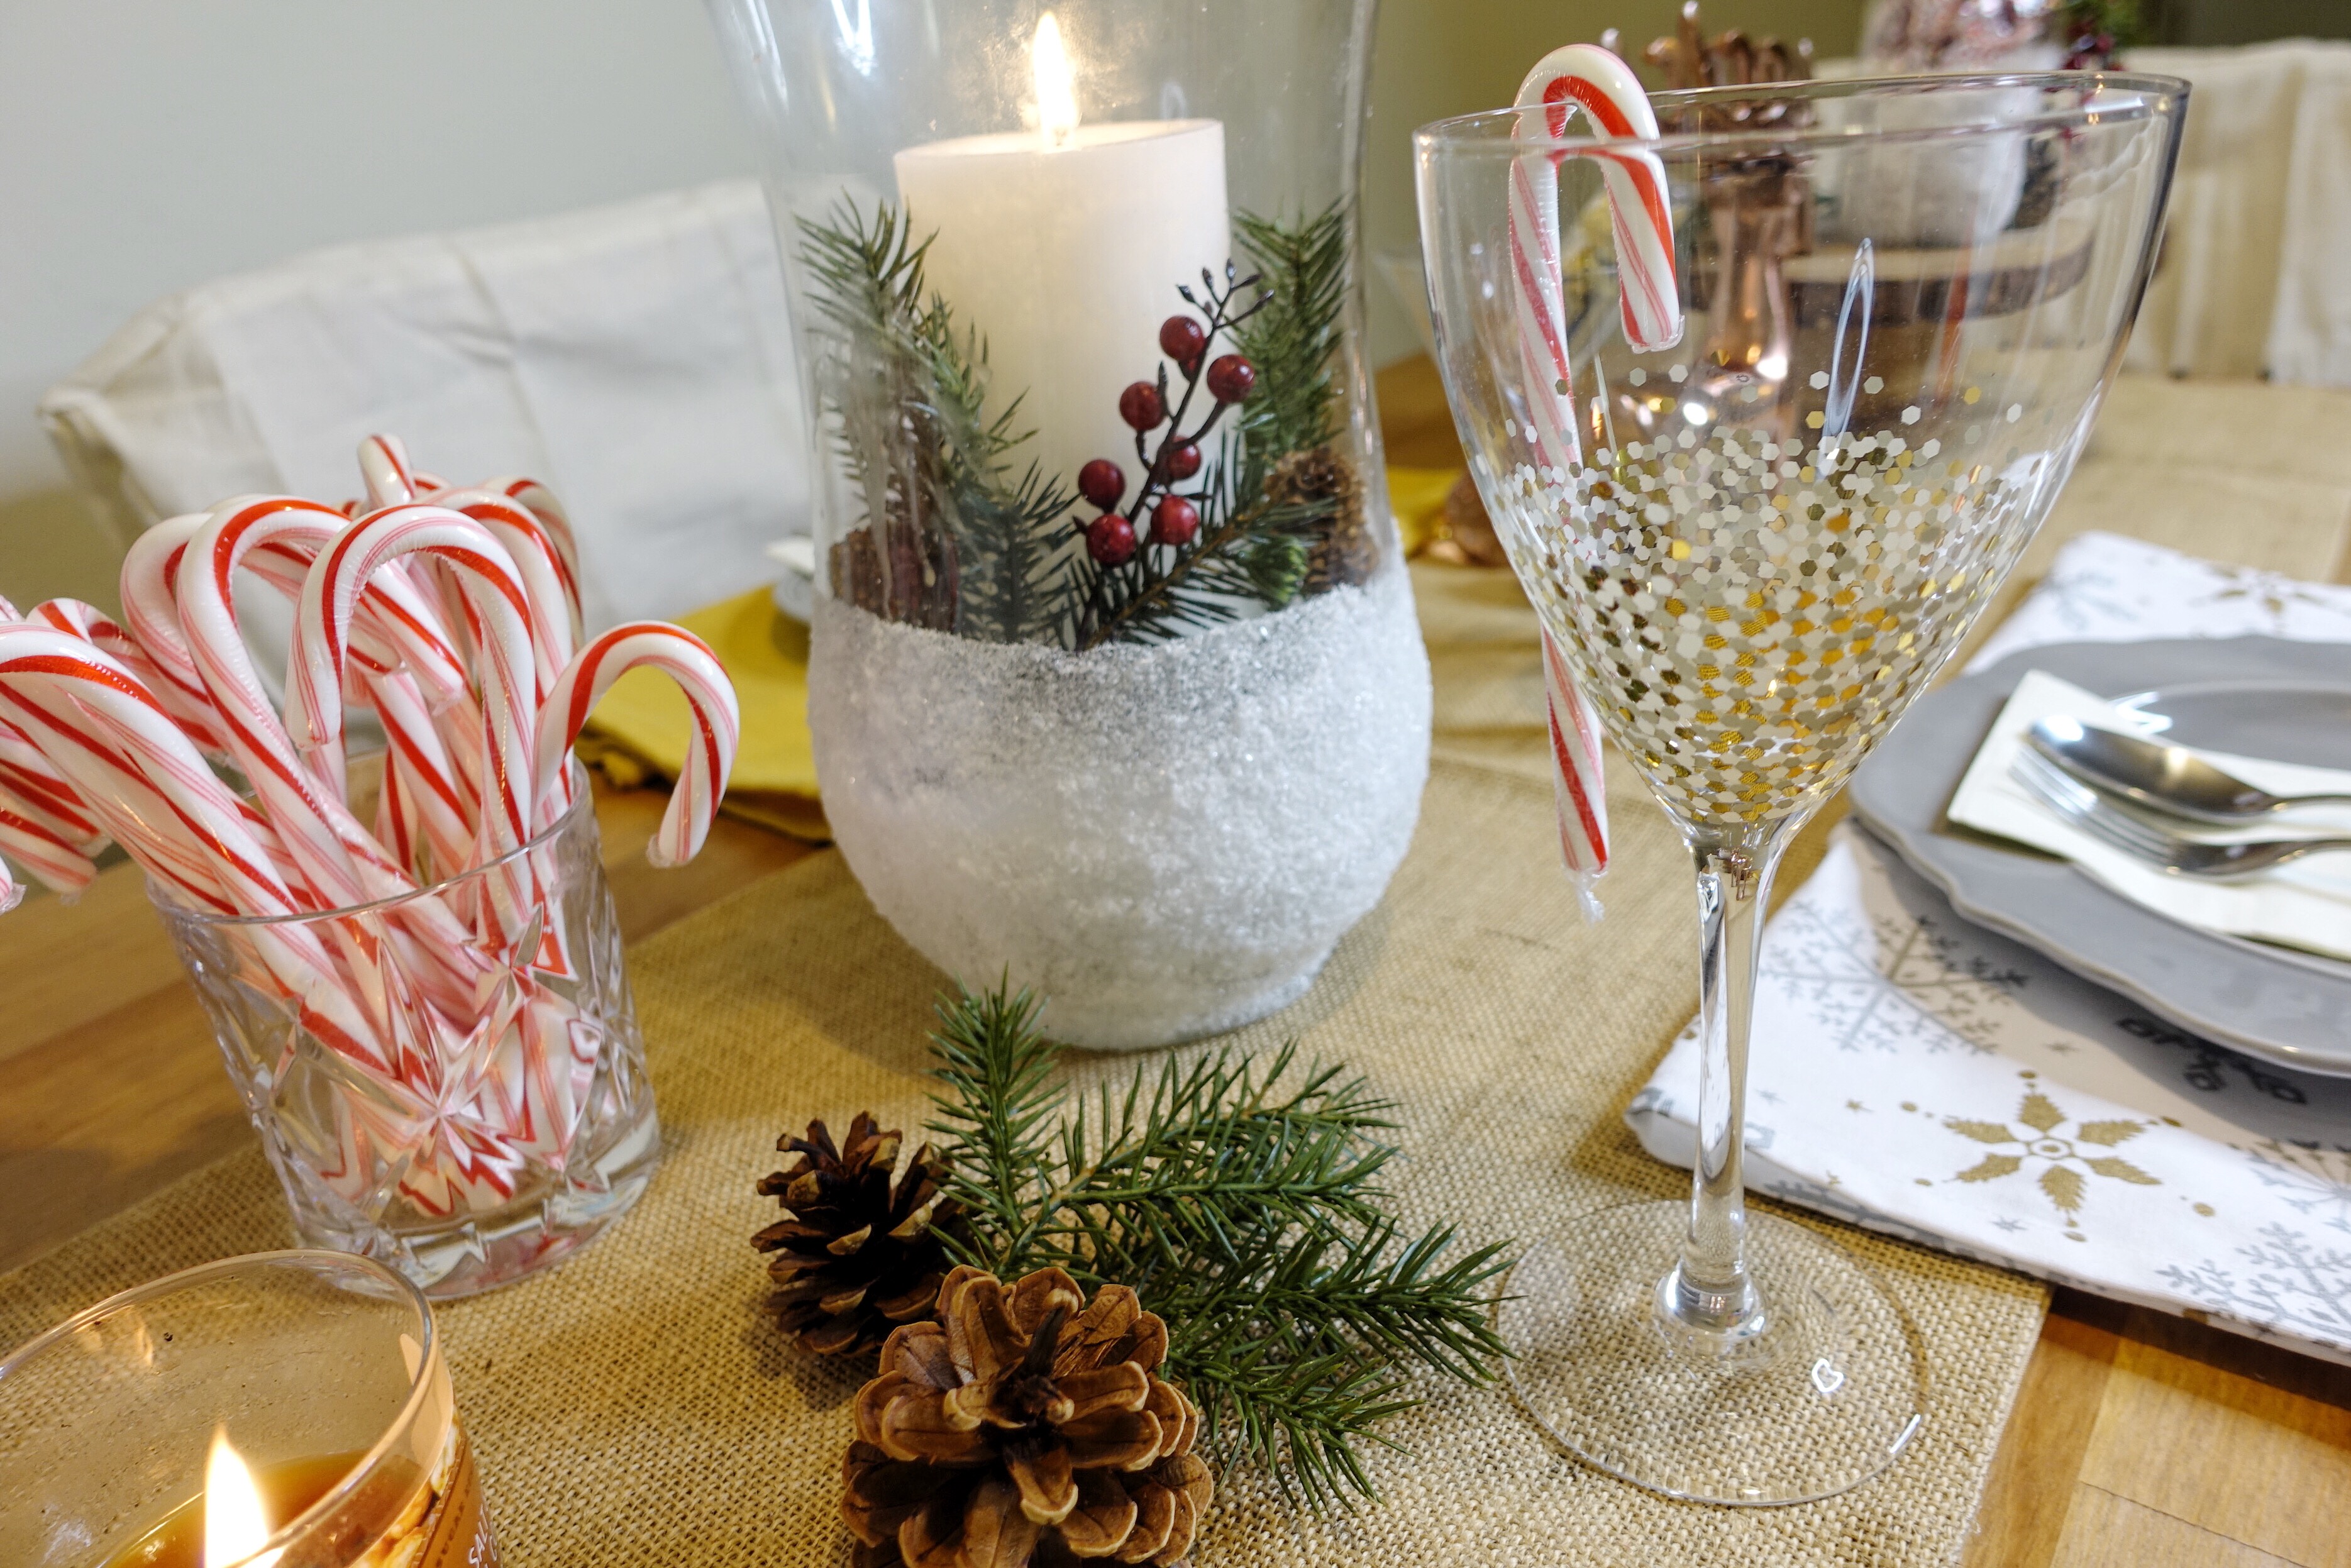
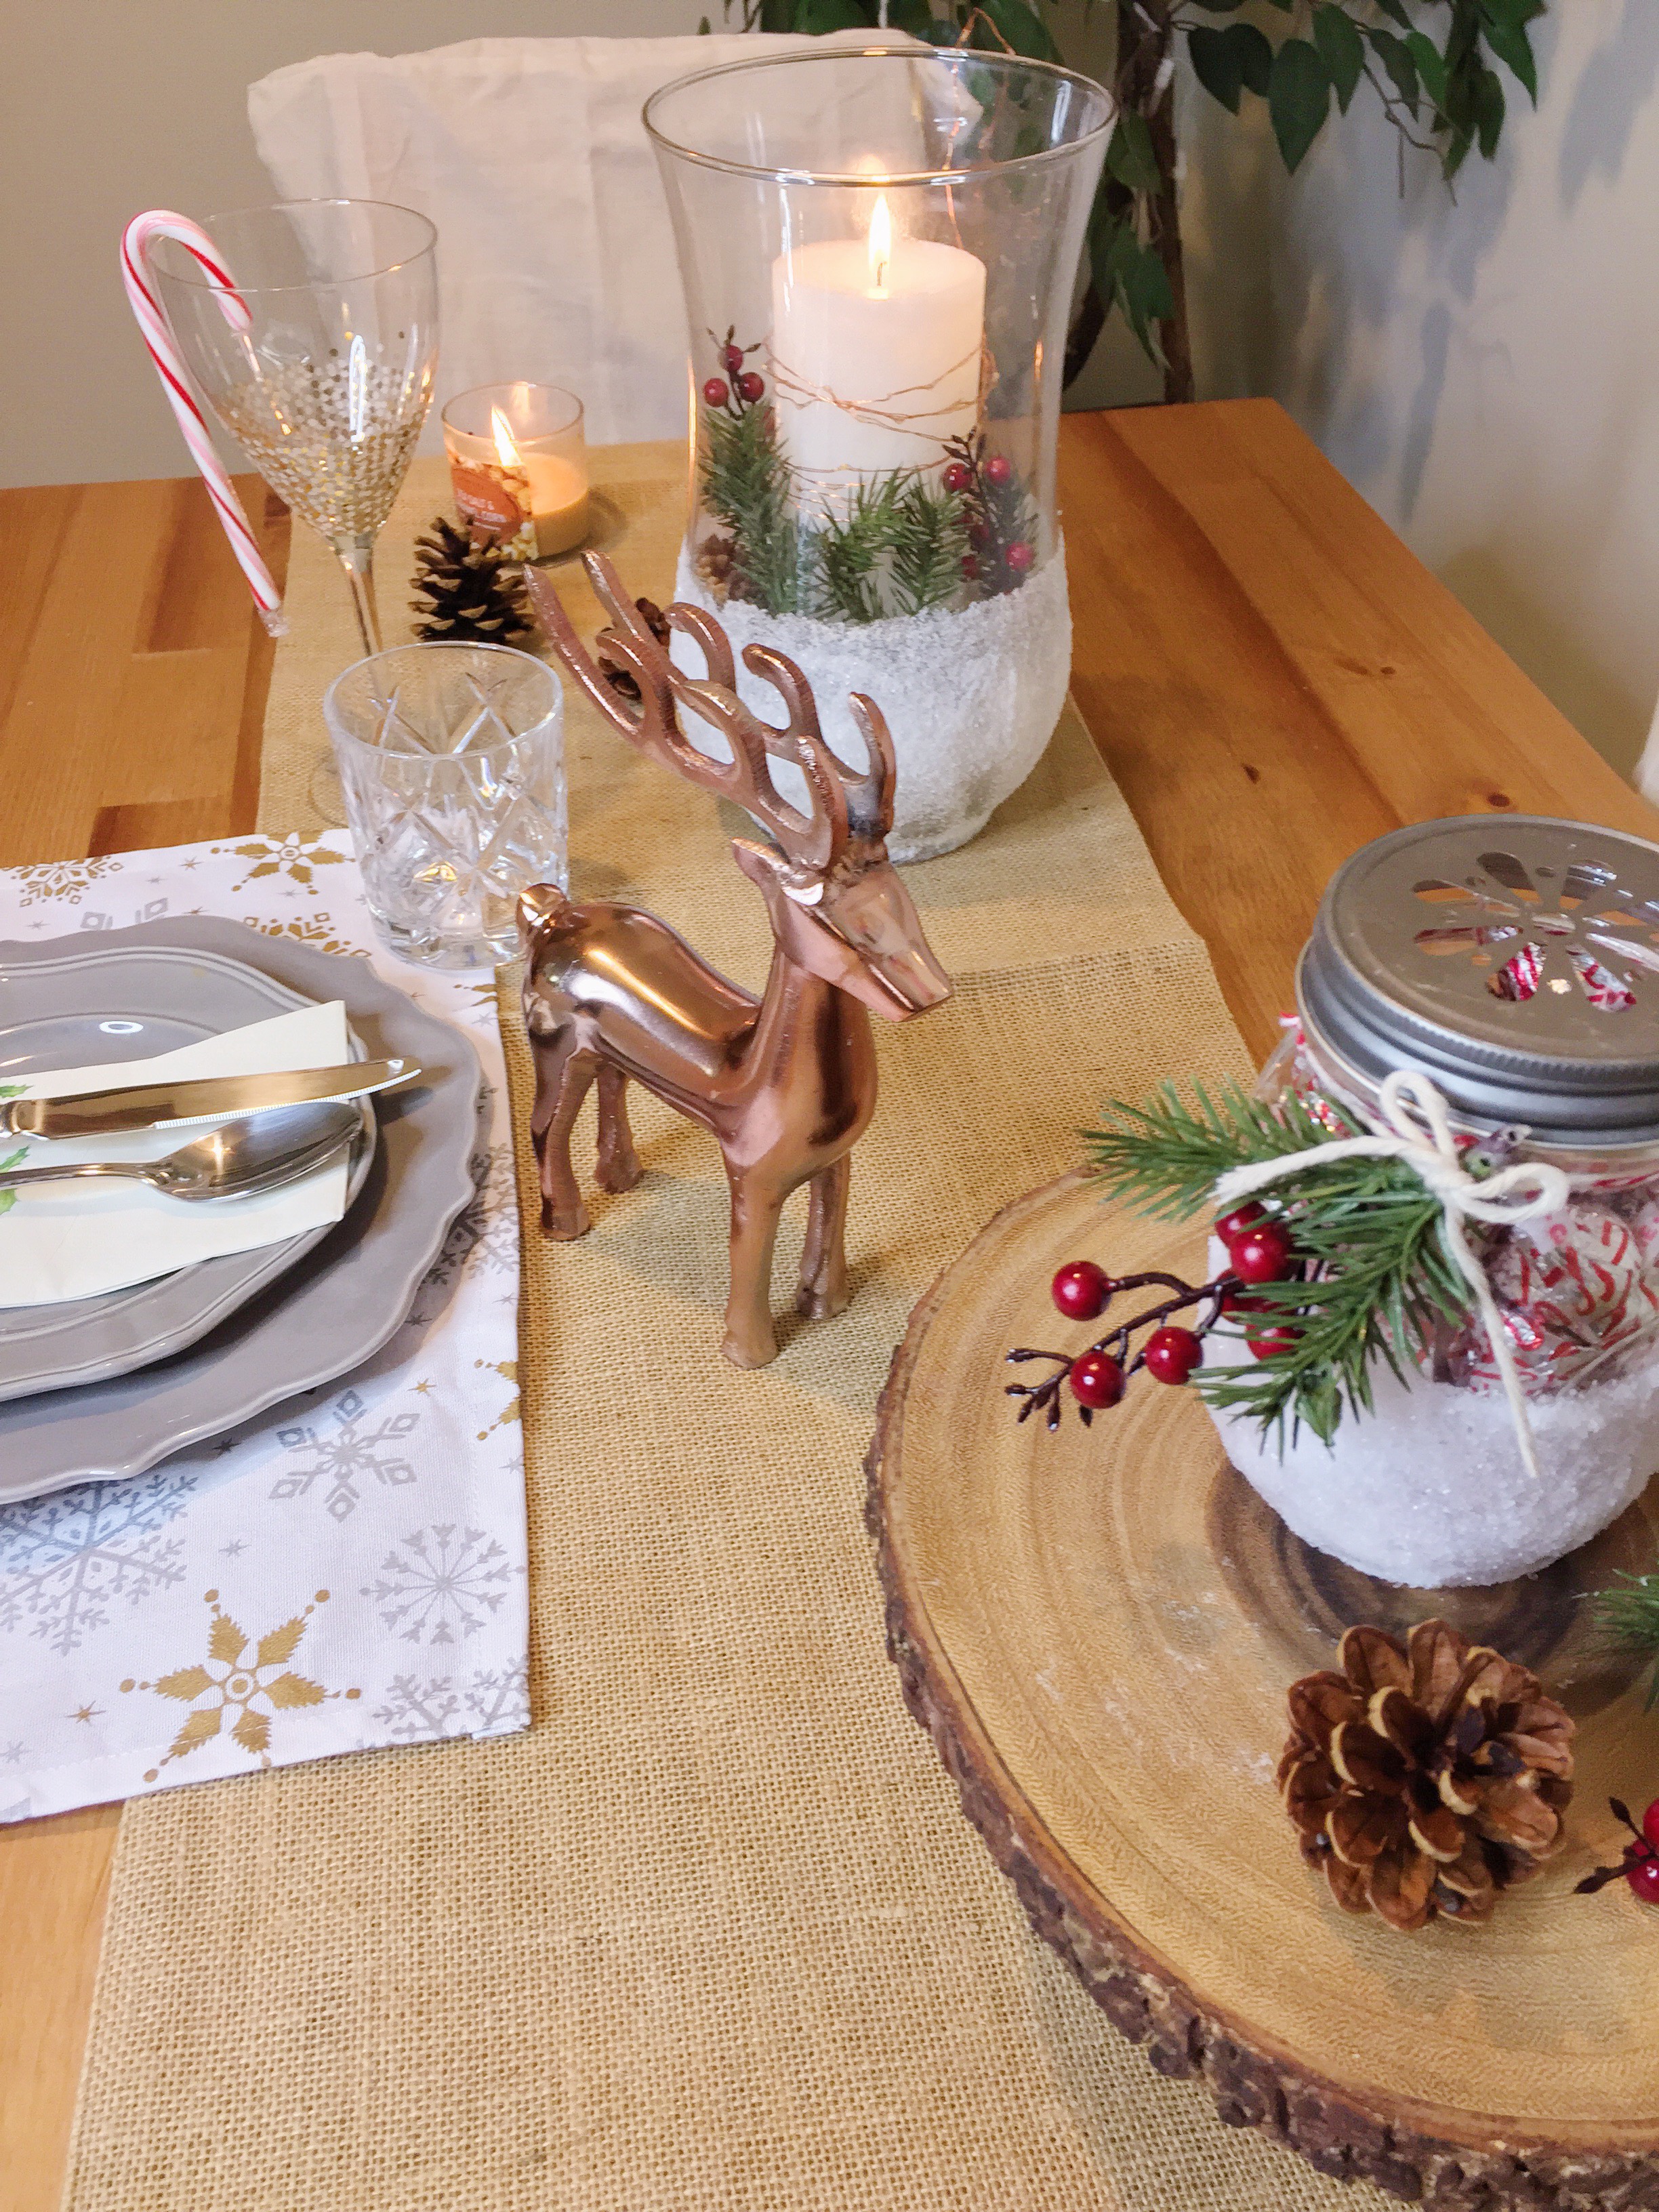
Twenty-one more sleeps until Christmas morning!!! So with that, I am feeling festive and this year I didn’t let ‘do it yourself’ projects intimidate me. I usually talk myself out of doing these kinds of things, but today I’m sharing with you my easy, festive, and QUICK do-it-yourself creations and cocktails. First up, this snow covered pillar holder!
What you’ll need:
tall glass pillar holder or sconce
pillar candle of your choice
epsom salt
mod podge
sponge or brush for mod podge application
faux pine branch with berries and pine cones
string of mini lights (optional)
Method:
Take your sponge or brush and coat the outside of the pillar holder with a thick layer of mod podge, going up with the mod podge as high as you’d like the ‘snow’ to go. Take a bowl full of epsom salt and dip the holder into the bowl using your hands to coat the mod podge with the salt. Set aside and let dry 20-30 minutes.
Fill the pillar holder with epsom salt up to just below the ‘snow’ line. Take your pillar candle and set it inside of the glass holder on top of the salt. Give it a nice little push to center it and secure it. Then take your pine branch and pluck off the bits you like- the berries, the cones- and simply stick them into the salt surrounding the candle. For some extra flare, take miniature lights and layer them up and around the candle. Now your festive snow-filled candle holder is complete!
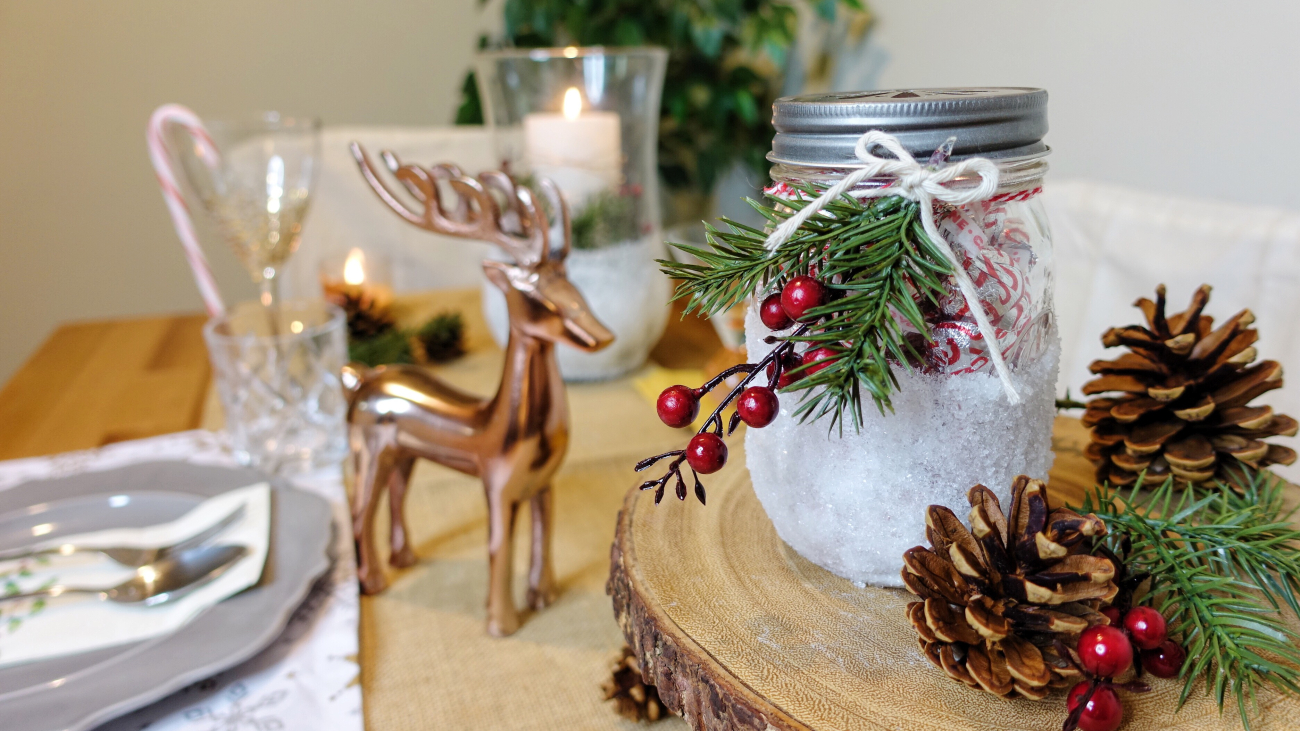
Now for this DIY gift! A merry-lil-mason-jar, filled with candy OR your favorite hot cocoa recipe mix!
What you’ll need:
mason jar with a lid
candy of your choice (or your favorite hot cocoa mix)
epsom salt
mod podge
brush or sponge for application
scissors
hot glue gun
festive string or burlap
Method:
Paint the mod podge three quarters of the way up the mason jar so that some of the candy shows through the glass once you’ve completed this project. Place the jar into the bowl of salt and begin applying a thick layer of salt around the jar, on top of the mod podge, using your hands. Set aside and let that sit 20-30 minutes.
Now we’re ready to decorate! Fill your mason jar with your favorite holiday candy or layer it up with your favorite hot cocoa mix. Pluck off some berries and pine stems and hot glue them into a bundle with a dollop of hot glue so that the bundle stays in place. Then wrap your string around the bundle so that it stays in place while hanging from the lid, and tie the string it all the way around the jar. Secure the knot with a prettybow just under the lip where the lid goes and tadaaaa!
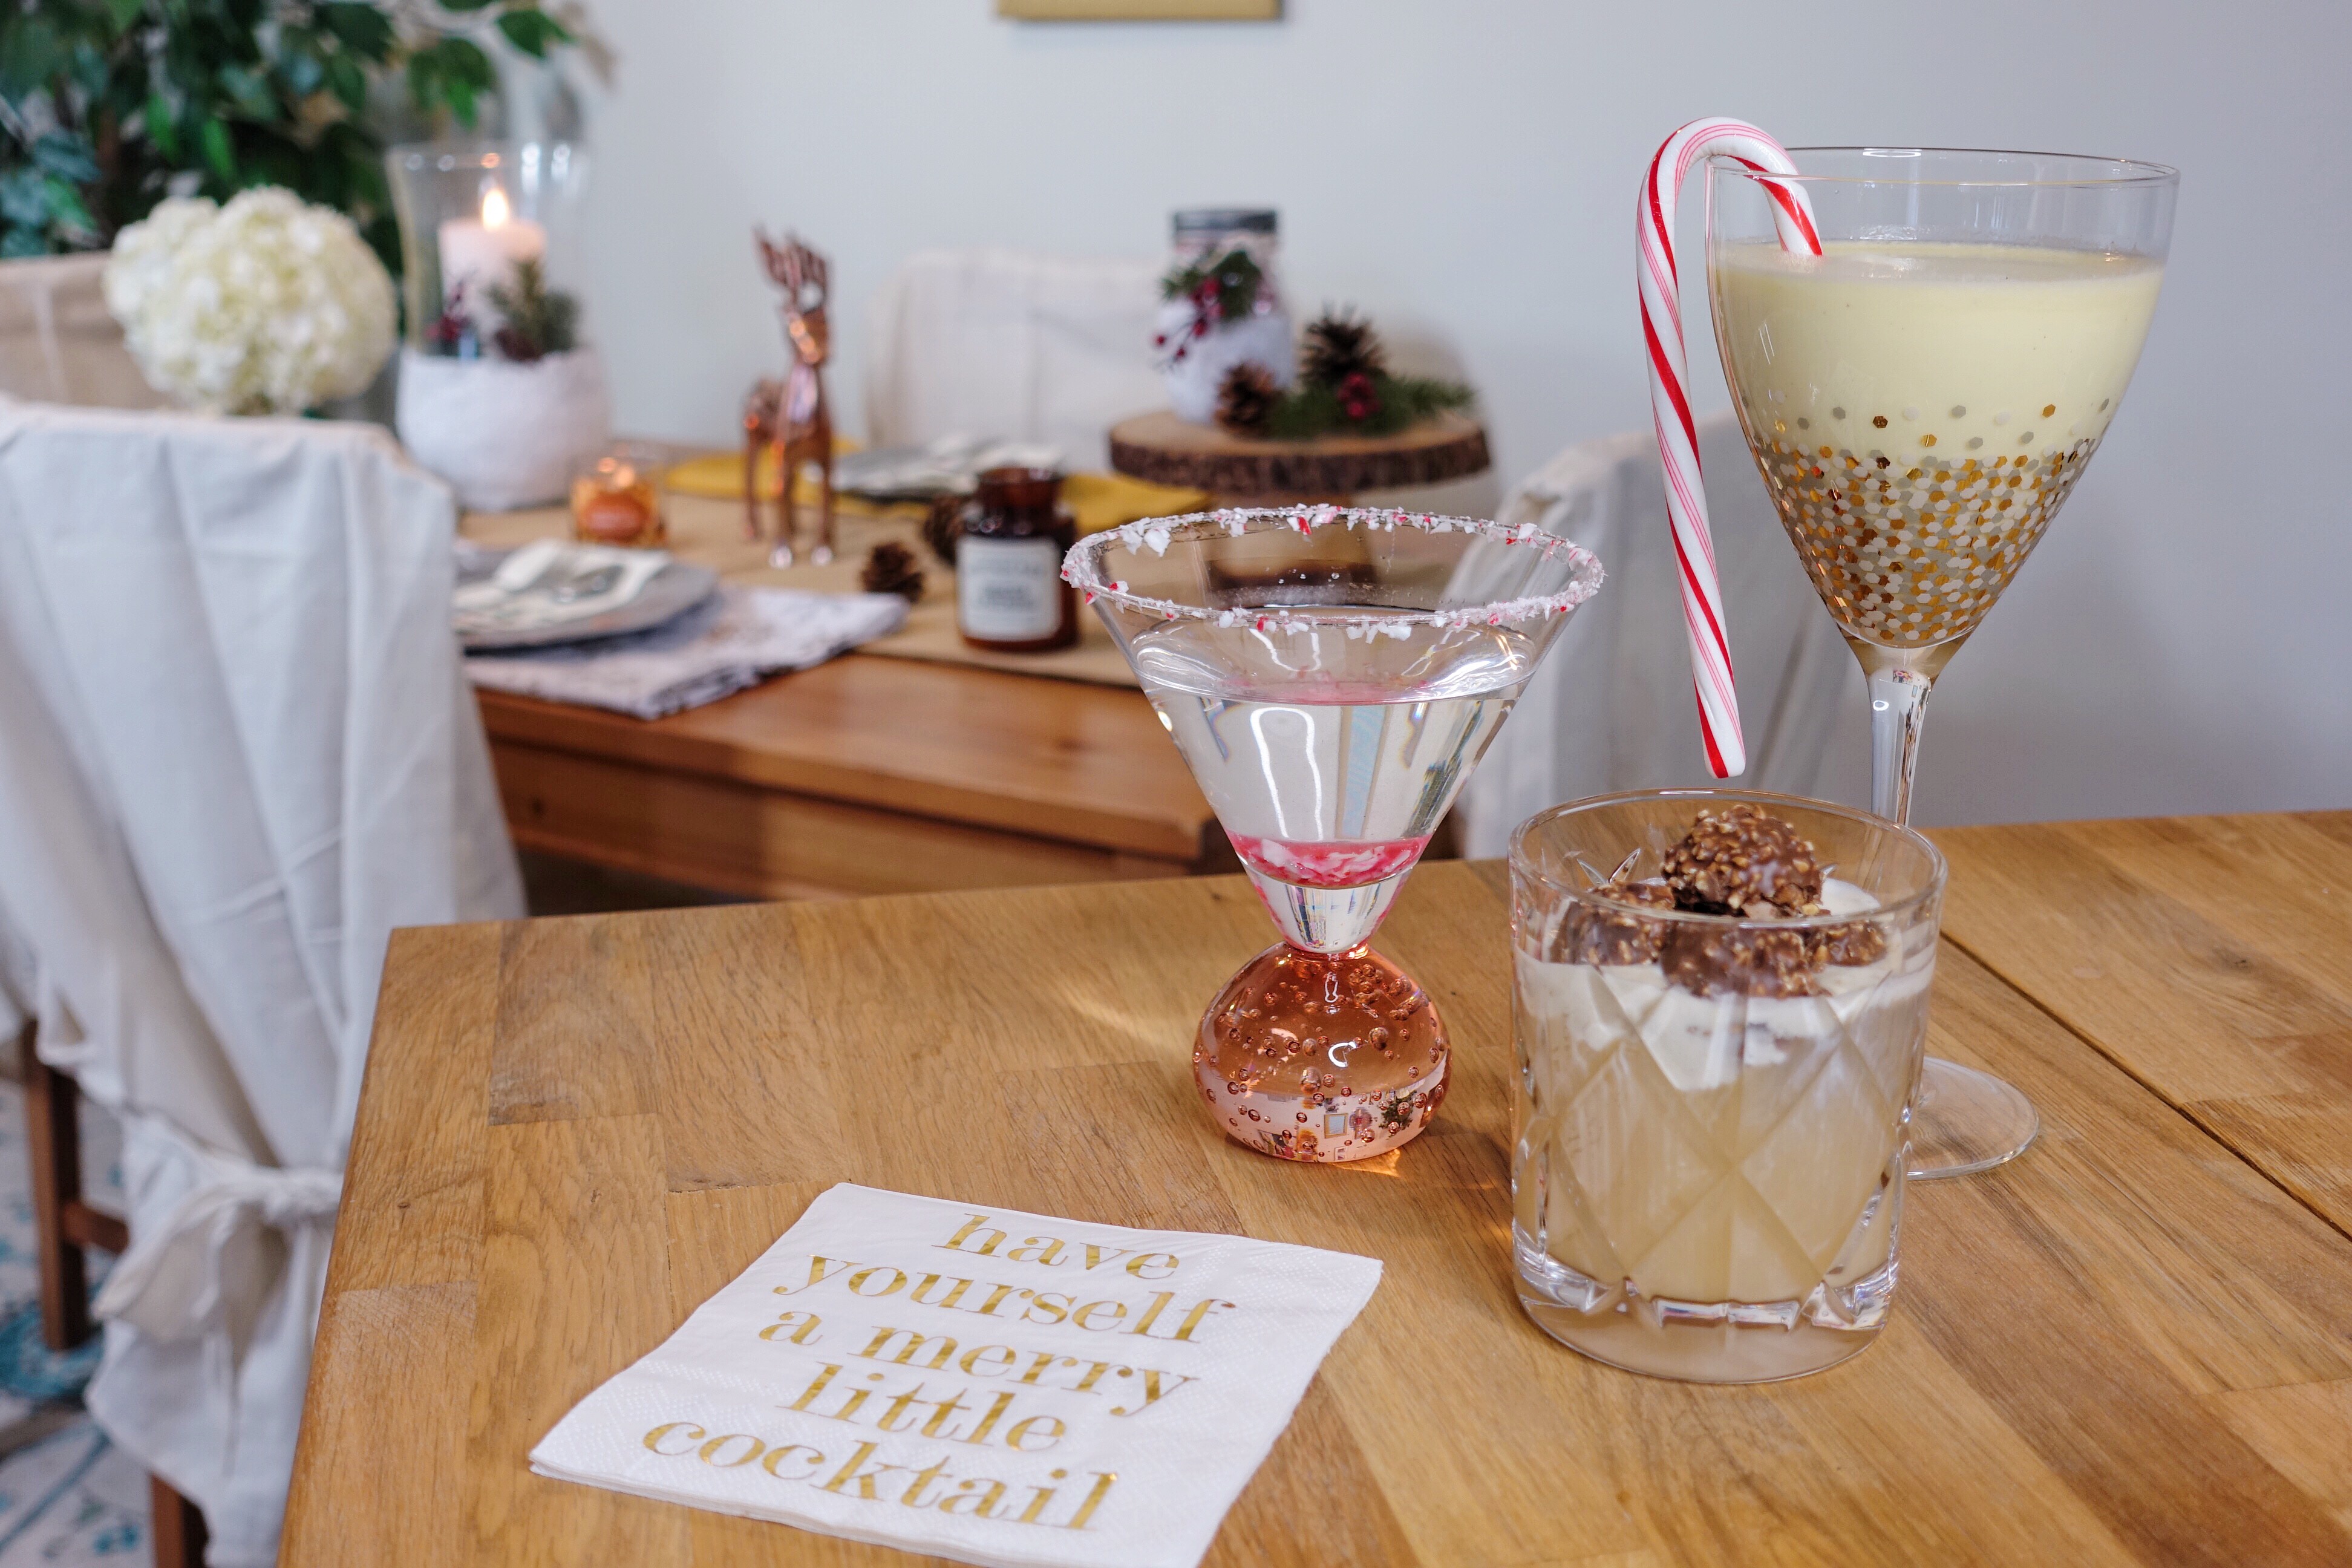
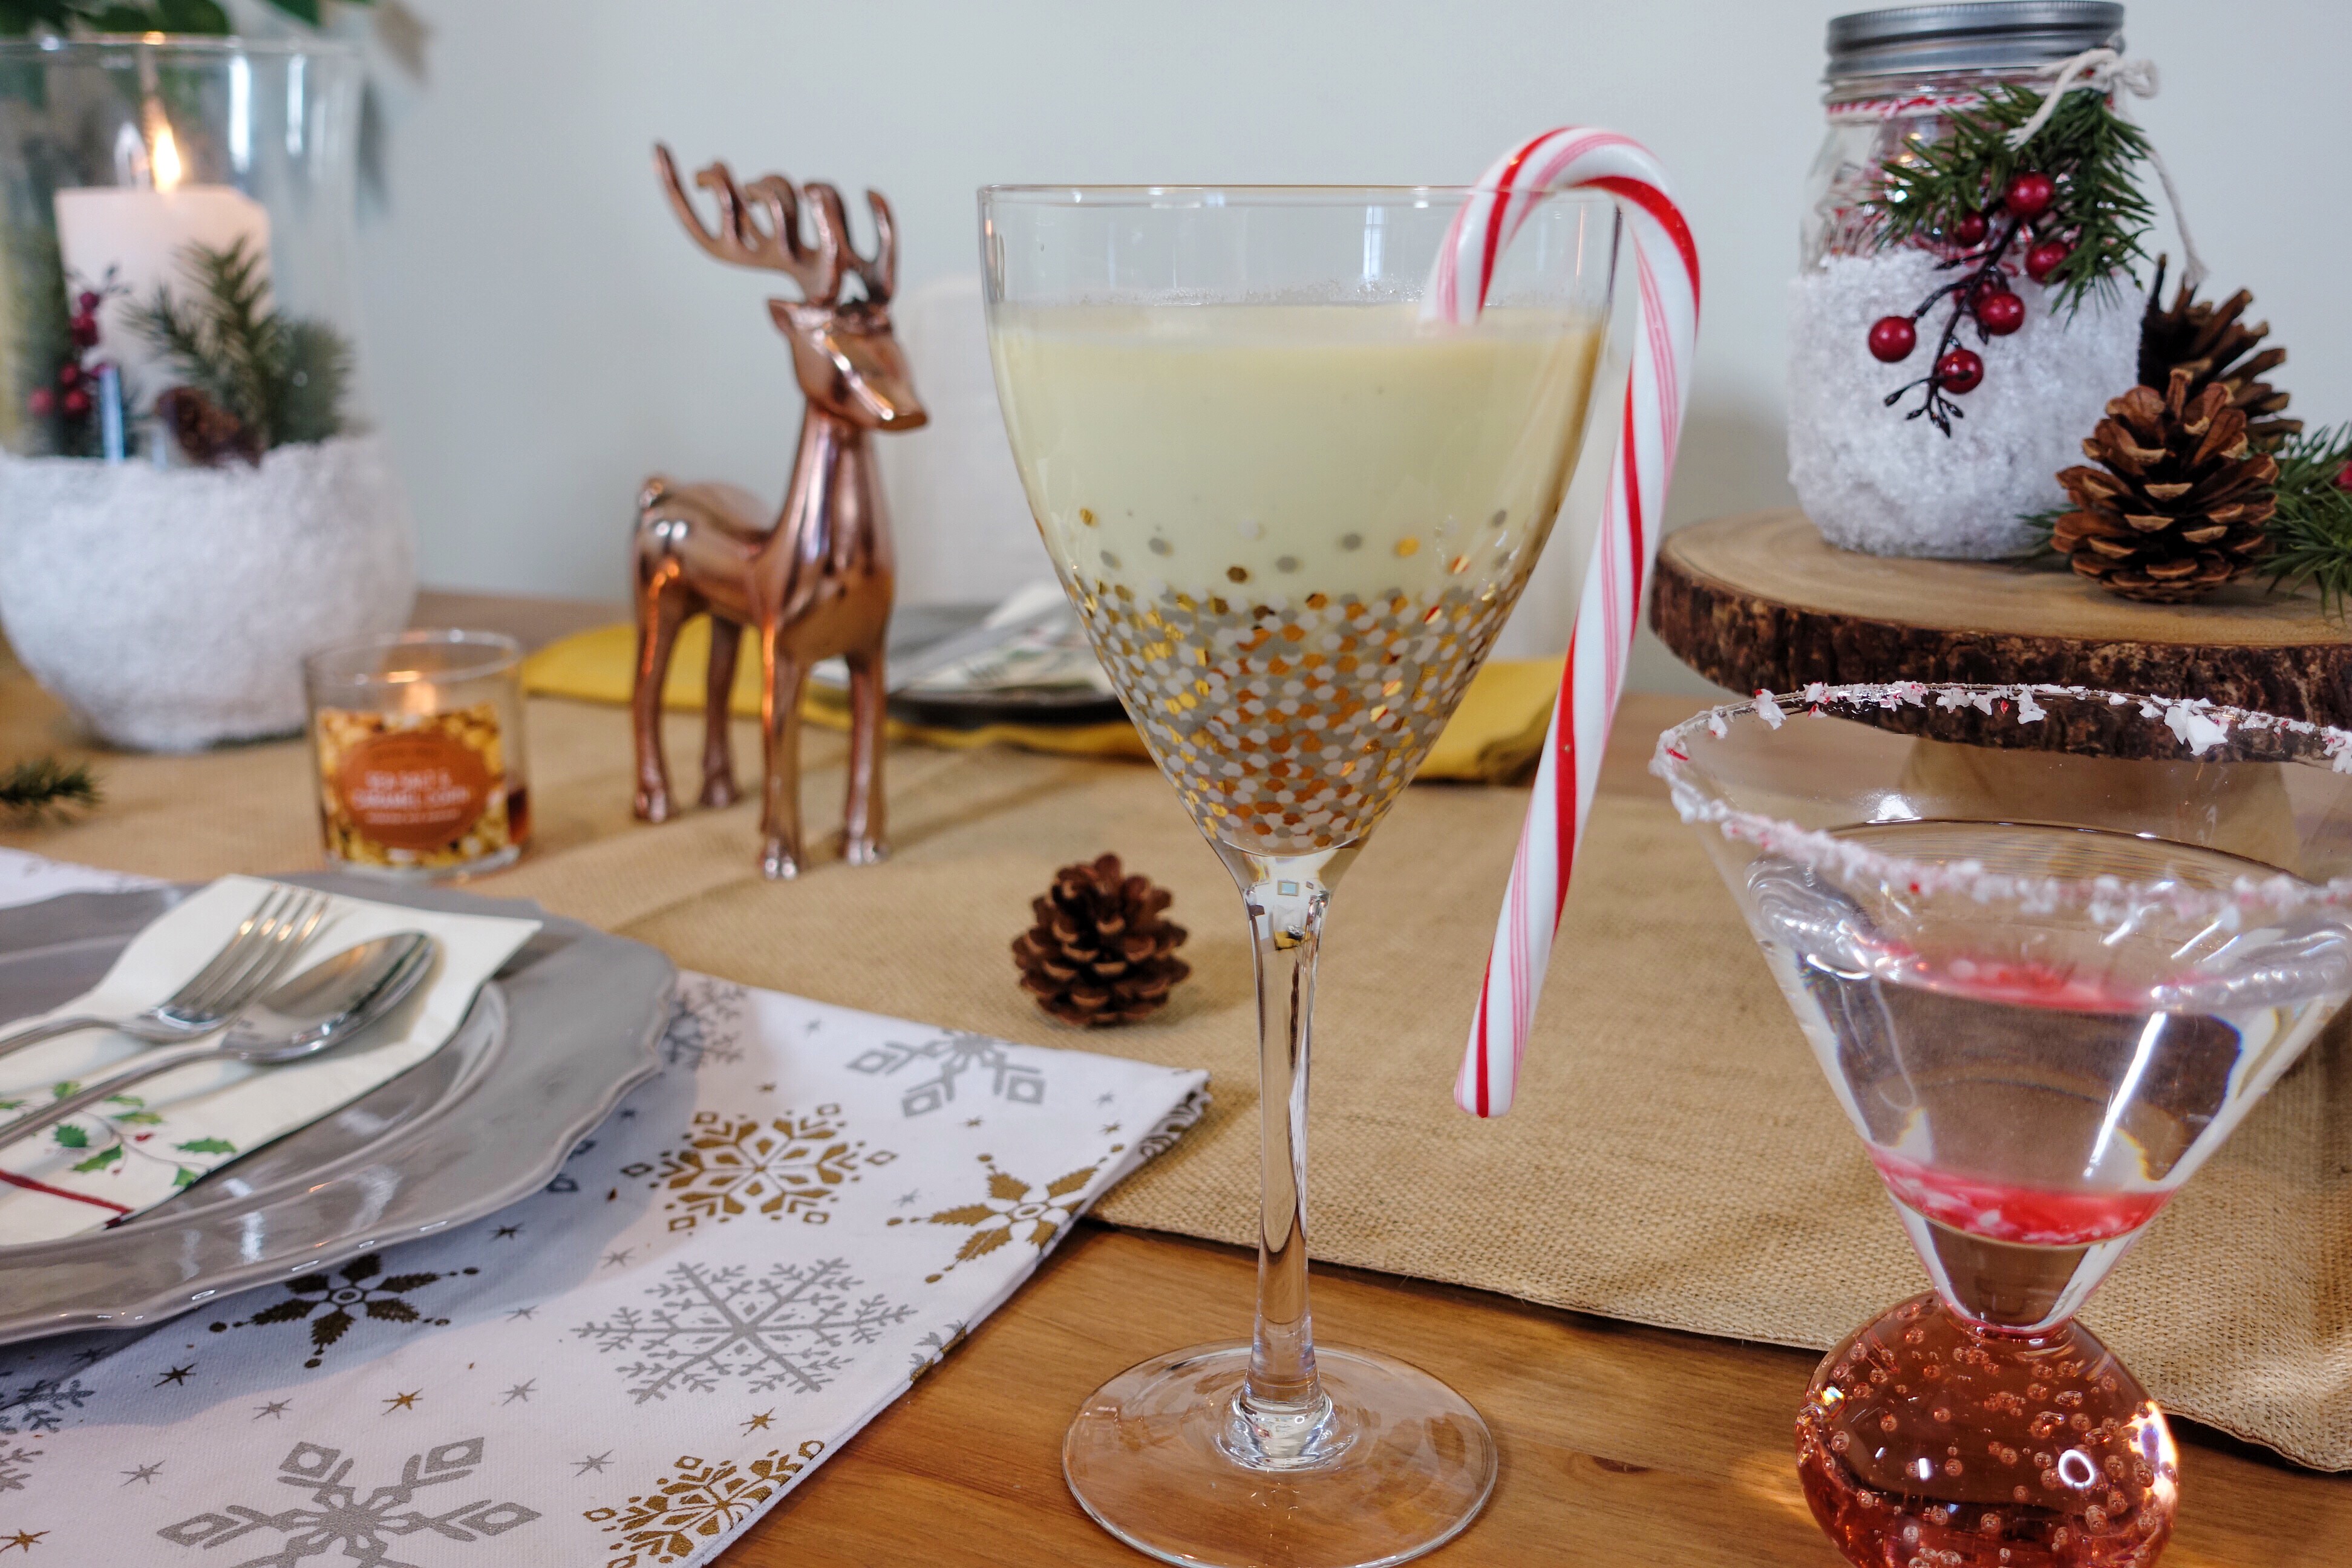
Holiday cocktail time!!! Today we’re making three holiday inspired cocktails, a peppermint kiss, a GRAND spiked eggnog, and a Ferrero Rocher chocolate bliss cocktail!!!
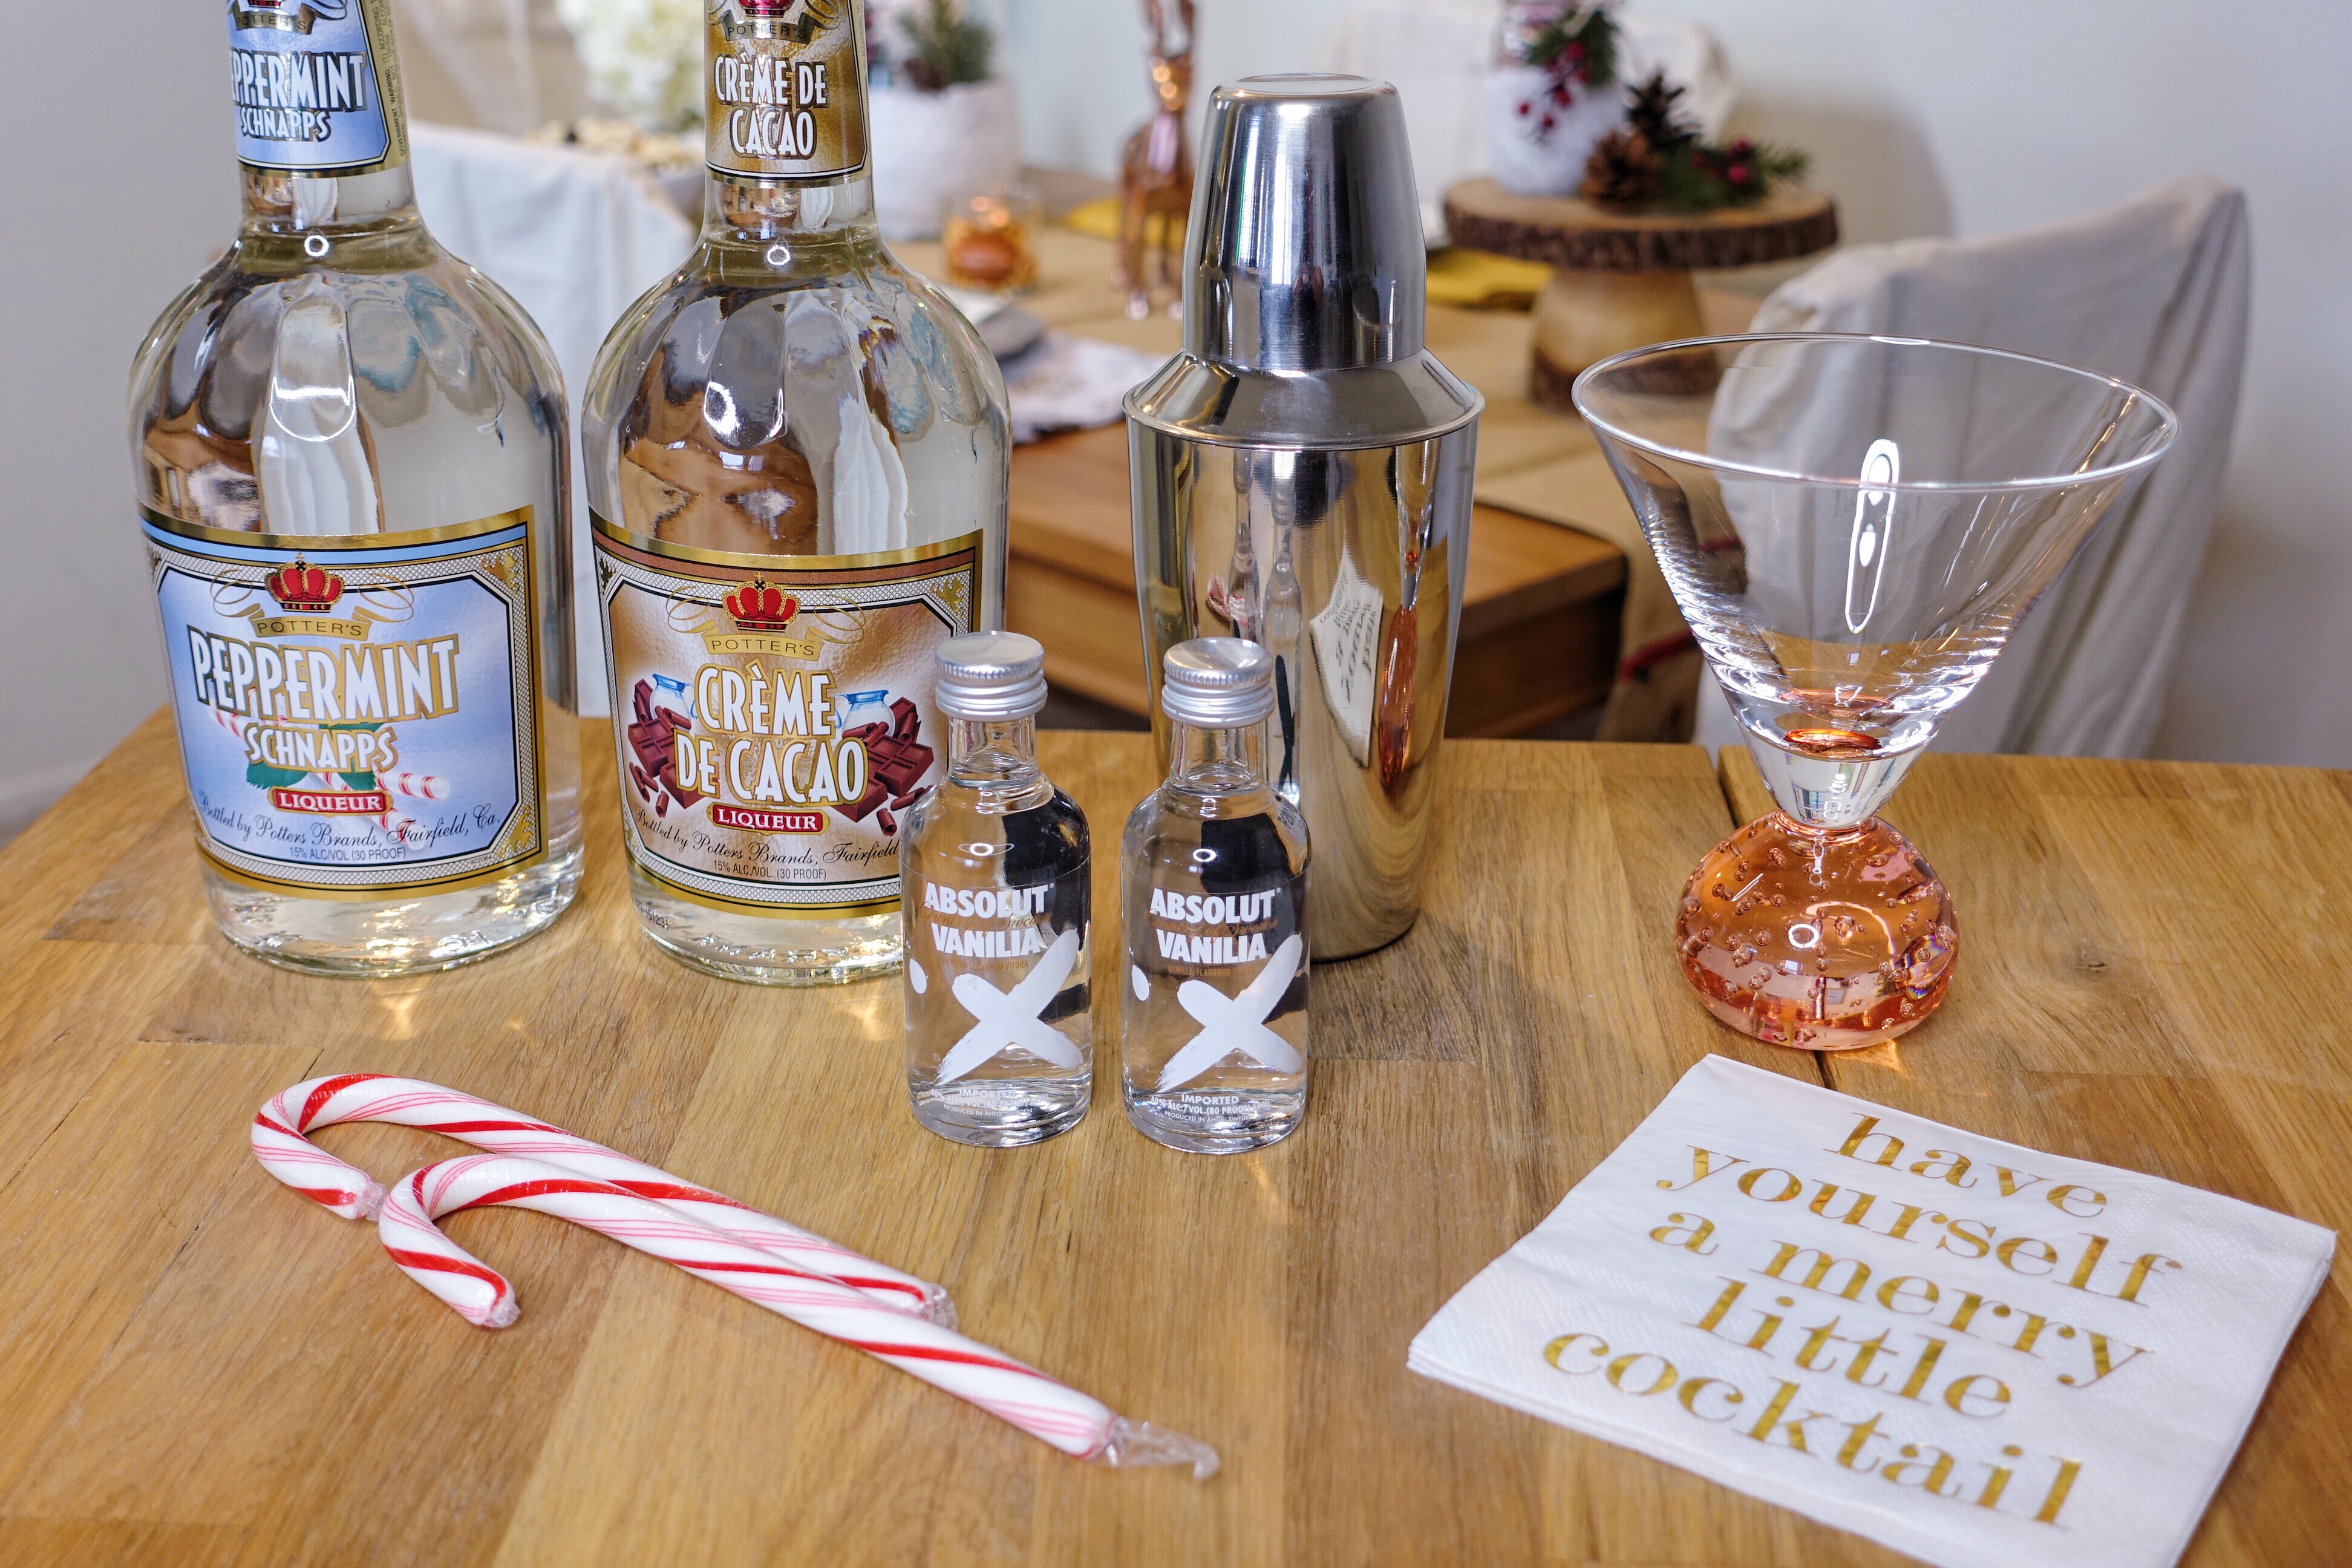
For the Peppermint Kiss Cocktail you’ll need:
martini glass
shaker
ice
white chocolate liqueur
peppermint schnapps
vanilla flavored vodka
peppermint candies
Method:
Take the peppermint candies, place them into in a plastic bag and crush them into tiny bits for the rim of your martini glass. Dip the rim of your glass into a liqueur and dip the glass into the crushed bits of peppermint, set it aside.
In the shaker add your ice, equal parts of the vanilla vodka and white chocolate liqueur- which is about 1/4 cup each. Add in 1 table spoon peppermint schnapps, and shake it all up! Pour the drink into your fancy cup, sprinkle in some more peppermint chips, and you’re done!
The GRAND Spiked Egg Nog!
What you’ll need:
fancy wine glass
egg nog
Grand Marnier
Method:
This one’s an easy one so don’t blink! Simply fill the glass half way with your favorite egg nog, and spike it up with 1/4 cup of your favorite cognac,I’m using grand mariner. Give the mixture a soft stir with a spoon or straw. Since both liquids are pretty thick I didn’t want to shake this in a shaker, so a little swirl with a spoon or straw and you’re set! Enjoy!
And the very BEST for last, the Ferrero Rocher Chocolate Bliss Cocktail!
What you’ll need:
low ball glass
a hazelnut liqueur (I’m using Frangelico)
cookie butter ice cream (or chocolate)
Ferrero Rocher chocolate candies
Method:
This cocktail is also super simple and it’s SUPER decadent! totally worth the five seconds it takes to make! Simply fill half of the glass up with the Frangelico then drop in a generous spoonful of ice cream! Top that baby off with some Ferrero Rocher candies and then ENJOY because this drink is worth every single guilty sip!!!
I hope you try making these drinks yourself and please TAG me on Instagram and Twitter when you do! Don’t be afraid of these DIY projects either, give them a go and let me know how it goes!!! The tutorial of each of these is up on my channel now so go show it some love!
Let me know what your holiday plans are and if you’re going to get adventurous in DIY this season!!!
It’s wedding season! For the type A/planner in me, I couldn’t have been more excited about gift giving and surprise planning than I was for this bachelorette party! My girl Linz is getting married in 3 weeks and I’m the maid of honor!!! This past weekend we celebrated her with a fun filled weekend in Vegas with the best group of girls you’ve ever seen, and I wanted to share with you all the fun things I did that you can use for your next Bachelorette/birthday/celebration! Also I suck at surprises and it was SO hard for me not to send the girls photos of everything I was doing.
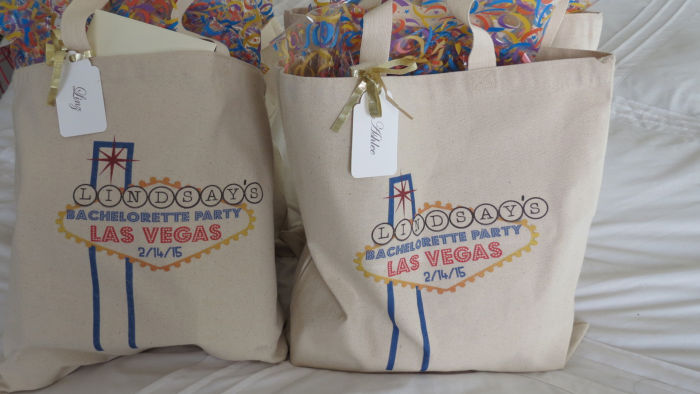
So I had these ‘Who Doesn’t Want That‘ totes especially made for Linz’s bach party with the date, because it’s the best party favor … cute and functional! Yes it was over Valentine’s day weekend and we had THE best ever Galentine’s day I could even have imagined #girlpower
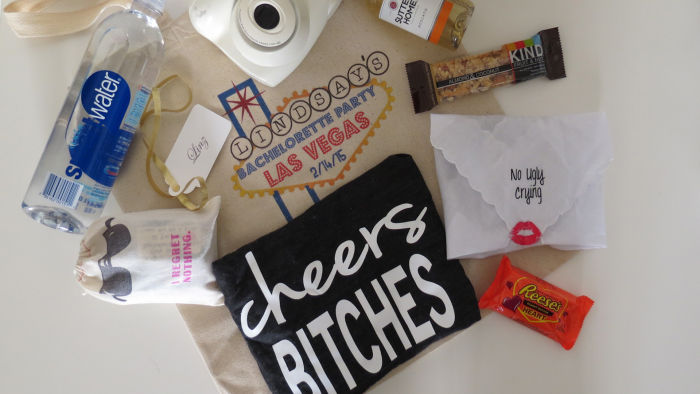
So in the bags I put together a lil ‘survival kit’ for the weekend complete with a hangover kit:
smart water because dumb decisions
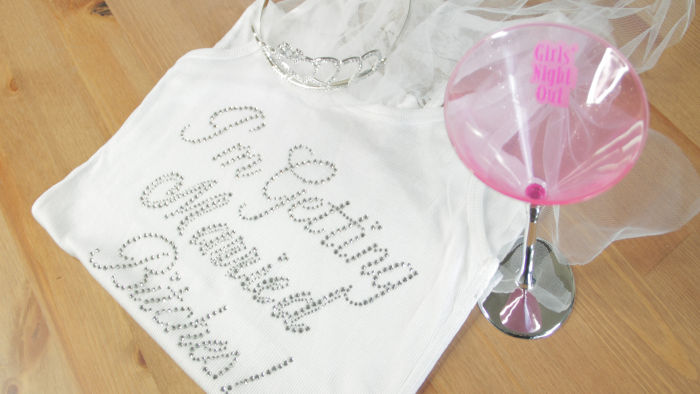
a ‘cheers bitches’ tank since this was our theme for the weekend
Reese’s candy, Linz’s favorite
Kind bars because we were meanies to our livers
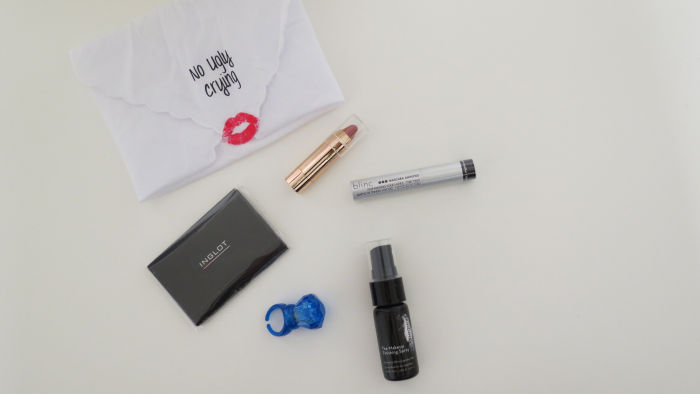
a ‘no ugly crying’ hankie filled with my favorite products to ensure no faces fell off
Moscato wine because never enough
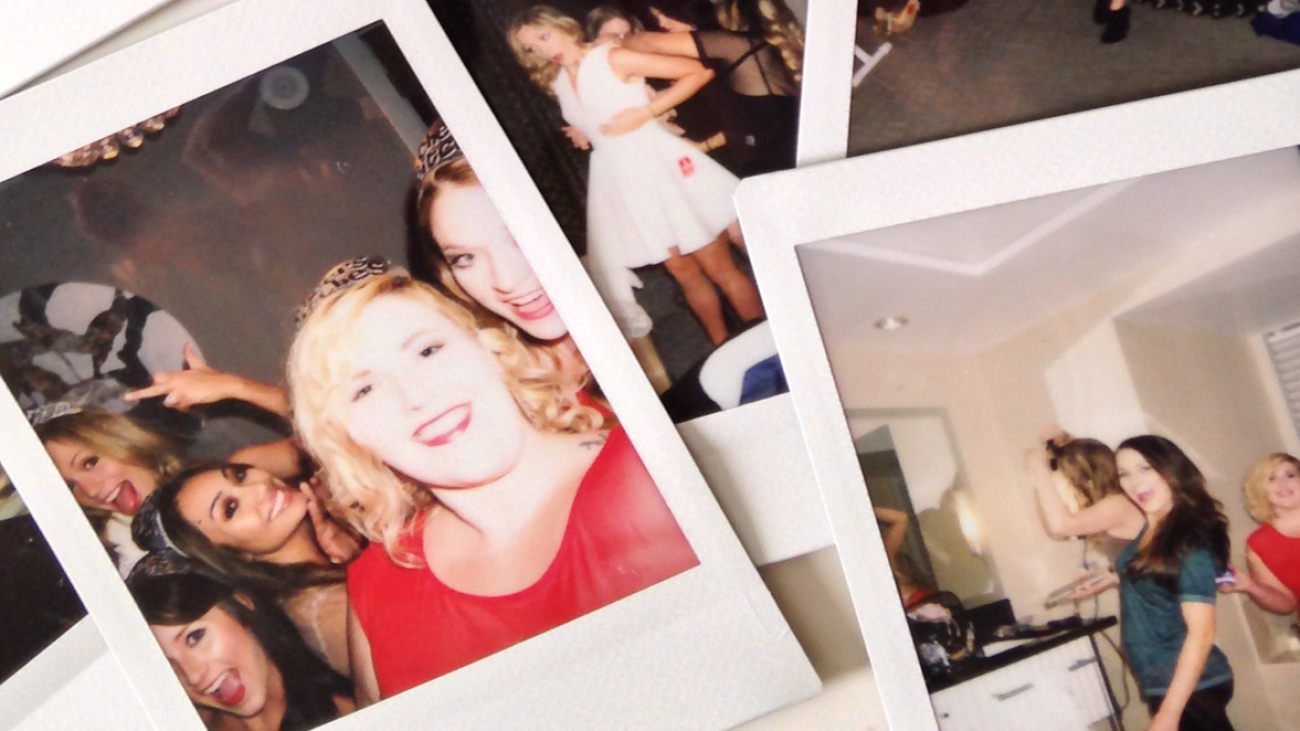
a pack of polaroids for the polaroid camera I brought because polaroids are lyyyfe
le mieux eye masks (didn’t fit in the photo)- best evaaar for dark circles & puffiness!
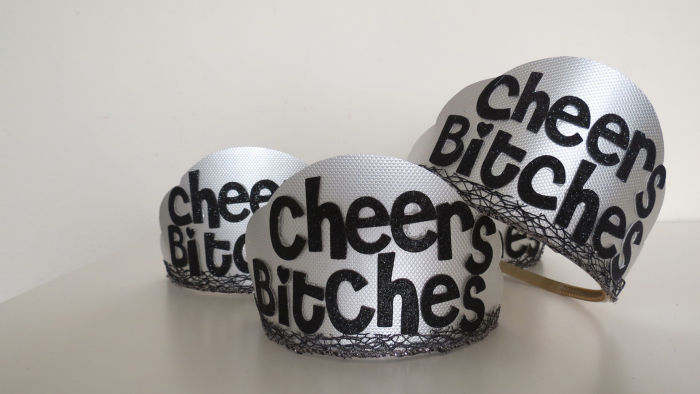
handmade tiaras that I made…with my hands thus they later fell a part!
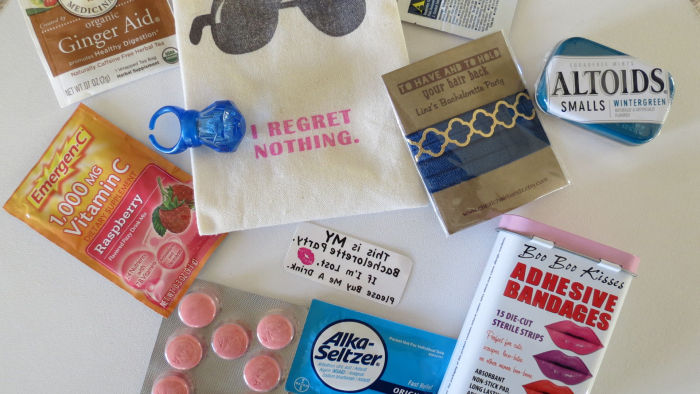
and “I regret nothing” survival/hangover kits!In these kits I put all my go-to items that you just NEED the morning after any kind of partying because survival mode:
my FAVORITE part of the gift bags: temporary tattoos that read “I belong to Linz’s bachelorette party. If I’m lost please buy me a drink!” (I mean….genius Etsy just genius)
ginger tea (aids in belly aches and nausea)
raspberry Emergen-C (tastes delicious and you need all the vitamins you can get)
nausea chews (these really do work!)
alka seltzer
kissy bandaids for any booboos (kissing a booboo makes everything better)
“To have and to hold….your hair back” hair ties with Linz bach note on it (cutest ever)
altoids
advil
glow in the dark rings so I could find my girls in dark clubs! We were likePower Rangers!
The ‘no ugly crying’ hankies folded into the perfect envelopes to hold some of my favorite ‘don’t let my face fall off’ products. Weddings will make you cry so I didn’t want anyone’s beautiful face to melt off:
Inglot blotting tissues (my favorite brand)
Blinc mascara that turns any mascara into a waterproof/ cry proof/ smudge proof magic-ness
my favorite lip liner that can double as blush and is perfect to layer or wear alone
Skindinavia’s setting spray (hands down the best) it’s time released and temperature controlled so when you start to sweat it kicks in high gear, hello dancing! (oh technology)
These were the ‘cheers bitches’ tiaras I made….after about 3 attempts, 2 trips to Michaels, a return to Marth-freaking-Stuart, and gluing 2 of my fingers together…. here they are! Post on the how to’s coming soon! I did so much DIY for this party that you’d all be so proud of me…because DIY is not my friend!
Linz’s bag had a few extra special items that I threw in there since it’s her big day I wanted even her martini cup to be wearing a veil! I got this tank from Etsy, and the tiara and matching cup veil cup came from Party City.
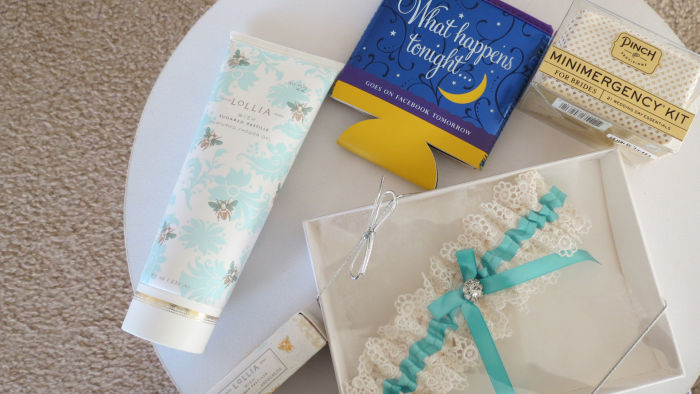
I think what makes a person a good friend is different from person to person, and what makes Linz a great friend to me, consists of too many words that deserve their own post. So I wanted her to feel just as loved, so in her bag also went her favorite Lollia Wish body wash and lotion, a bridal emergency kit, a quirky drink sleeve (because truth), and the something ‘blue’ I got her was this garter I had made for her that matches the same blue as Tiffany’s, and has Swarovski crystals surrounding the center bow. I fell in love with it when I saw it and I wanted her to have one to keep since one goes to a lucky bachelor! Every girl deserves a Tiffany blue something!
Some things I couldn’t make and bring with was the traditional penis cake….what an awkward conversation to have to the hotel concierge about baking such a cake and delivering it to the room! But it was so fun and their cake was delicious! I brought along with me the penis straws, cups, shot glasses, and all things penis I could find on the internet and it made for an amazing time!
Do it big ladies! Go ALL out and laugh until you’re swimming on a flooded bathroom suite floor with girls you absolutely adore, while having a communal bath and rubbing one another’s feet! haha yup that all happened! I honestly couldn’t have asked for a better more beautiful and supportive group of girls to be around than Bailey, Linz, Ashlee, and Meghan who I spent an incredible weekend with (Dani you were missed girl!!!)! I got so much closer to them and I’ve known them for years! There was no drama, it was all love, all laughs, and all dancing! Top night ladies!!! #buttsout
Hope you all have a wonderful rest of your week and party til ya need an IV in the mornin 😉 We did that too!
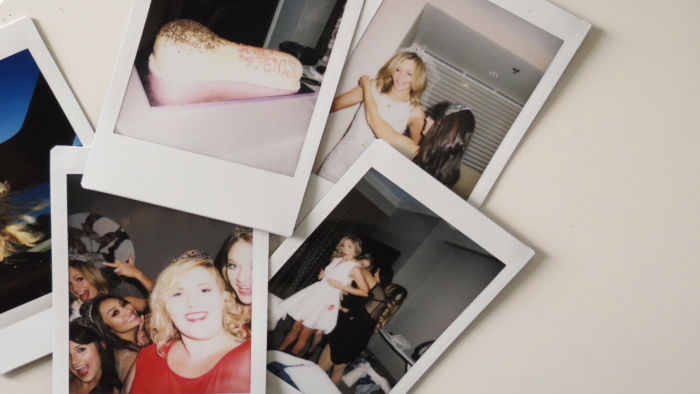
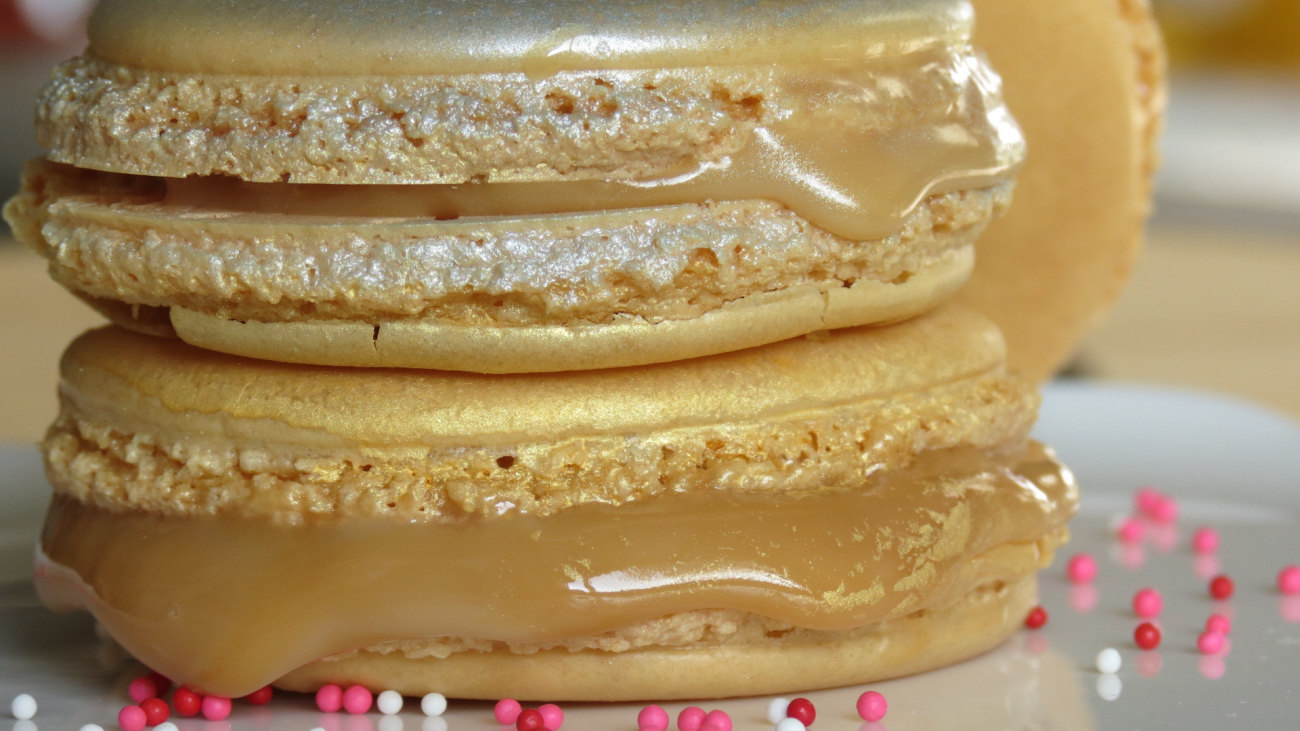
Macarons can totally be romantic right?! You bet! These babies were a labor of LOVE!!! These sweet treats make a perfect dessert or gift idea for this Valentine’s day- for your loved ones and friends! These are salted caramel metallic gold and silver macarons and I get it now why these crunchy, chewy, sweet, and savory treats can be so expensive. This photo was taken this morning after:
two trips to Bed Bath & Beyond
two trips to my local grocery store (in sweats and tear streaked cheeks)
an impromptu trip to Target at 10PM
a trip to Michael’s
and dumping the entire first batch to start again from scratch at 11PM
Let me tell ya, if you’ve mastered the art of making macarons than you’ve mastered an art. Below is a recipe I got from two different places EatLiveTravelWrite and HowToCookThat blogs.
I’ve linked you to the two original recipes if you want to follow their method, HowToCookThat’s blog, saved me from breakdown number two! I won’t list the step by step here since she so adequately displays the ‘how to’s’ over there. Instead I’ll show you what I learned along the way to get these fluffy, chewy, and delicious macarons…..errr take two!
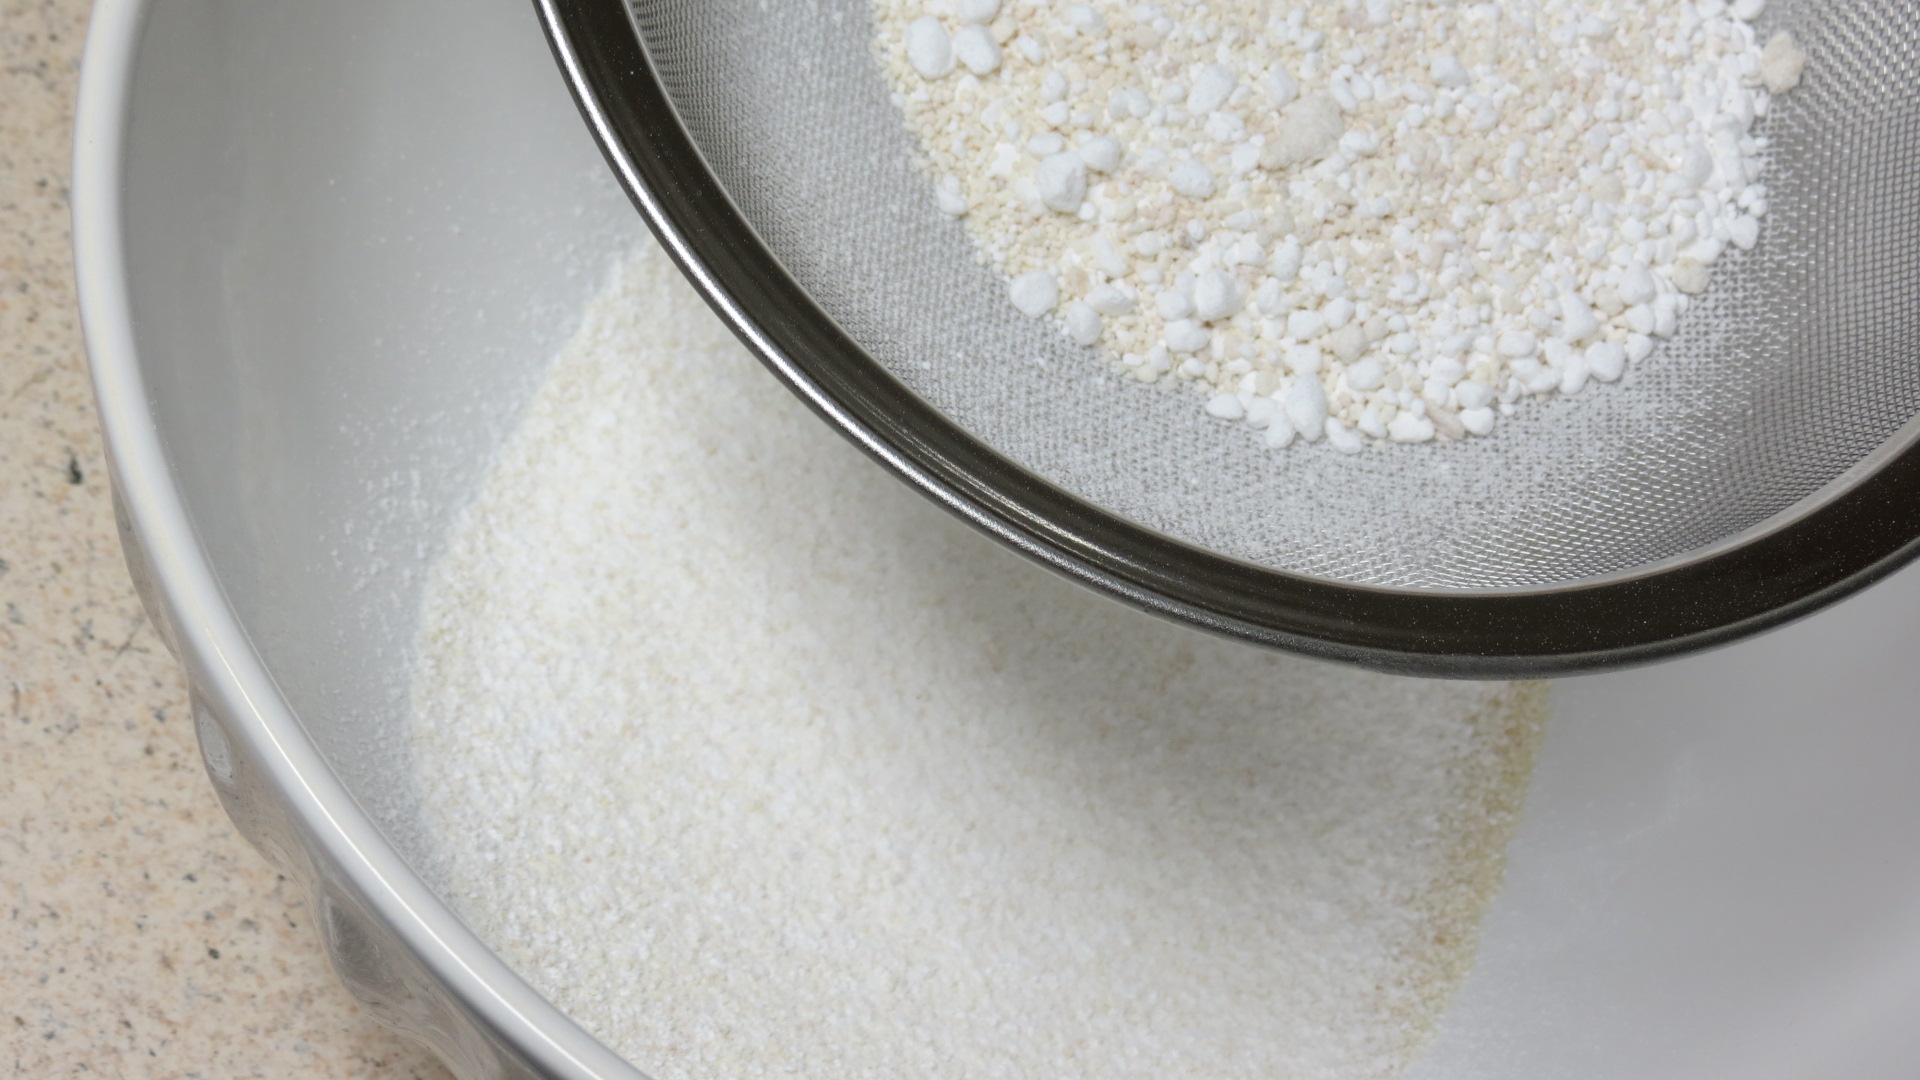
First sift your dry ingredients once twice….trust me on this. And set aside.
I took my egg whites out for about 2 hours before I whipped them into a fluffy mound. Just when you think it’s ready, it’s not…keep on whisking folks! It took me about 15 minutes by hand to achieve what 2 minutes of an electric mixer did.
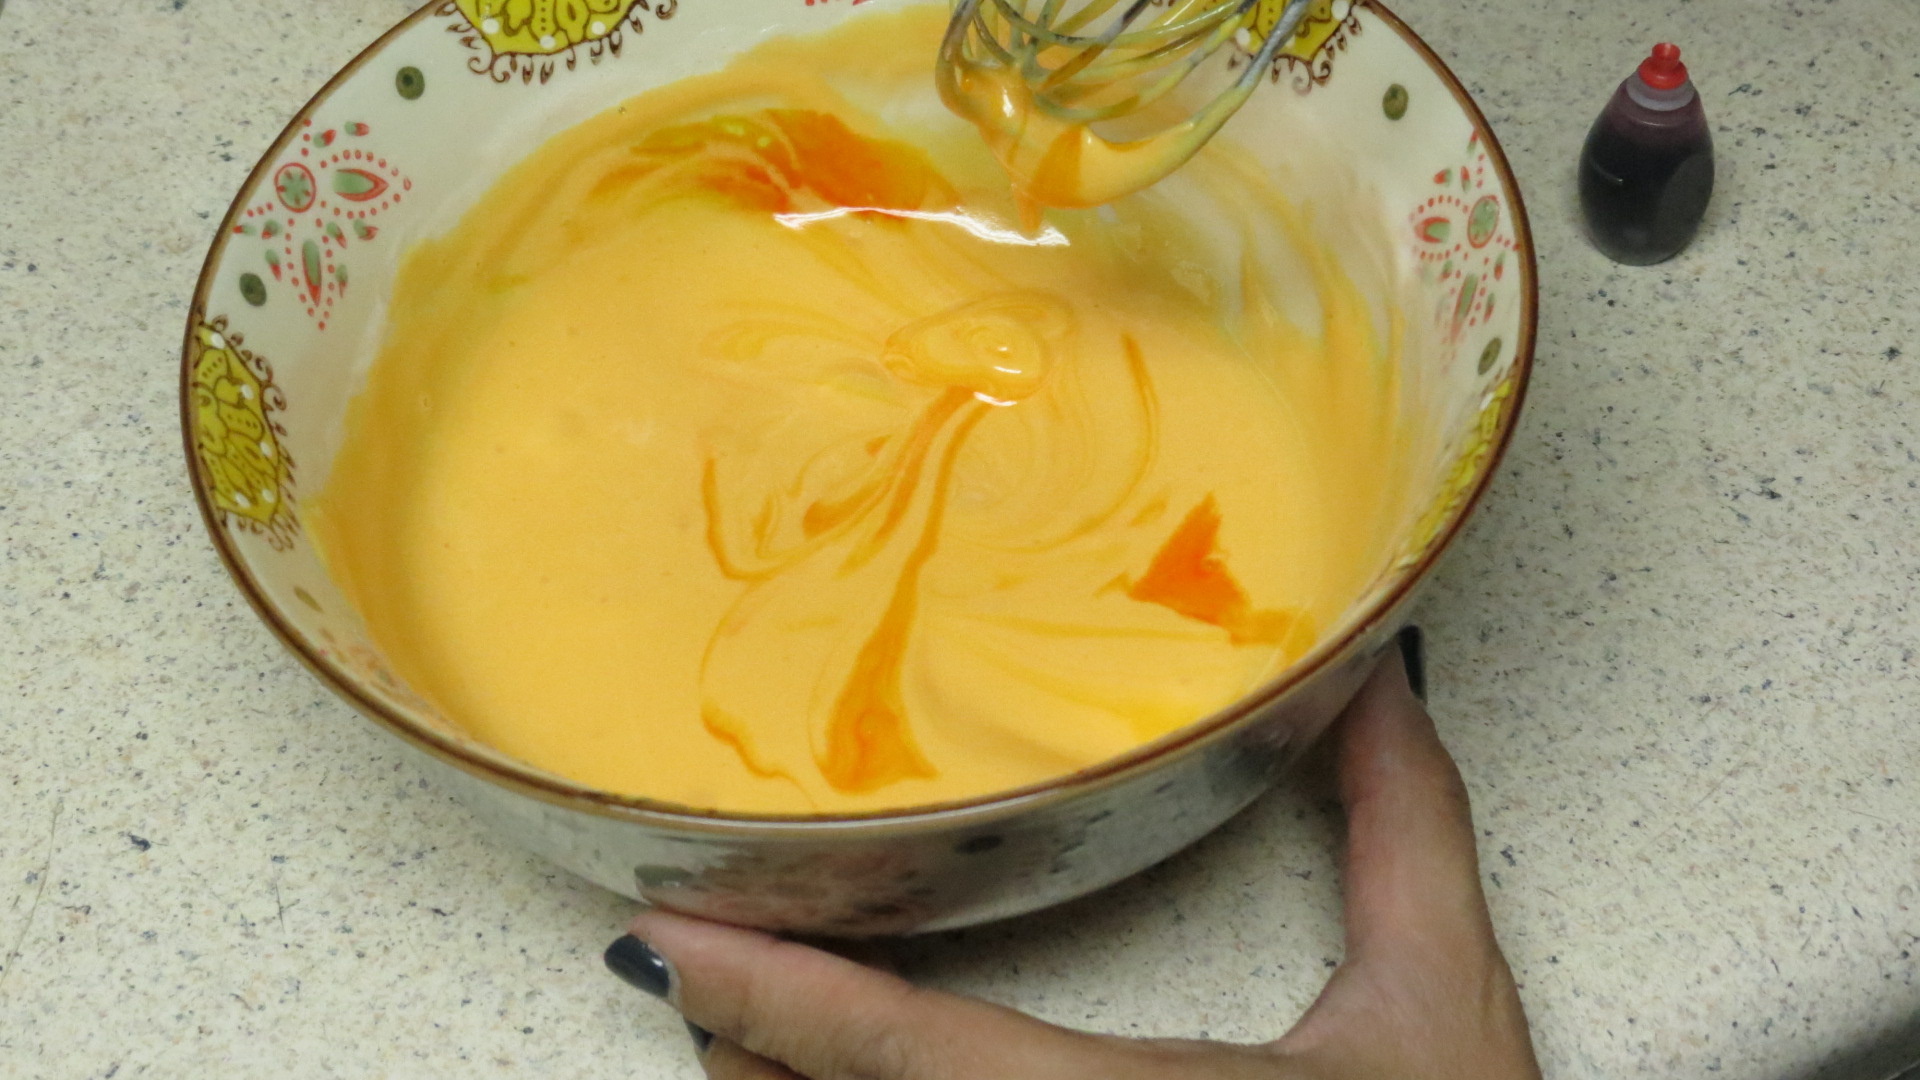
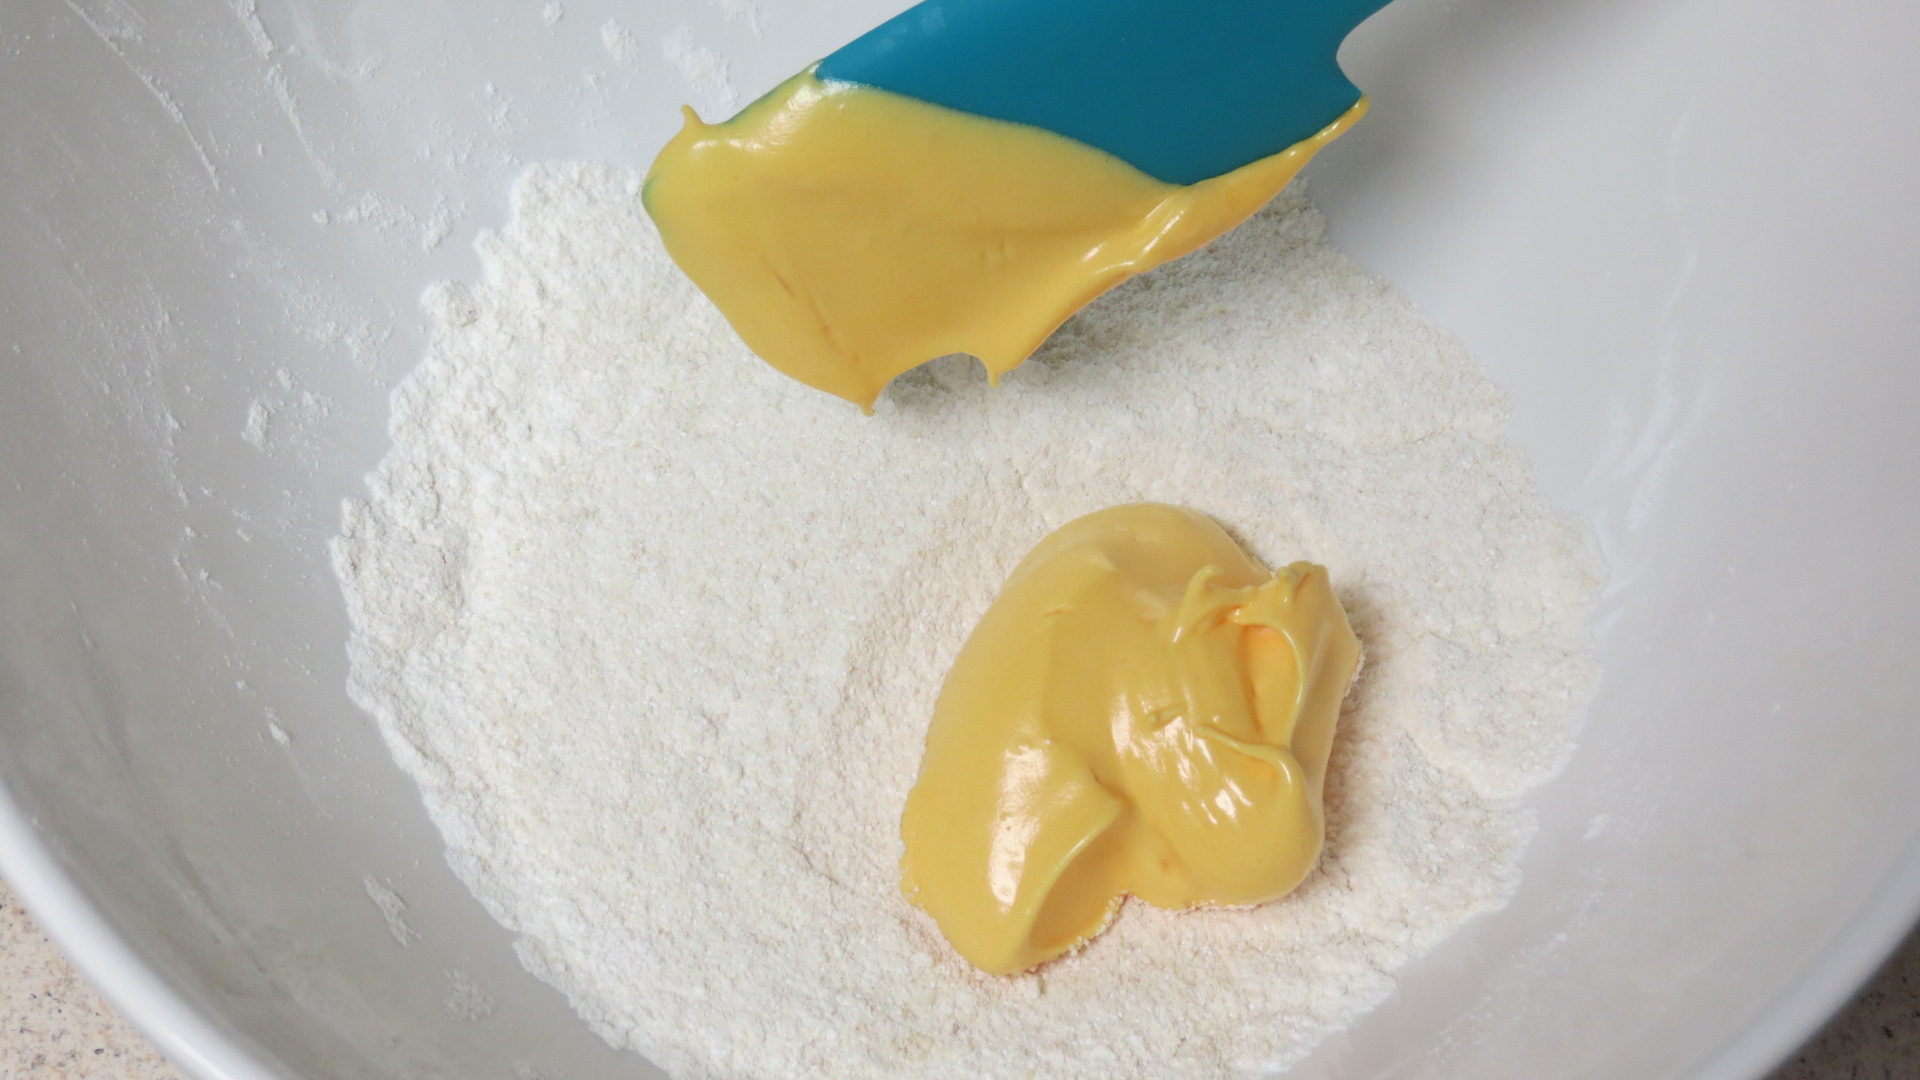
I wanted a golden macaron to fit in with the theme of metallic salted caramel, so I mixed in 10 drops of yellow food coloring with 2 drops of red food coloring.
Then I added it into my dry ingredients and folded, press, turn….that’s the method. Fold, press, turn, repeat. Until your mixture flows like lava!
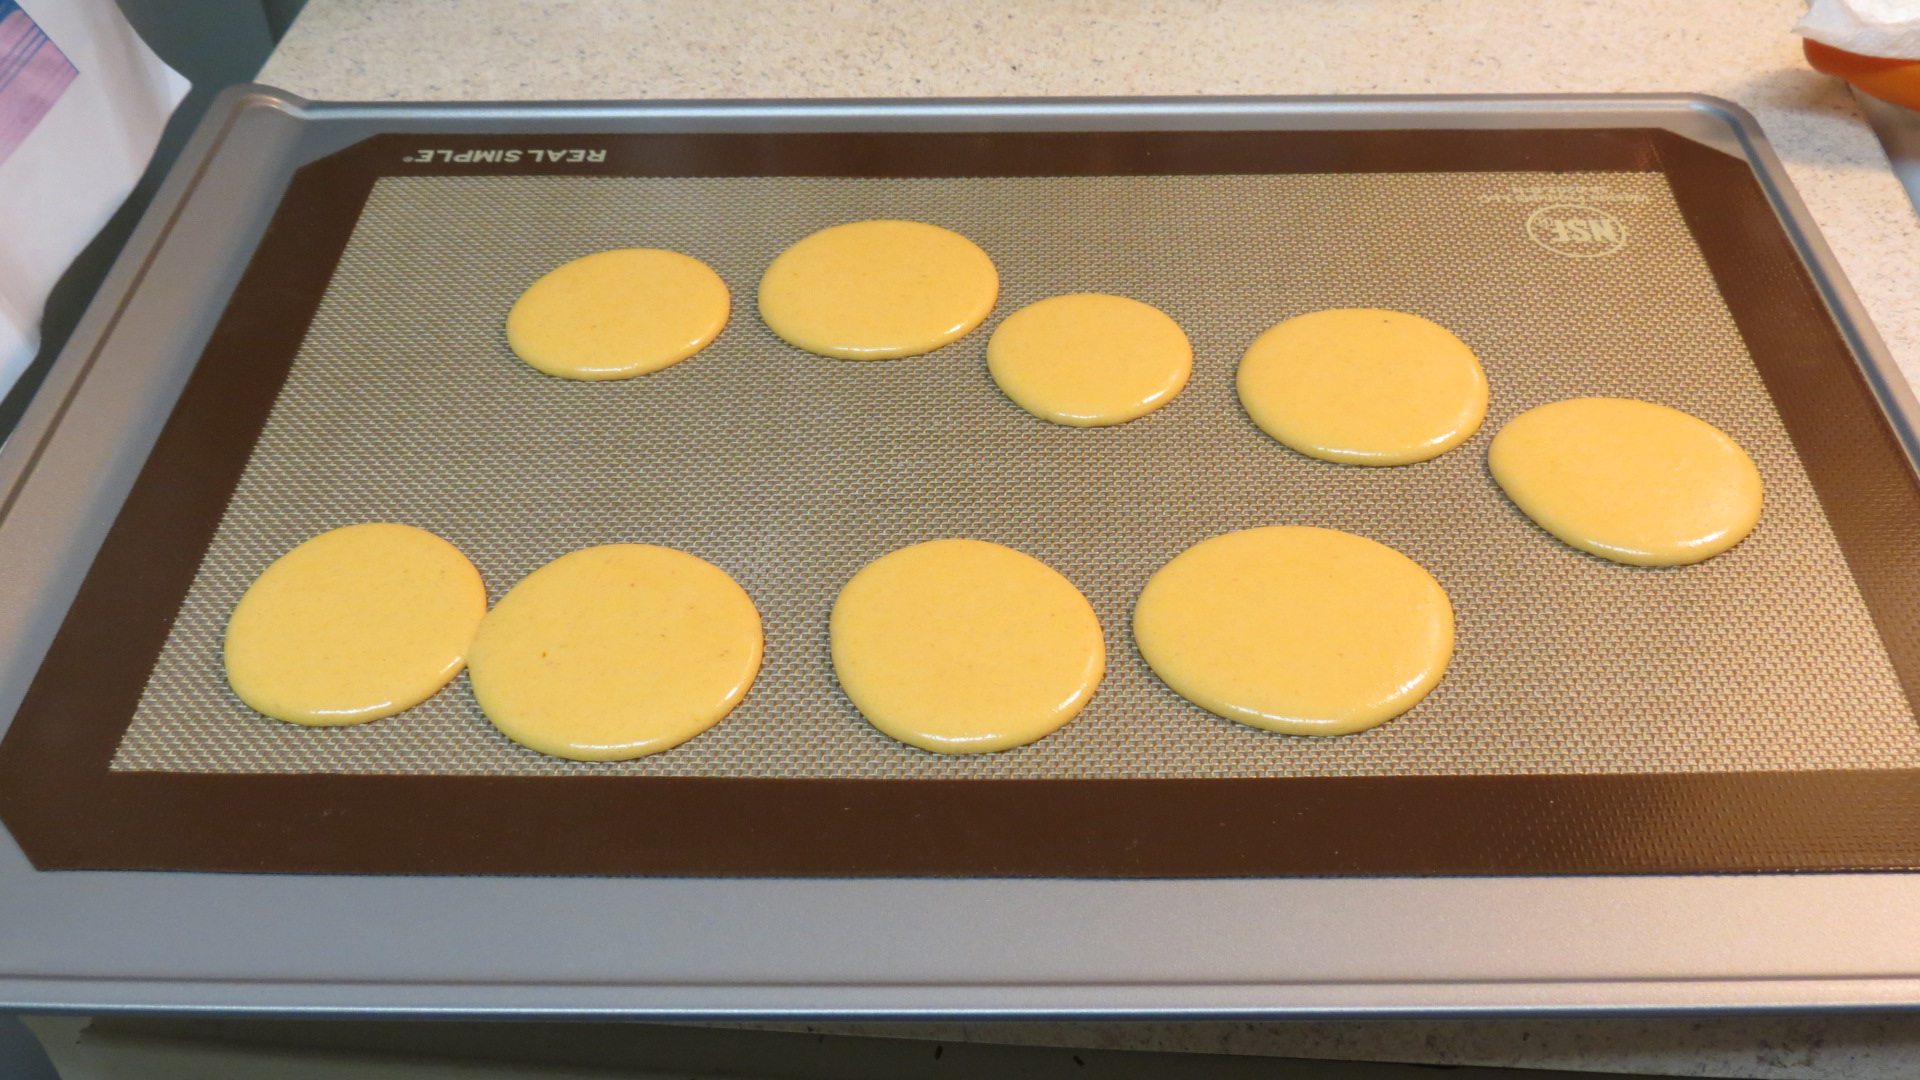
I piped my ‘rows’ of batter into an odd zig zag pattern for some reason, also they were huge like loving lil cookies, some even touching. They will spread so don’t over pipe them out like I did.
Allow them to rest on the counter for about 30 minutes after racking them to release air pockets. This is the time to set your oven to 300 degrees and sprinkle a bit of coarse salt on top of each of them.
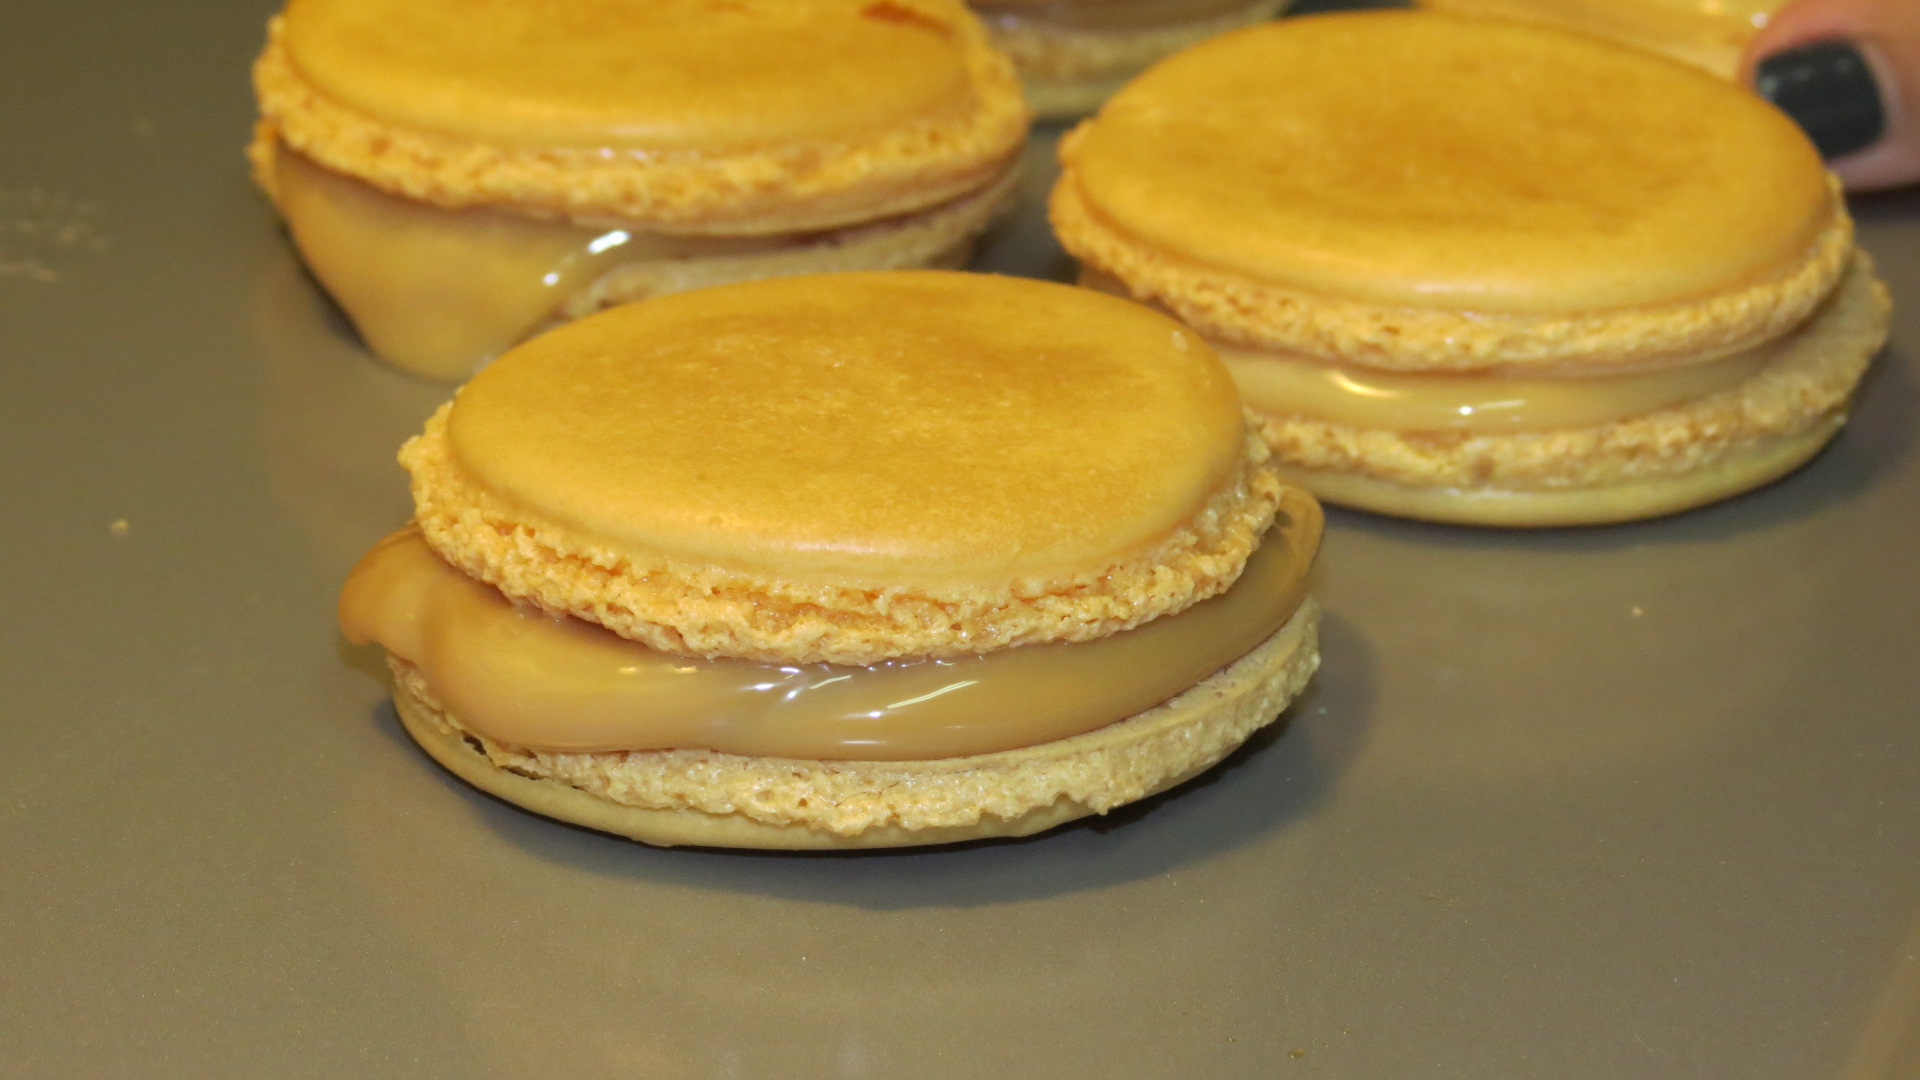
Then pipe out some homemade Dulce de Leche in the centers and sandwhich with another macaron.
I also got inspired by my friend’s birthday macaroons that were bright gold, so I picked up some cake spray paint in metallic gold and silver and when the macaroons were set, I sprayed them down and above is what I got!
I took a ton of photos with them and then allowed my family to devour them, they were soooo delicious!!! They are chewy and fluffy, they’re delicious and delightful, try them out!
I love to bake but I’d give these a sold 7 in difficulty level haha. Try them out and tag me in your yummy posts! You can make them for events, holidays, and gifts! Happy love day to you and yours!!!
xoxo- Jess


 In these kits I put all my go-to items that you just NEED the morning after any kind of partying because survival mode: