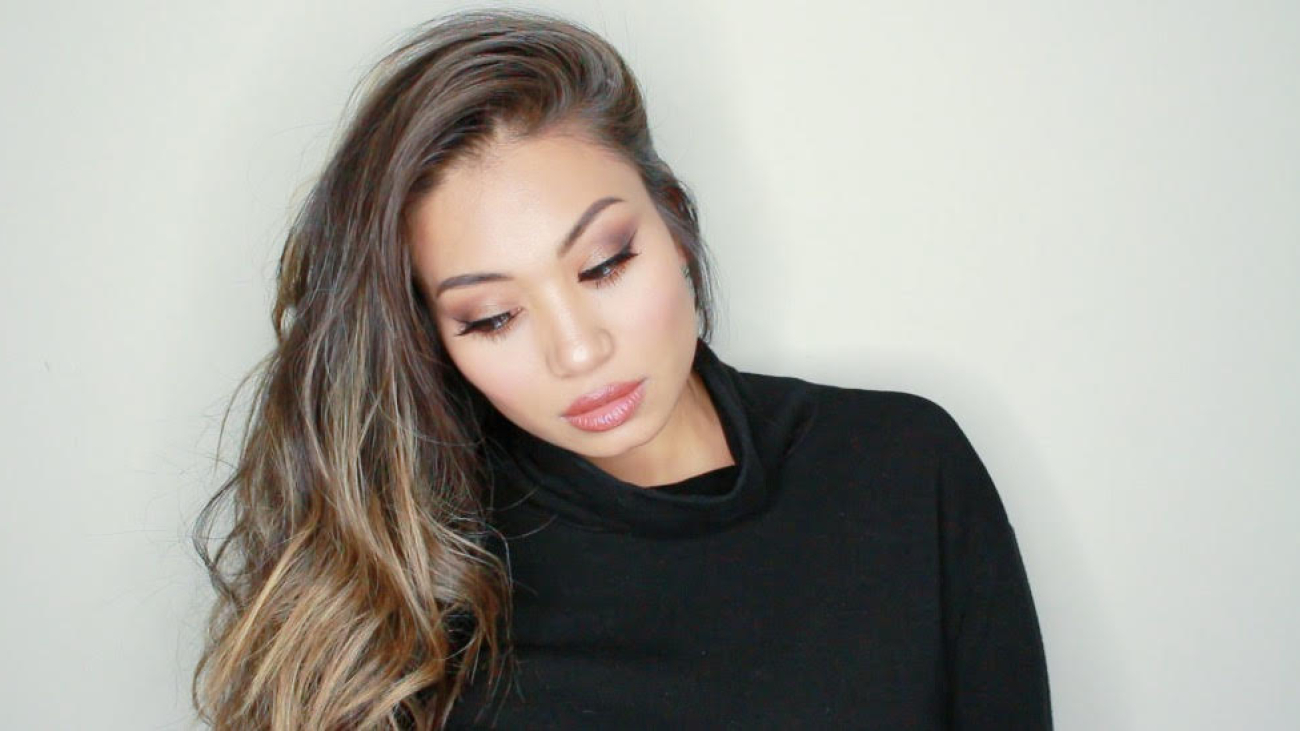
I am so fascinated by these ‘Get Unready With Me’ videos! I like to know what people are using on their skin, what are they putting in their hair, and what are they spritzing on their pillows! Lavender… that’s what!
Here is my current nighttime skincare routine, lets get ‘unready’ together <3
Do you use a neck cream? Who even knows how to pronounce decolletage??? Ten points if you also sleep like a Geisha and don’t move at all ya lil sardine.
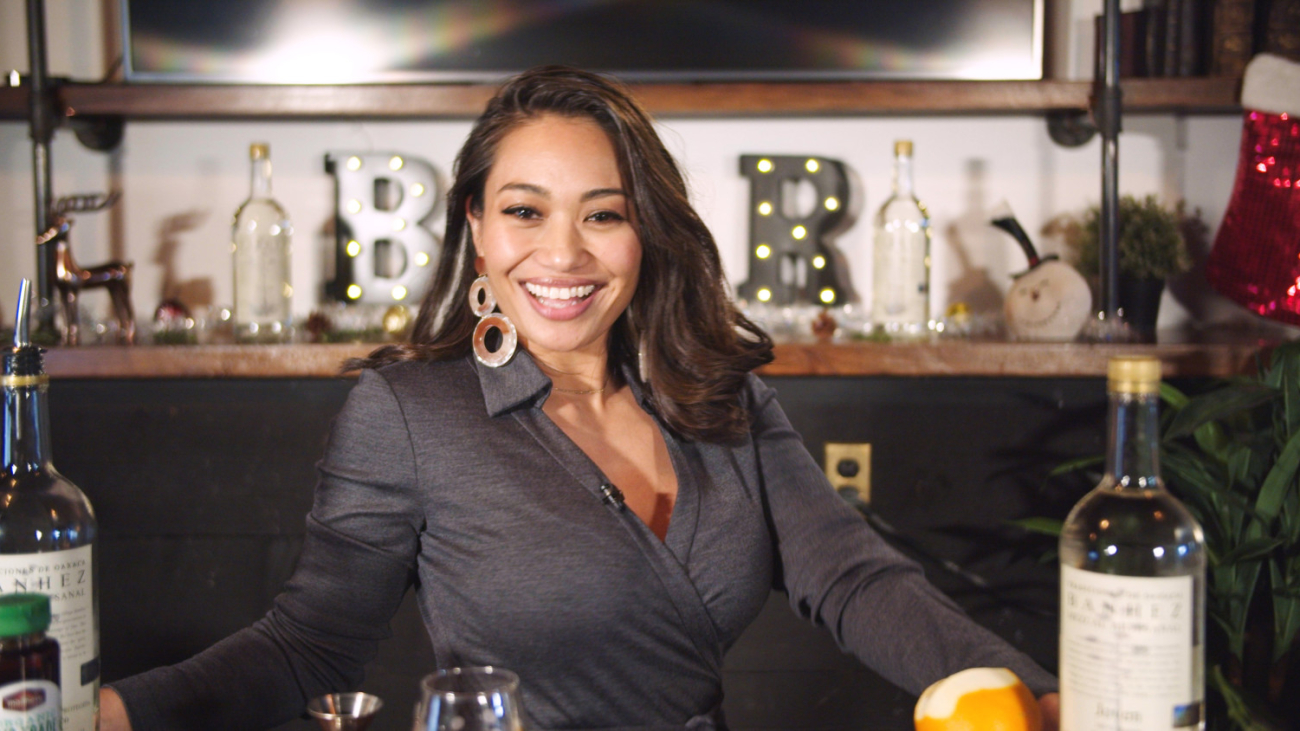
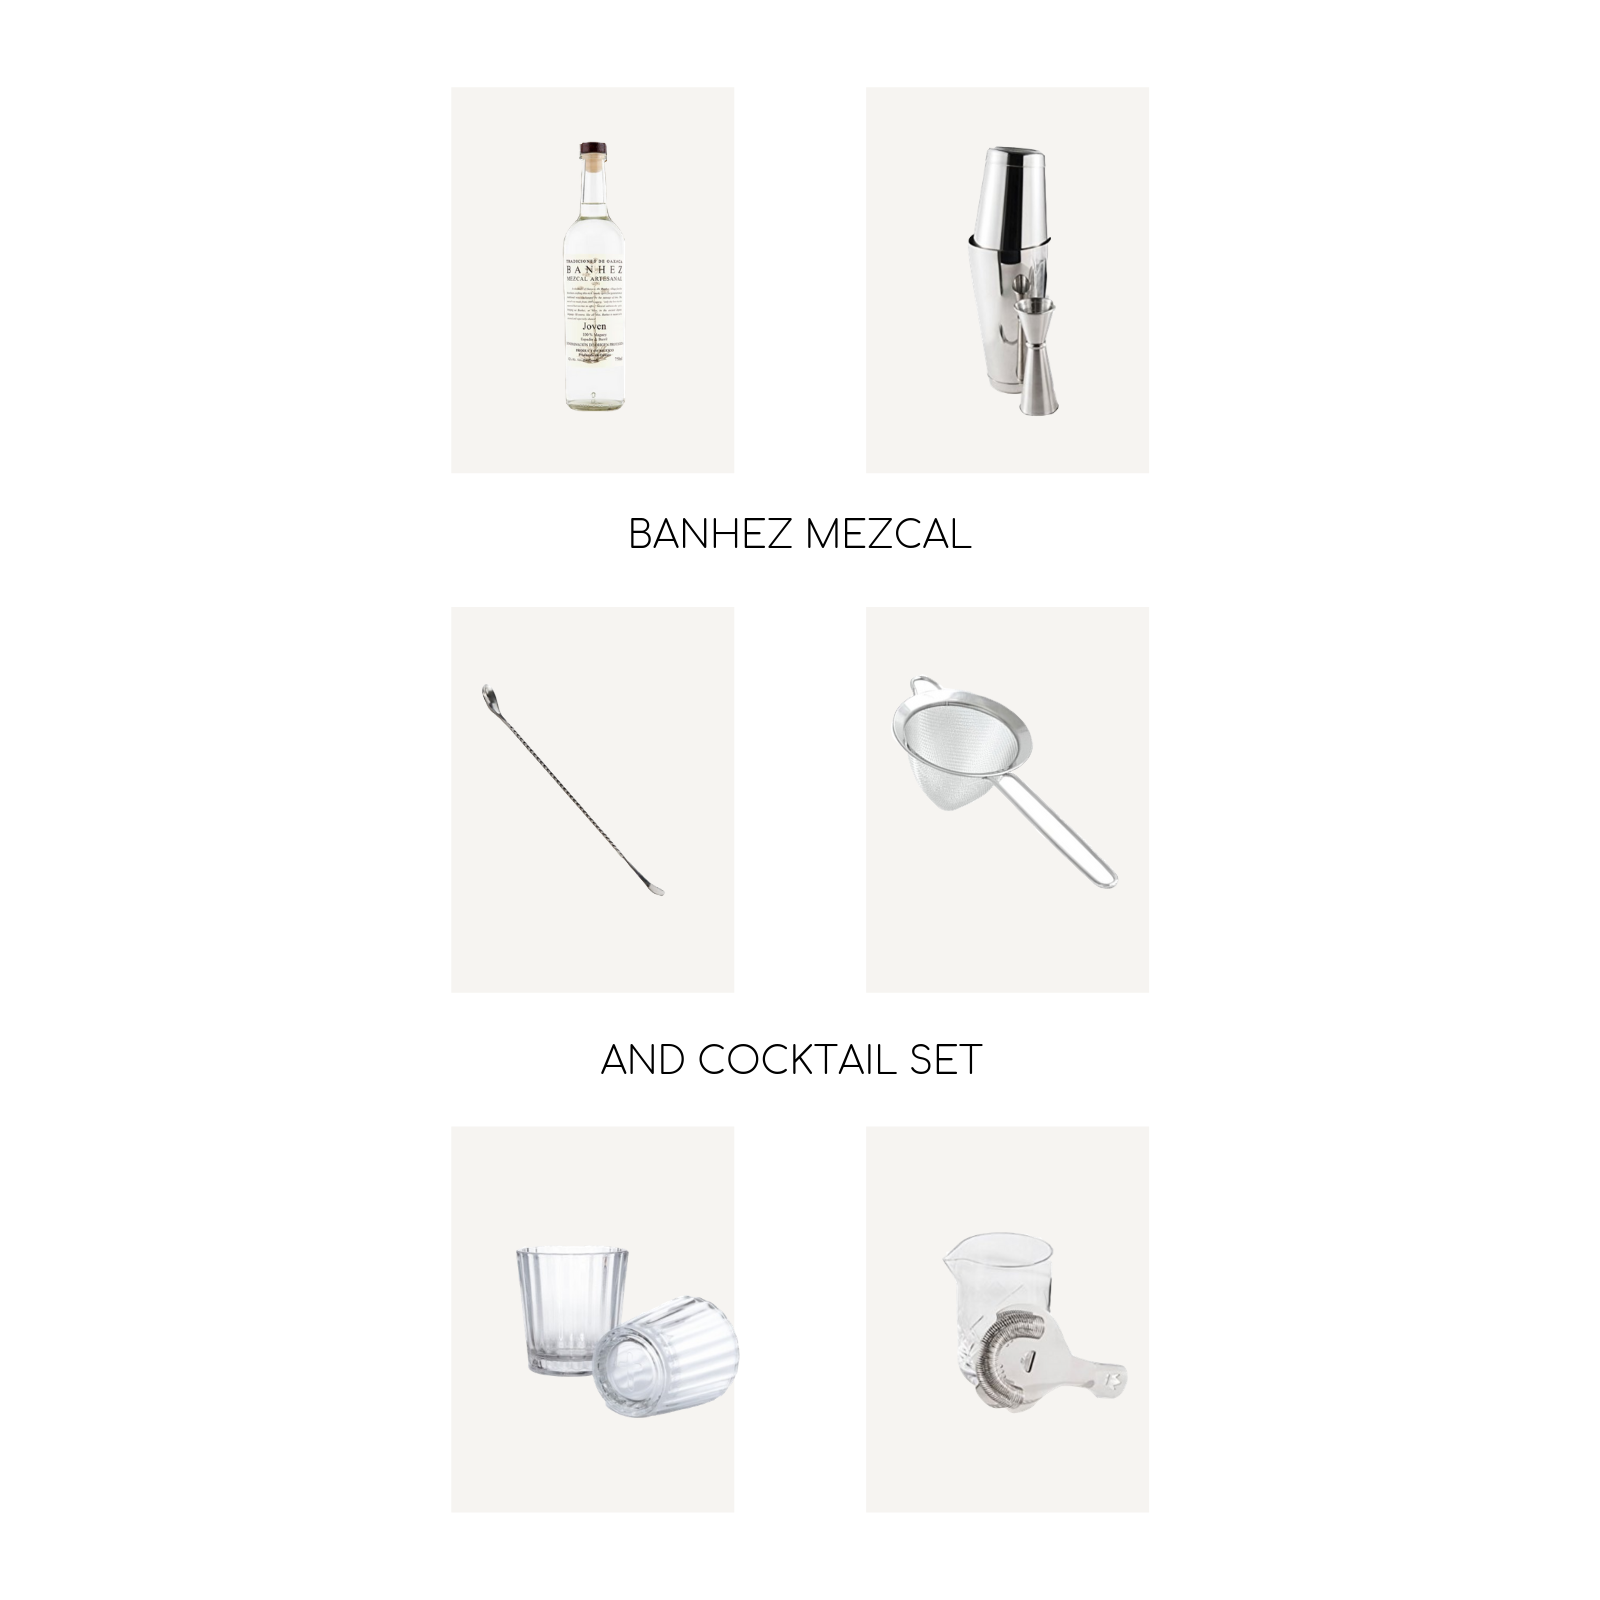
Happy Friday!!! Today I’m back with another installment of our holiday cocktail series featuring my favorite smokey beverage, Banhez Mezcal! This is Santa’s Helper Pt 2, the follow up to Episode 1 and in this recipe we sweeten with agave instead of our homemade cranberry syrup and I love the addition of cranberry bitters! So if you’re pressed for time and need to whip together something fancy and fast, this is for you!
Don’t forget I’m hosting an exciting GIVEAWAY with Banhez which includes the entire cocktail creating kit you see in this video! PLUS a 1L bottle of Banhez Mezcal so now you can make these cocktails at home! All you have to do to enter is comment on this post and the other two episodes by Monday and I’ll pick the winner next week! To purchase a bottle of Banhez for yourself and a friend (ahem this makes the perfect gift) I’ll link you HERE!
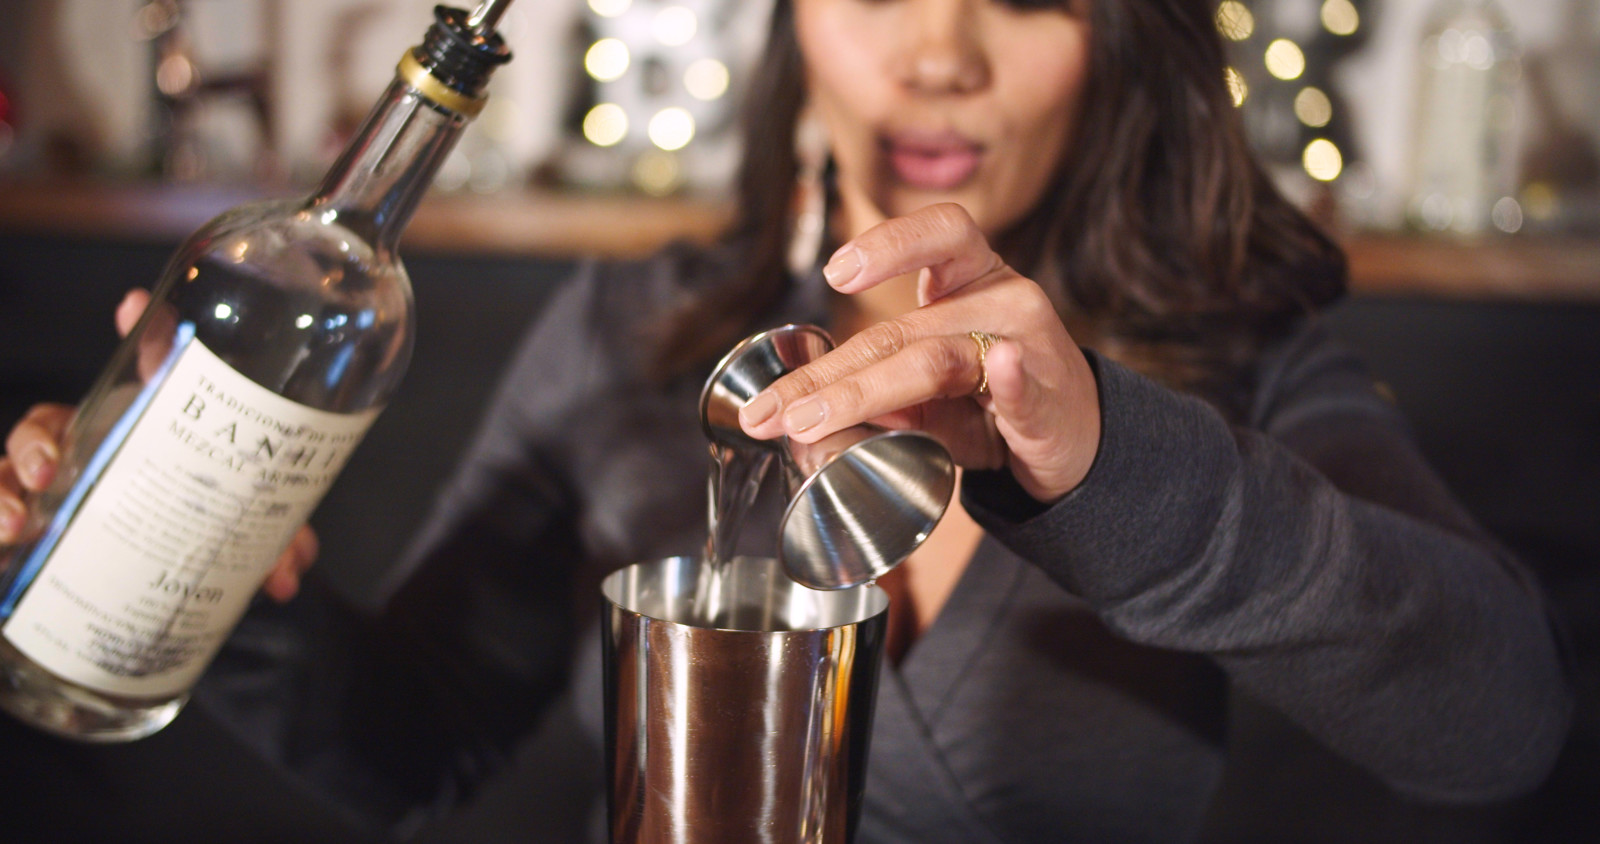
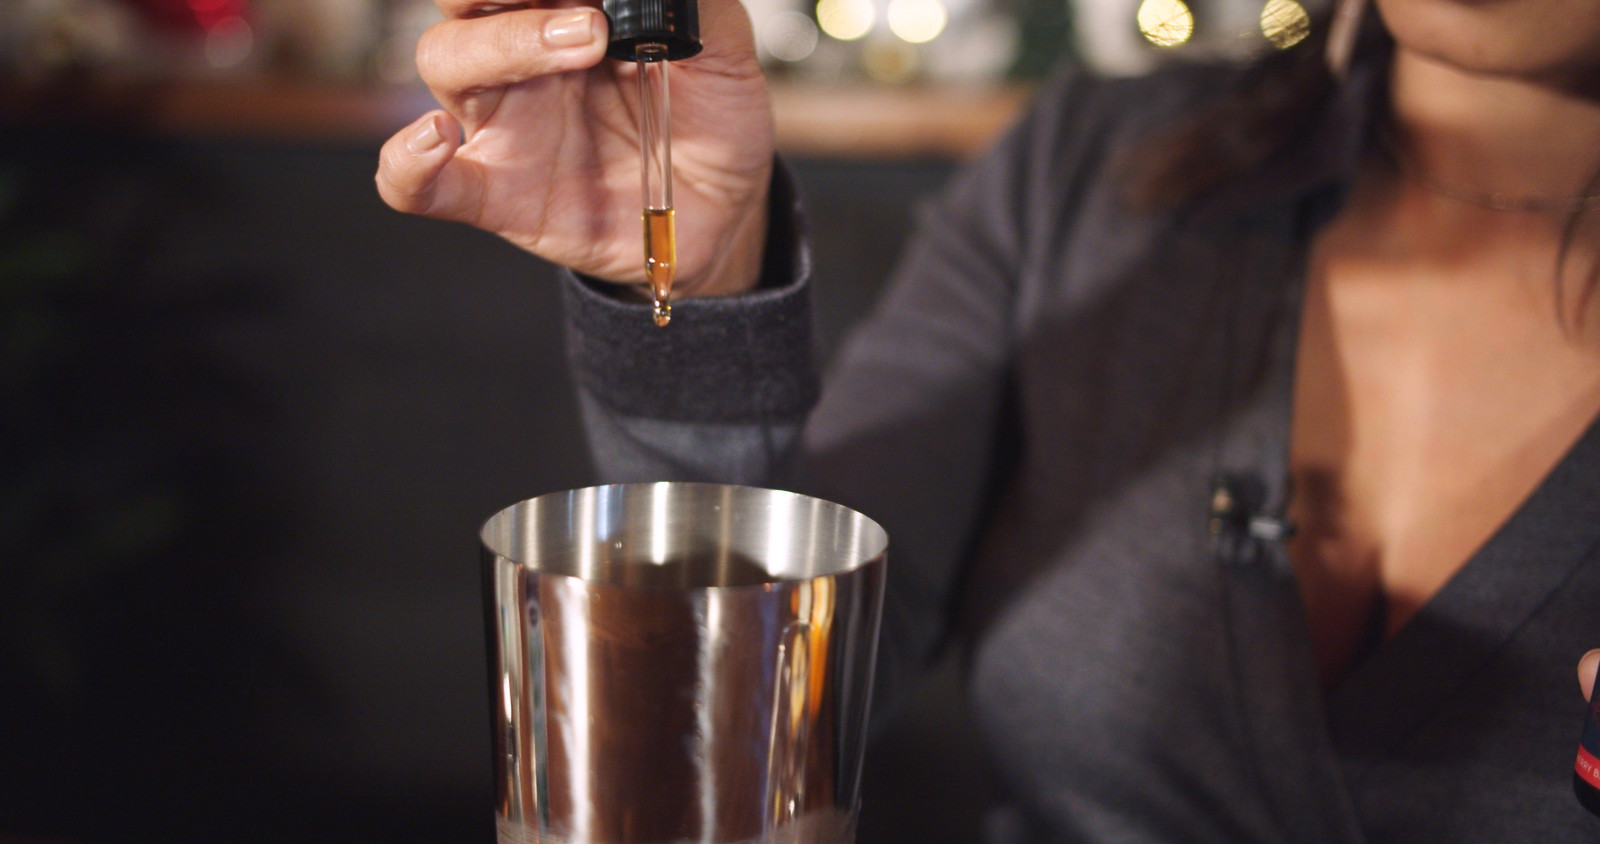
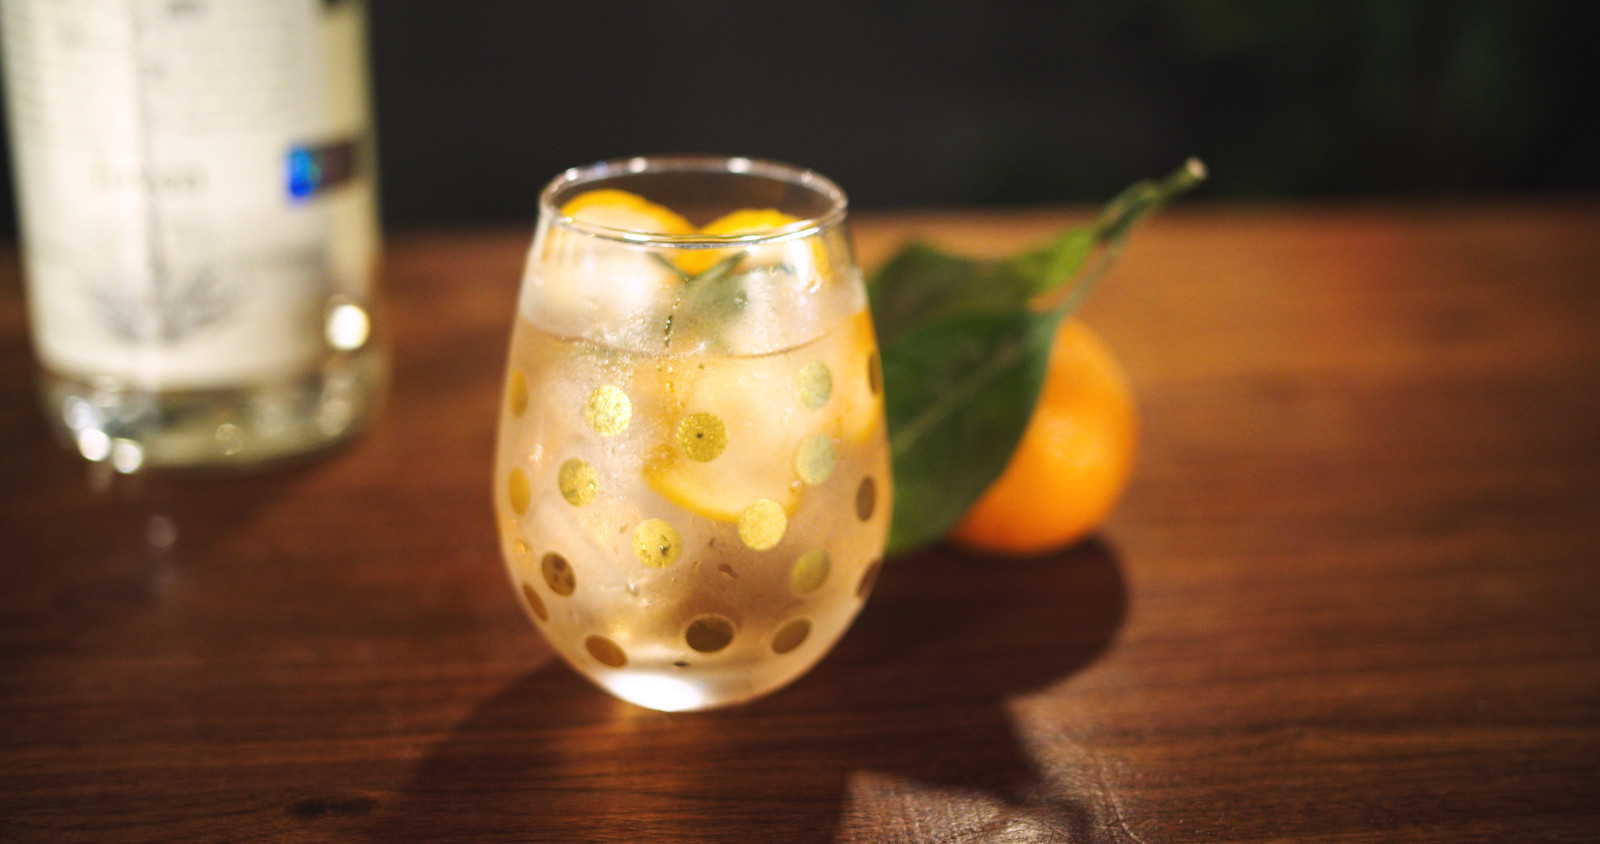
Santa’s Helper #2
2 oz Banhez Ensemble
1/4 oz agave
2 dashes Fee Brother’s Old Fashioned Bitters
2-4 dashes Fee Brother’s Cranberry Bitters (modify for how much of that cranberry flavor you want)
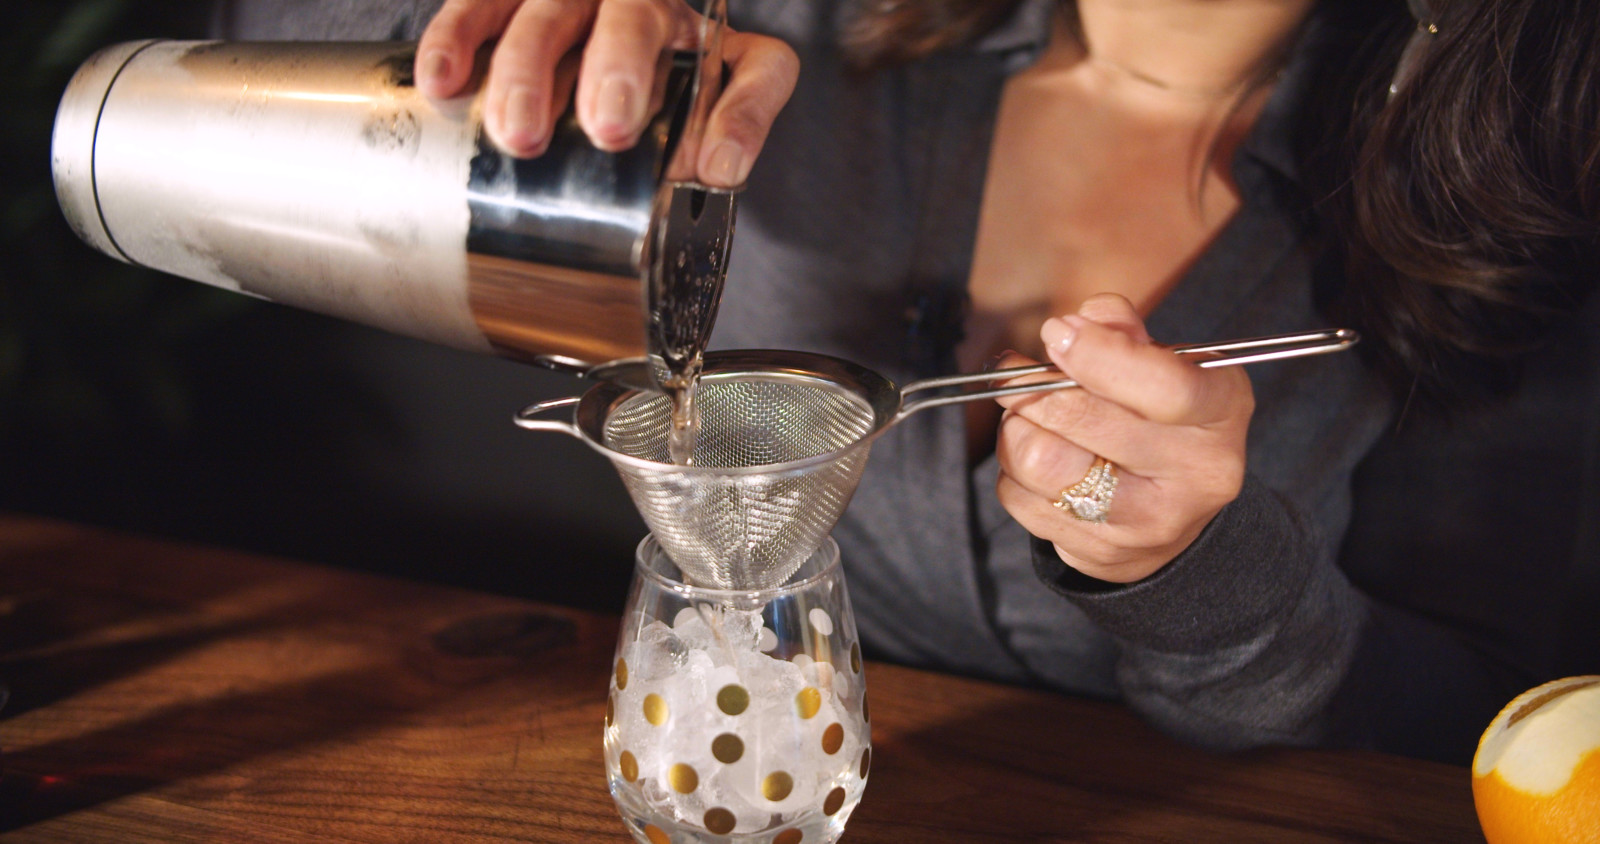
Stir in Japanese stirring glass (or pint glass) with a long spoon until you can easily move the spoon through the ice. Strain into a rocks glass with ice, garnish with orange zest and a rosemary sprig.
Banhez Pro Tip: this recipe is easy to batch but given how spirit-forward it is, it can lose flavor the longer it sits in ice, so keep that in mind 😉
Tada! It’s sweet and tangy, light yet flavorful, and the smokiness of the Banhez Mezcal won’t go unnoticed! This is one of my favorites because of how quickly you can stir together the ingredients given most of them are already in your pantry!
Give this a try and let me know what you think, I know you’re gonna want to batch this! P.S. did you hear that I’m hosting a giveaway featuring this beautiful set below?! Enter in the comments, good luck <3
Giveaway Entry Rules:
– must be 21+ years old to enter
– winner will be selected at random
– enter as many times as you like, the more you enter, the more chances you have to win!
– an ‘entry’ is a comment on all 3 of my Banhez Mezcal cocktail recipes that’s here on my blog. Here’s Epi 1 and Epi 3 for you, be sure to comment on all 3 articles and good luck!
– stumped on what comment to leave? Tell me a fun fact about yourself or what your plans are for the holidays!
– and drink responsibly always please and thank you <3 , love Mama Lizama
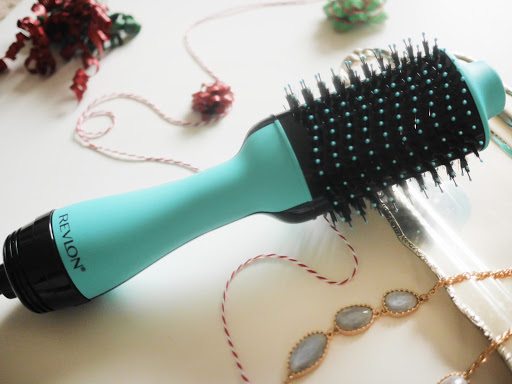
This post is sponsored by Revlon Hair Tools as part of an Influencer Activation for Influence Central and all opinions expressed in my post are my own.
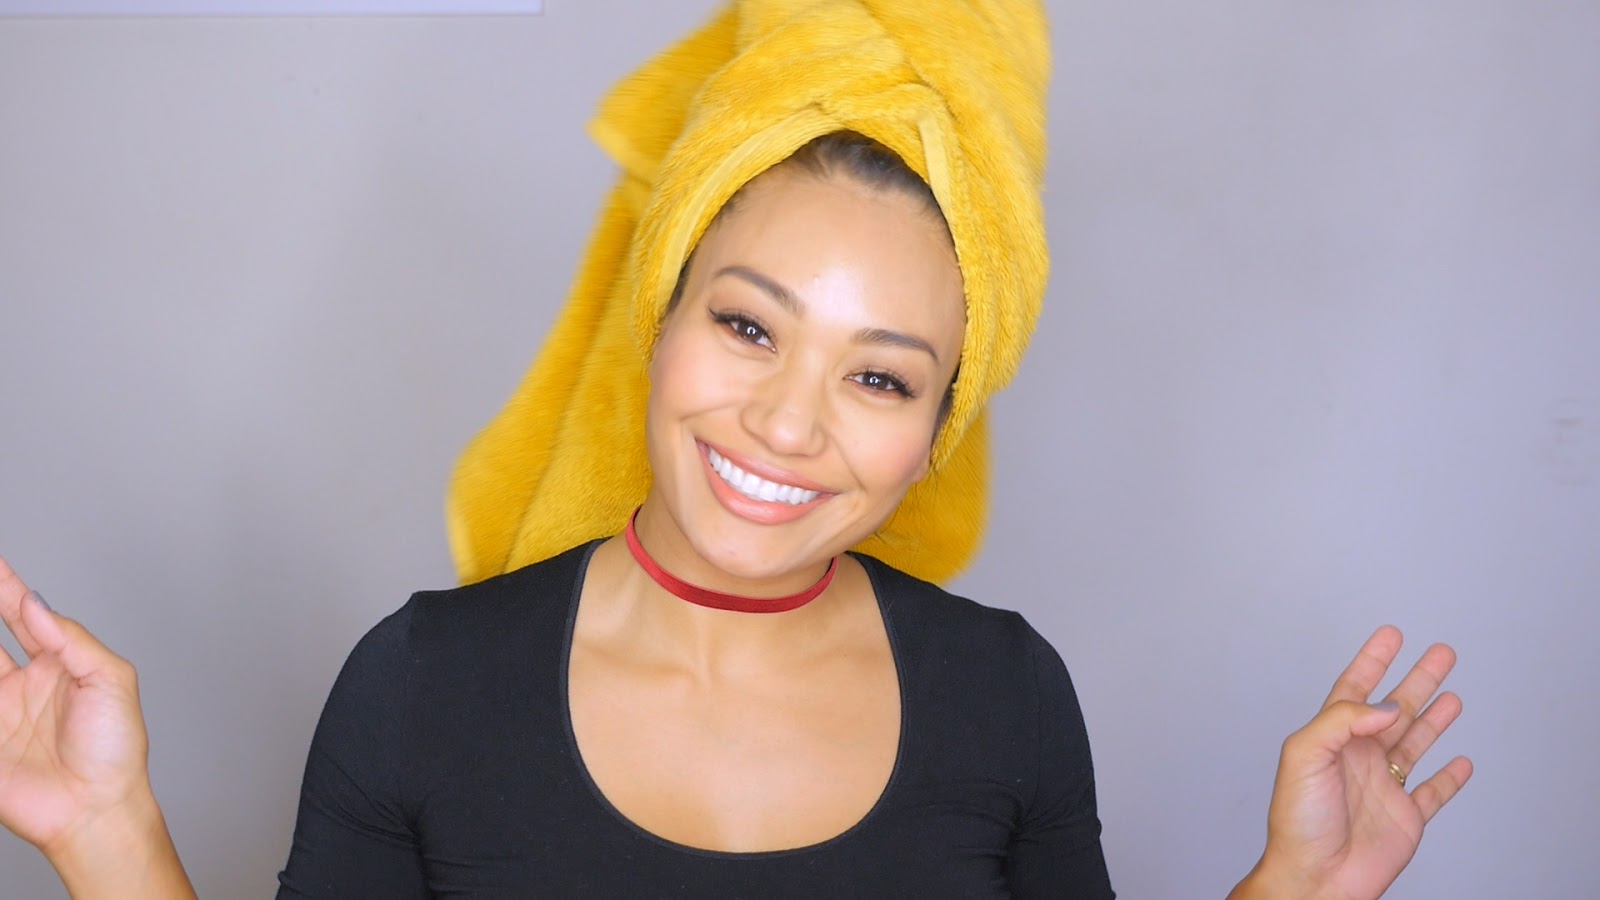
You may be surprised to know that someone like me who’s had fine, pin straight hair her entire life exclusively styles with a blow dryer. Yes, even on my ‘pageant queen’ hair days when locks are large and in charge, I first give myself a blow out and then add in the curls. So I wanted to share with you my go-to, 3-step, straighten-style-volumize routine, featuring the Revlon Pro Collection Salon One-Step Hair Dryer and Volumizing Styler.
Creating a quick, easy, and low maintenance routine was important to me as this style is the base style I launch with each and every day. I knew when I chose a one-step dryer that I wanted it to 1) save me time … hello hair dryer + oval brush in ONE 2) improve my haircare routine aka save me time and 3) be easy enough for me to do all on my own but still have those salon results. I mean, am I the only one that can deadlift 110 lbs but still believes that holding a round brush over my head while blow drying my hair seems unreasonable? How does that become so heavy!
Luckily for me this Revlon hair tool does all 3 things in 1 easy step, so let me explain what I use the three different heat settings for and then I’ll walk you through each step of my hair drying and styling routine. I utilize the cool setting for drying my hair after a workout, on days I don’t want to wash my hair and just need to mach 5 to make it through the day.
For drying my hair after washing it, for events, and for special occasions I dry my hair with the two heat settings, switching between the low and high settings. Here’s why: this Revlon hair tool has an easy grip with its ergonomic design, maximum drying power as the air is distributed evenly through its airflow vents in every direction, and you get high shine and fewer frizzes with the tufted bristles with boar technology. Now that’s a lot of technology! And here’s what I do:
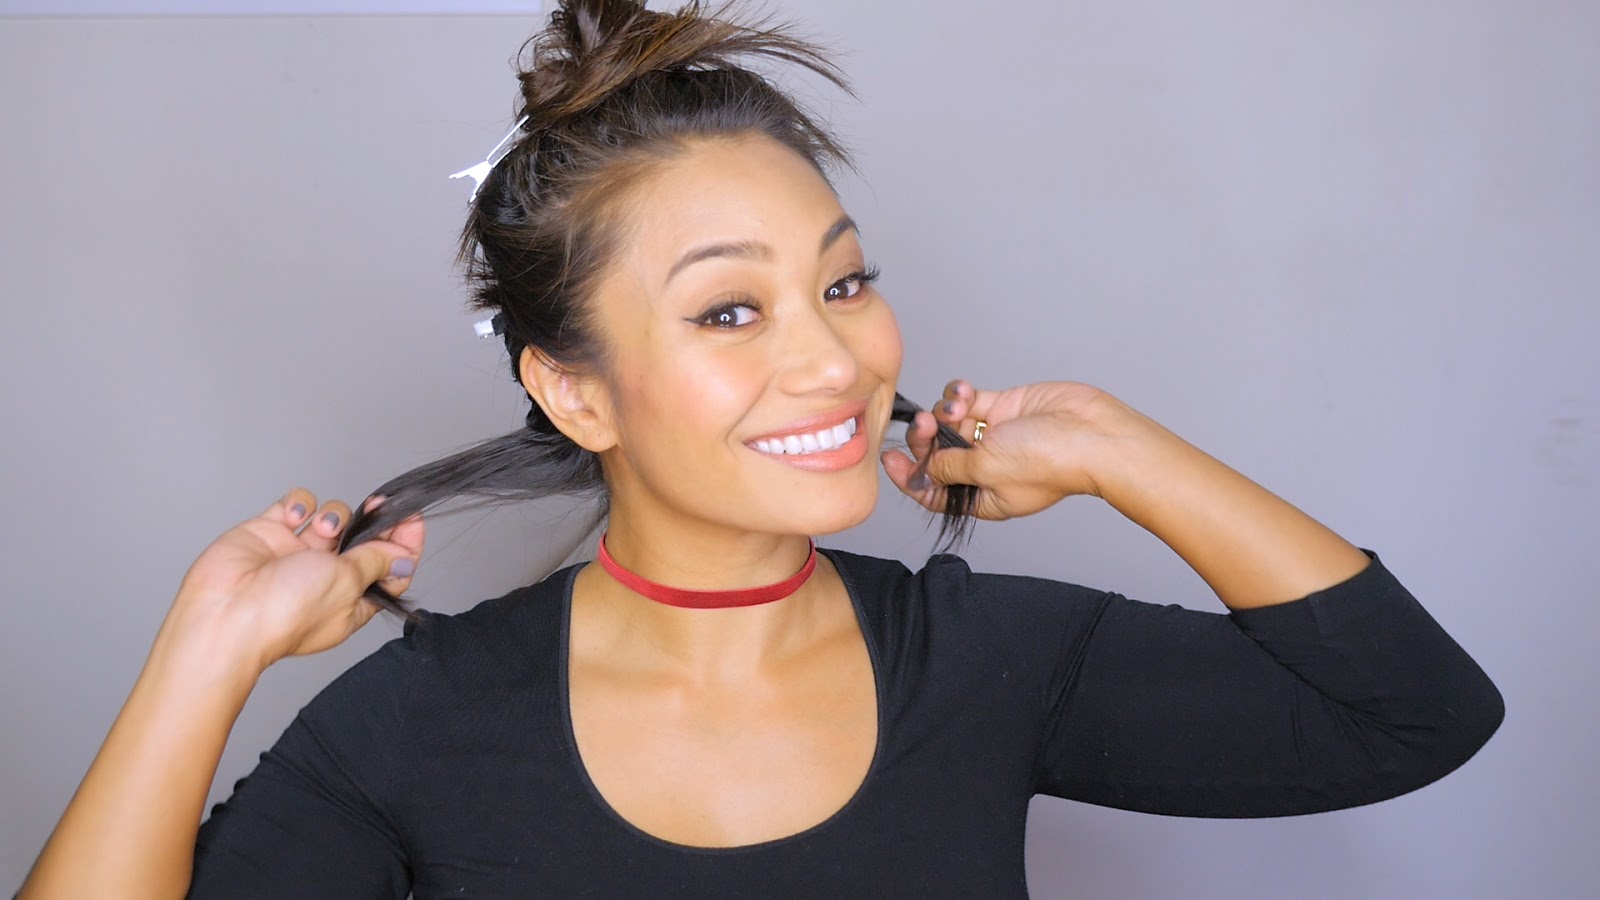
Step one: Your hair’s wet, now what?
Begin with damp hair, allow your hair to air dry 60% and then use this Revlon Hair Tool to achieve that salon look, this will ensure that the least amount of damage is being done to your hair. I usually do my makeup, allowing my hair to air dry for ten minutes and then blow dry and style it.
Step two: Just flipping your head over and blow drying your hair isn’t going to cut it.
Section out your hair, this makes it easier to style pieces more a more manageable way and keeps tangles at bay.
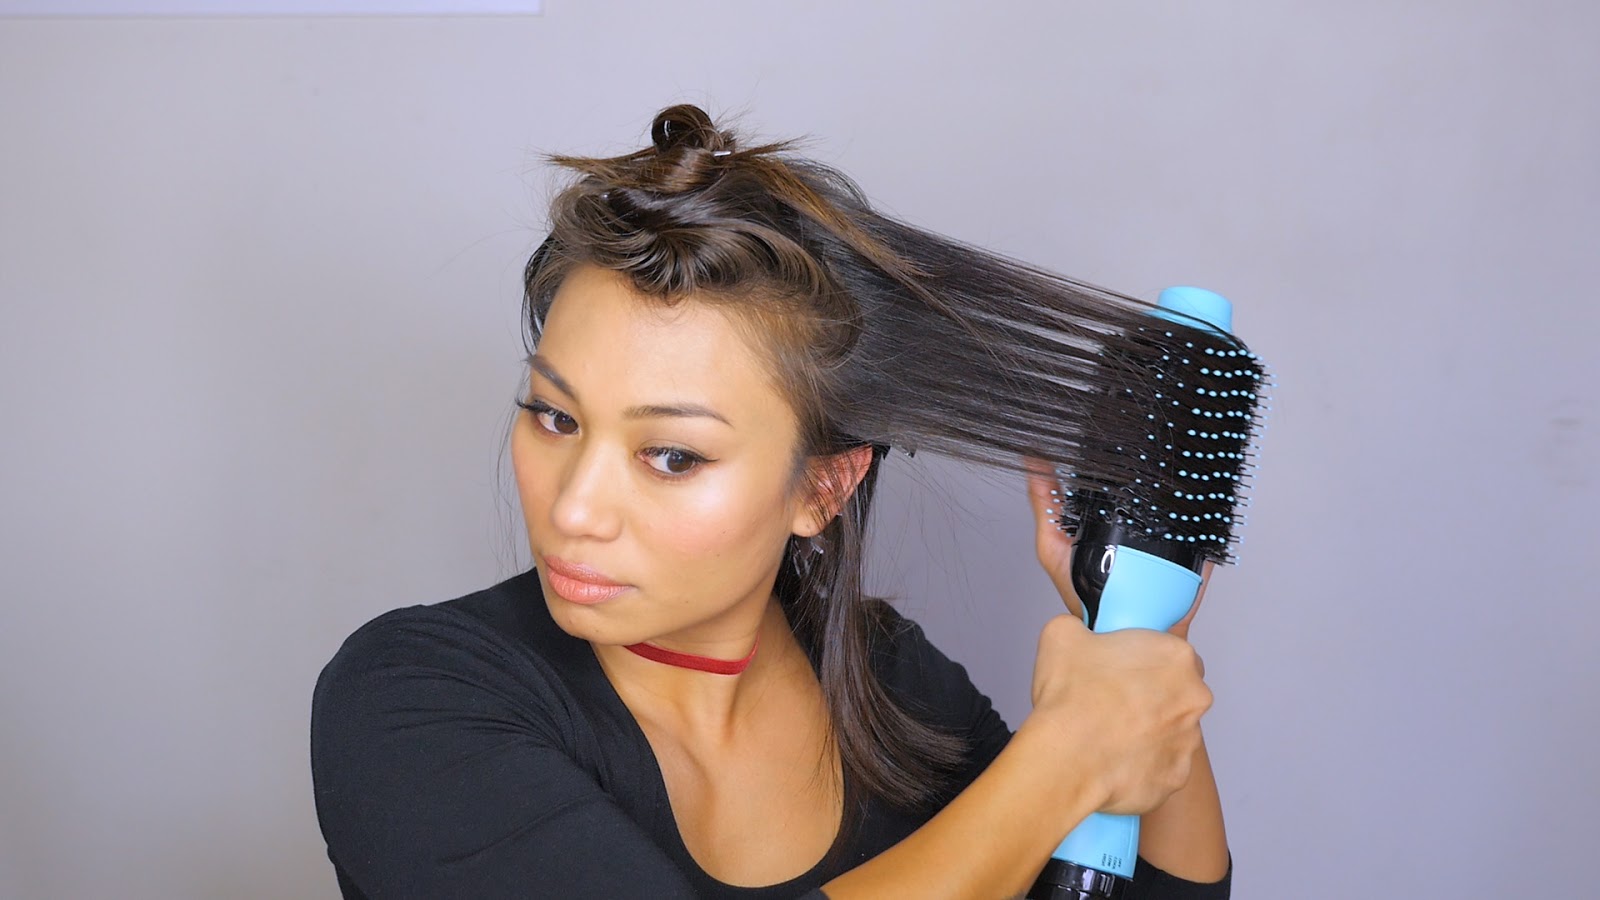
Step three: You got this!
Blow dry and style! I start with the hair at the nape of my neck, on the high setting grabbing a section of hair, allow the brush to sit in your hair for an extra moment, just long enough for heat to be evenly distributed, and then slow drag the oval brush down and through your hair. I always flick my wrist on the ends of my hair, giving that piece a nice polished, curled look and just continue to twist and comb the hair through the brush until each section is dry.
Moving on to each section, the last section I do is on my bangs where I blow dry them forwards and then push them back for a nice voluminous, polished look.
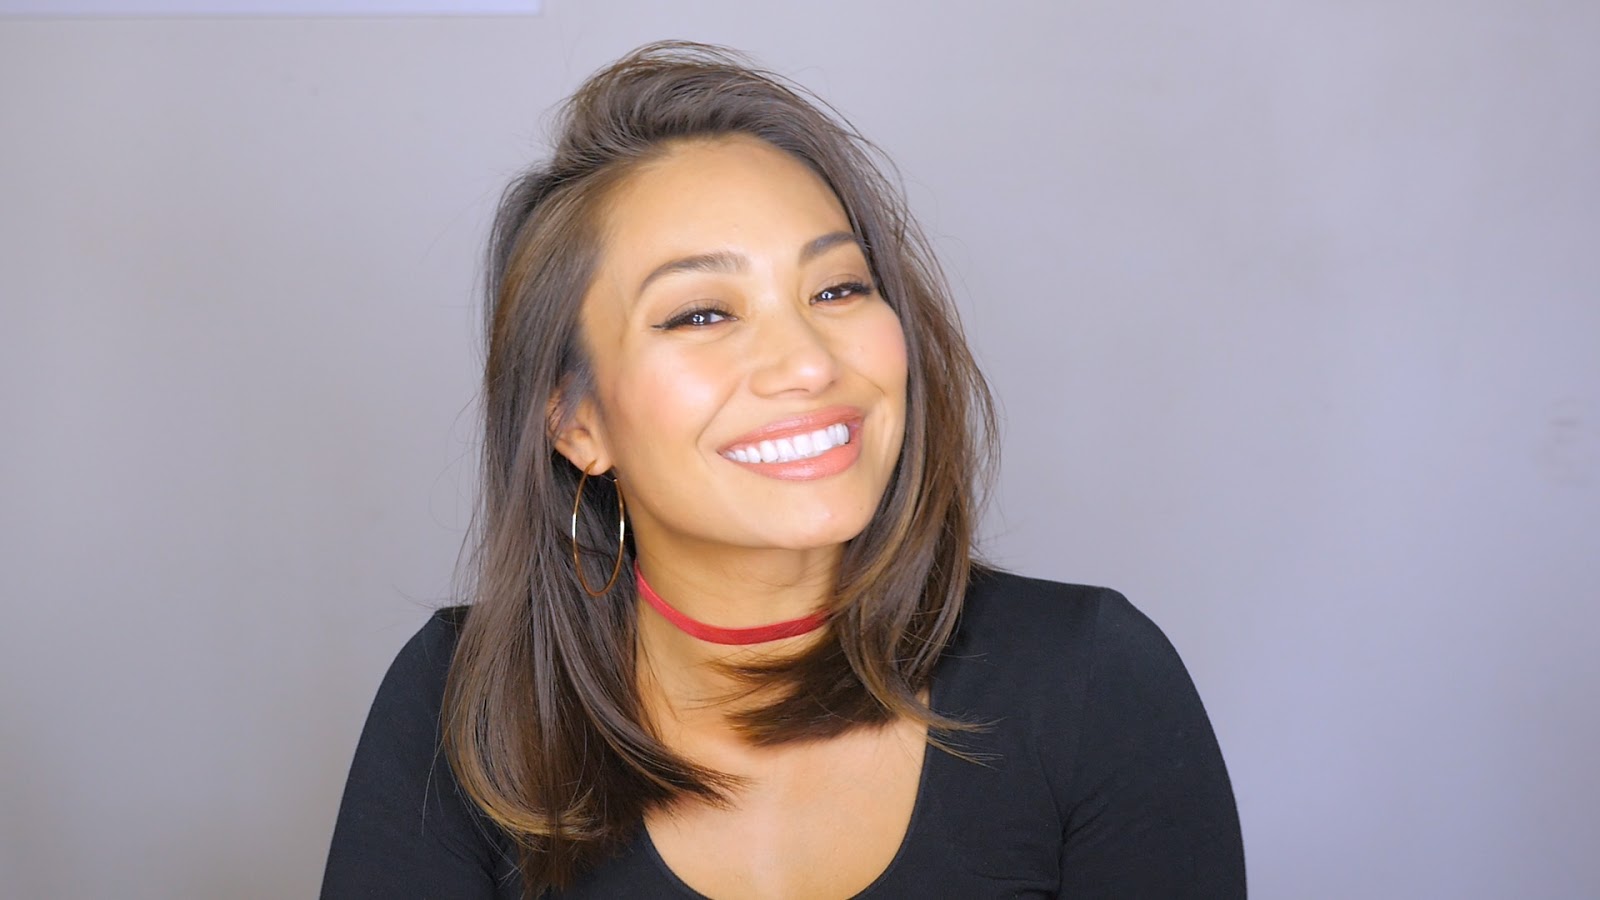
Lastly, I give my entire head one more pass with the Revlon Pro Collection Salon One-Step Hair Dryer and Volumizing Styler to eliminate an extra moisture left behind, and then BOOM! Just like that, your hair is dry, it’s shiny, and ready for the day!
Here’s how: the Revlon Pro Collection One-Step Hair Dryer and Volumizer is now available at Ulta.com in an exclusive holiday color and retails at $59.99 so snag yours before the time is up!
I hope you enjoy this video I created, sharing with you the visual step by step process to achieve this look.
What is your daily go-to hairstyle? Have you ever used a Revlon Hair Tool before?
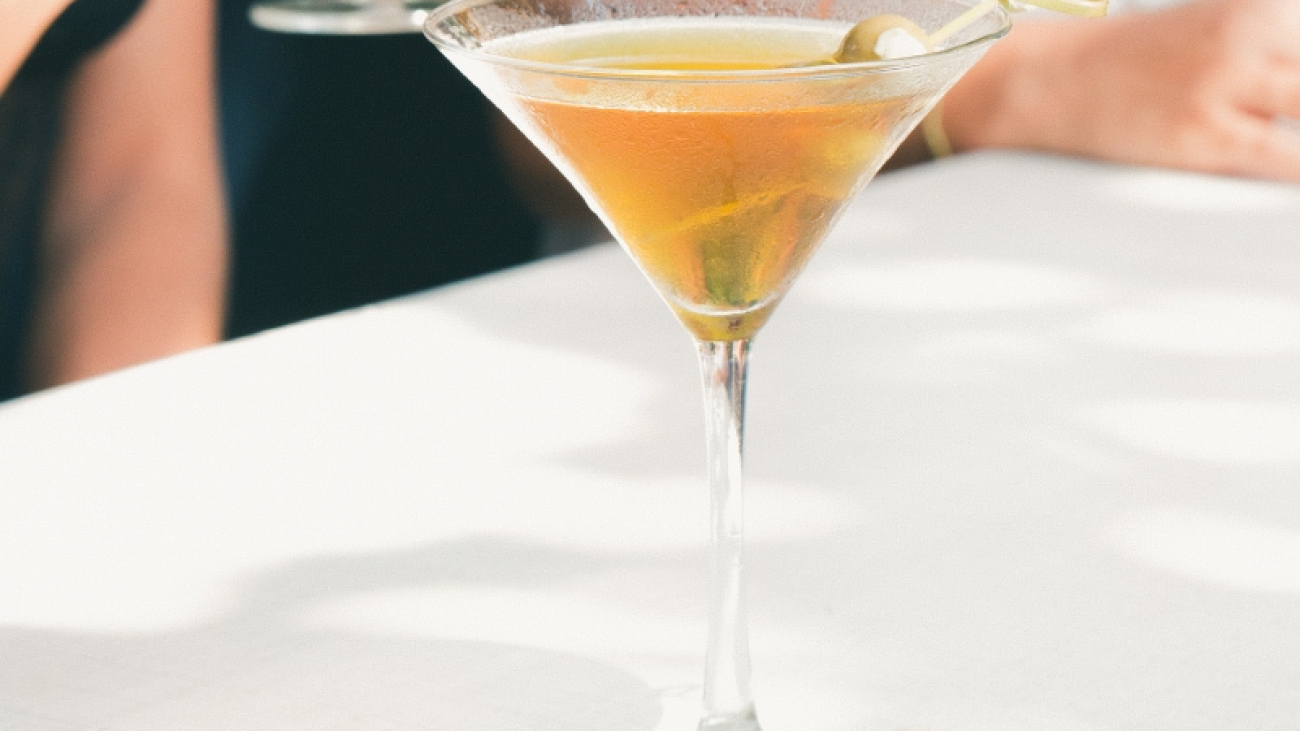
Halloween is this week and I’m all for an easy themed cocktail just as much as I’m up for an easy costume! This is the Vampiress Kiss, it’s delicious, Rum-my, sweet, and you’ll just need one… kinda like that vampiress kiss, only takes one.
What you’ll need:
– Captain Morgan’s White Rum
– Coconut Rum
– Ice
– Kahlua
– coconut essence
– Milk
For the Vampiress Kiss Drizzle:
– Sugar
– Cherry juice
Method: add ice to a tumbler and combine an oz of white rum with an oz of coconut rum, splash of coconut essence, half an oz kahlua, 1/4 cup milk, and SHAKE
For the drizzle you’ll combine one part sugar to two parts juice in a small pot and boil the mixture until thickened. Then drizzle that goodness into a martini glass and try not to lick the pot. Or do!
I hope you enjoyed this easy and not so spooky Halloween themed cocktail and have a safe and happy Halloween babes!
What are your plans? Staying in or braving the chilly weather and going trick or treating?
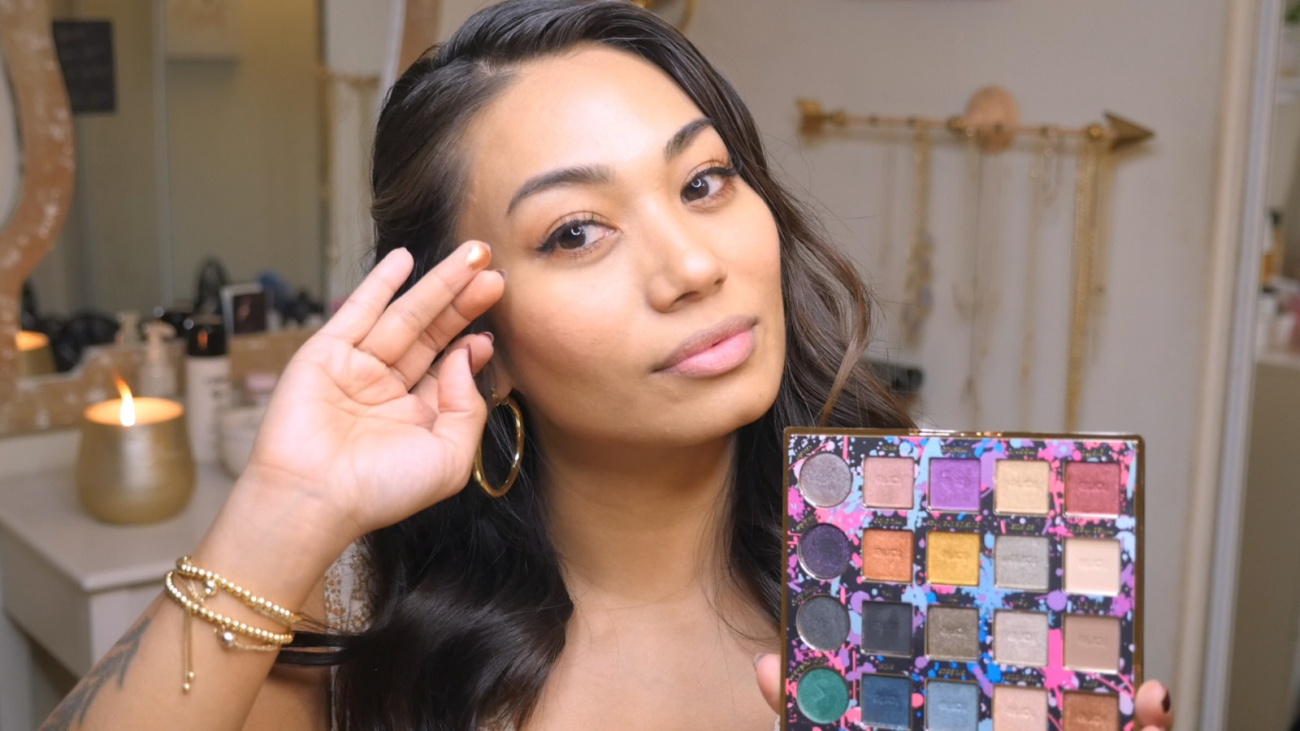
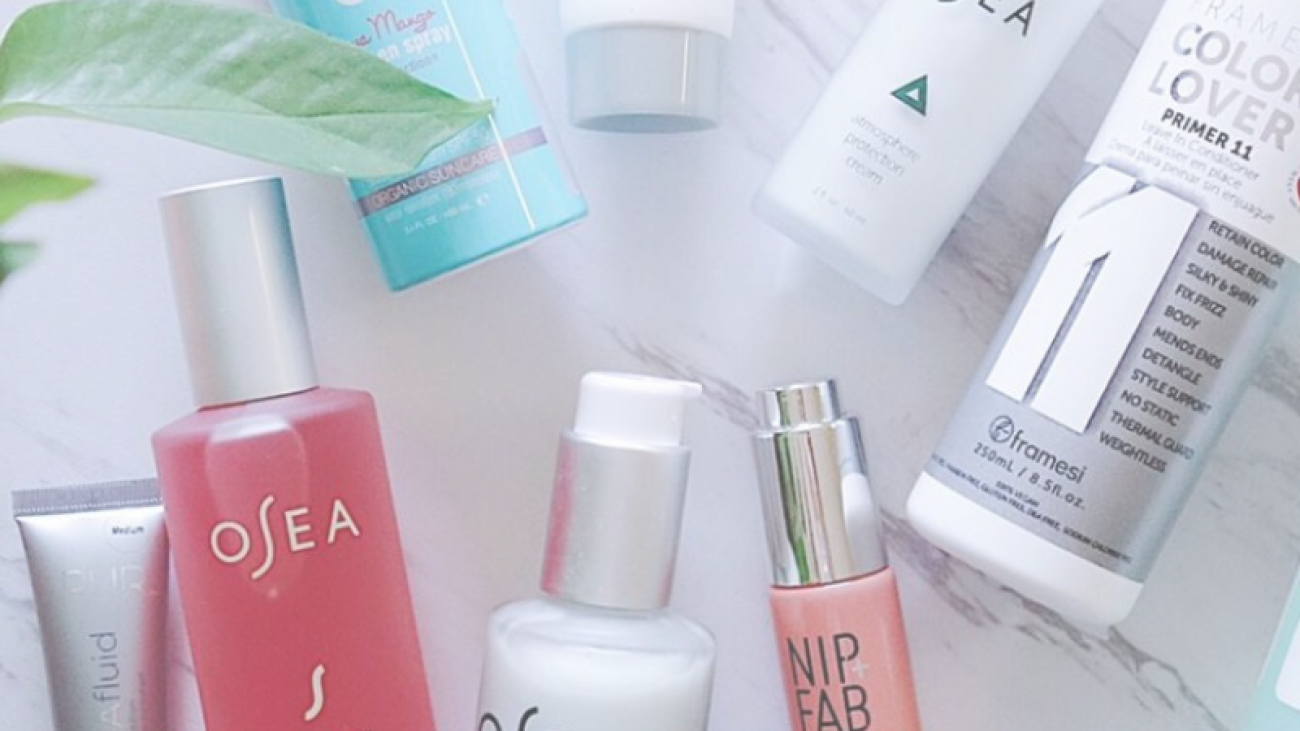
If you asked my husband to assess the product situation happening on my vanity he’d tell you I’m borderline a hoarder LOL Between makeup and beauty products, I’m not ashamed to admit that my life’s become a Netflix series episode. Honestly, I think we all have, I mean there’s just SO many options out there!
I started this blog 4 years ago to share with you any tips, tricks, and advice that I myself would love to hear about. So today I’m sharing with you a brand I’ve been using for the past month, Beauty By Design, what makes them unique, and how their service will help you to slash the stash!
The way their service works is you send them a selfie and skin survey, then they connect you to a Licensed Esthetician (!) via text. She diagnoses your skin and sends you a ‘skinscription’ where listed is all of the ‘game-changer’ products that she suggests just for YOU- and you can choose what to purchase.
I purchased four products that I’ve implemented into my daily skincare routine and have genuinely noticed a difference in my skin’s texture and hydration level. The best part… I can now text her anytime for advice… pssst hey Hilary, I promise not to call you at 3am and heavy breathe lol
Enjoy this Get Ready With Me video featuring the 4 Beauty By Design products that I purchased <3
Try their service for yourself, I’d love to get your feedback, and PS they offer free shipping on all orders! Click HERE to shop the site and use my code JESSICALIZAMA20 to receive 20% off your order because friends don’t let friends product hoard. #slashthestash <—- I’m coining this term lol
What’s your skincare routine look like? Wouldn’t you love to just eliminate the guestimating of it all and have a professional help you out? Do ittttt <3
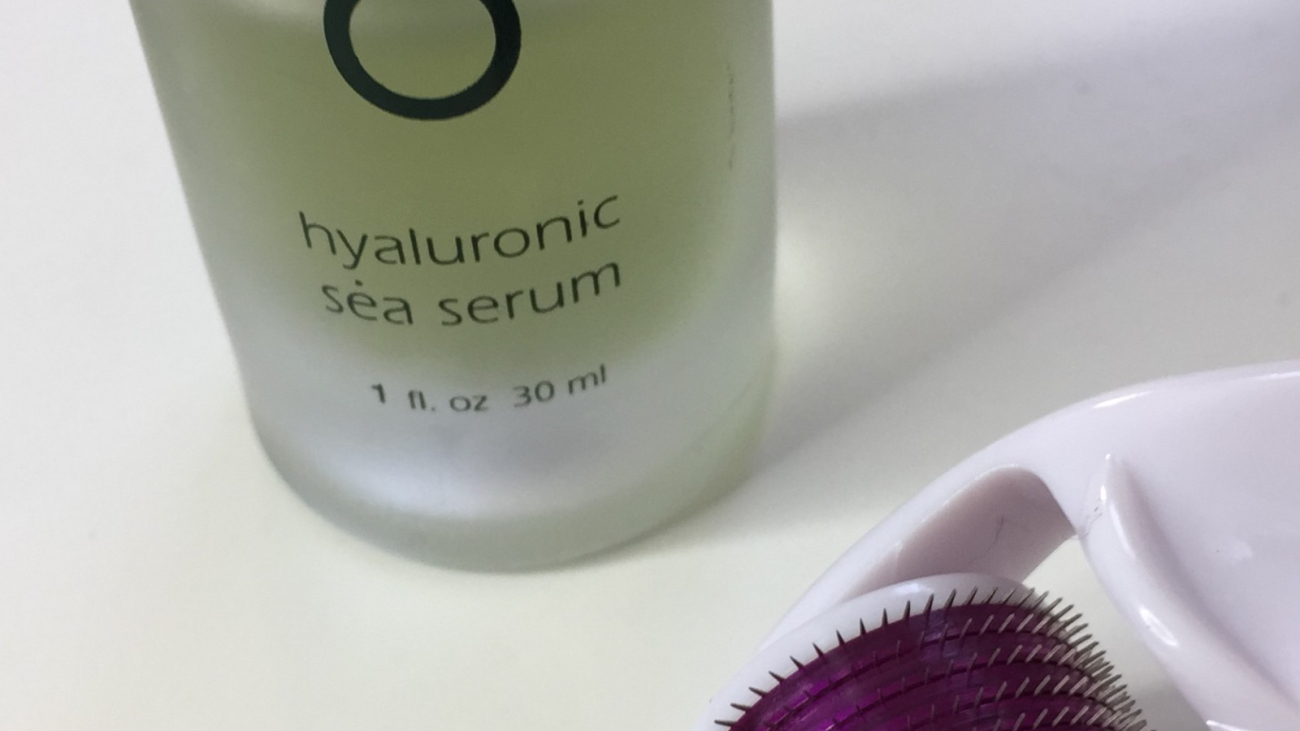
Dermarolling! You’ve probably heard of dermarolling like you’ve heard of bullet proof coffee- which was met with the same sentiment …. “say what?”. Yes, I am telling you that I roll tiny needles all over my face all in the name of YOUTHFUL SKIN! 😉 (and also that I put BUTTER in my coffee!)
I’m usually pretty chill, pretty simple- I live for comfort, top knots, and cozy clothes … but when it comes to my skin care routine I go all out! 19 steps, 23 hours later, and 37 peculiar treatments tried – I’m all about it! I mean, if you told me that manure would keep my skin glowy and dewy, I’d dip my entire body in it HAHA Jokes aside, we’re all going to age and I’m cool with that because Asian don’t raisin y’all, but one day I too will be all Freddy Krueger-ed out 😉 But until then, I’m doing all the preventative crazy ass measures I can so that my skin looks as young and vibrant on the outside as I feel on the inside <3
Disclosure, I’m no skin professional so do your own research before including any new treatment into your routine, but I really love sharing with you what I do and what works for me. Enjoy this lil video of me rolling my face 😀
So dermarolling, lets talk about it! It’s the act of rolling hundreds of tiny needles across your face- personally microneedling your way into the future. Okay not really but you feel me. It signals to your skin that there’s been a minor injury which triggers your cells to send collagen and elastin production into hyperdrive! Both of which we lose as we get older. Hallelu tiny dancer needles. Think of collagen like grapes and as we get older they shrivel up to raisins. Ya, what a fun visual right? So plump em up why dontcha! After I dermaroll my skin is always dewy, glowy, and soft … and a teeny bit red tbh.
Method:
Disinfect your dermaroller before and after use, cleanse your skin, apply a serum, dermaroll horizontally and vertically (be gentle, avoid your eye area, don’t go nuts on your nose, and roll don’t press), apply another layer of serum, I seal with a moisturizer, and then go to sleep to wake up looking like a damn queen.
I started with a 0.5mm dermaroller once a week (my skin can tolerate that) and then I moved up to 1.0. I personally think that anything larger than that needs to be performed by an esthetician. I’m just not trying to put my face through a meat tenderizing session ja feel! So check out dermarolling, and tell me what other treatments I should try, I’m an open book!
Have you heard of dermarolling? Do you do it at home? Have you seen a difference in your skin since doing it or having it performed on your face?
I’m so excited to share that you can finally shop my posts directly and see what products I’m currently using in my featured videos! You’ve perhaps seen this utilized by other creators on Instagram and Facebook, so if you aren’t on DubCandy already, download it (it’s free!) and add me! I’m jess_lizama over there just like on all of my other platforms. I’m sharing my most recent videos over there!
This week I have for you a Valentine’s day cocktail (Cupid’s Kiss to be exact), a ‘day to night out’ makeup look, and the worlds quickest and easiest flat-iron ‘beachy waves’ tutorial!
If you’ve already explored the app and shopped people’s posts and videos, please share them with me so I can see what everyone is most interested in these days! I’d love to know if you’d like to see more beauty stuff from me, or cooking and travel . . . let me know and I’ll recruit my Corriney to help me post more frequently on there! I love being able to link you to the things I’ve tried and tested, and I hope you enjoy these and it makes it easier for you to peruse the items I feature:D
Do you like posts where you can shop the products featured or do you feel distracted by the option?
FTC: I am an affiliate with DubCandy but the products I feature and the opinions expressed here are mine. As always I’ll continue to share with you the things I truly use and love, and always in my honest opinion.
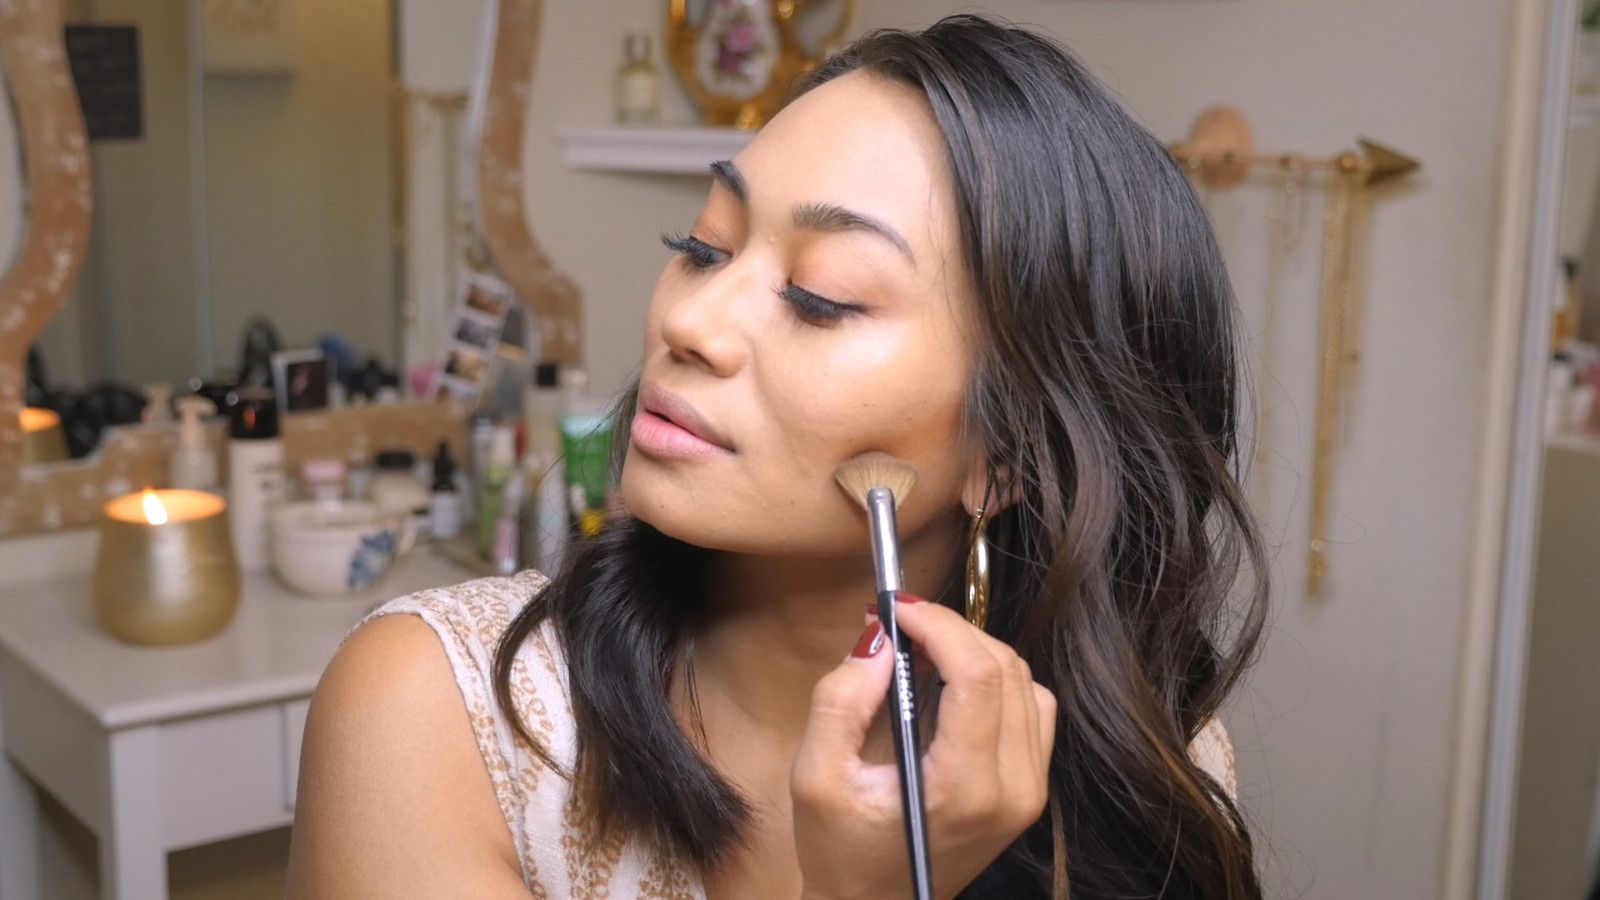
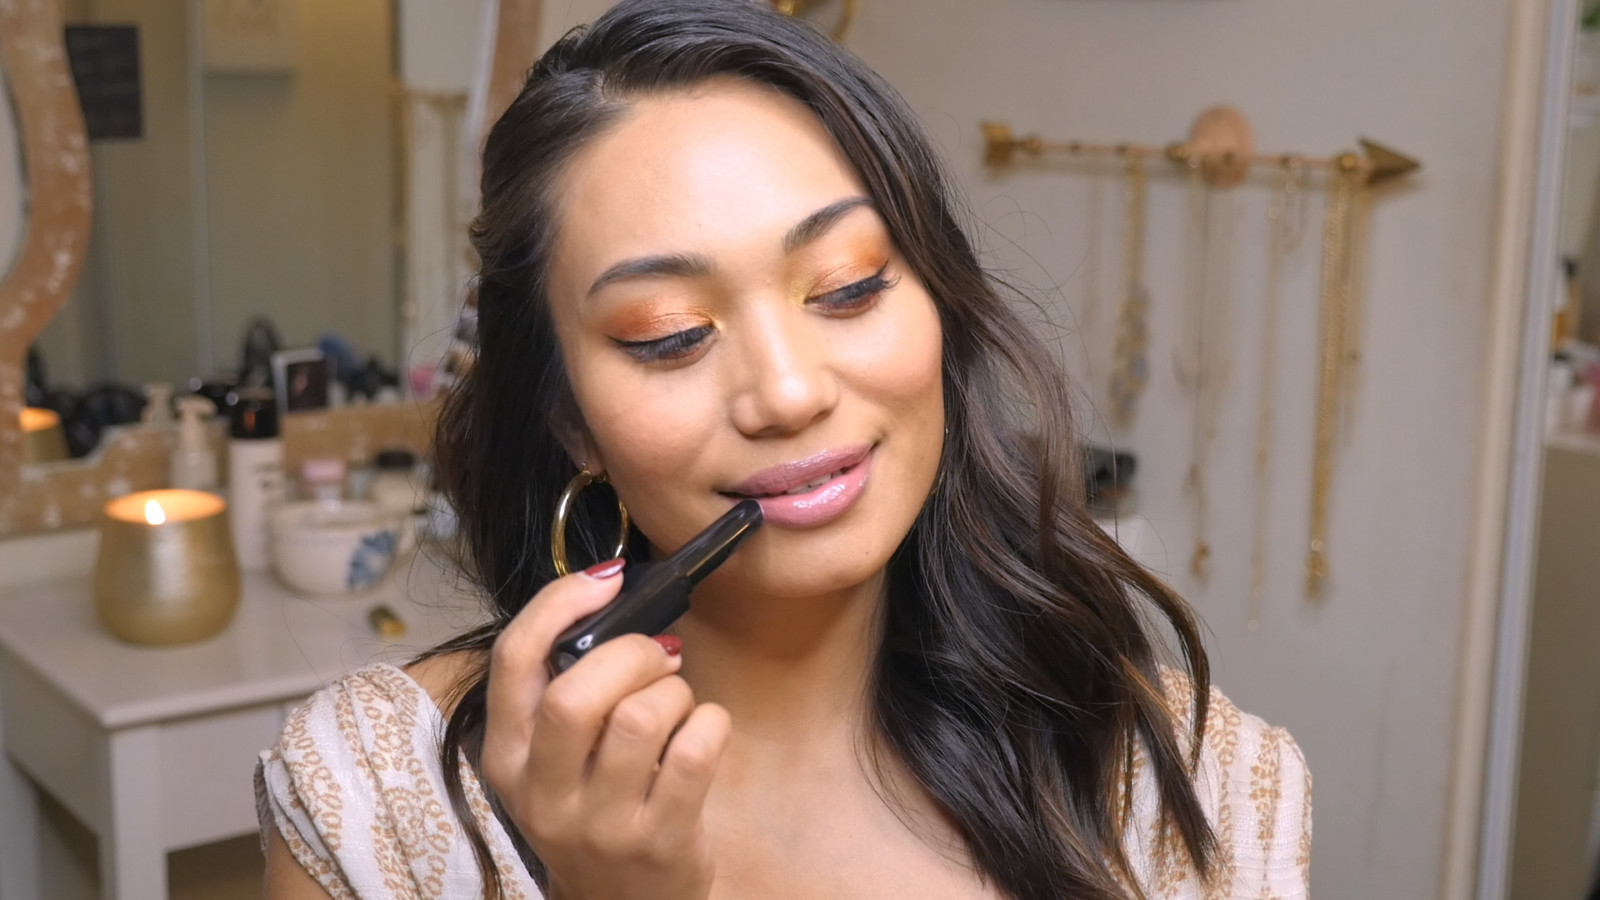
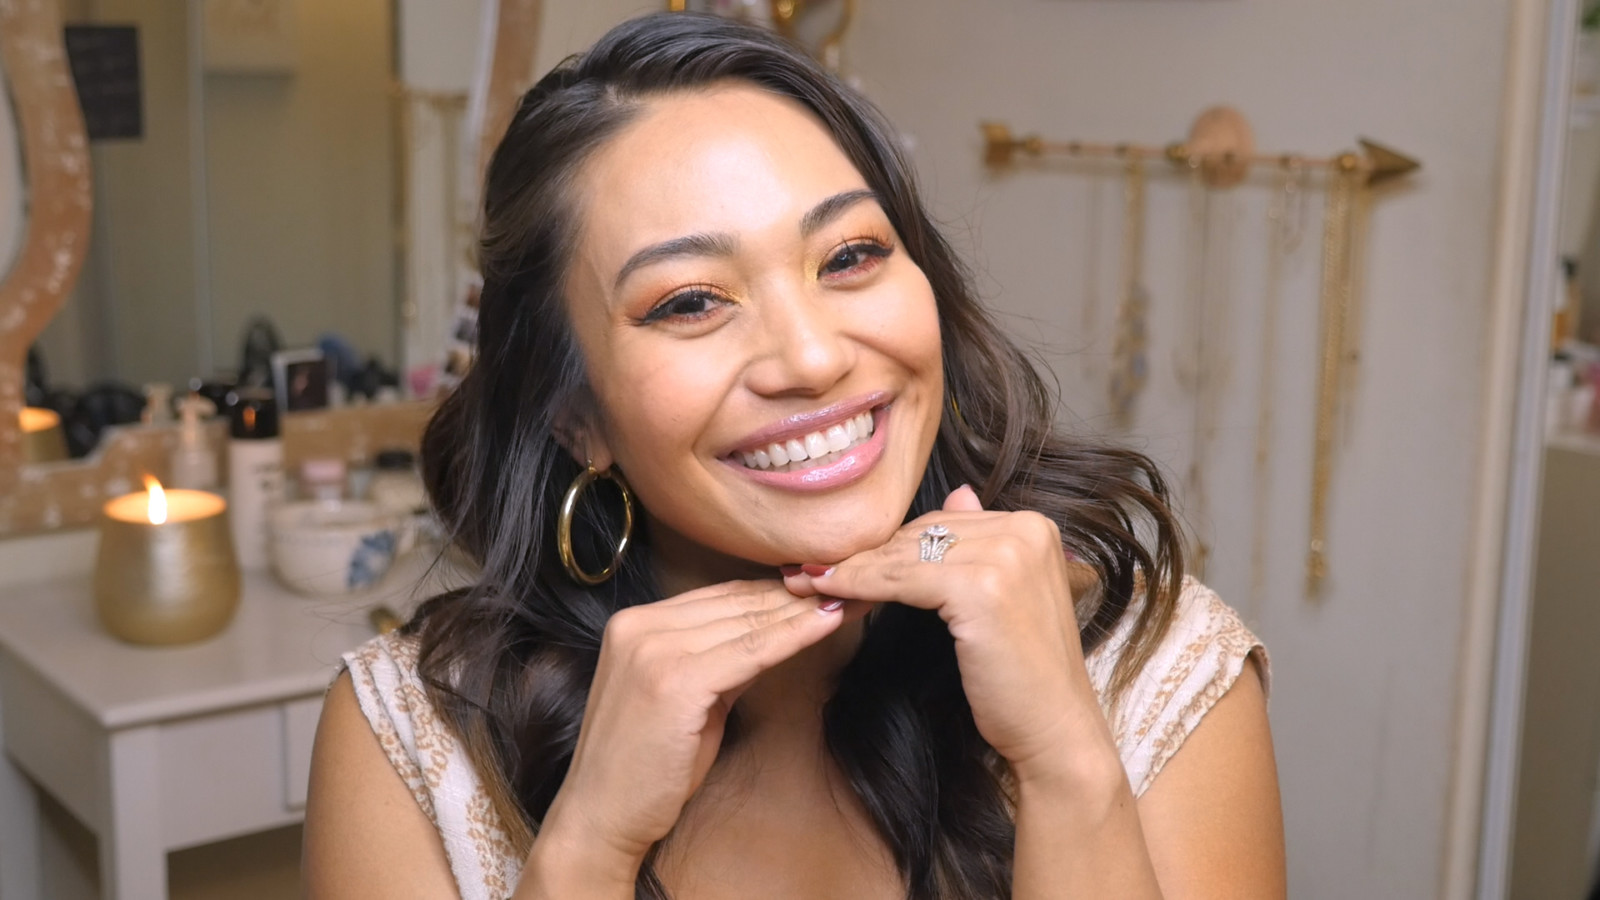
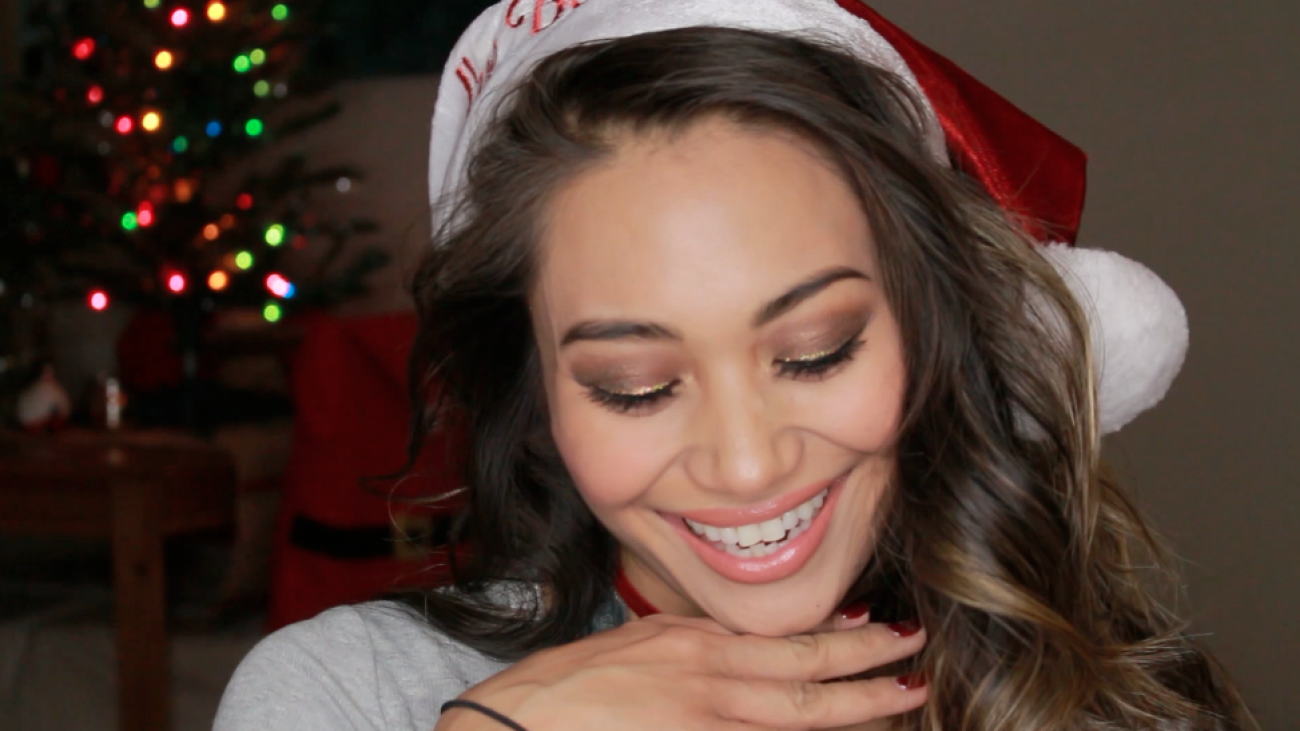
‘Tis the season and it’s my most favorite time of year! With all of the holiday gatherings, ugly sweater parties, white elephant gift exchanges, and office celebrations, I thought I’d share my favorite holiday look with you! It’s super easy and I hope you like this glittery creation!
This is my video tutorial, step by step. Do you like these fast paced tutorials or would you prefer a real-time version with voice over instructions? Let me know in the comments 😀