THE BEST AND FASTEST FOUNDATION ROUTINE!

For those times that we’re in a rush to get out the door, or when we’re forced to be in a mega-rush *ahem, shout out to my fiancé*, this foundation routine will meet those deadlines! Do you like how I’m referring to one of our morning rituals like it’s an employee of ours? Ha, well it is because it’s work!

Every few weeks I switch up my foundation routine, varying slightly depending on the weather, my mood, and how much time I’m given! Today’s post is all about my most recent “stay all day, look fab all night” routine. It’s quick, it’s simple, and it requires just a few minutes in the morning – but those few minutes will have you feeling and looking like a goddess! Pssst, no one will ever know that you didn’t spend forever getting ready <3 This is our super power.

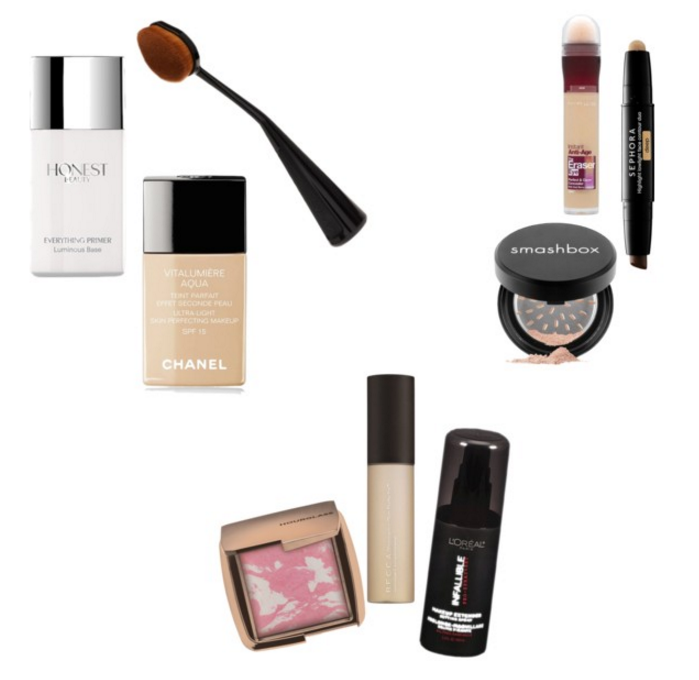
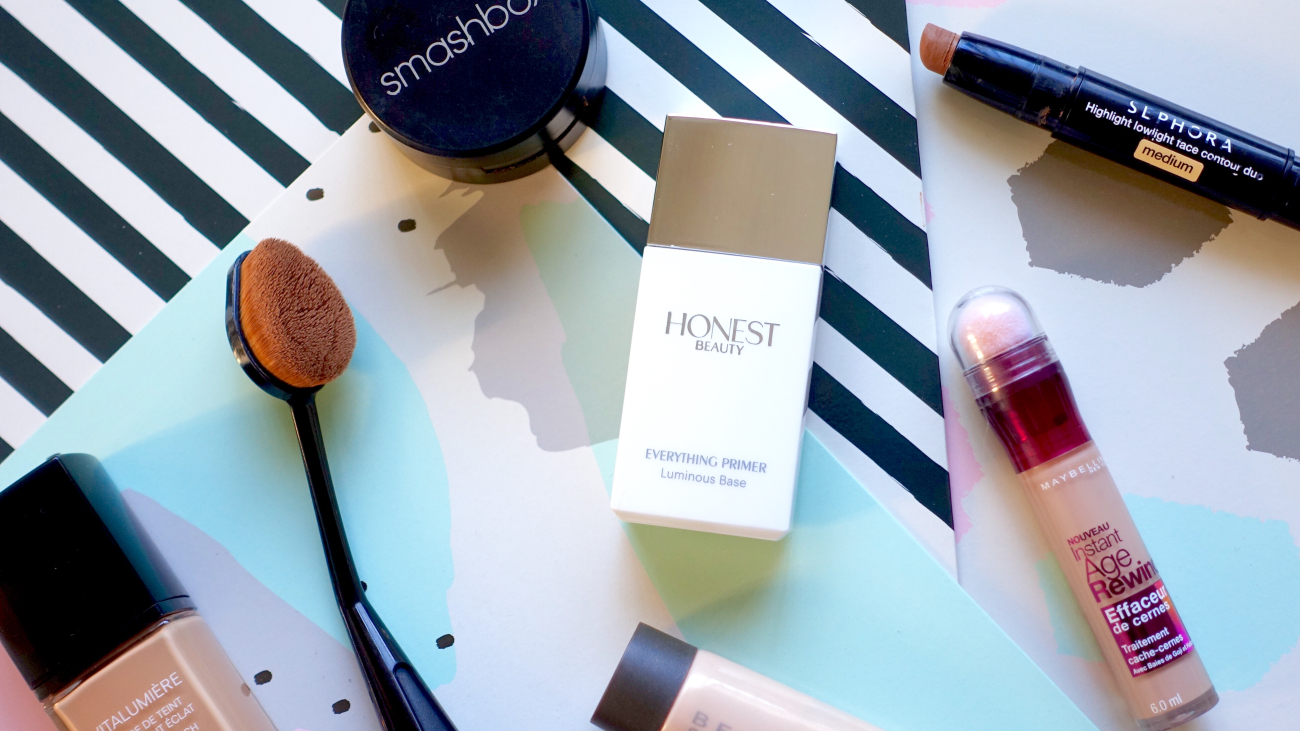
1. Prime and prep– you need a good base for your foundation so that it glides on smoothly and evenly. This primer is one of my favorites, it’s hyaluronic acid based, illuminating, and light as a feather!
2. Foundation is the foundation– I’m funny I know. So everyone has their favorite whether it’s a cream, powder, or liquid. This happens to be in my top 3. It’s buildable, offers up great coverage, and still manages to look ultra natural
3. Brush it or leave it – the most convenient way for me to apply foundation to my skin is with my fingertips, but I’ve read so many reviews on this brush that I decided to give it try! I have to say, it’s hands down one of the best brushes ever; it has dense bristles, feels like cashmere against your skin, and gives you an airbrushed finished look
4. Conceal how much sleep we don’t get– my friend Ashlee introduced me to this little gem; it glides on smoothly, I love the precision of the pen, and it doesn’t crease hallelu
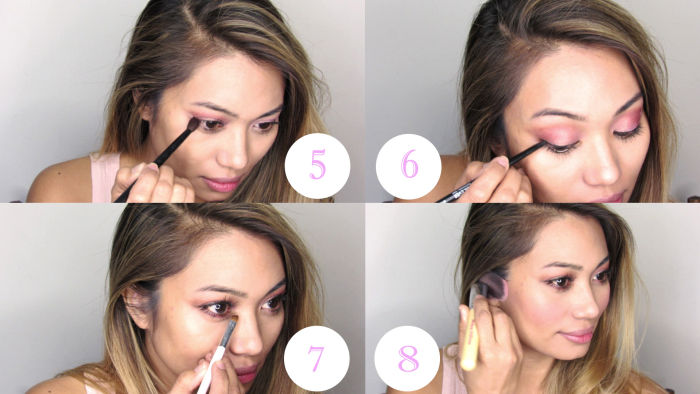
5. Powder up– I have dry skin so I don’t usually powder my entire face. So to make sure the concealer under my eyes doesn’t slide around, I use a fluffy brush to swipe on a setting powder and this one is finely milled enough that it’s not cakey at all
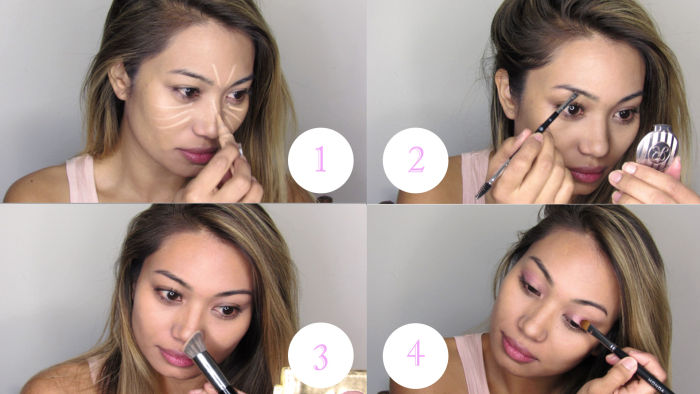
6. Contour– I’ve seen some people really go to town with contour and I’m not a huge fan of it, I think it alters the face a bit too much than what I’m comfortable with. Subtly contouring your face is flattering however, I usually do the hollows of cheeks and my nose. Subtle is sexy in my opinion but hey, opinions are like armpits
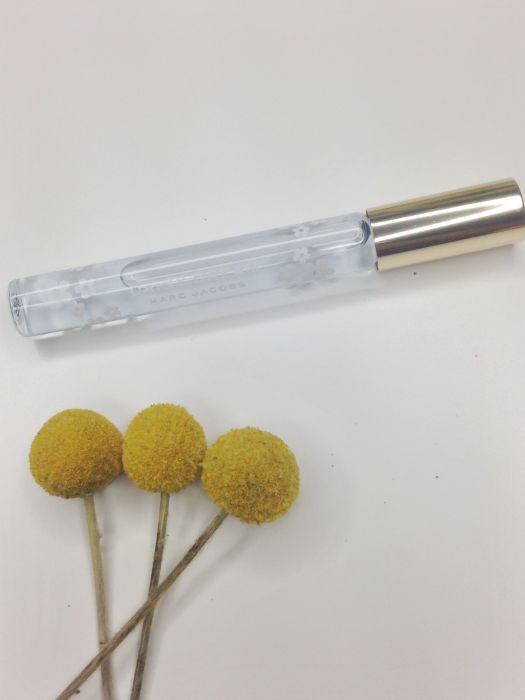
7. Set it and forget it– once all of your makeup is on, spray it, set it, and then you’re good for the entire day on through the night! This one is awesome and adjusts to the temperature of you skin. Don’t ask me how, I think it’s Science or something
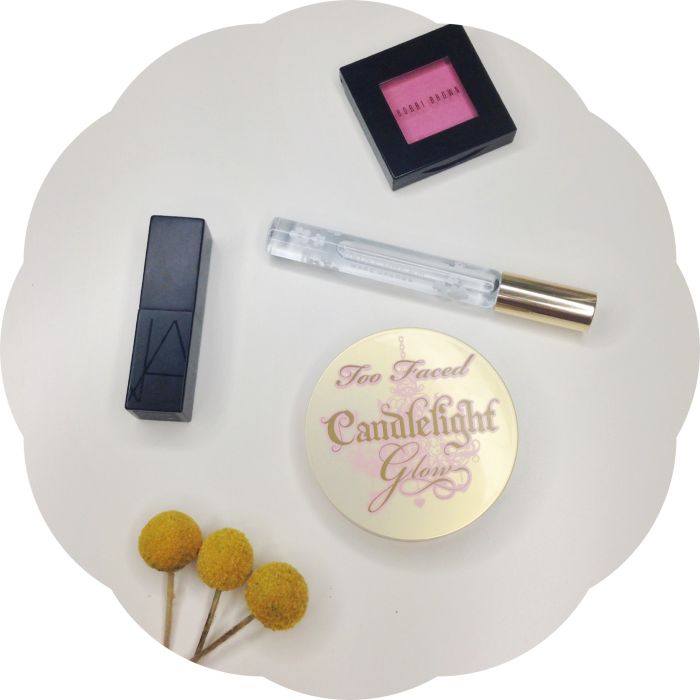
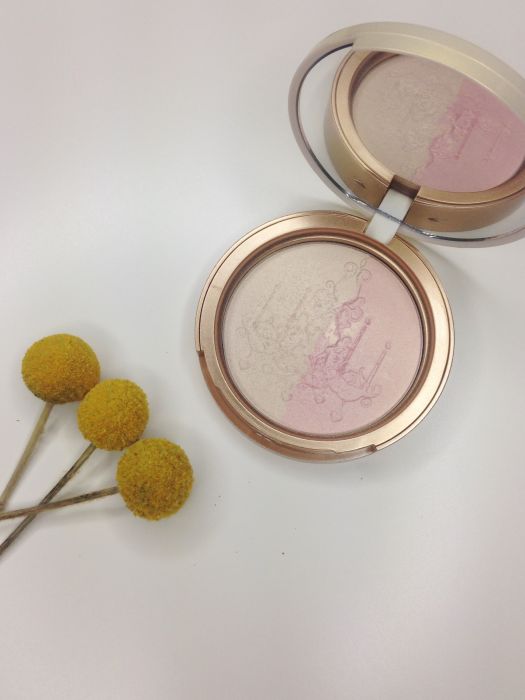
8. Make ’em think you’ve just ran up a flight of stairs– oh that naturally flushed look. Well I’m not trying to run up any flights of stairs any time soon so I’ll stick to my rouge. This one is light enough as to not make you feel like Raggedy Ann, but bright enough to give you that healthy glow
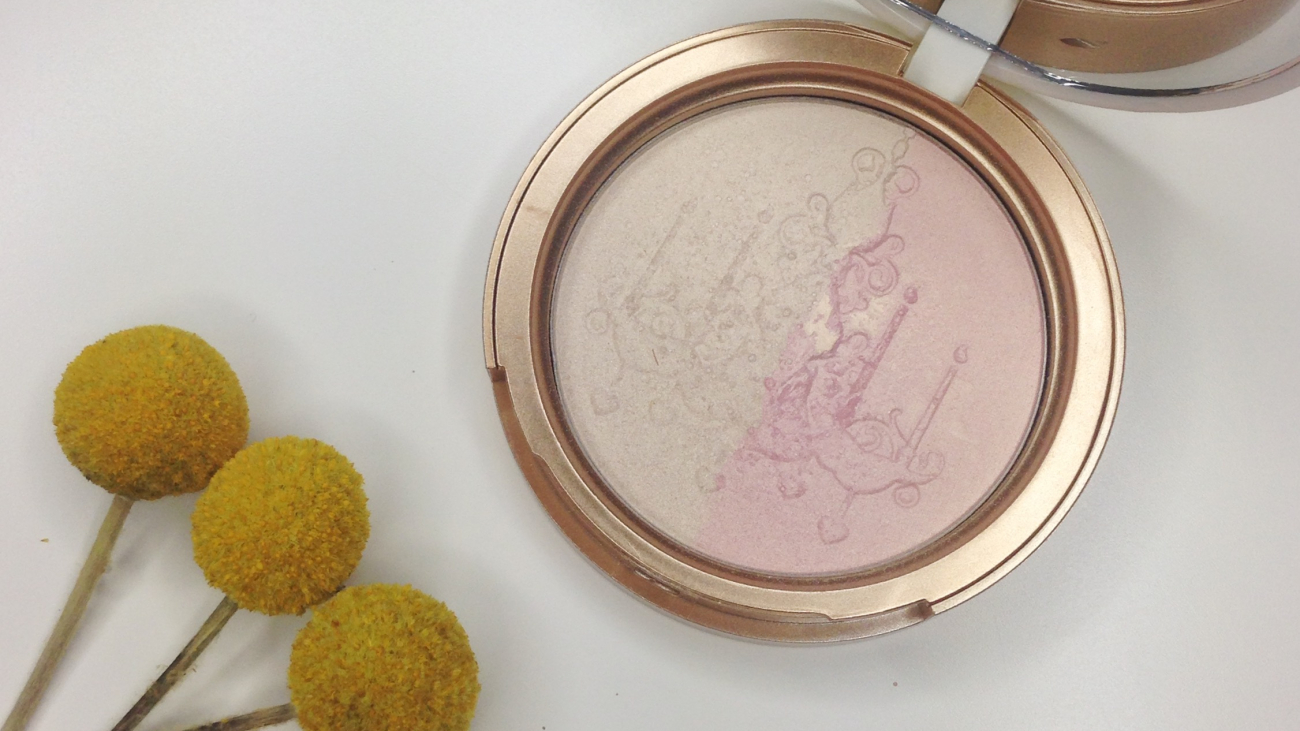
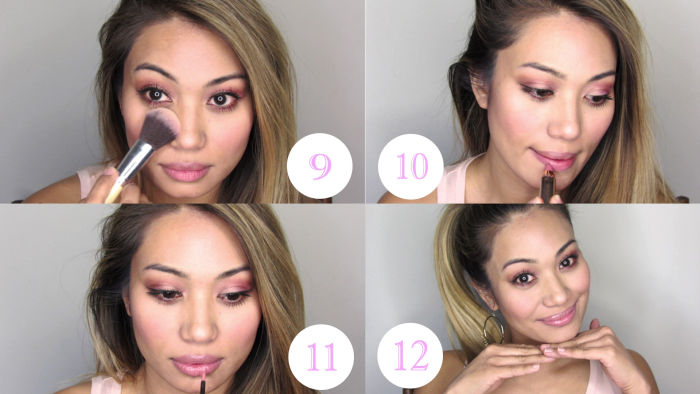
9. Shine bright like a diamond– illuminators have been all the rage lately and I’m all in! I love how natural this cream is; you shine, but not like a fairy dumped her bag of sparkles onto your face, more like you’re an angel who’s descended just to run errands and make it to Trader Joe’s before the rest of the world

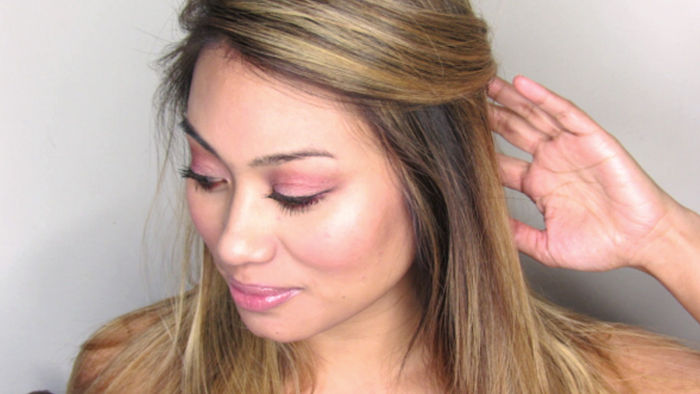
See! You can do all of that in just FIVE minutes! Maybe even less if you move fast! I mean, we’re magical, I believe in you!

I’ll link you here so you can see all of these steps in action over on my YouTube channel, subscribe to me if you haven’t already so that I’m not just making videos for my mom please and thank you. I love you mom.

What’s your go-to foundation routine? Is it a mineral powder, liquid, or a cream kind of regimen? 

See you soon for some Pinterest DIY happenings … or mishaps if you know me <3


YOSEMITE SNOW DAY AND HOW TO GEAR UP!

If you’ve been following my adventure series than you know I’ve been on some pretty awesome excursions these past few months!

Our latest explorations brought us to Yosemite, CA with our good friends Esther and Jacob of Local Adventurer, who invited us to join them on a snow-shoeing snow-day extravaganza! Before hopping into the car and excitedly making our way from the sun to the snow though, I of course, had a meltdown … WHAT WAS I GOING TO WEAR?!?!?!

We live in L.A. so we’ve become a little lot accustomed to our ‘clear skies, perfect 75 degree, surf and swim’ conditions. So to prepare for what was predicted to be a winter storm with 10+ inches of snow and icy roads, I told myself, “meh, five layers will be fine!”

I searched high and low for good deals on the internet for a few reasons, 1) I had t-minus 4 days to get my butt in gear, literally 2) if you haven’t been in the market for snow gear lately, insider-tip: they’re expensive! 3) I’m not an insider so I have zero clue what I need, where to get it, or what I will actually use verses what I will buy just because it’s CUTE, hashtag Wanderlust.


So this is what I ended up purchasing, and I have to say, I did pretty good! *high fives self* I got most things on sale and on time (hallelu Amazon Prime)! I also got a few things in child sizes because, cheaper. I’m a size 5 1/2 in women’s shoes so that makes me a child size 4! Pro tip: you can apply this kind of calculation for purchasing Uggs and other expensive shoes that you’d like to pay 30-50% less for.

I didn’t know how ‘active’ we’d be on this trip and a lot of the gear was labeled ‘low to moderate’ activity. How does one quantify the level of activity snowshoeing will bring? So I assumed it wouldn’t be THAT strenuous (1st lie I told myself). So I layered up (pictured below), featuring the bottom layer, and I also wore some tights underneath and a huge winter coat over top.

1. weatherproof thermal shirt 2. thermal bottom layer 3. waterproof pants 4. thermal socks 5. lightweight waterproof jacket 6. waterproof gloves 7. winter snow boots 8. snow googles

Emphasis on waterproof for as much of the apparel as possible because when snow melts it becomes cold ice-water. You don’t want that pressed up against your skin when changing isn’t an option (oh you’ll be cute with less layers they said, it’s not that cold they said. Hashtag Wanderlust).


Well here I am, all geared up, layered up, and ready to go! How cute are Esther and I?! This is us attempting to throw a snow ball. Jacob snapped a few photos of us and then we all frolicked in the snow until we were ready to go inside to thaw out.

Snowshoeing with everyone this weekend in this snowy winter wonderland was wonderful! Also, it was a workout! Midway through the hike up a hill (that felt like it was an 80% incline but was probably not steep at all, 2nd lie I told myself!) I removed two of my layers and rolled them up into Joe’s backpack and honestly I was just fine for the rest of the trip. Blame it on sweaty me, huffing and puffing up the hill, but I didn’t need the extra layers at all.


This was the entrance to the short cut that Joe and I took back to the lodge to meet up with the group for lunch. How incredibly beautiful are these trees? Snow makes everything even more magical, but so does Joe’s photography skills.


This is tunnel view, looking out onto half dome when we first arrived into the park on Friday. Just moments before this photo was taken the clouds were dark and we thought we’d missed seeing the sun look over the mountains. Then, wouldn’t ya know it, mother nature peered her beautiful face through the clouds and we all went nuts!


This is from our second trip to tunnel view this weekend and the landscape looked completely different from the 24 hours before. Ominous and moody, I was happy that we could appreciate the contrast in views and see the beauty in both.


I was sad to leave this enchanted forest but I’m excited to come back this summer! It’s pretty remarkable the ways you experience nature just given the change in season.

I hope this post inspired you to visit a snowy scene near you AND informed you of how to properly layer up! To see more photos from this weekend’s trip check out the hashtags #yosemitesnowday #tenayalodge and #yosemite_dn. While you’re at it, catch up on all of my #FindYourPark happenings by typing in the hashtag and scrolling through!

I really had a superb time with all of these marvelous people; I loved meeting new faces and spending quality time with long time friends, so please head over to Esther and Jacob’s blog and check out their adventures! They inspire me so much!

What winter wonderland activity would you most like to do?! P.S. If you haven’t tried snowshoeing than you should because, easier than snow boarding!

MY UPDATED NIGHT TIME SKINCARE ROUTINE!

My skin care routine changes depending on the time of year and the time of day, are you this particular about skincare too? So today I wanted to share with you my current night time skincare regimen and just how I keep this 30-something skin of mine as youthful as I can!

First step is cleansing. I cleanse in the shower usually since I’m one of those ‘night time shower before bed’ kinda people. Takes me all of one minute, thank you handy dandy Clarasonic timer, and I alternate between a few different products depending on what day of the week it is, errr and what time of the month it is.

Clarasonics and cleansing systems of the like, are more effective at removing impurities and giving your skin a deeper cleanse than your finger tips would, so I highly recommend them. Start slowly with exfoliation so that you don’t irritate your skin, especially if you’re not used to exfoliating weekly.

1. Exfoliate: Even if you have another skin type than my own (I have very dry skin), it’s still important to exfoliate so that your skin is prompted to create more collagen and it provides a deeper cleanse than the every day cleanser gives you. I alternate between the Clinique 7 day scrub– I love this because it’s gentle enough to use daily though that’s not how I use it, and it doesn’t make my skin feel overly exfoliated. That’s a Monday, Friday routine and on Tuesdays and Thursdays I will use the Kate Somerville ExfoliKate because there’s something about it that is different than any other exfoliant I’ve used. Leaves your skin squeaky clean without over drying and it smells like the spa! I swear by these two. The Tatcha rice powder is wonderful for a quick deep cleanse that brightens up your face instantly! I use this on the weekends after a week full of makeup and movin’ n groovin’!


2. Cleanse and eye makeup removal: I love the Tula cleanser for these purposes because it’s gentle and foams up nicely. It also doesn’t irritate the sensitive skin around my eyes, and it’s light enough to use twice a day if I needed to. The Lush lip scrub I find quick and easy and takes only a few seconds to do the job- just scrub, rub, and rinse!
3. Tone: Right after the shower I will spray a few pumps of the Honest hydrating mist onto my face and while that is still drying I will go in with my serums.
4. Hydrate: Serums are the gate keepers between your skincare products and the layers deep within your face. Hyaluronic acid serum has got to be my number one go-to product for deep hydration and quick absorption. It’s something our skin already produces except in very low amounts and as we age, of COURSE we produce less of it. Oh joy. A few drops of this and then a few drops of Vitamin C will leave your skin soft and supple!
5. Seal and treat: Now that you have your serum on, you can hydrate with a moisturizer here or you can do what I do and seal all of those products in with a nice treatment! I’m in my 30’s so one of my ‘never-ever-forget-to-do’s’ is to use a treatment on my skin, something that will really plump up my skin like the PTR glycolic hydrating serum or the Ole Henriksen night treatment. Both of these are great for fine lines, acne scarring, and overall problematic skin.
6. All about the eyes: Since the skin around our eyes is the thinnest of all of our face, we age there the quickest. Oh joy! So use your ring finger and gentle pat and roll your eye cream from the outer corner of your eye, in towards your nose. Remember pat and roll and press and hold! That’s the secret! This eye serum is inexpensive and one of the best I’ve tried! My advice, start using an eye cream fresh out of the womb! And of course I drench my lashes in castor oil because it moisturizes and protects them, and keeps them healthy through all of the mascara and eye liner layers. It’s been a beauty secret for year past so lets keep it going for years to come!
7. Don’t forget your pout: Since you’ve scrubbed your lips and got them bright and smooth again, it’s time to moisturize them. For years I’ve been using this rose salve because it’s thick, smooth, and ultra hydrating.
8. Prevent turkey neck! Yup I said it, turkey neck y’all! If you’re under the age of 25 I’d say a neck treatment isn’t necessary, but for us babes who are 25+, a neck cream is a MUST! From your cleavage up (pecks up for you men out there) you should be cleansing, hydrating, and treating. You don’t want to have the face of a 19 year old and the neck of a 109 year old. I looove this Tula advanced neck cream because it’s thick like a balm but goes on smooth and doesn’t feel sticky at all. It’s extremely moisturizing and it’s packed full of probiotics and vitamins to replenish your skin and keep it young!

So there you have it! Eight steps to great skin, skin that is hydrated and healthy! This doesn’t take long at all by the way, 3-5 minutes tops is all it takes to end your day with some pampering and to start your night with some regenerating power! Go baby cells goooo!

On days I don’t wash my hair, more joys of color treated locks, I like to run a bit of oil into the ends to prevent drying and splitting. This argan oil is light enough to use daily and smells divine!

If you’d like to see these steps in action, head on over to my YouTube channel where I did a tutorial of this exact routine for you! And Subscribe if you haven’t already, fun and exciting things coming this year <3

Let me know what your number one beauty secret is! Is it a special cleanser, a mud from the Alps?! 

Tell me so we can all obsess over these things together because, sharing! See you next week with some tips on how to survive the winter! *yes, this coming from a gal in LA, though this weekend we’ll be in Yosemite so I’ll be “experienced”!*

SPRING DECOR ROOM INSPO!!!

Having enjoyed a staycation this past weekend, in one of the most luxurious homes I’ve ever visited, I was totally inspired to revamp my room! I took these photos from a beautiful home in the hills that we stayed in that was elegant and clean with its crisp whites and pops of color!

Stay with me here, if you’re ready to flee from the pom poms, stick around because it’s a jungle in here, literally!


I really love this string of pom poms above this simple bed, the chandelier above, and the all that natural light coming through! It was a YouTuber’s dream to film in here … ahem no lights necessary, there was so much light coming through both corners of the room! Filming a vlog was the first thing I thought of when I saw this set up, “Yes I can sit there and face that way”. Also, those prints you see on the bed spread, that would be from puppy Luna thinking she owns the place! She galloped (she runs like a baby horse) from room to room and jumped on all of the beds. All of them.

This was one of the 4 bedrooms in the house, and my personal favorite! I called it the Princess Room because that’s what it felt like to me, a doll-house princess room, so pretty and dainty. The second room I’ll feature was Corrine’s favorite! We called it the Jungle Room because the walls were covered with giant leaves and the green hue was so beautiful, I wish I could’ve really captured it’s true tone!


Again with the simple, clean, white bedspread and sheets, I love the choice here because it doesn’t take away from how busy, yet fun, the walls are. A simple lamp in the corner, two windows allowing for the day to peak through, and this beautiful set up on the far wall – we were in love I tell ya.


Why yes, that is my phone just candidly hanging out on the bamboo table. I had forgotten where it was until I saw this photo and remembered I’d put it down here. Lavender stems in vases sprinkled around the house was the most inviting and fragrant aroma you could imagine. Again, the decor is simple, but I love simplicity, I love the bamboo themed furniture, and I love how it fit so perfectly with the painted walls.

The rest of the home was just as beautifully decorated as these two rooms, people were bustling about so I wasn’t able to capture the home room by room. It has however inspired me to focus on being more simplistic in my decor choices, more open to big prints and bright colors, and to let light be the focus of each room.

I really loved it here and I loved how inspired we were when we left. I actually ordered some pom pom wall hangings of my own and a new white duvet cover in honor of these rooms! One room at a time, one space at time, that’s what I keep telling myself. I think it’s easy to get overwhelmed by decorating, by theming a room or picking colors. It’s especially difficult when you have zero clue what you’re doing … me!

I like to think that once my bedroom is complete, I’ll migrate into the living room and redecorate the space in there. Baby steps … if I can do it, trust me, you can too! Pick a space in your home, start small, and surround it with things that make you feel less anxious and more relaxed. That’s exactly how I felt when I walked into this house.

I hope this inspired you to get thinking about Spring decor and what colors you’re drawn to. I know that I’m really loving this white out look!

What kinds of colors or prints are you most drawn to, and are you more of a decor person or a wall and accessory person?

See you next week with some more happenings and have a wonderful weekend!

MY GYM BAG ESSENTIALS!!!

As I currently find myself in the middle of holiday season ‘feast mode’, I also find myself in the middle of “tis the season-full blown- freak-out-mode”! Anyone else find it difficult to say no to all the holiday food and NOT partake in all the merriment? Seriously, my body doesn’t know what to do with all the extra egg nog and yule log calories that I HAVE to indulge in because, Scrooge.

During this time of year I try to balance out all the holiday feasting with extra strength training and doubling up on HIIT workouts. So here is my number one tip to maintaining your waistline this season … get up and get moving! That’s right, gym time baby! Where’s the motivation you say?!

Well just like when we were younger and the new school year would begin, you’d have a new backpack full of shiny new school supplies, welcome to the adult version of that! Meet your new backpack … Lil Ms. (or Mr.) Totebag! Being fully prepped to hit up a sweat session will have you prepped to hit up the food table for seconds! Here is what’s in my gym bag!

1. The tote – this sleek lil baby will carry your gym essentials in style! It’s the perfect size, not crazy bulky like a duffel, yet spacious enough to hold all of these items AND a change of clothes!

2. A sweatband – oh that sweet sweat, it doesn’t stand a chance with this nylon sweat band. Ladies and long haired gents, you’ll be happy to hear that this also doubles as a hair tie!

3. Headphones – not just any headphones, these are blue tooth ear buds that allow you to lunge and lift without the annoyance of cords. Don’t you just hate that!

4. The kicks – my most recent obsession, these tennis shoes! Like with hand bags, shoes also set the tempo, literally. These are comfortable and classic, and will get you excited to pump some iron!

5. Recovery – this is important if you’re ripping and tearing through your workouts, AND your muscles. These are BCAA’s- branched-chain amino acids, which help to repair and build your muscles. I like this blueberry flavor, it’s like a sports drink meets koolaid! I habitually add this to my water bottle and drink it up during my workout. I’ll also reach for some coconut water during my more intense workouts, which replenish lost electrolytes and aid in hydration.

6. Protein – this is key to building lean muscle and fueling your muscle growth. Remember to have your protein shake or protein + carbohydrate packed meal within 30 minutes after completing your workout. You want to send protein to your muscles as quickly as possible so your body doesn’t eat away at the muscle you just worked so hard for! I love this Perfect Fit Protein because it’s a plant based protein powder that is especially good to bake with, ummm can you say protein waffles every day all day?!

7. Sweat be gone – I love this micro fibre towel because it’s made from a quick dry, anti-bacterial material, and has a grip covered underside. So no matter how crazy I get with my burpees and jumping lunges, this towel stays in place!

8. Hydration –  hydration, hydration, hydration!!! It’s crazy to think that we should be drinking half of our body weight in water! Sounds daunting but it can easily be done if you infuse your water with some lemon wedges or some fruit pieces. Just a trick that makes your water delicious and extra beneficial! This water bottle is especially dear to me because proceeds from each water bottle sold goes to support clean water efforts in Africa. Also, it’s BPA-free, dishwasher-safe, reusable, and recyclable! I slip this into the side of my gym tote making it easily accessible, just refilling it at the water fountain. Ahem, Los Angeles tap water is OK to drink now haha!


There you have it! The only sure way to ensure that the only thing you’re spiking this holiday season is the eggnog and not your cholesterol! Share with me your gym and fitness essentials, and I hope you enjoyed this post!

This really is the time of year to indulge in all of your favorite holiday dishes with wild abandonment! No regrets! I’ll be doing the same, so just do it, and I’ll see you later this week with some festive side dish ideas! Yum!!!


SUMMER MAKEUP FAVORITES: WITH CORRINE

We all have our everyday essentials that live in our bags, we can’t leave the house without em, and they’re essential to any and every dilemma. For me, my makeup must-haves that can undoubtedly be found at the bottom of my bag are: LIPSTICK (as always), perfume, and blush.

Favez

Here I’m sharing with you some of my favorite products by my favorite brands:

1. Nars Lipstick in the shade “Audrey”

The perfect rosy red for any night out.

2. Bobbi Brown Blush in the shade “Pretty Pink”

Creates the perfect flush.

3. “Daisy Dream” by Marc Jacobs Rollerball

smells like a real life DREAM.

4. Too Faced Candlelight Glow Highlighter

YOU NEED THIS. apply lightly to the cheekbones and down the center of your nose. you’re on fire.

xo, Corrine

BACK-TO-SCHOOL STYLE WITH CORRINE!

This post is promoted by Sears, and we’re happy to share Corrine’s back-to-school style for this year!

The new school year is almost here and whether your child is starting a new year at middle school, high school, or college, every parent knows that the most fun part about prepping for a new year …  is the shopping!

I remember when I was younger, my siblings and I would nag and beg our parents to take us school shopping because we just couldn’t wait to get new clothes, new shoes, and new supplies! It was the most exciting part about it all! We loved organizing our pencil cases and putting paper and folders into our new binders, and my sister and I especially loved picking out our outfits for the first day of school!

Corrine’s style is much different from mine at her age. I remember color coordinating purple and pink leg warmers to match my purple skirt and pink teeshirt! It was the style of the ’90s and I was all about that side pony tail … and in my defense, the side pony was the modern look of the times! Corrine is much more fashionable than I; she loves creating looks that fit her personality and that speak to the vintage side of her.

This year, her style was influenced by the ’70s and the ’70s modern revival that we’re seeing trend around, which inspired her to create this year’s theme. Since Sears is a great destination for sophisticated and stylish clothing, off we went!


This year’s theme is representative of Corrine’s love of vintage fashion, and she paired each look with some modern pieces to make them her own. We can thank Bongo Girls and Canyon River Blues for this look, featuring these high-waisted shorts, a simple tee, and this crochet fringe cardigan. She paired this ensemble with these black ankle booties and a bolo tie. (The booties are so versitile and you’ll see them again soon!)

The shorts in particular gave this outfit a ’70s revival feel; high waisted with a V-knotched zipper, Corrine loved how simple and classic this was. The “pardon moi” tee has short sleeves and keeps the aesthetic simple with its muted burgundy lettering. She reminded me that this cardigan is perfect for cold classroom temperatures, and that comfort is everything when choosing campus walking shoes.


Keeping with the ’70s theme for this second ensemble, Corrine paired these black Bongo Girls skinny jeans with this white, loose-fit peplum blouse. She brought back the black booties since they pair so easily with everything, and topped the look off with a very simple yet edgy choice for an accessory. She tied a black-and-white bandana around her neck instead of opting for a simple necklace, and added a few stacked rings to fit this relaxed theme.

Corrine jumped for joy over these pieces, and I jumped for joy since we paid under $100 for both of these outfits! What made me most happy was how excited she was to put these looks together! They represent her funky and relaxed personality, and she has a special way of adding her own personal edge to everything she wears. Proud mama over here!

Leave us a comment below telling us what your themed style for this school year will be, and check out how Sassy Dove styled her child’s outfit on her blog soon! All these mamas inspiring me to start styling more!

Thank you for checking in and we’ll see you later this week with our Summer Skin Care Favorites!

Jess Lizama


The hottest trends, celebrity style and fashion tips you can afford to try. #SearsStyleFind

REDEFINING WARDROBE BASICS WITH CORRINE

I recently ventured out in search of a closet spruce up. I stumbled upon this season’s plethora of new basics and style must have pieces that I decided needed a place in my closet. On my short excursion I found a variety of styles I would deem “basics” due to their simple, tailored and sophisticated aspects that I find essential to my closet.

Mustard Oversized Crewneck

Mustard is such a rich, forgiving color that it suits every skin tone. Pair it with endless combinations featuring your favorite shorts, moto jacket and crisp white Converse.

Basics #4


Oversized Babydoll Dress

A flowy, oversized babydoll dress is in my book, essential for the warm seasons. I typically pair it my favorite bag, gold necklaces and vintage cowboy boots. It’s a fool proof look for any day out. Although this one isn’t on your everyday must haves list, its fresh and simple, and you can’t go wrong!

Basics #3


Long Maroon Cardigan

Cardigans are my favorite. Simply because they are so versatile, so easily dressed up, dressed down, layer-able and require hardly any effort to style. The possibilities here are endless, and for that reason, cardigans are on the forefront of wardrobe basics. Long cardigans especially, hold a special place in my heart for their easily achievable, effortless look that comes with wearing them with just about everything. Pair it with bell bottoms and ankle booties, a simple tank and some necklaces or a bandana and you’re good to go.

Basics #2: 70's Revival


Cropped Black Button Up
I can’t stress my love for button ups enough! A distunguished, tailored look is easily mastered with these. Wear them alongside your favorite pair of jeans, skirts, and shorts. OR, go for something with a little twist, pair it under a pinafore for an artfully mastered chic appearance.

Basics #1


As you can probably tell, there’s a pattern to these looks. The 70’s revival is coming back. Aside from these funky basics, try a pair of vintage ankle boots, fringe backpacks and suede anything.

Happy Monday xo, Corrine

Jlo at the Oscars

GET THE LOOK: JLO AT THE OSCAR’S!

Award show season and New York Fashion Week are the two biggest fashion and beauty inspirations for me and I have to say, at the Oscar’s this year I had SOOO many favorites! Beyonce and JLo topped my list per the usual, so I thought I’d give you a step by step on my take on JLo’s look! So below is my tutorial and listed beneath the photo set is the method and the products I used. It’s fun to play in makeup and I hope you put your own spin on this look and TAG me! <3

makeupOne
1. Prep your skin and then blend out your favorite foundation, shown here is my favorite Chanel Vitalumiere. Then using L.A. Girl’s Concealer draw fun tribal-esque lines under your eyes, between your brows, down the bridge of your nose, and under your chin (to conceal & highlight)
2. After blending that out, fill in any sparse areas in your brows, I’m using Anastacia’s blonde duo kit in dark brown with a firm slanted brush
3. Using Anastacia’s contour kit in light/medium, take a slanted contour brush and contour your face (think a backwards ‘3’ from your temple to your chin, and contour your nose too)
4. Load up a medium flat brush with the color Sonic from the Urban Decay Vice 3  palette and press the color in from lash line to crease creating a wash of this burgundy-pinky color
makeupTwo

5. Take a fluffly crease brush, load it up with the color Alchemy from the same UD palette and brush that color into your crease, sweeping it out slightly for a baby cat eye effect
6. Line your upper lash line with your favorite black pencil and smudge it out a bit with a smudge pencil brush to again enhance that baby winged look
7. Take a slanted brush, dip it into that same Alchemy color and trace just along your lower lash line (since JLo didn’t use any liner on her water line, this enhanced her eyes without making them smaller, woot!)
8. Load up a fluffy blush brush with this beautiful and bright Stila blush and sweep them across the apples of your cheeks

makeupThree

9. Go back into that Anastasia Contour Kit and use the Fawn color to highlight your temples and bridge of nose and then use the Banana color to set the concealer under your eyes – it’s the perfect setting powder
10. Line your lips with this awesome buildable lip liner from Clinique which best matched my Patone Universe Marsala layering in Dusty Cedar
11. Take a pinky-nude gloss like the one I’m using here from Tom Ford in Tawny Pink and layer it over your liner and walaaa!

jessdone1

You are a glowy pinky-rose bombshell!!! I loved this look so much! I tied my hair back in a sleek ponytail and topped off the look with a pair of signature JLo hoop earrings and ta-daaaa! I’m totally channeling her in my final pose haha. I had a lot of fun interpretting this look and I’ll be doing it again later this week with a look from Beyonce that I’m obsessed with!
the queen!Jlo at the Oscars

Video coming soon on this look over on my beauty channel and leave it in the comments below what your favorite looks from the Oscar’s were!

x’s and o’s- Jess